This tutorial coincides with step 14 (for the bumped-out accent panel) on page 5 of the Savannah Bag pattern.
The first step to successfully navigating your piping around the Accent Panel’s center bump is to measure the flange of your piping. If you used the pattern piece #2 from the pattern to cut out your piping fabric and you have 1/8″ cord, your flange should be right around 1/2″. If you used anything else (purchased piping, larger/smaller cord, ect.), you need to find out the width of your piping’s flange.
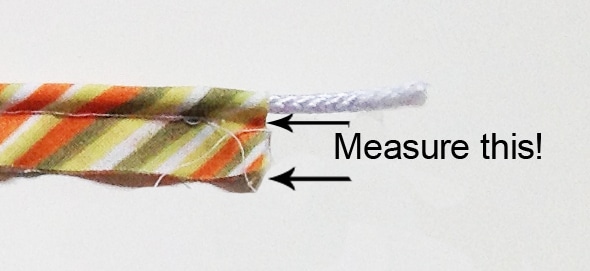
Make note of the flange measurement because it will be used as we maneuver the piping around the sharp v-shapes on each side of the bump.
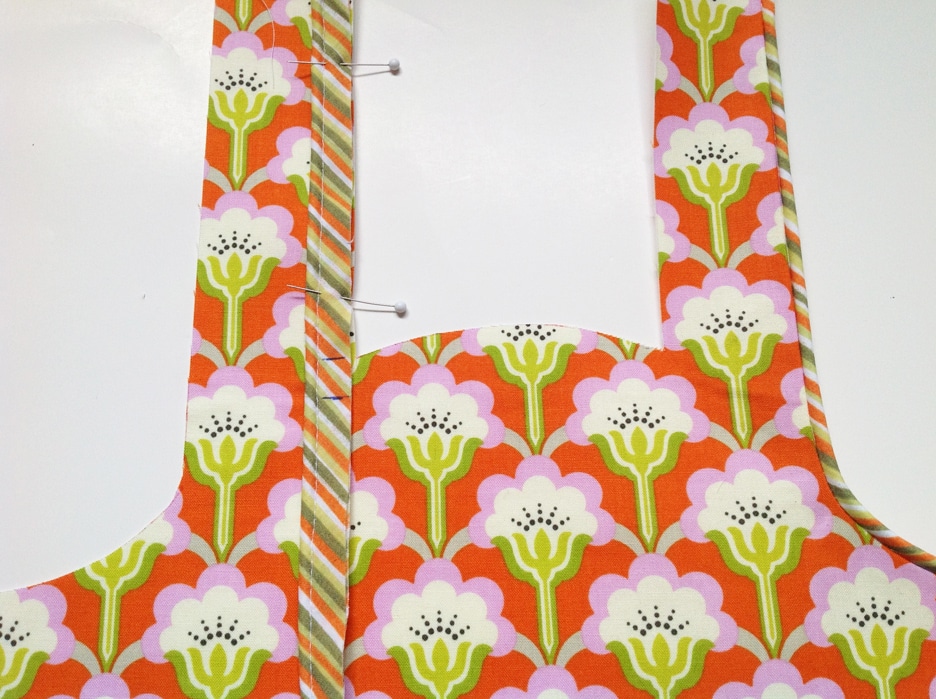
Pin the piping to the vertical edge of the handle tab on the left. don’t try to pin the piping all around the bump area. Make a mark on the piping right at the very lowest point of the v-shape. Measure down 1/2″ OR whatever your flange’s measurement is and mark there.
Sew down to the SECOND mark and leave your needle down. Grab the loose piping and realign the raw edge of the piping to the center bump. The piping will be tight around the needle and that’s ok, you want that curve to be sharp. Now getting your foot over that piping may be a little tricky. One of my testers suggested dropping the feed dogs to to make it easier. I haven’t tried this but you should definitely go slow, one and one stitch at a time so you sew neatly around it. If you just can’t work around it successfully, just skip it and go in later and hand sew it down.
Once you have gotten past that v – we need to tackle the other one! Sew the piping around most of the arc until you are close to the second v-shape. Stop and once again mark where the v-shape will intersect with the piping and either 1/2″ from that mark or the amount of your flange. When you go to sew this one be sure keep the piping along the same arc as the bump you just sewed. (click the photo to better see the marks).
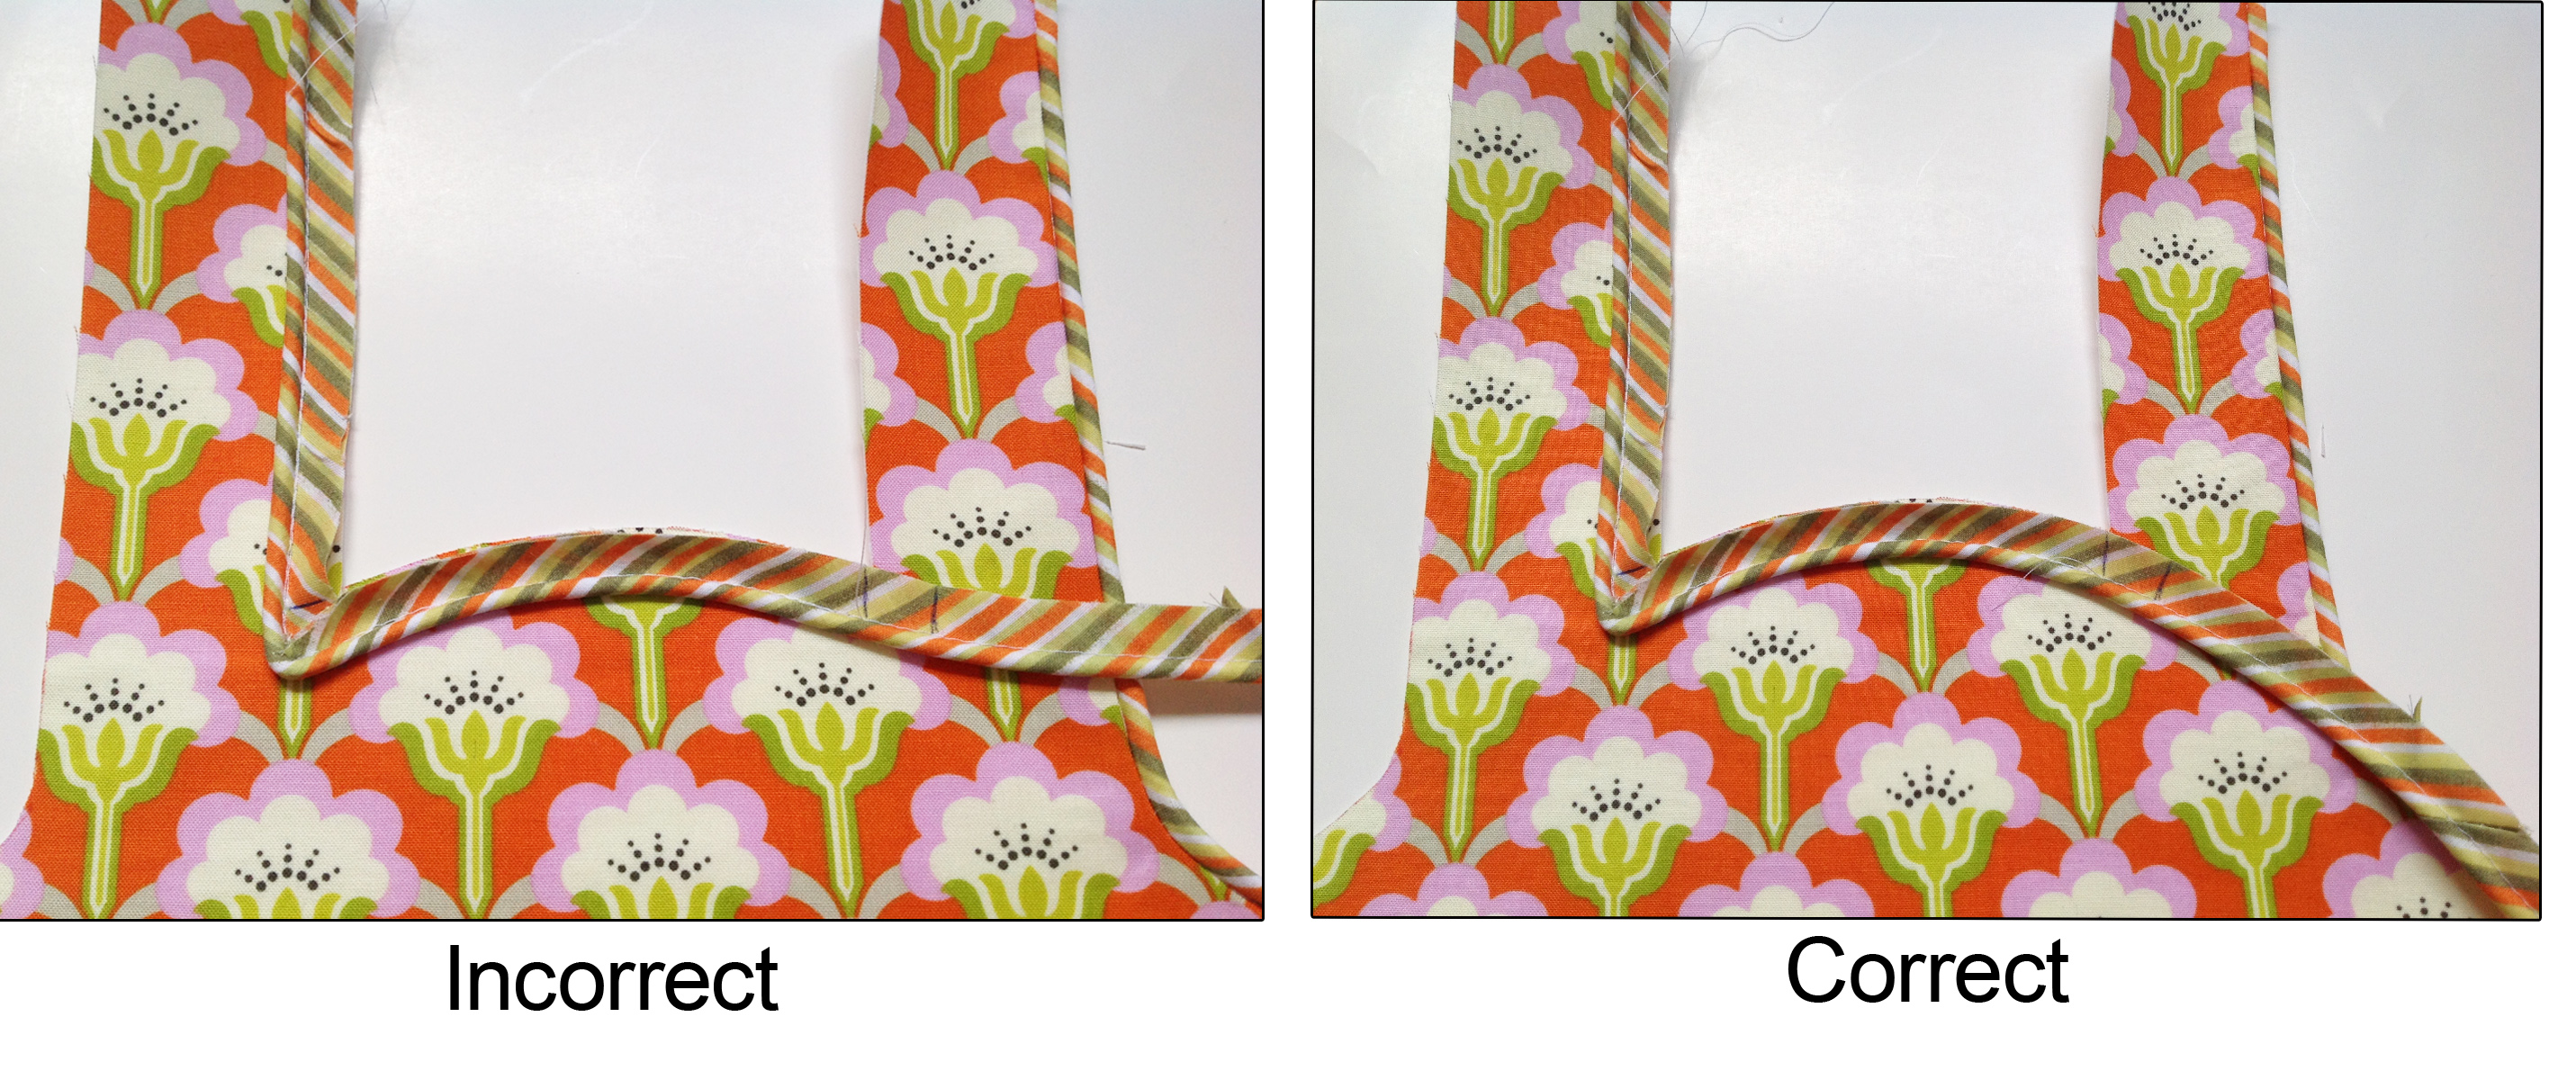
See how the piping in the correct photo continues to curved down? Sew until you hit that second mark, and then realign the piping up the vertical edge. Hope that helped!
Sarah
Leave a Reply
You must be logged in to post a comment.