I had a number of people express concern about making the ruffle on the backpack. One woman emailed me and said that she is rufflephobic!
Rufflephobia [ rúff’l f?bee ?] noun: the irrational fear of gathering or pleating a strip of fabric on one edge.
Origin: unknown
No, this isn’t a real affliction (I don’t think…) but if this describes you, I hope this post can put you on the road to recovery!
There are tons of ways to ruffle fabric. I made many, many backpacks while designing the pattern, and had the opportunity to ruffle what seems like miles of fabric. I found 2 methods that are my favorite for the backpack project. The reason I like them is they don’t require special presser feet, they are fast, and one or the other can ruffle pretty much any weight of fabric – with no broken basting stitches!
The reason I prefer these methods over my ruffling foot is because it takes a good amount of testing to find the right combination of settings (stitch length and foot adjustments) to know exactly how much ruffling will take place for each type/weight of fabric. Not only that, but I practically have to stand on my head to put the thing on!
Technique #1:
I learned this technique from a video from Niler Taylor. I have the video at the end of my demo if you prefer to watch that, but I will go through it here was well.
First, position your fabric under the presser foot with the foot raised so that the needle will fall where you want to start the ruffle. Hold the upper thread tail as you turn the hand wheel a full turn. As you finish the rotation, the bobbin thread will come up from the bottom forming a little loop (pictured here in black).
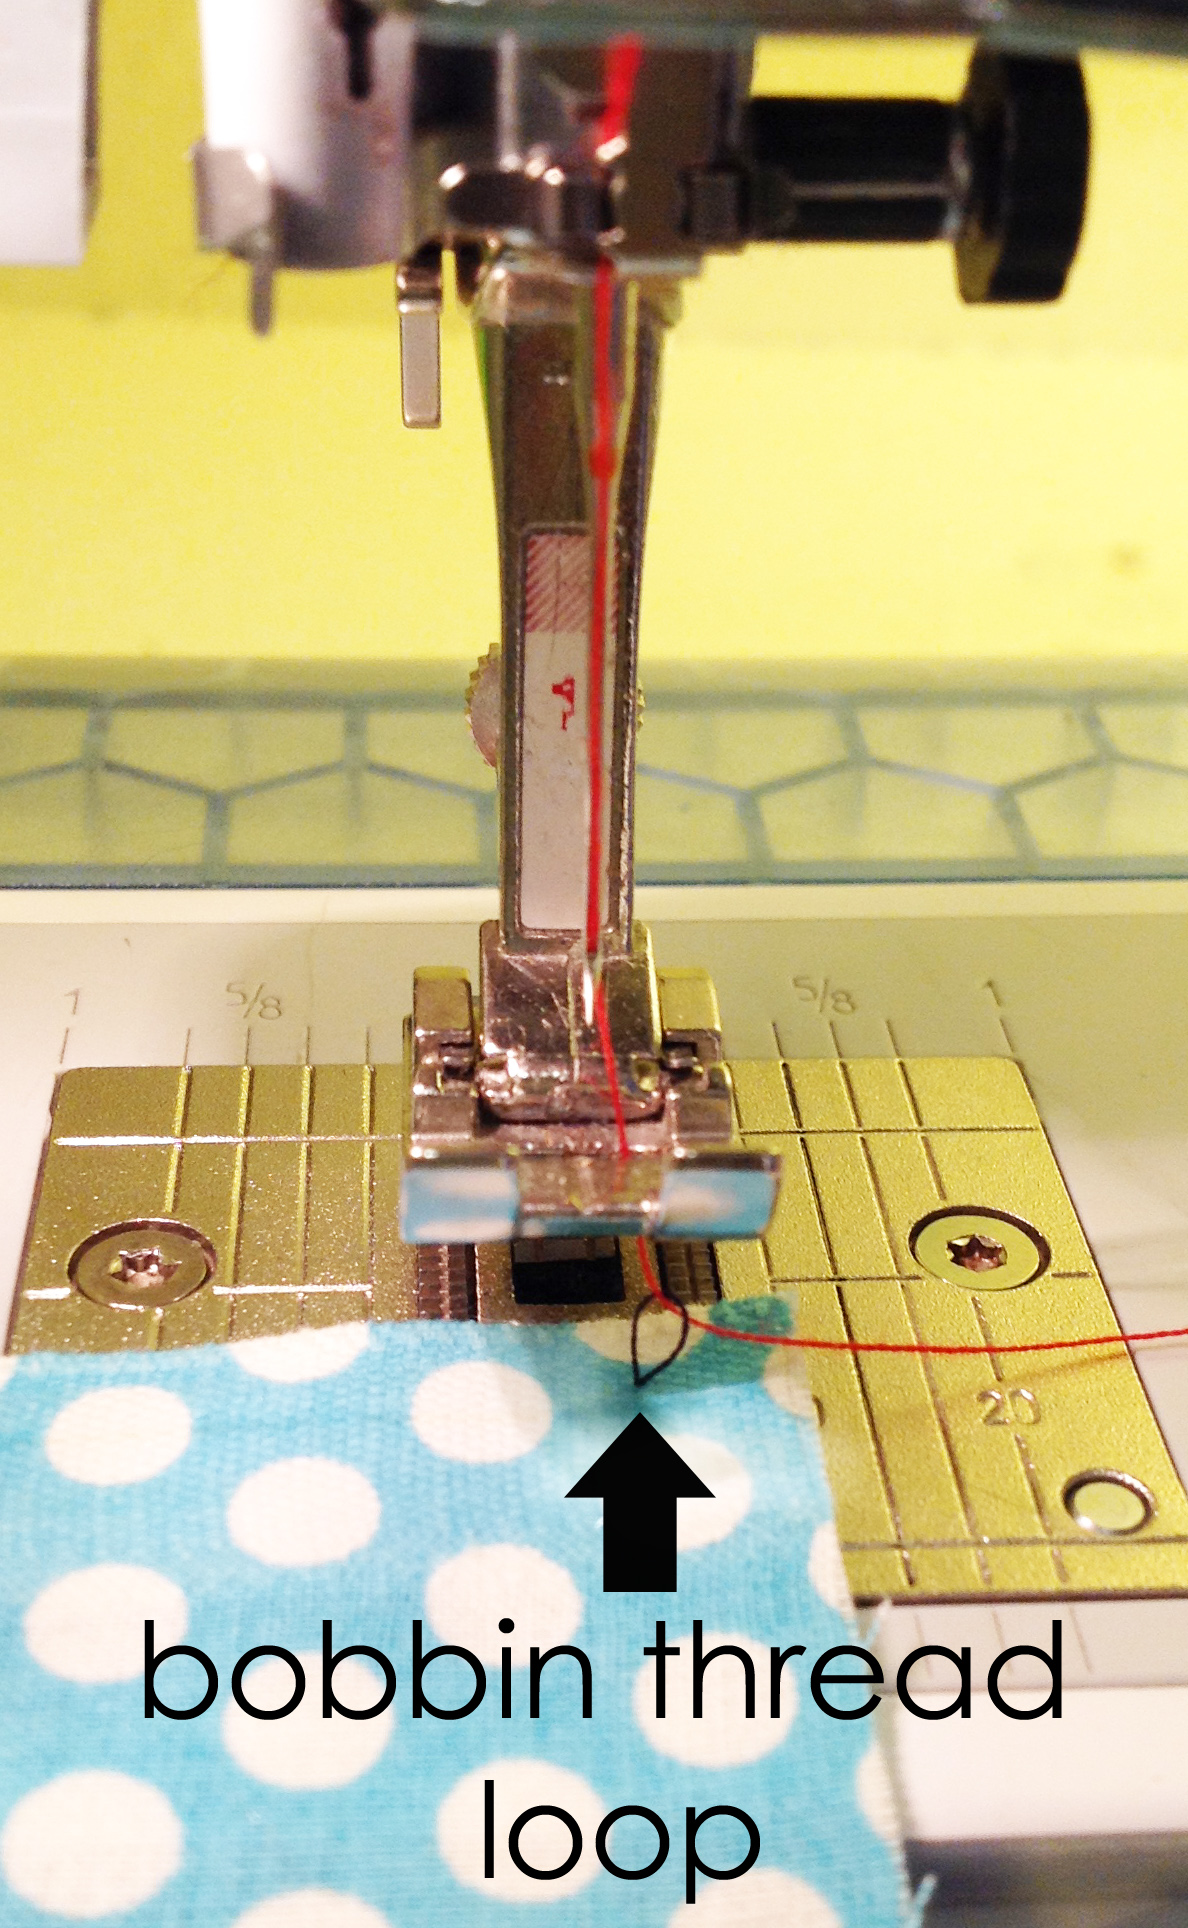
Grab the loop and pull the bobbin thread all the way out on top of your fabric panel. Hold both bobbin (black) and upper threads (red) together and pull a long tail, about 3-4″ longer than the length you want your ruffle.
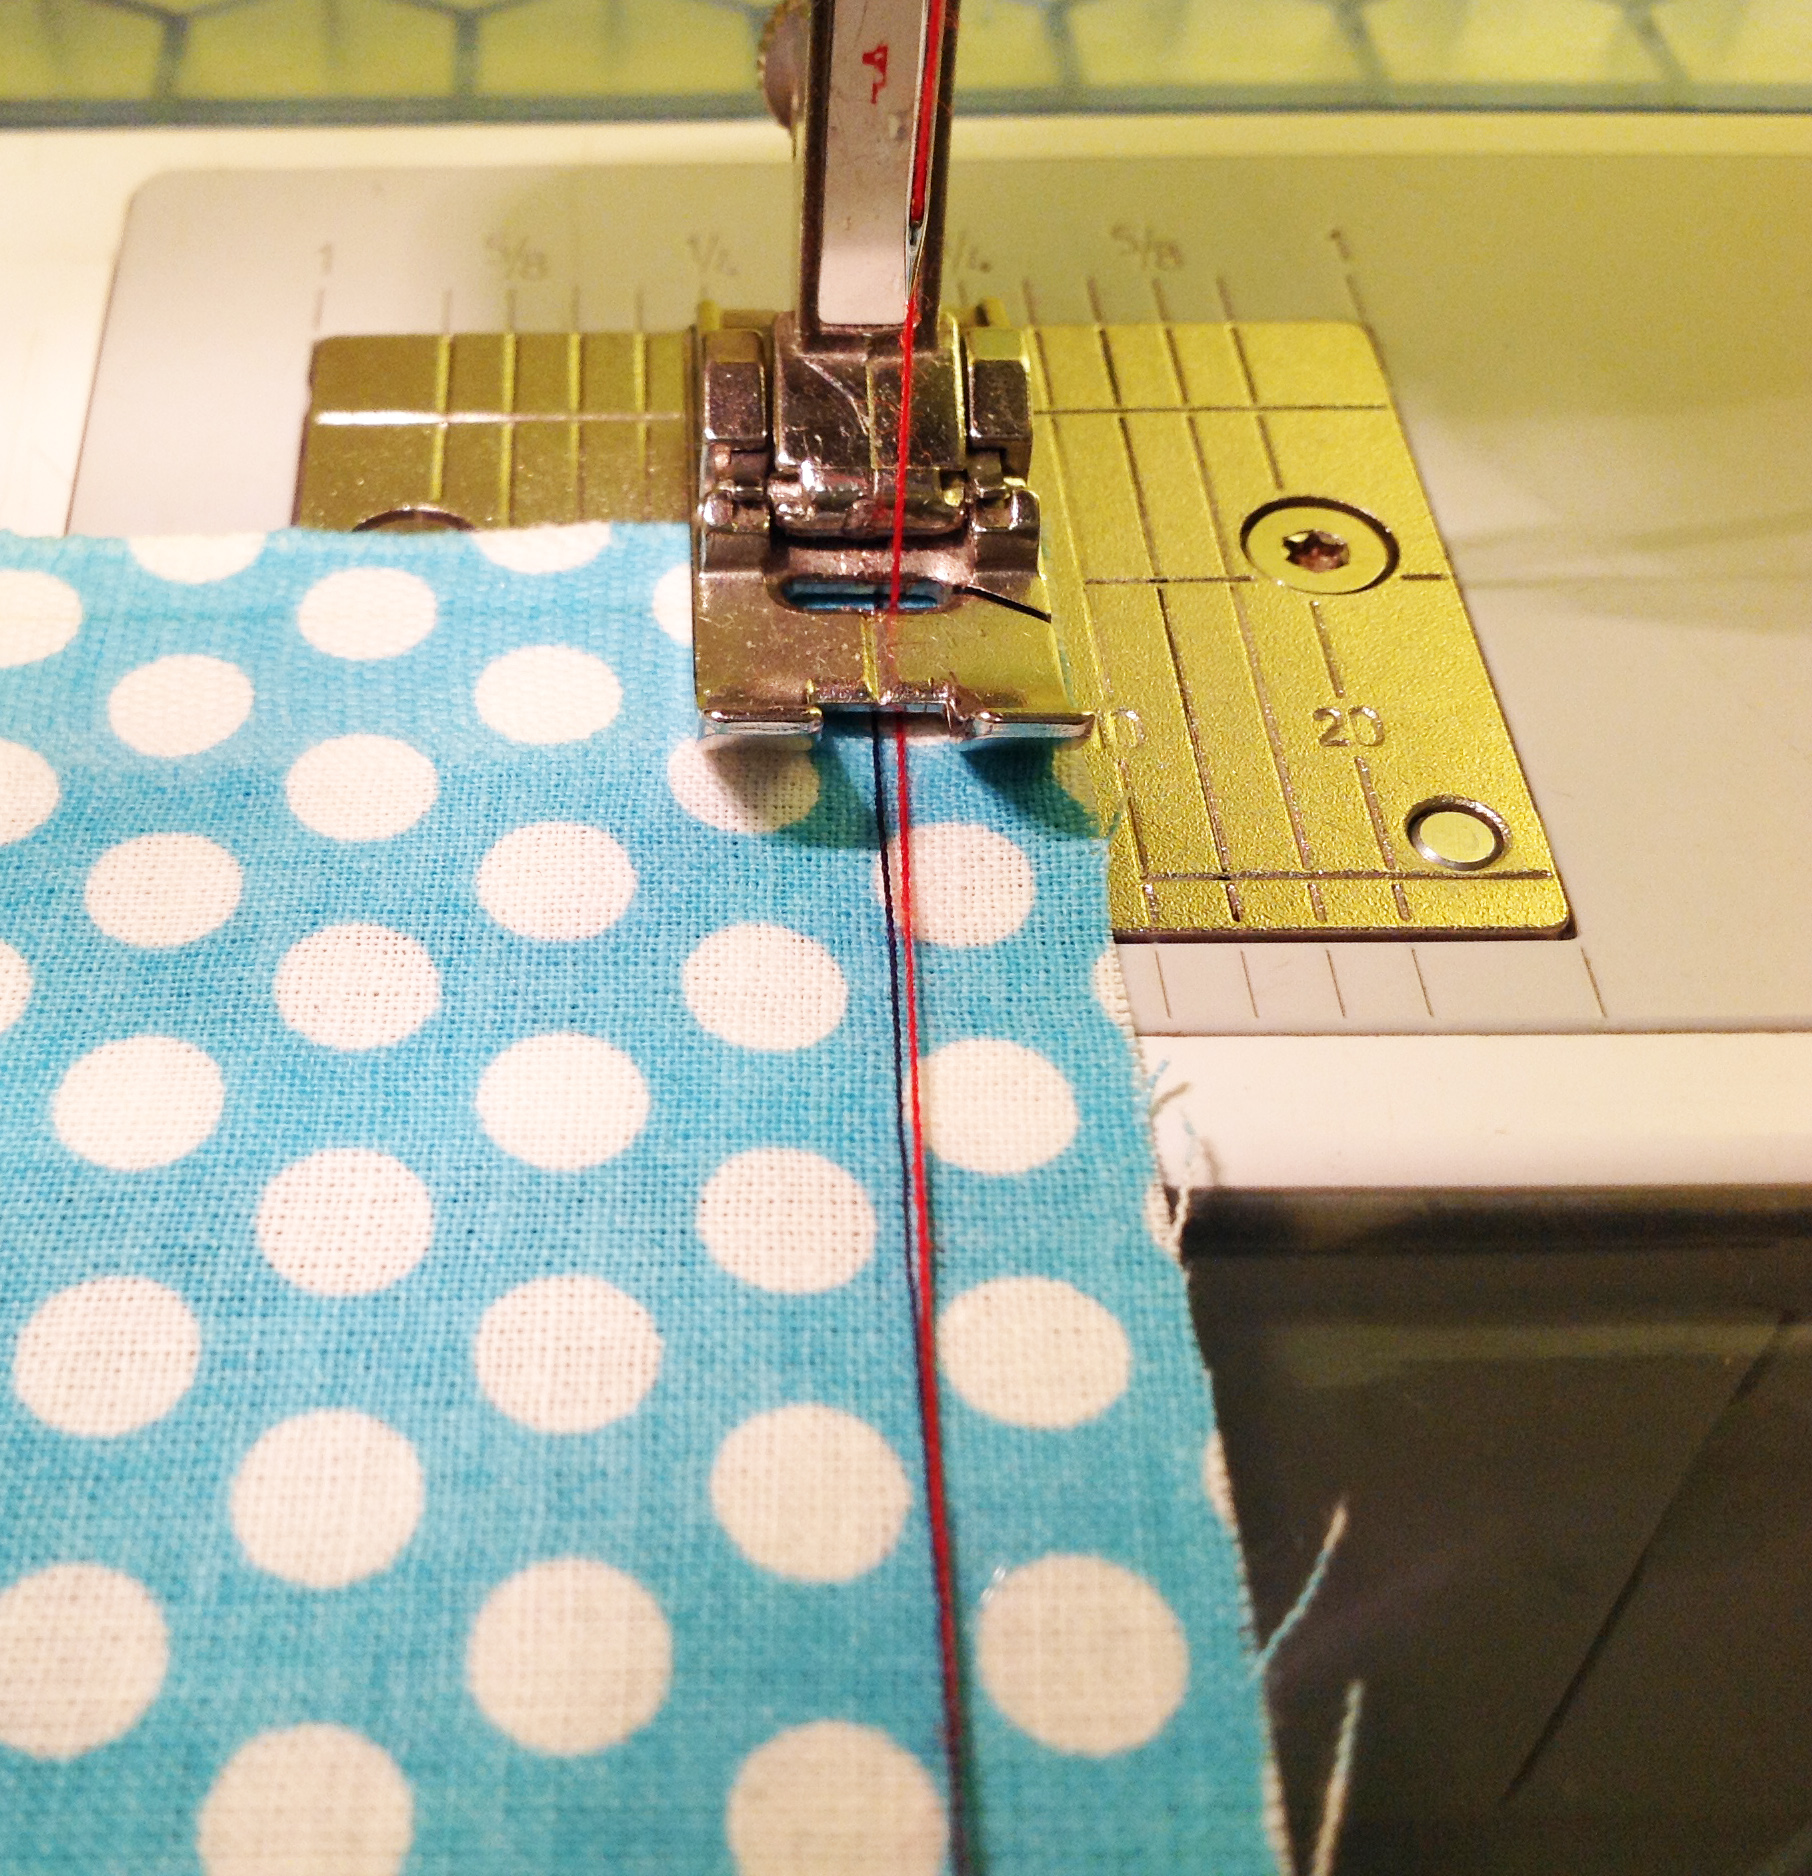
Lower your presser foot and your needle.
Set your machine to a wide and long zig zag stitch. Make sure your threads are in the center of your presser foot so the zig zag stitch will form over the upper and bobbin threads. Hold the threads securely and zig zag over them. If you hold your threads very tight as you stitch the ruffles will be tight, if let the thread feed more through your fingers, they will be looser. It doesn’t really matter, because you can adjust the ruffles after you are done sewing.

Remove it from the machine. Adjust the ruffles to the length you need. Put a pin at the end with the loose thread tails and figure 8 the thread tails around the pin so the ruffles don’t shift.
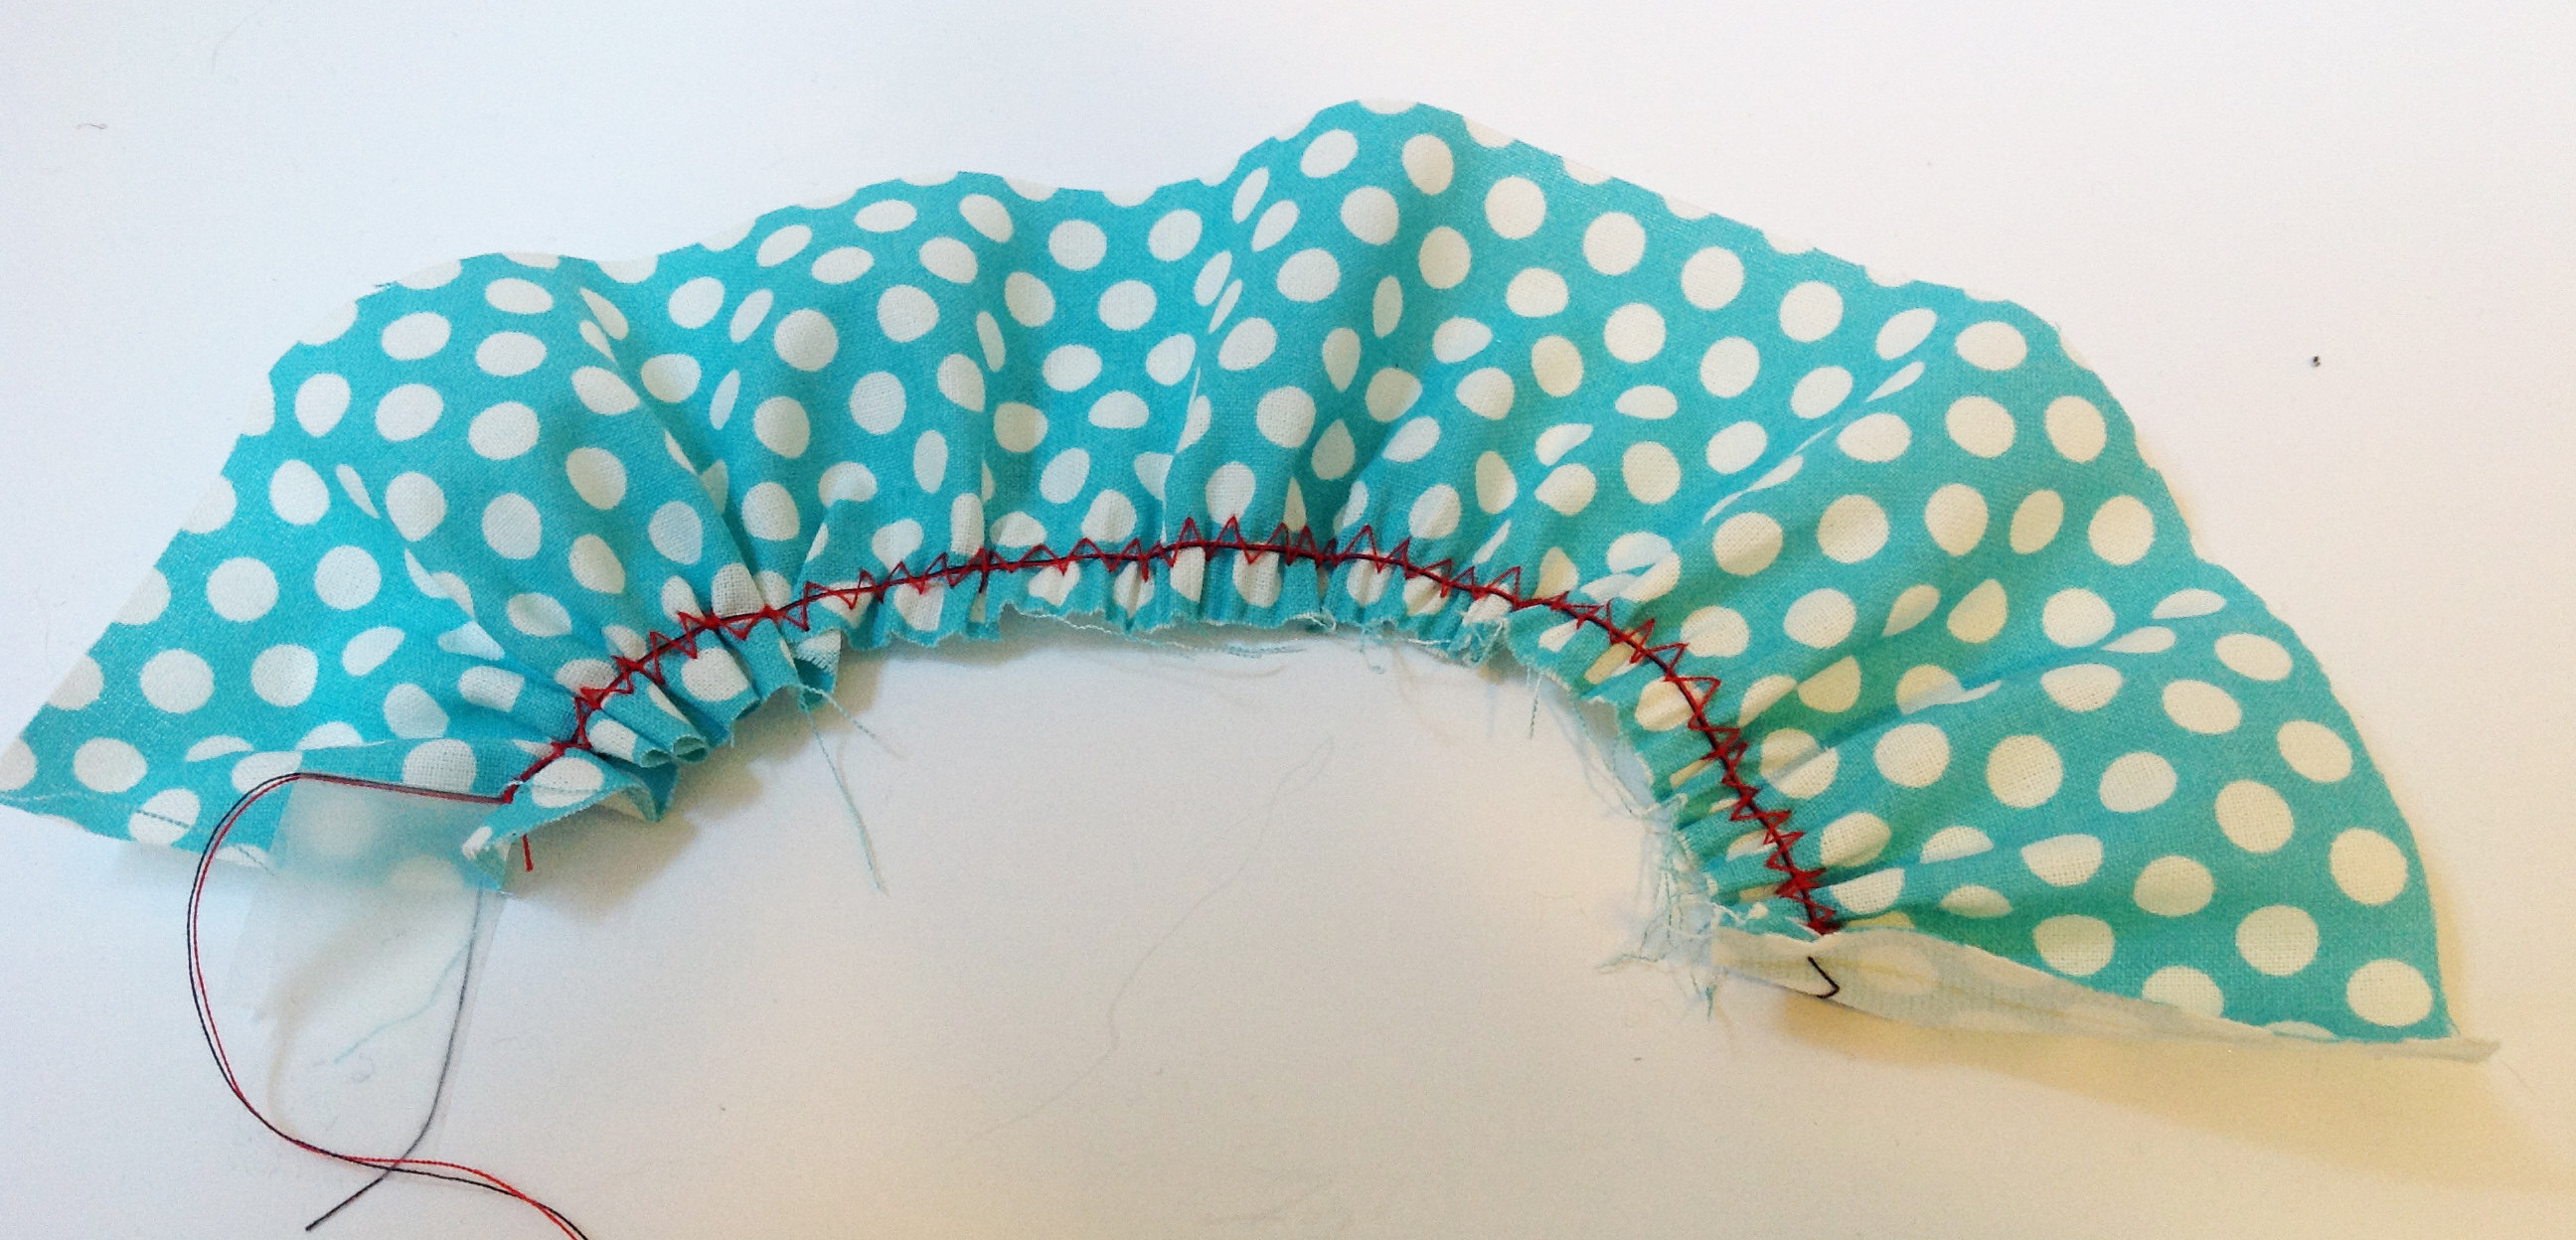
Isn’t that cool?
Here is the youtube video where I learned this method, if you want to check it out!
Technique #2:
This one is better on lighter-weight fabrics.
Here’s what you do:
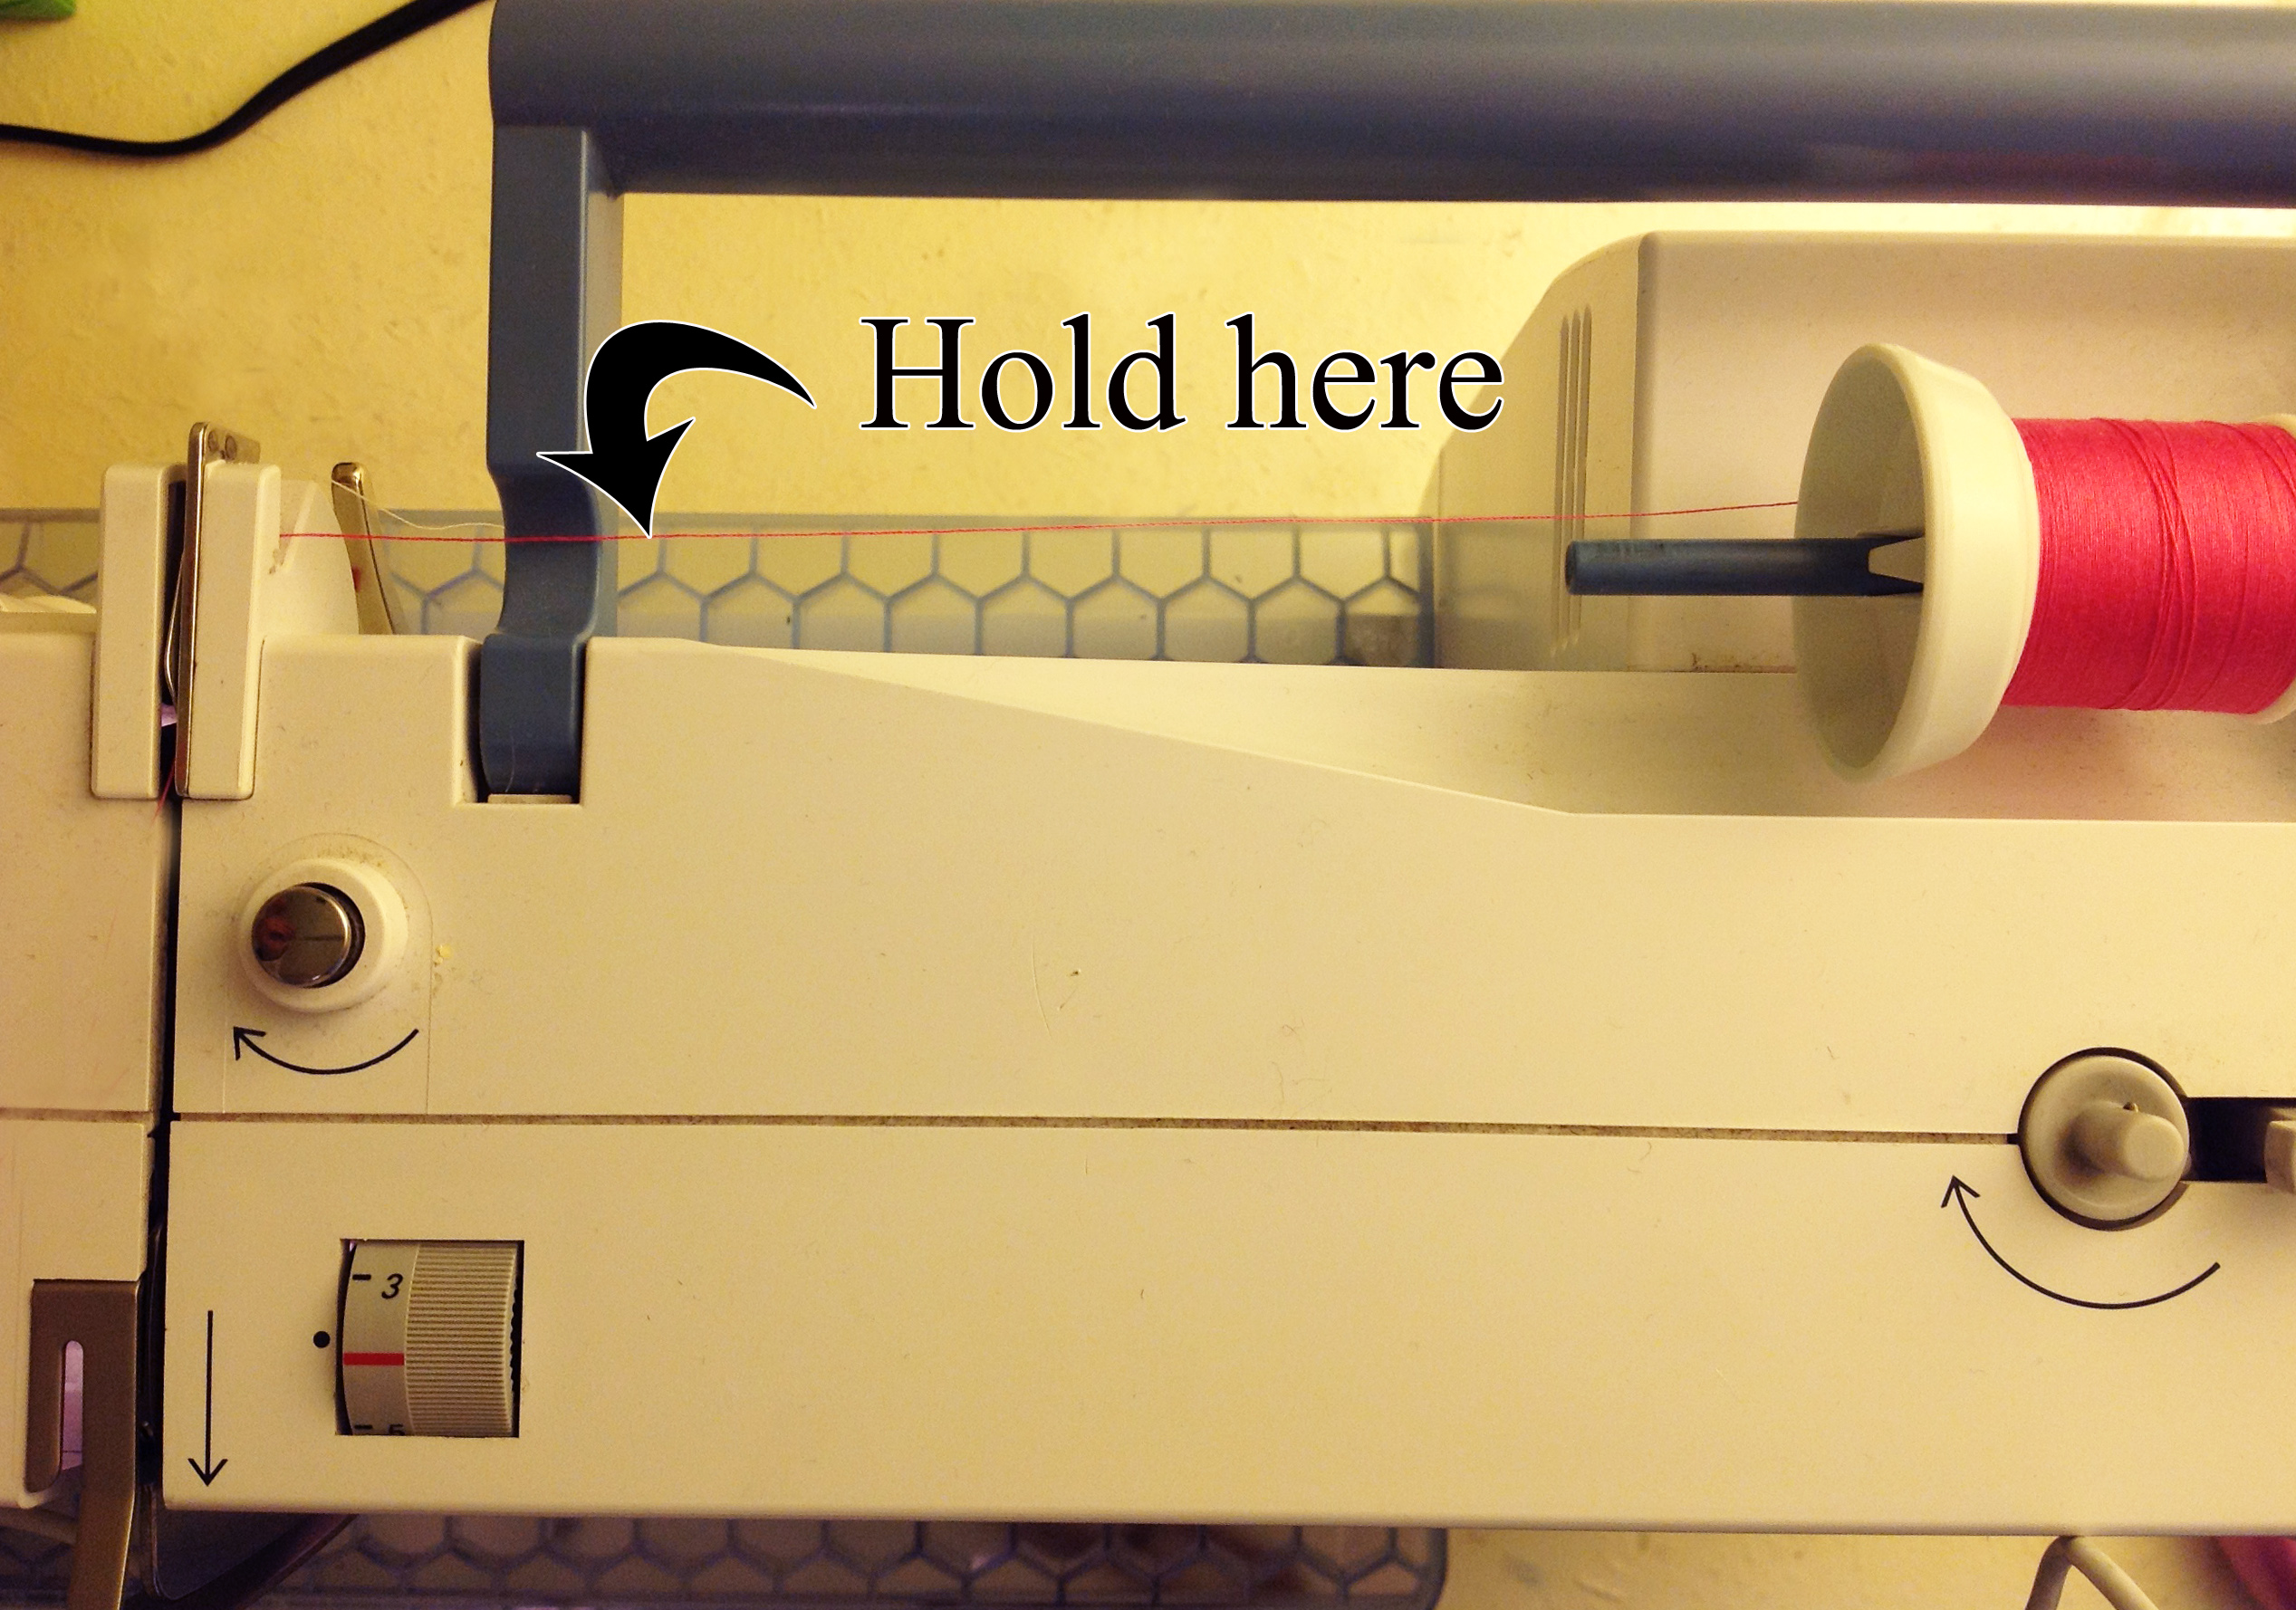
First dial you tension to it’s tightest setting.
Then set your stitch length to it’s longest setting.
Start with a test piece from the fabric you are going to ruffle. Place your fabric under the presser foot where you want the ruffle to start. Backstitch at the beginning of the seam and sew. As you stitch the fabric may start to ruffle up, if not, you need a little more tension on the upper thread. So, hold the upper thread between the spool and where it feeds into the machine. You don’t want to hold too tight or your thread will break. Allow the thread to run through your fingers as you sew, just provide a little extra resistance with your fingers. When you are done sewing, give yourself a long thread tail and remove from the machine.
Distribute the ruffle to the length you need. Put a pin at the end with the loose thread tails and figure 8 the thread tails around it so the ruffles don’t shift.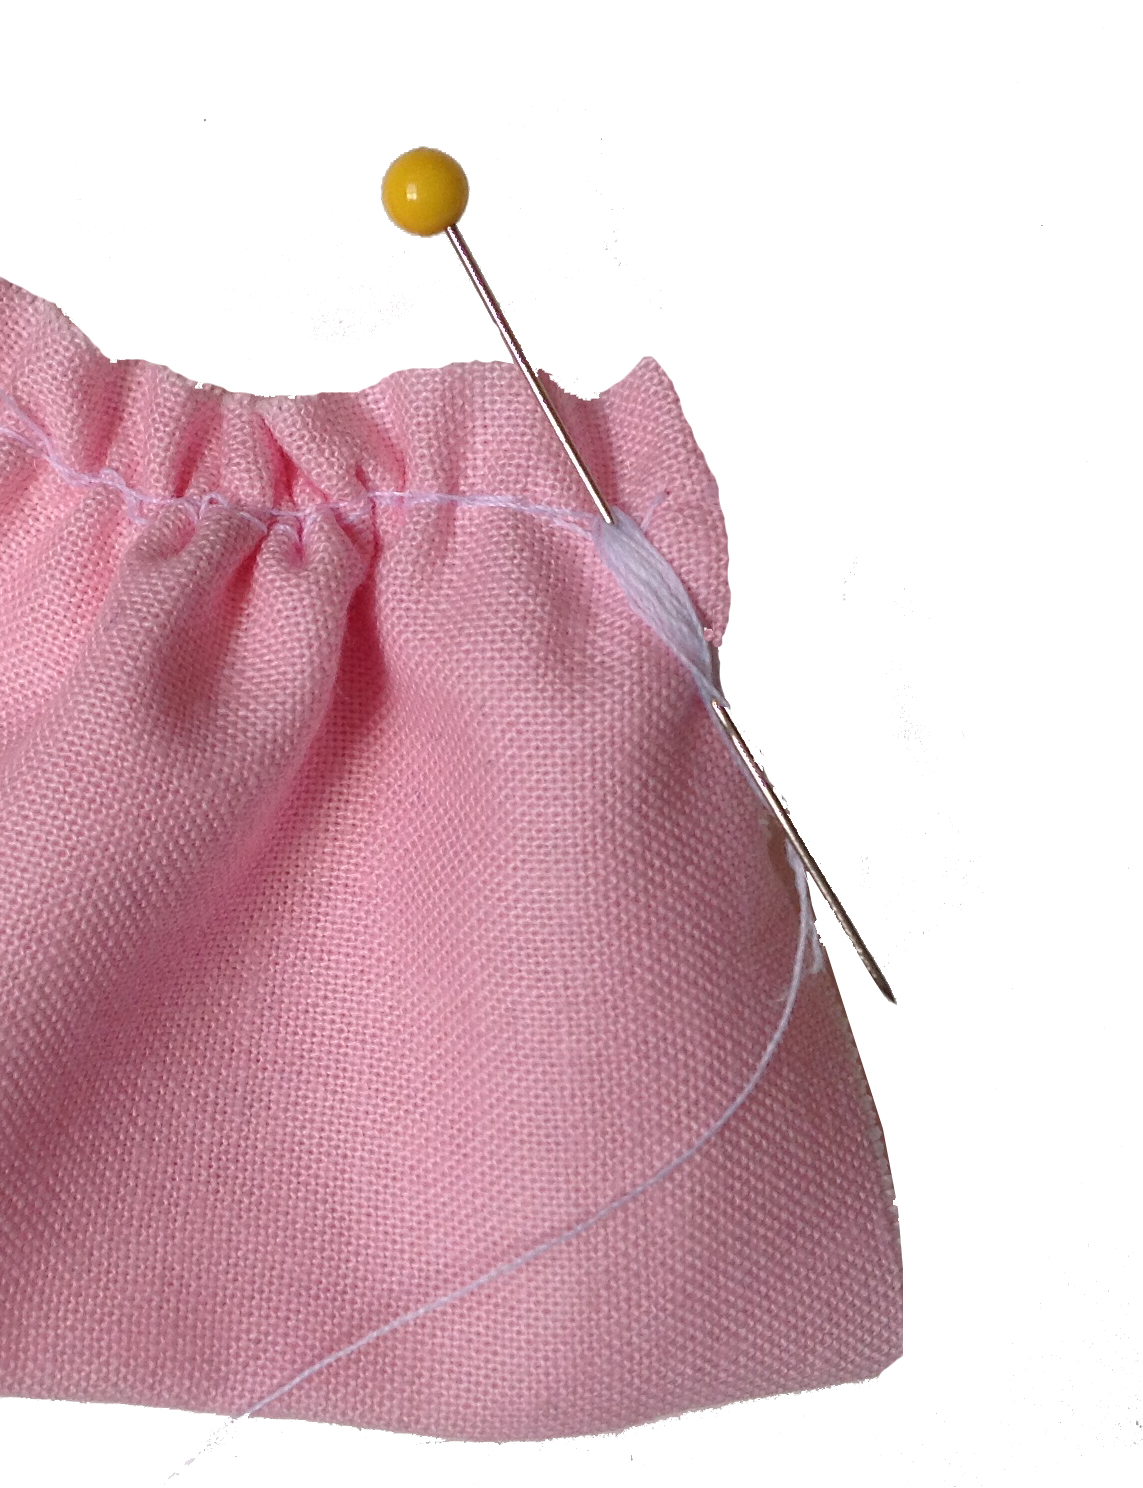
oh you are so right, this is so simple and so great. Now I love ruffles. Forget the huge money my store wants for a ruffle foot.