This tutorial coincides with steps 30-33 on page 8 or the Savannah Bag pattern.
Now we need to square the bottom corners of our bag. Sometimes this is called boxing the corners or gusseting the corners. Whatever you call it, the idea is to create depth to the bag and to create a bottom so we can put things in it.
For this tutorial I am using a single layer of fabric that is interfaced the same way as your Savannah bag. It will be easier to see than to show you on the whole bag.
At this point you have your exterior front and back panels sewn together and your lining is attached (lining is not shown here).

Here’s what you do.
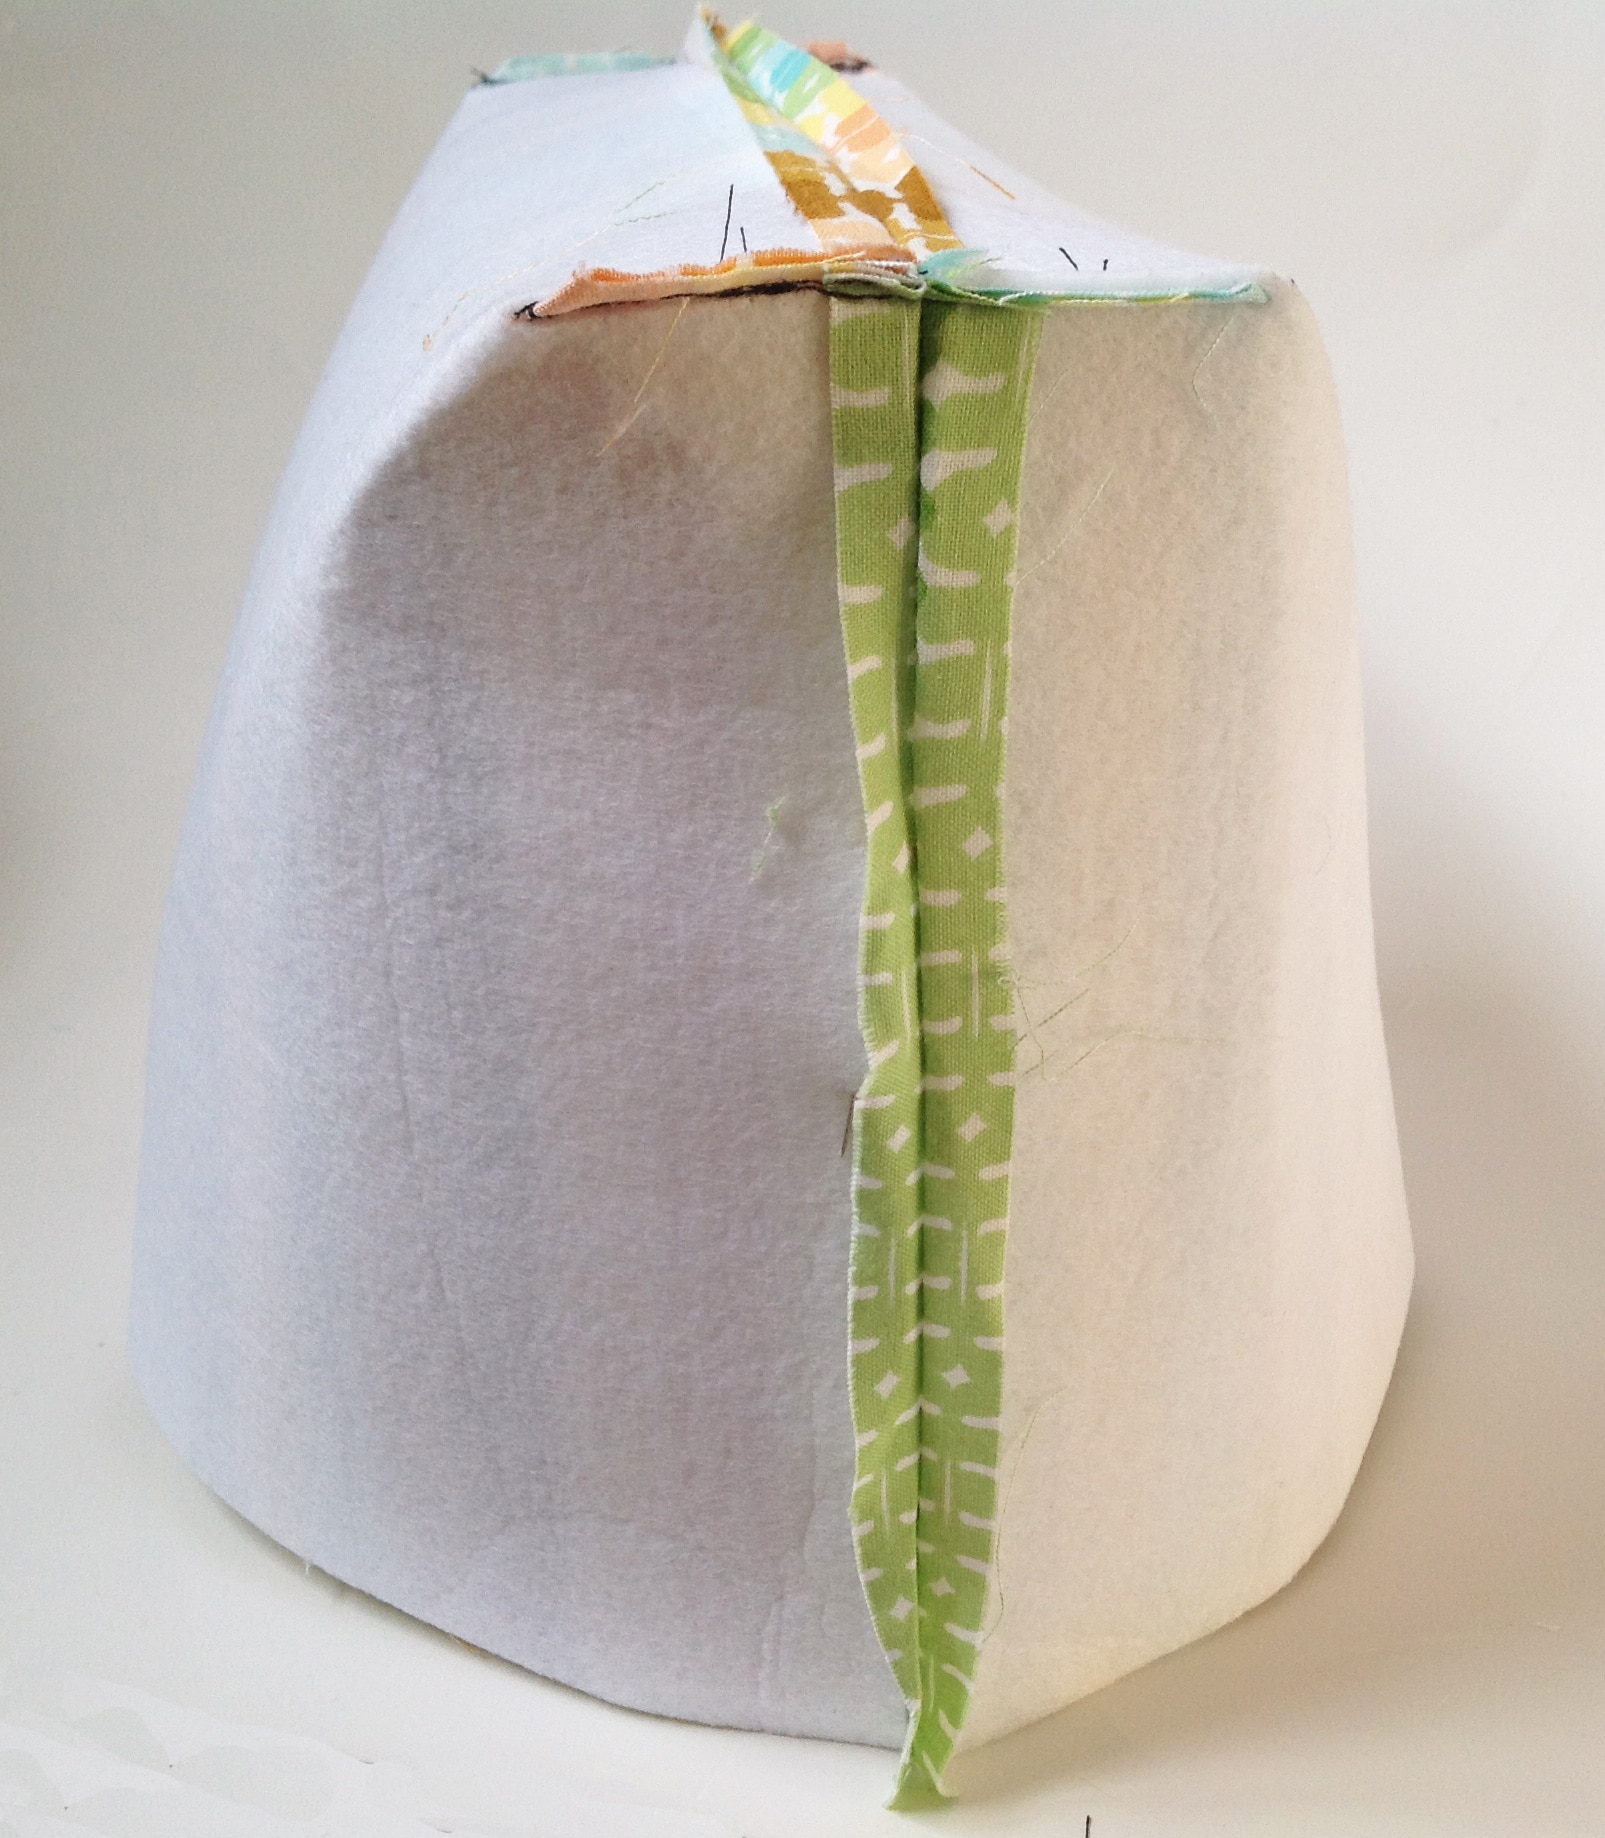
Look inside the exterior portion of the bag. At one corner, match up the side seam with the bottom seam.
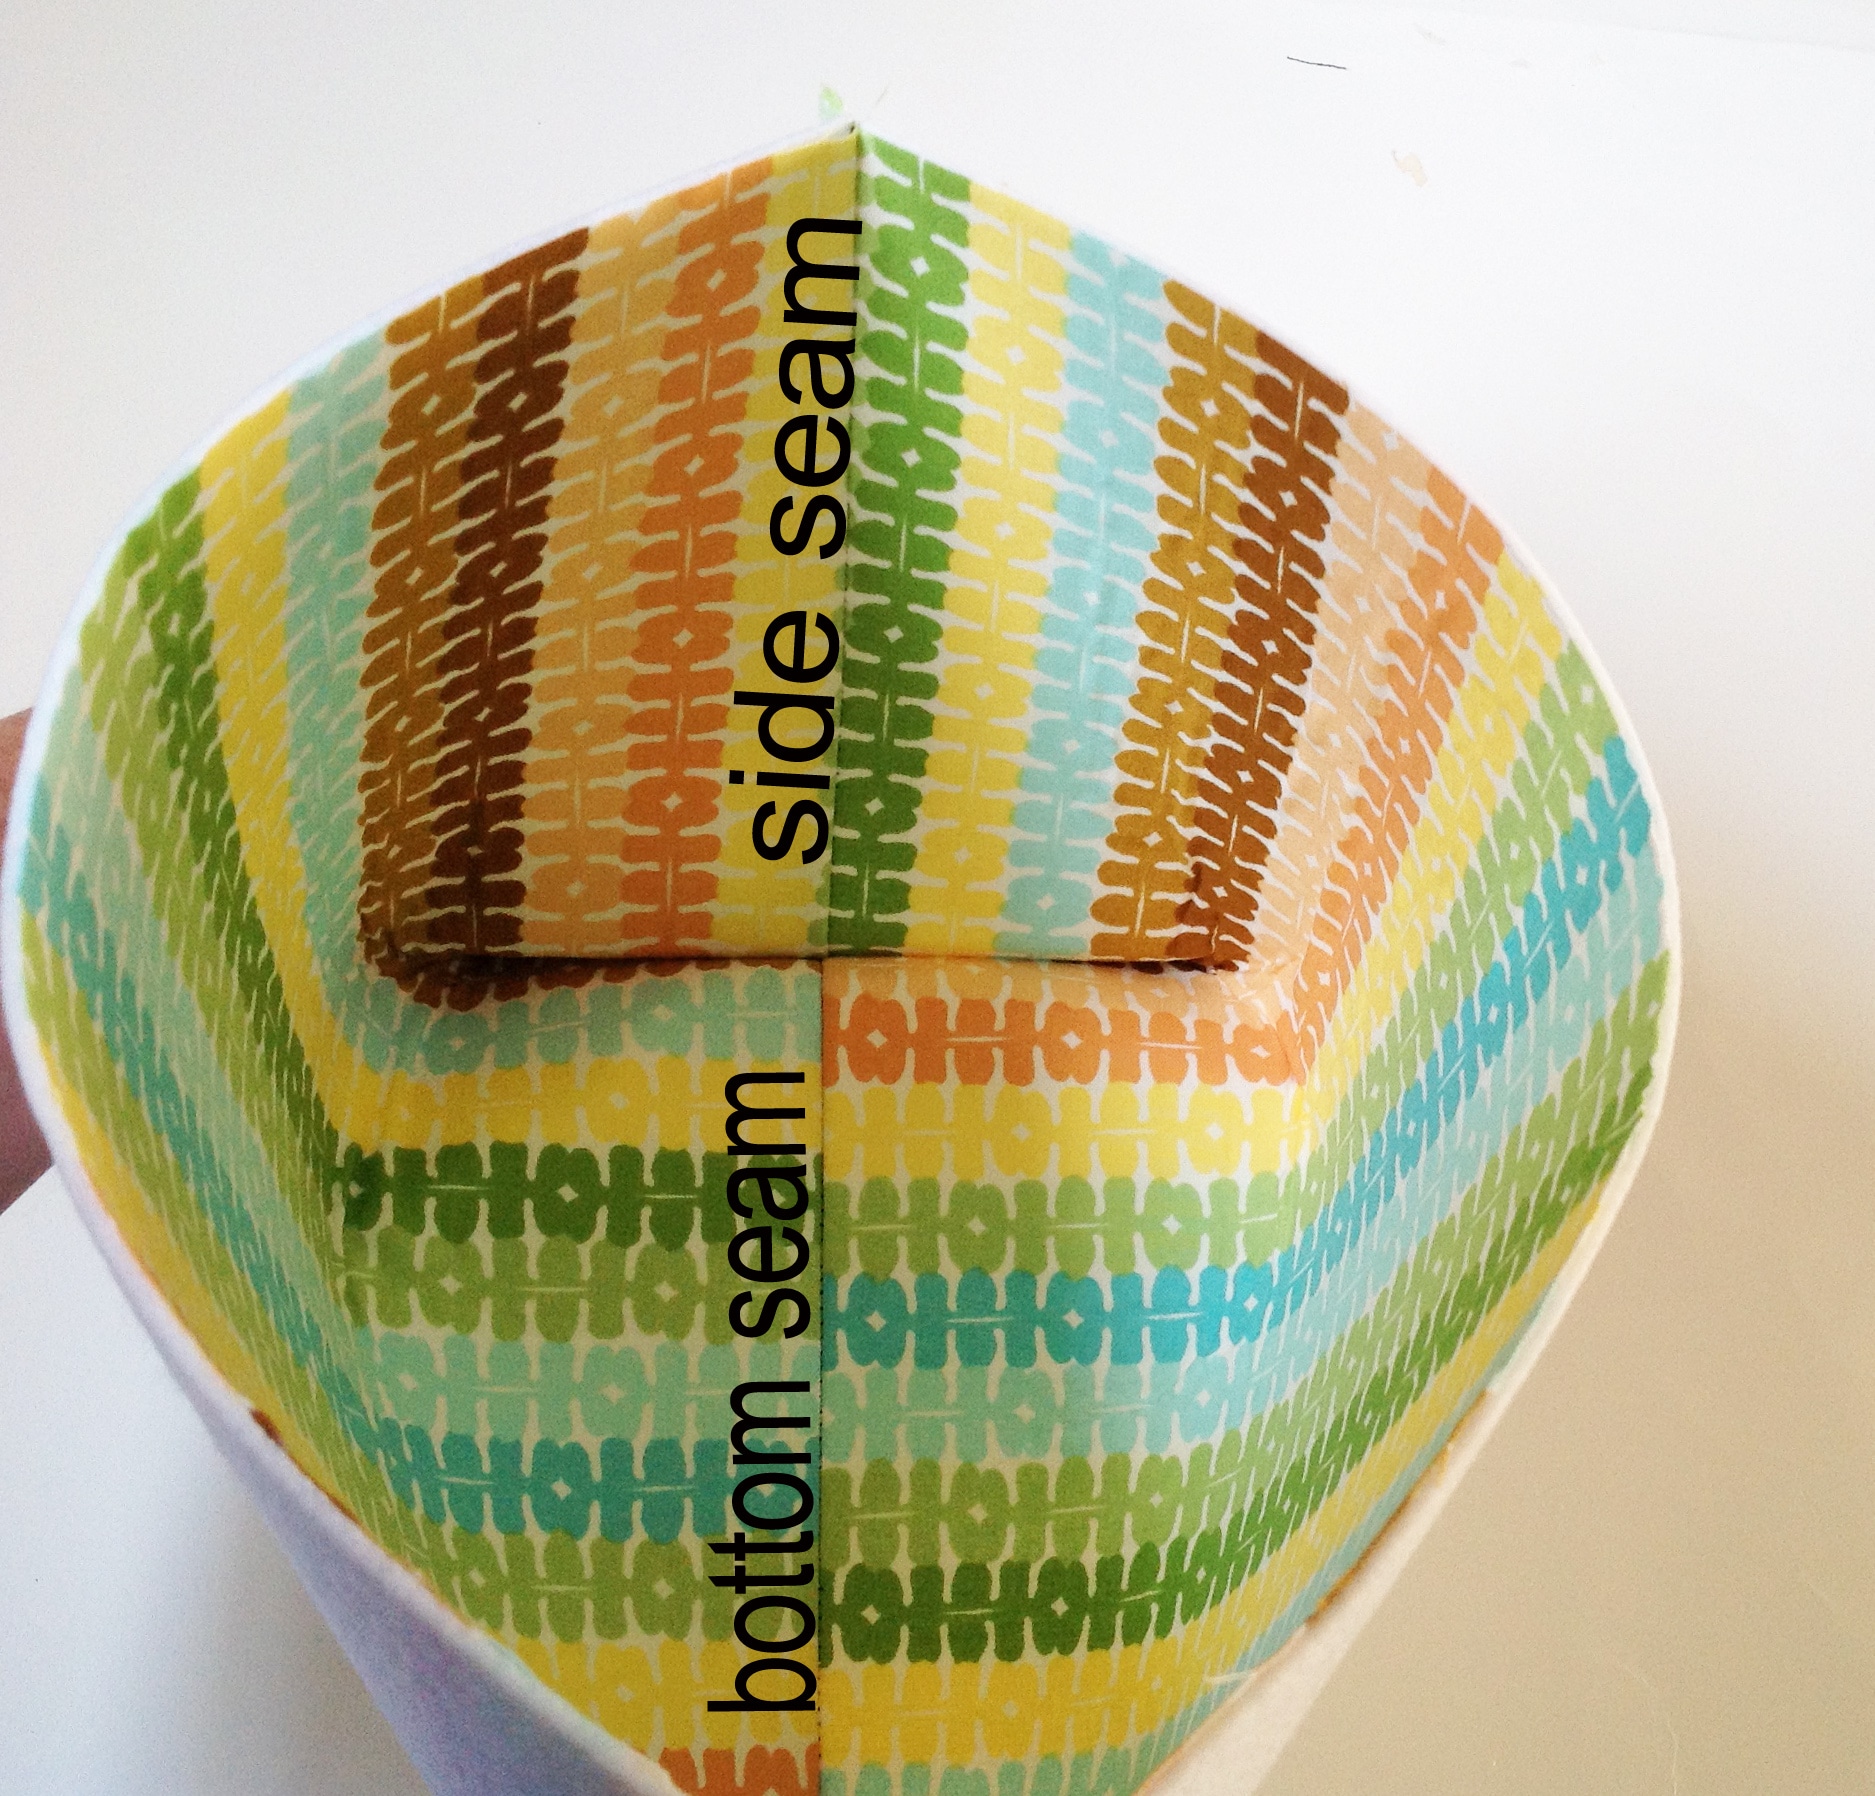
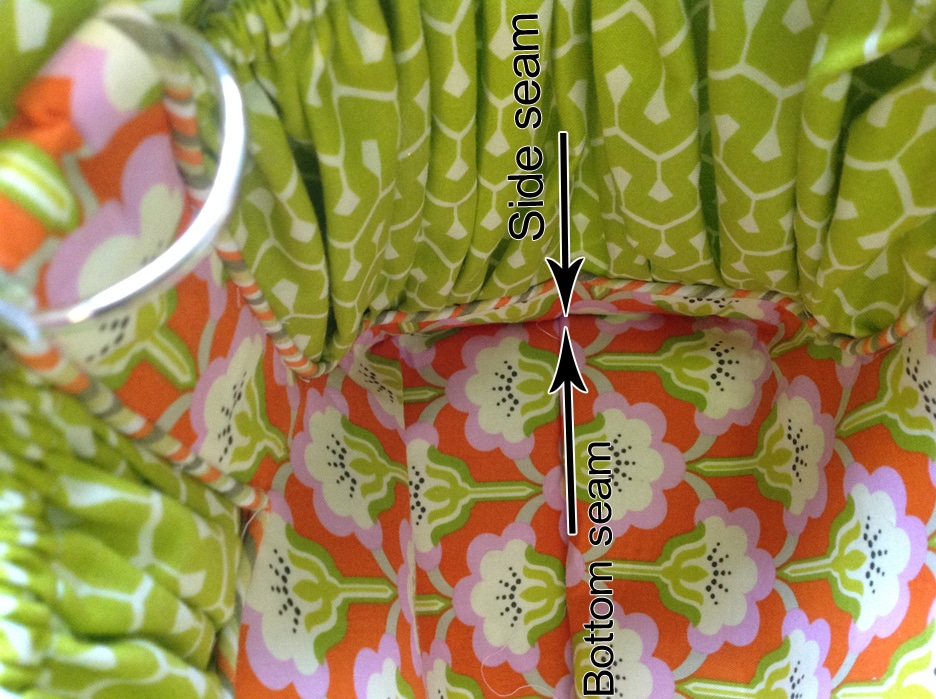
Here’s what it looks like on the Savannah. With the gathered pockets it’s a little hard to see the side seam on this bag so I have put arrows where the seams are in the photo below..
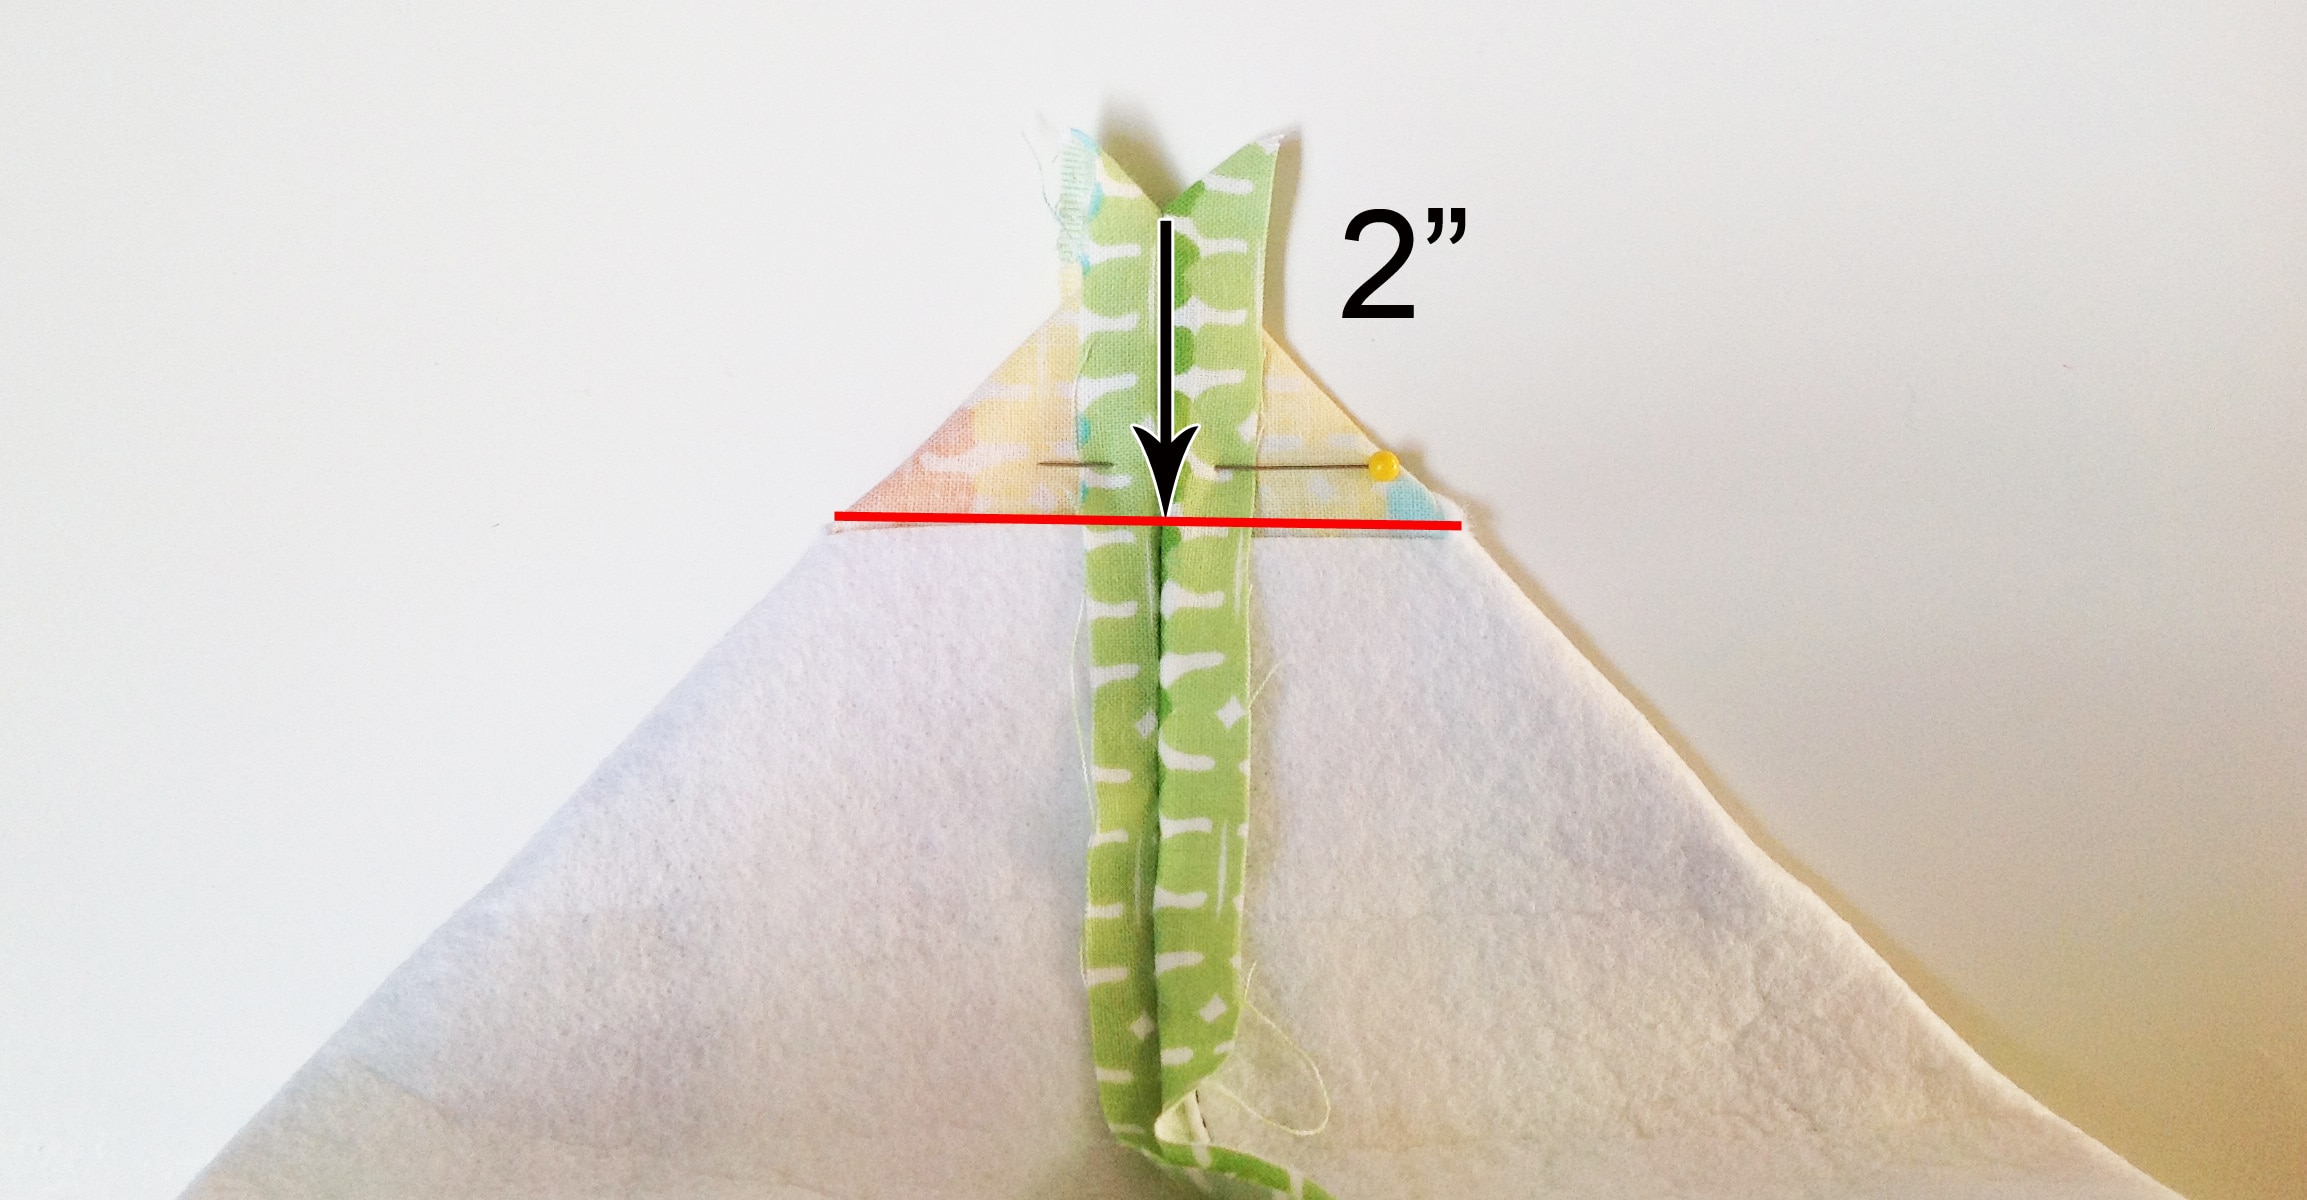
Hold those seam together. On the outside of the bag, you are going to want to open up the seam allowances and pin those seam together. Measure down from the very tip of the seam 2″ and mark a line there. BTW, I am using a much smaller piece so these measurements are not to scale. The line you draw that is 2″ down should end up being just a hair outside the edge of the interfacing.
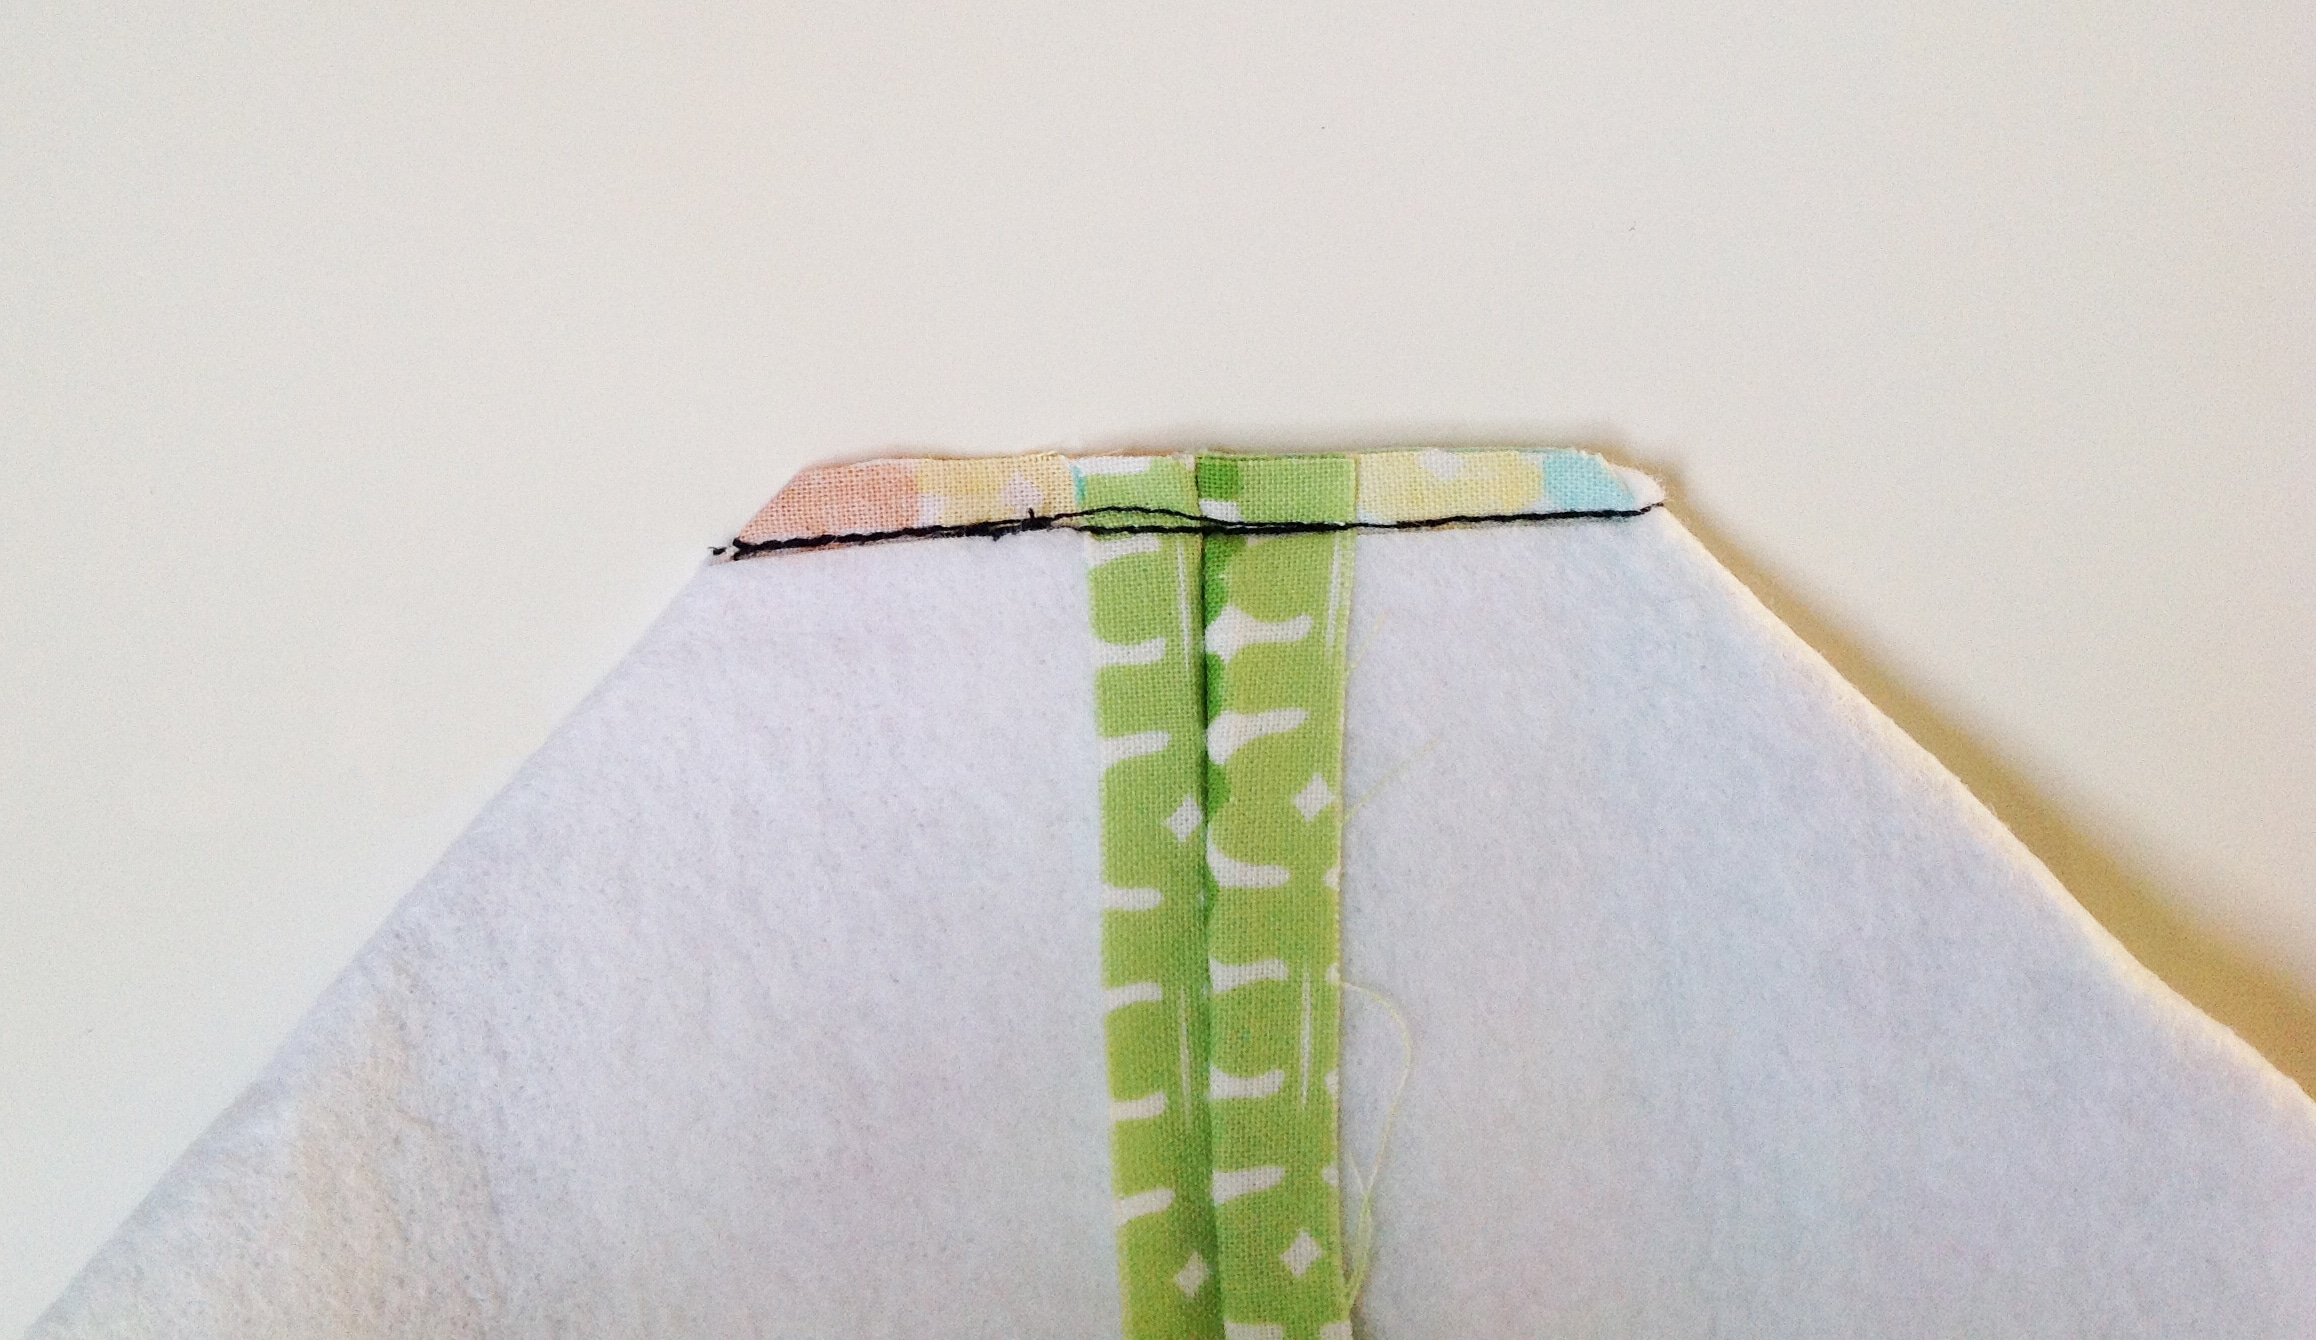
Sew along the line you just drew. Be sure to backstitch at the start and end of the seam and you might even want to reinforce the seam by stitching again right next to it. Then, cut the point off about 1/4″ from the seamline.
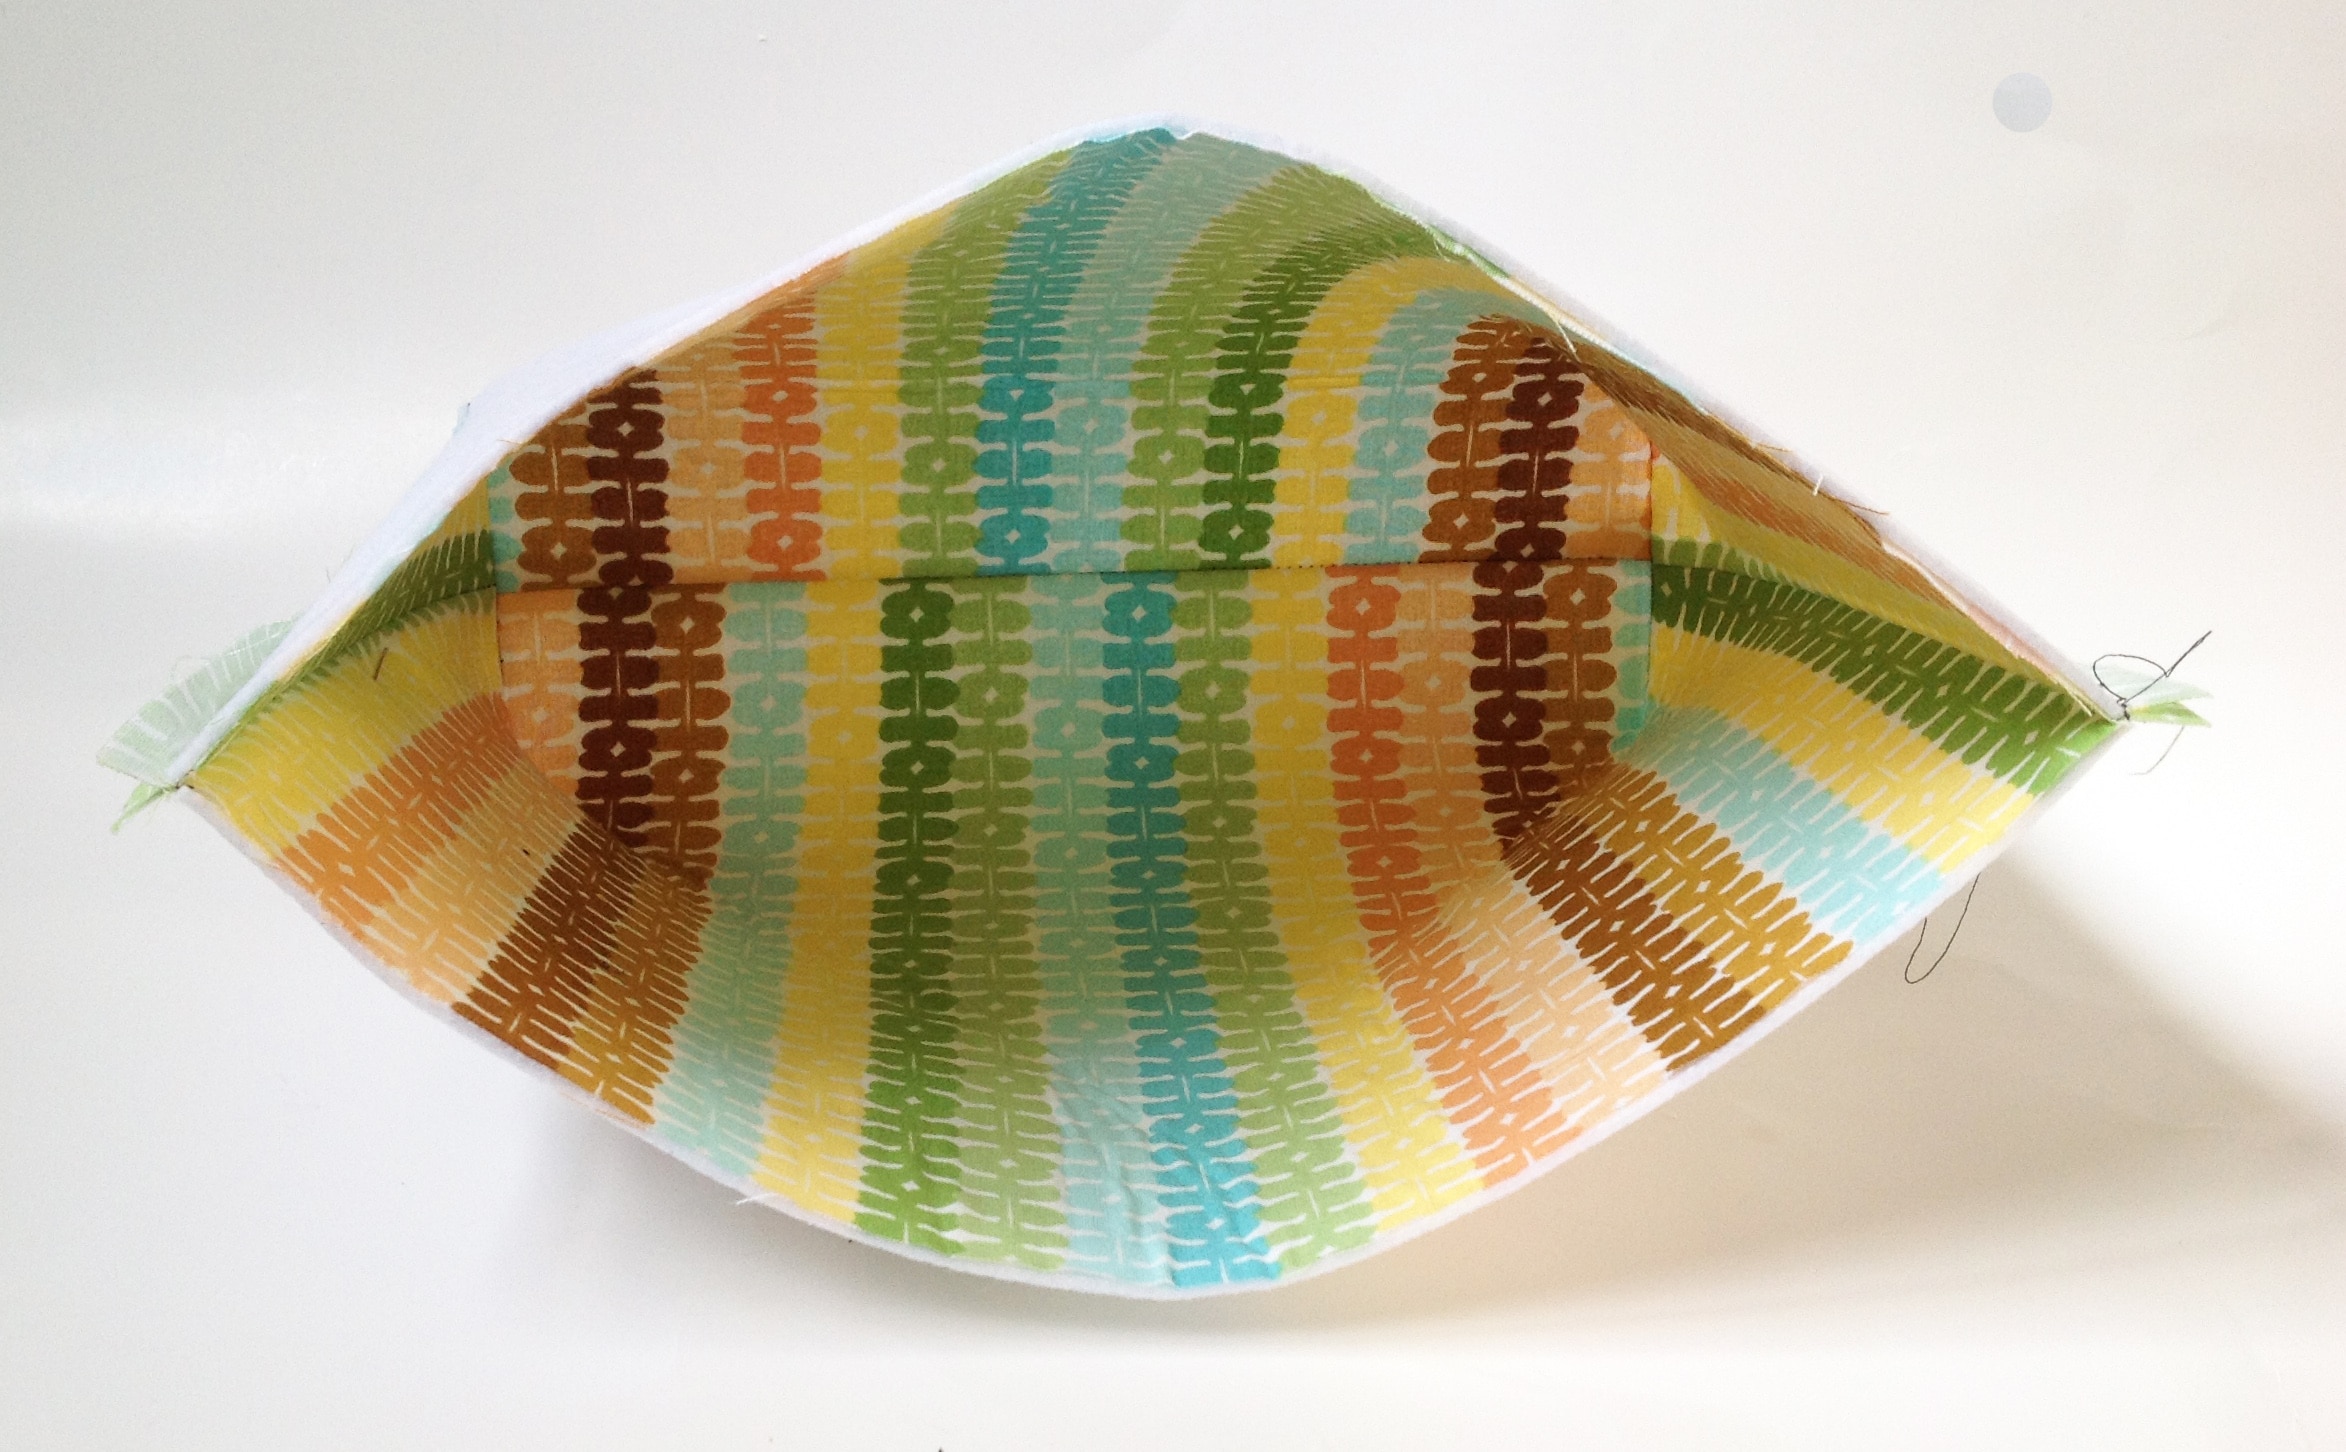
You want to do the same thing on the other corner. Here’s what that looks like when both corners are done and it is sitting upside down:
And here’s what it looks like on the inside:
That’s all there is to it. You will do this same process on the corners of the lining. You are almost finished with your bag!!
Leave a Reply
You must be logged in to post a comment.