• Home
  • Shop
    • All Items
    • Sewing Patterns
      • Printed Sewing Patterns
      • Digital Sewing Patterns
      • Seat Belt Sewing Patterns
    • Seat Belt Sewing Patterns
    • Seat Belt Project Kits
    • Seat Belt By-the-Yard & Swatches
    • Hardware
    • Free & On Sale
  • Galleries
  • Blog
  • Revisions
  • Wholesale
  • Contact
  • FAQ’s
  • My Account
  • Cart

cozy nest design

You are here: Home / accessory / How to Make a Magnetic Key Fob! Hang your keys in your purse!

How to Make a Magnetic Key Fob! Hang your keys in your purse!

accessory· diy· free· organization· tutorial

19 Jun
 
 Picture the scene:  You are leaving the store loaded down with bags and the hungry, there tired, click toddler  on your hip has lost his patience.  You are happy to see the haven of your vehicle just yards ahead because your right biceps quakes under the weight of the extra-large Tide bottle and bag of groceries that swings from your pinkie.  Finally, you reach your car, but your happiness is short-lived – where are the key???  In the bottom of your purse, of course!  Never neatly on top!  You put your child and groceries on the ground and your purse on the hood. With one eye on the child, you rifle through the bag pushing aside old crayons, the broken watch you still  haven’t had  fixed, and you wonder what a lone sock is doing in there.  It starts to rain hail and the child starts to cry.  Where are those keys!! your mind screams.  In your frenzy, your hand grazes the snap of your wallet, releasing a flurry of reward cards and expired coupons. You do eventually find the keys, in the deep abyss that is your purse, but not before snapping off the fingernail of your right index finger (the hardest to grow – and just when all 10 where almost the same length).
 
Don’t let this happen to you!  
 
 Make a magnetic key fob and hang your keys on the inside of your purse!  Your keys will hang serenely, as if floating, on the side wall of your purse waiting to be gently plucked whenever they are needed.
 
 This tutorial will show you how to make a magnetic key fob and how to install the snap in your bag for the fob to hang from.  These instructions illustrate installing the snap while you are in the process of making the purse.  It’s a little trickier but you can  install a snap in bag that is already finished, you will just need to open the lining, then follow these directions and sew up the lining when your done.
So. here’s what you do: 

“Dig No More” Magnetic Key Fob Tutorial 
Finished size 1 1/4 x 3 1/2″
 
Supplies

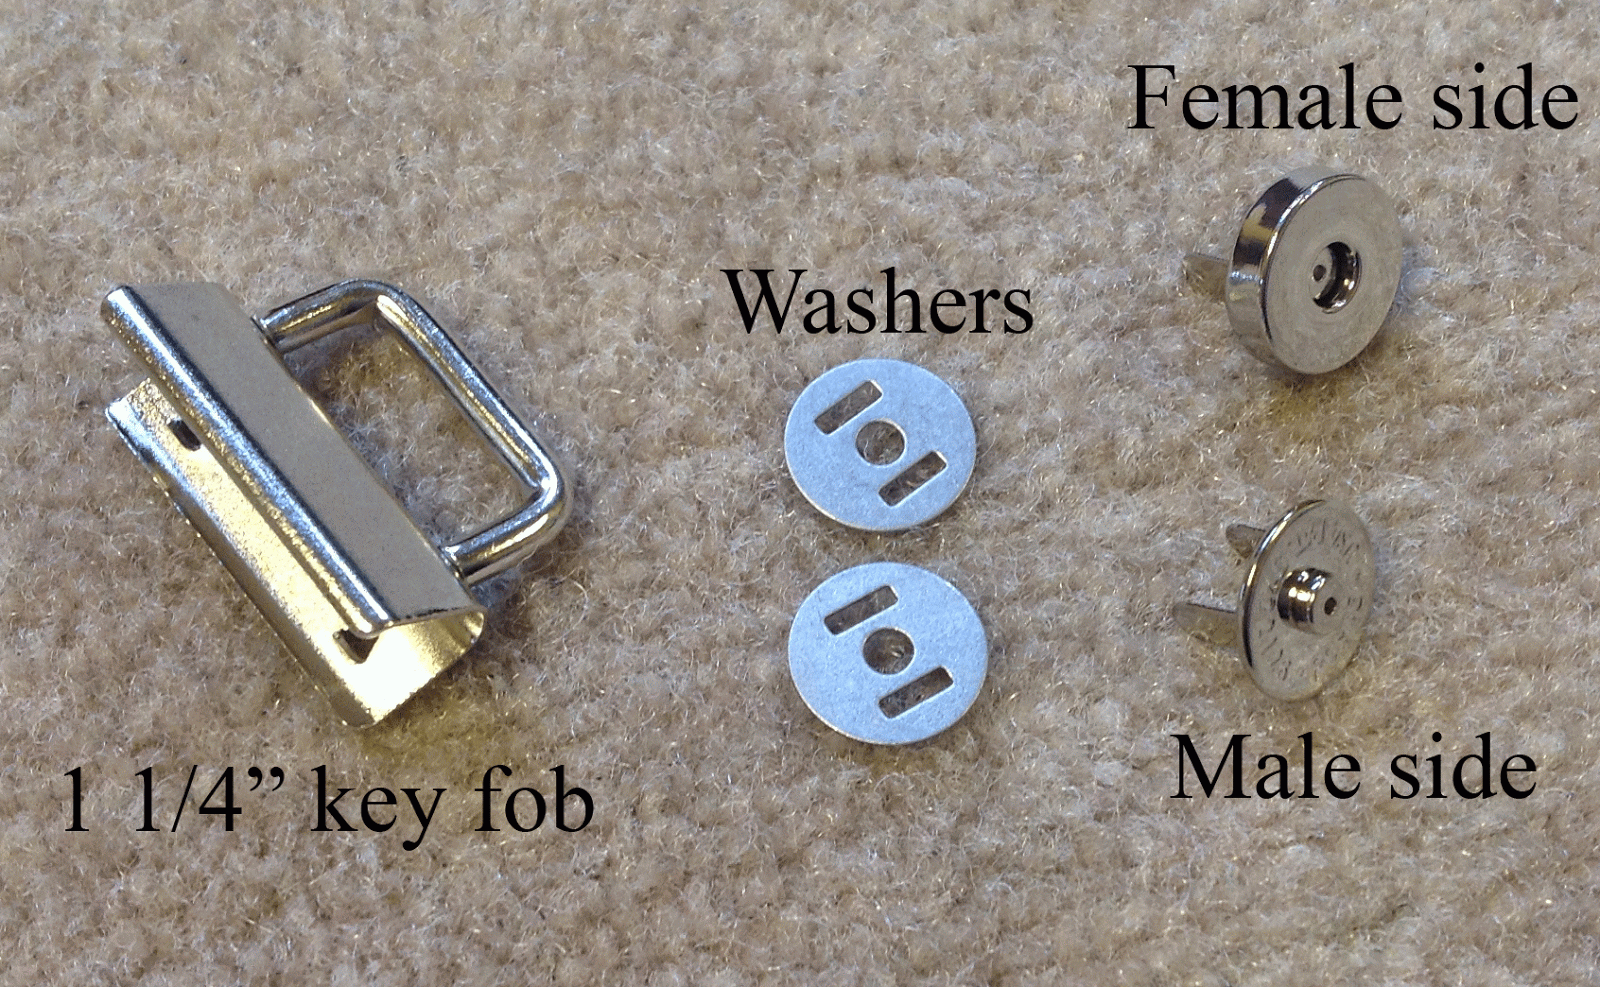
  • (1) 2 x 7″ fabric scrap for exterior key fob
  • (1) 2 1/4 x 7″ fabric scrap for interior key fob
  • (1)  1×7″,  (1) 1 1/4×7″ & (1) 2×2″ pieces medium-weight, fusible interfacing (I used Craft Bond by Pellon)
  • (1) 2 x 2″ piece of plastic canvas (not pictured – sorry about that)
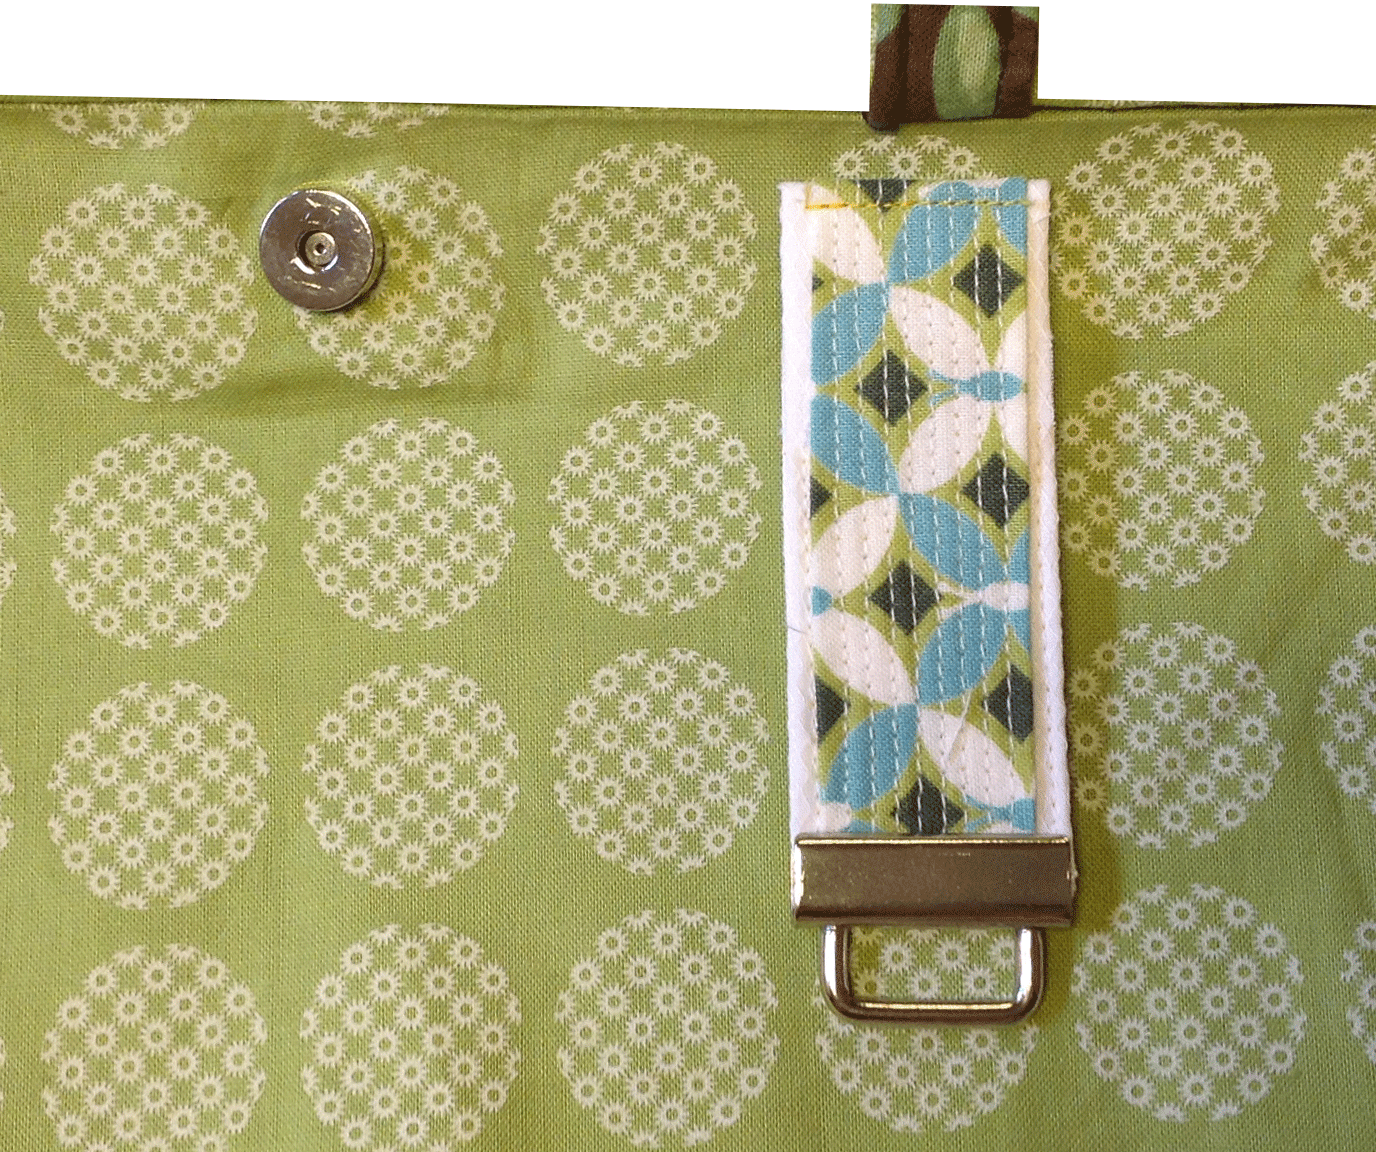
  • (1)  1/2″ Magnetic purse snap kit (comes with male and female sides, and 2 washers)
  • (1)  1 1/4″ key fob hardware
  • Basic sewing supplies
  • Pencil or other temporary marking tool
  • Pliers

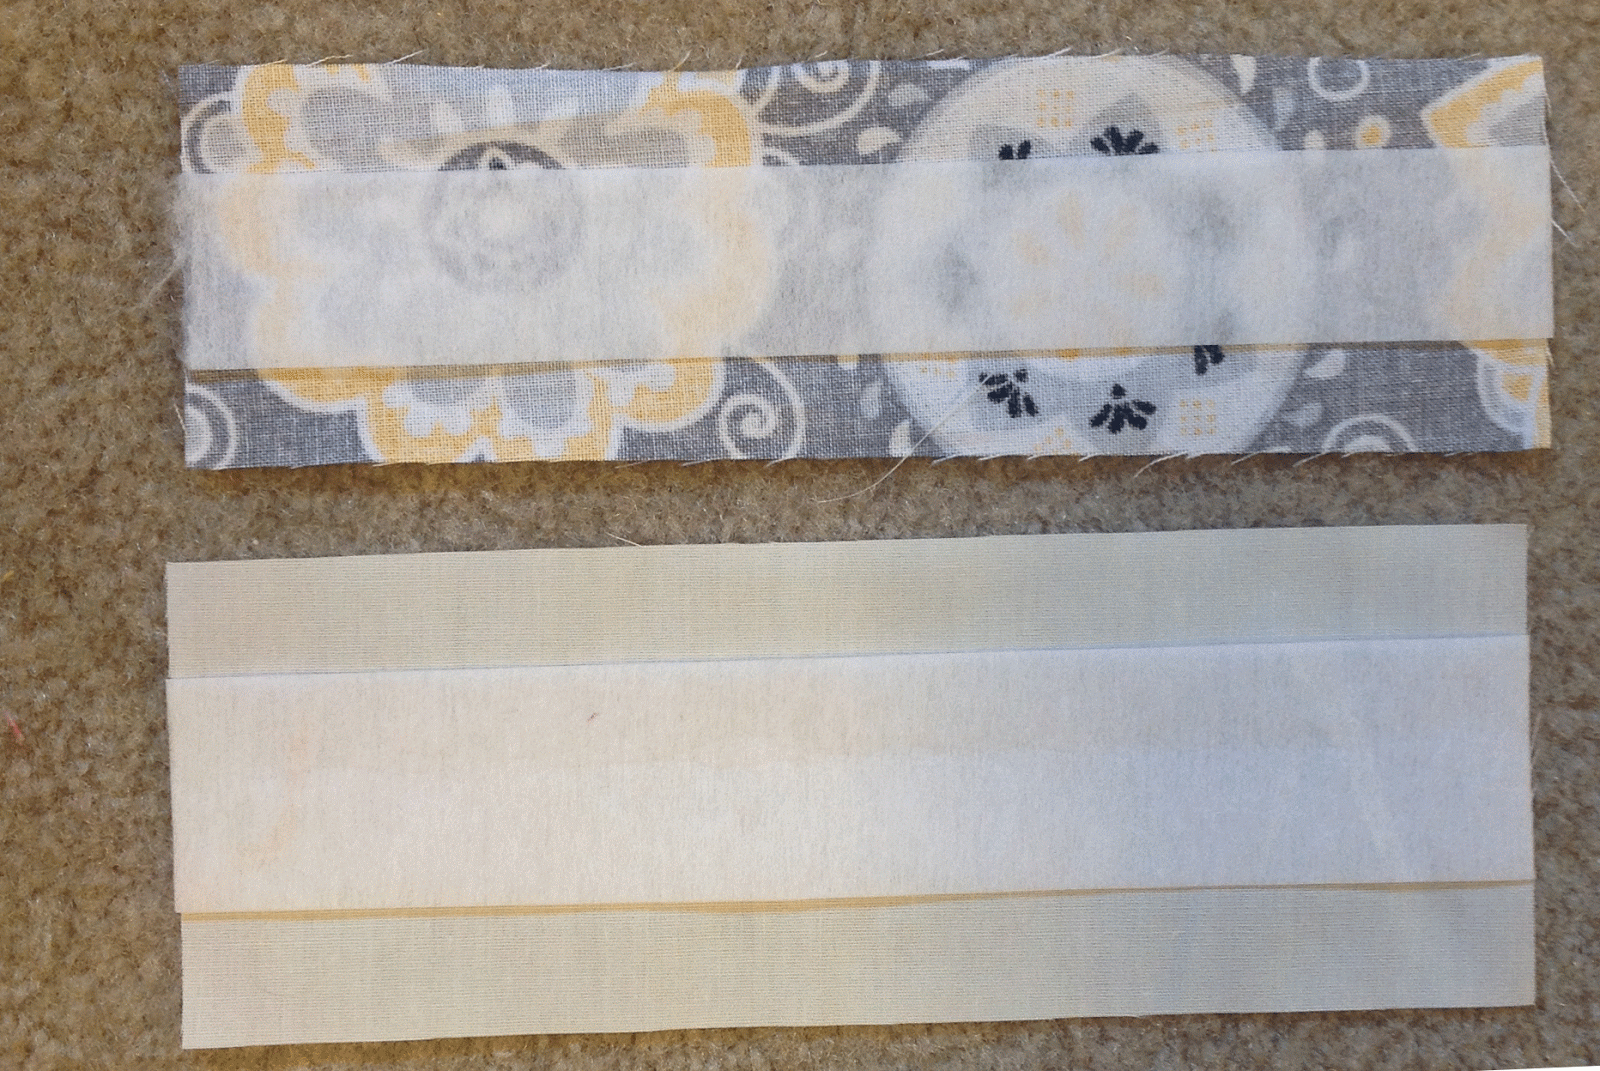
Here we go: Center and apply the 1″ interfacing to WRONG side of the exterior piece and the 1 1/4″” interfacing to WRONG side of the interior piece following manufacturer’s instructions.  When centered, there should be a 1/2″ margin on both long edges of the interfacing.

On the WRONG side of exterior, measure and draws a faint line 3″ from one short end and 1″ in from the long end.

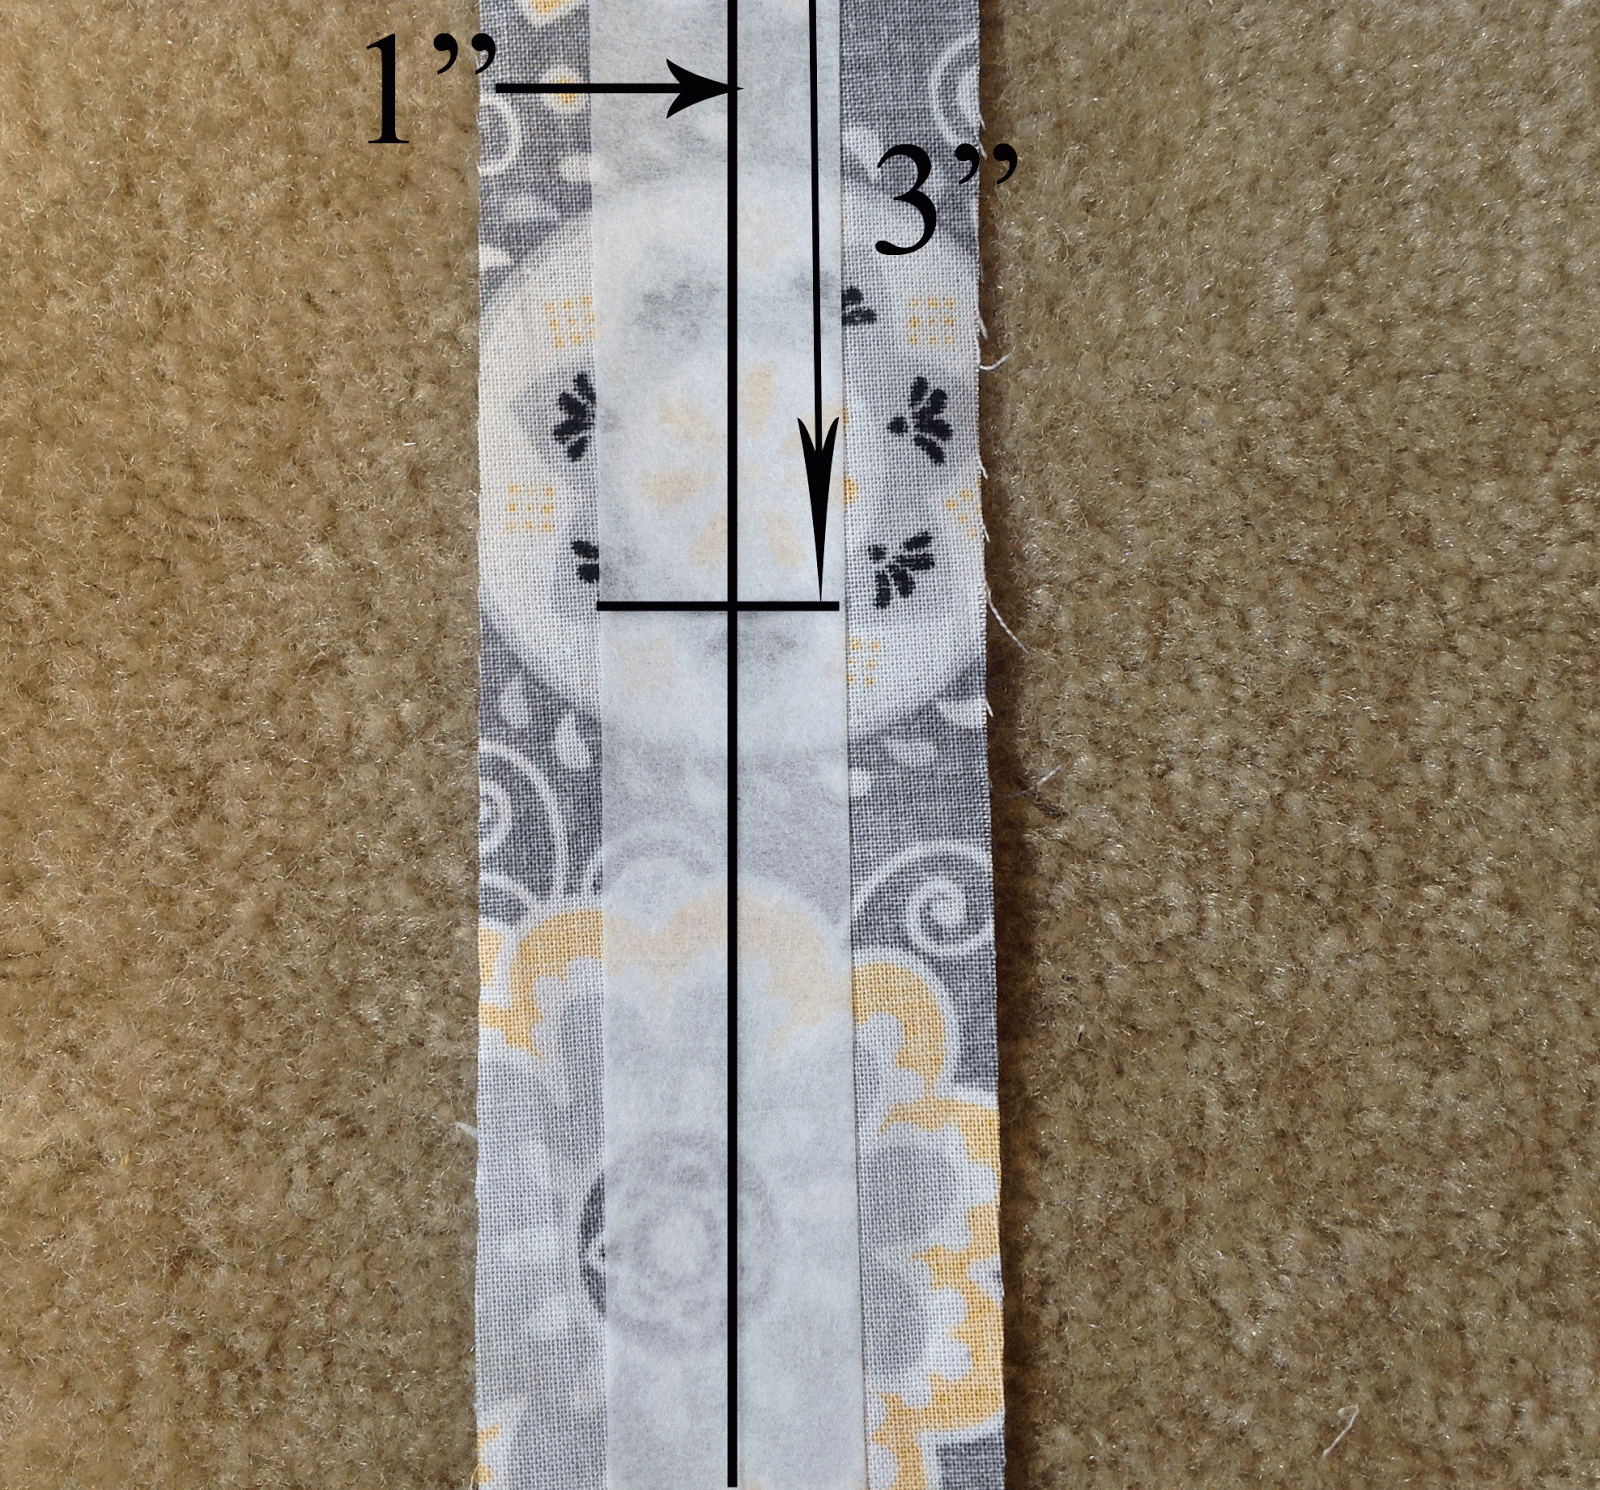
Place a washer on the exterior so that the bottom edge of the washer is at the horizontal line and the slits in the washer are centered over the vertical line.  Place a pencil into the slits and mark. Cut the slits with small scissors.  I sort of  puncture the fabric with my scissors more than cut but you have to be careful not to use too much pressure or the slit will end up too large. Insert the prongs of the male side of the snap into the slits from the RIGHT side of the  panel.  Fold the prongs down toward the center, overlapping one another.

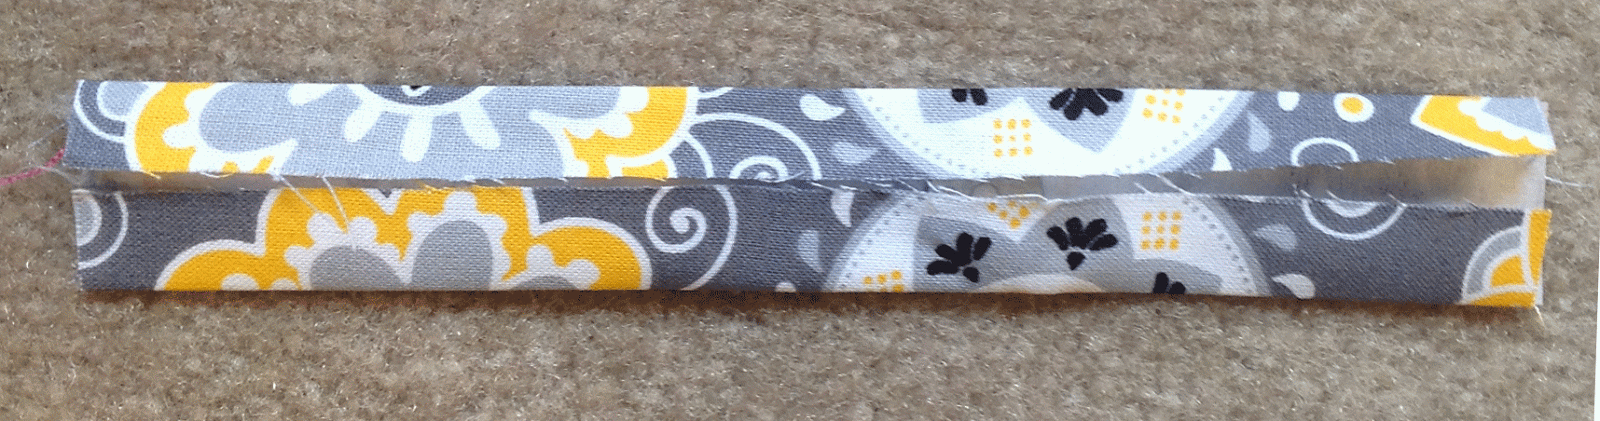
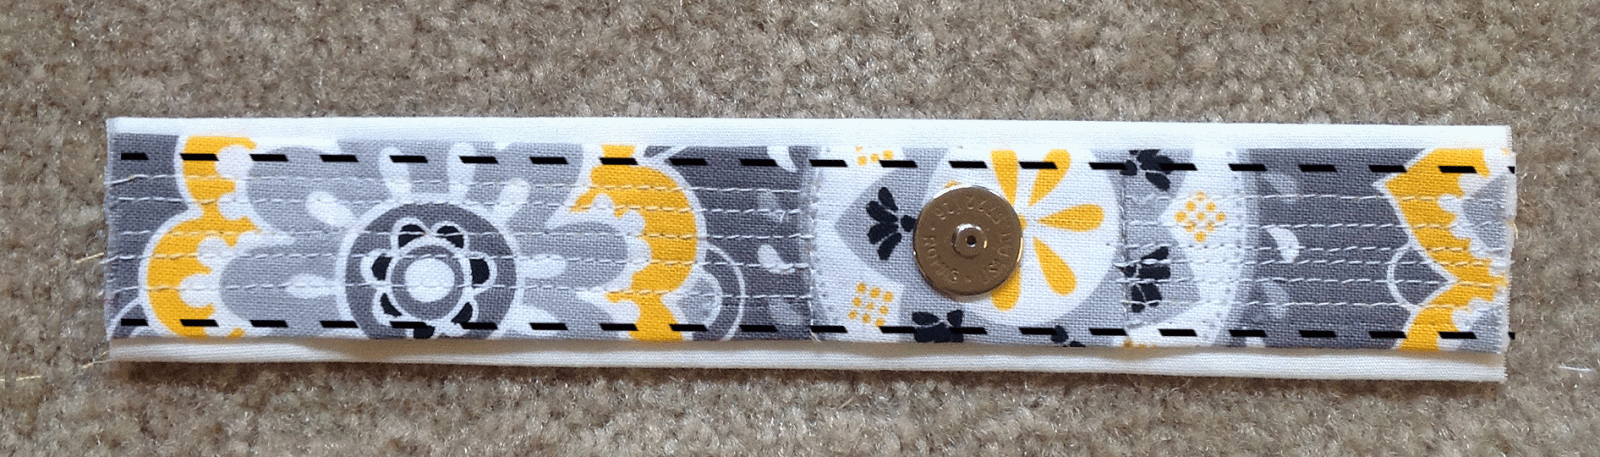
Fold 1/2″ of both long edges to the WRONG side using the interfacing as a guide. Press.

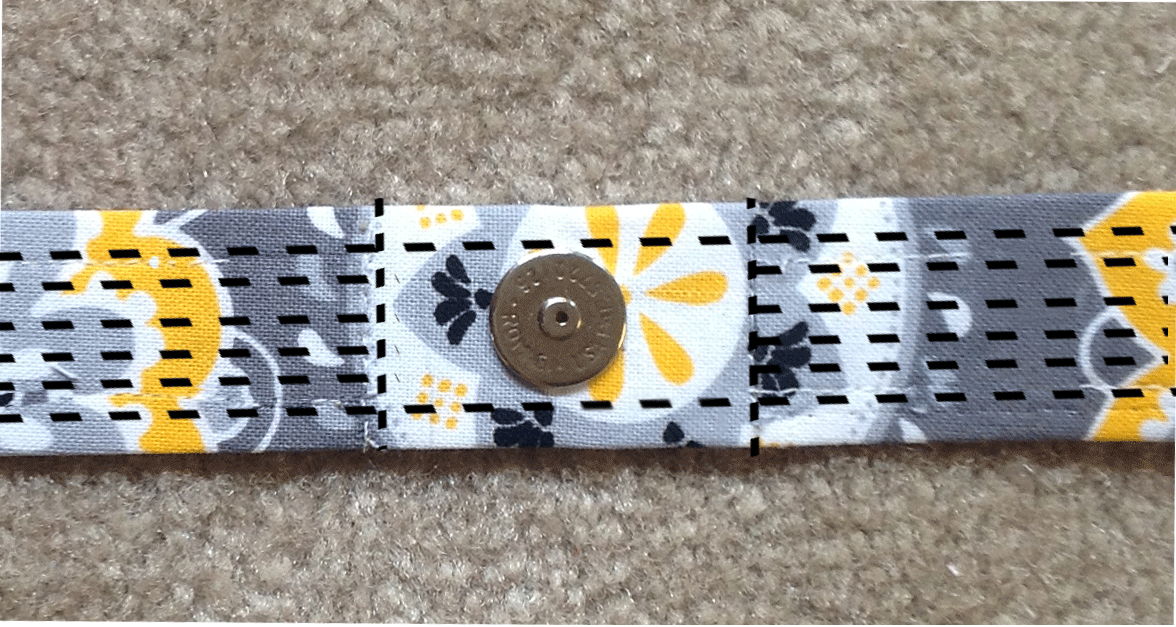
Make it Pretty:  On the RIGHT side, measure and lightly mark lines 1/2″ from top and bottom edges of magnetic snap.  Topstitch along these lines.  Topstitch 1/4″ from both long edges.

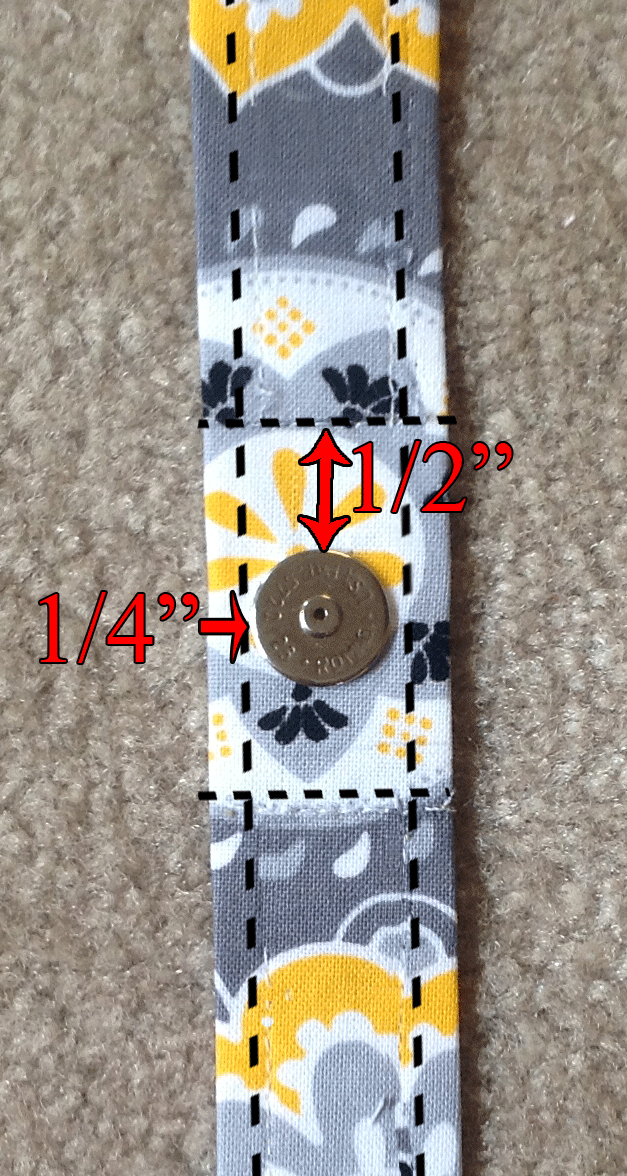
Topstitch parallel lines 1/8″ apart across panel between the seam lines from the previous step.  Do not sew into the area surrounding snap as illustrated below.  There should be a total of 6 lines. Set aside.


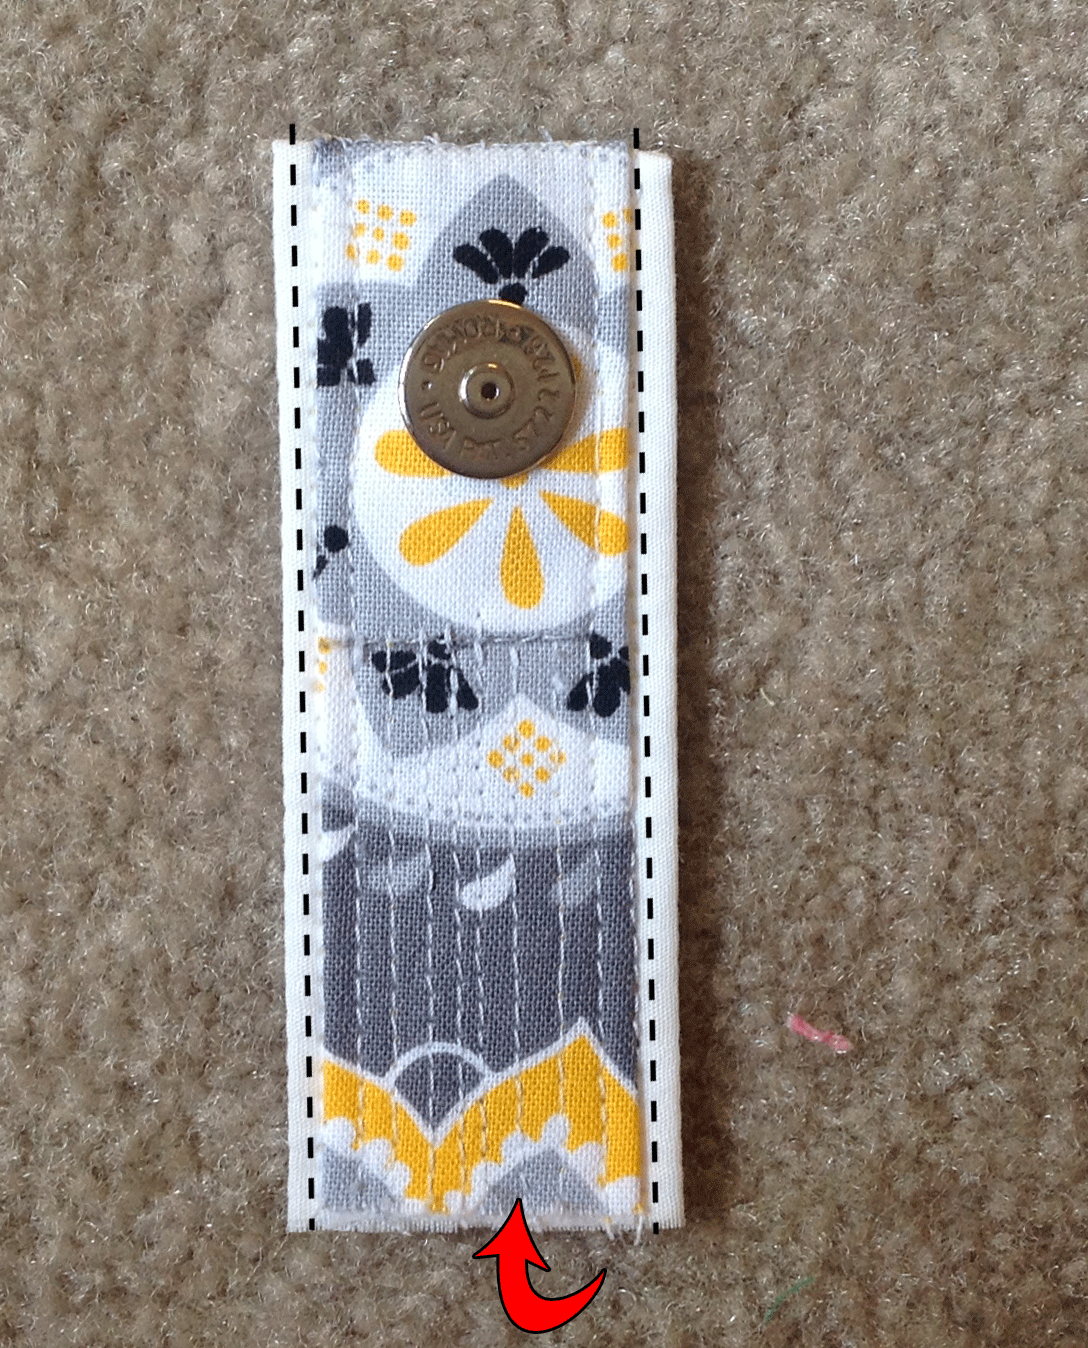
Attach Interior: Fold 1/2″ of both long edges of interior to the WRONG side using interfacing as a guide. Press folds. Stitch  both long edges using a 1/4″ seam allowance.

With WRONG sides together, align the short edges of the interior and exterior.  A 1/8″ margin of the interior panel should be visible around the long edges of the exterior.  Stitch 1/8″ in from the long edges of exterior panel.
 
Fold  in half, resulting in a  1 1/4 x 3″ long panel.  The exterior fabric should be facing out.  Sew the long edges using a 1/8″ seam allowance from the edge of the interior panel.
 
Position the raw, short edge of panel  into the open end of the key fob hardware.  Cover the key fob with a scrap of fabric to avoid scratching it and pinch closed with pliers.  I like to position the side of the hardware with the holes on the same side as the snap (see picture below).


Ta Da!
 
Install the second snap: 
The time to install the second snap is when you sewn the lining of your handbag but have not sewn it to the exterior.  You will need to first decide where you want the keys to hang inside your purse.  I like mine very near the top and by the handle. Keep in mind that you will need to allow for the seam allowance and that the snap is 1/2″ down from the top of the fob.
 
In the example below, I installed the snap 1 3/4″ from the top edge of the lining.  I  had a 1/2″ seam allowance and I wanted the top of the fob to start about 3/4″ from the top, so I installed the snap at 1 3/4″ from the top (1/2″ for seam allowance + 3/4″ for distance I wanted from the top + 1/2″ for the snap’s location from top of key fob).  Once you have decided on placement, use the second washer to mark slits like we did to install the snap on the key fob.


To reinforce the fabric, fuse the 2″ piece of interfacing to the WRONG side of the lining over the slits marks.  Cut the slits through the fabric and interfacing. Insert the  prongs of the snap into the slits from RIGHT side of fabric.  Place a 2″ piece of plastic canvas on the prongs and press to push the prongs through. Fold the prongs down.  If you decided to install your snap very close to the top, you may need to trim down the plastic canvas.
 
 
Finish sewing your bag as usual and enjoy!

2 Comments

Previous Post: « Weekender Bag pattern release
Next Post: Petals Cosmetic Bag Tutorial »

Reader Interactions

Comments

  1. Judith Clauss says

    May 9, 2014 at 2:32 pm

    Great idea. Thanks for sharing!

    Log in to Reply
    • admin says

      May 9, 2014 at 2:33 pm

      Glad you like it – can’t wait to see your creation!

      Log in to Reply

Leave a Reply Cancel reply

You must be logged in to post a comment.

Primary Sidebar

Hello!

Thanks for stopping by! I’m Sarah. I love to design and write sewing patterns. It’s a great way to justify the absurd amount of fabric I own! I live in Kansas with my husband, two sons, and a dog named Bear. I hope you find something here that inspires you to break out your sewing machine.

Connect with me!

Facebook Pinterest Email instagram etsy

Don’t miss a post!

Enter your email address to receive notifications of new posts:

Delivered by FeedBurner

Find me on Instagram!

Archives

  • February 2023
  • August 2021
  • July 2021
  • July 2020
  • April 2020
  • June 2018
  • January 2017
  • September 2016
  • August 2016
  • November 2015
  • June 2015
  • March 2015
  • September 2014
  • August 2014
  • July 2014
  • June 2014
  • May 2014
  • April 2014
  • February 2014
  • January 2014
  • December 2013
  • November 2013
  • June 2013
  • March 2013
  • February 2013
  • August 2012

Copyright © 2025 · Cozy Nest Design · Log in

SHIPPING DELAY
Cozy Nest is on vacation.
Physical items purchased between May 13th - June 1st will be shipped June 2nd.
Digital items are still available for immediate download.
Dismiss