• Home
  • Shop
    • All Items
    • Sewing Patterns
      • Printed Sewing Patterns
      • Digital Sewing Patterns
      • Seat Belt Sewing Patterns
    • Seat Belt Sewing Patterns
    • Seat Belt Project Kits
    • Seat Belt By-the-Yard & Swatches
    • Hardware
    • Free & On Sale
  • Galleries
  • Blog
  • Revisions
  • Wholesale
  • Contact
  • FAQ’s
  • My Account
  • Cart

cozy nest design

You are here: Home / How to make an adjustable purse strap

How to make an adjustable purse strap

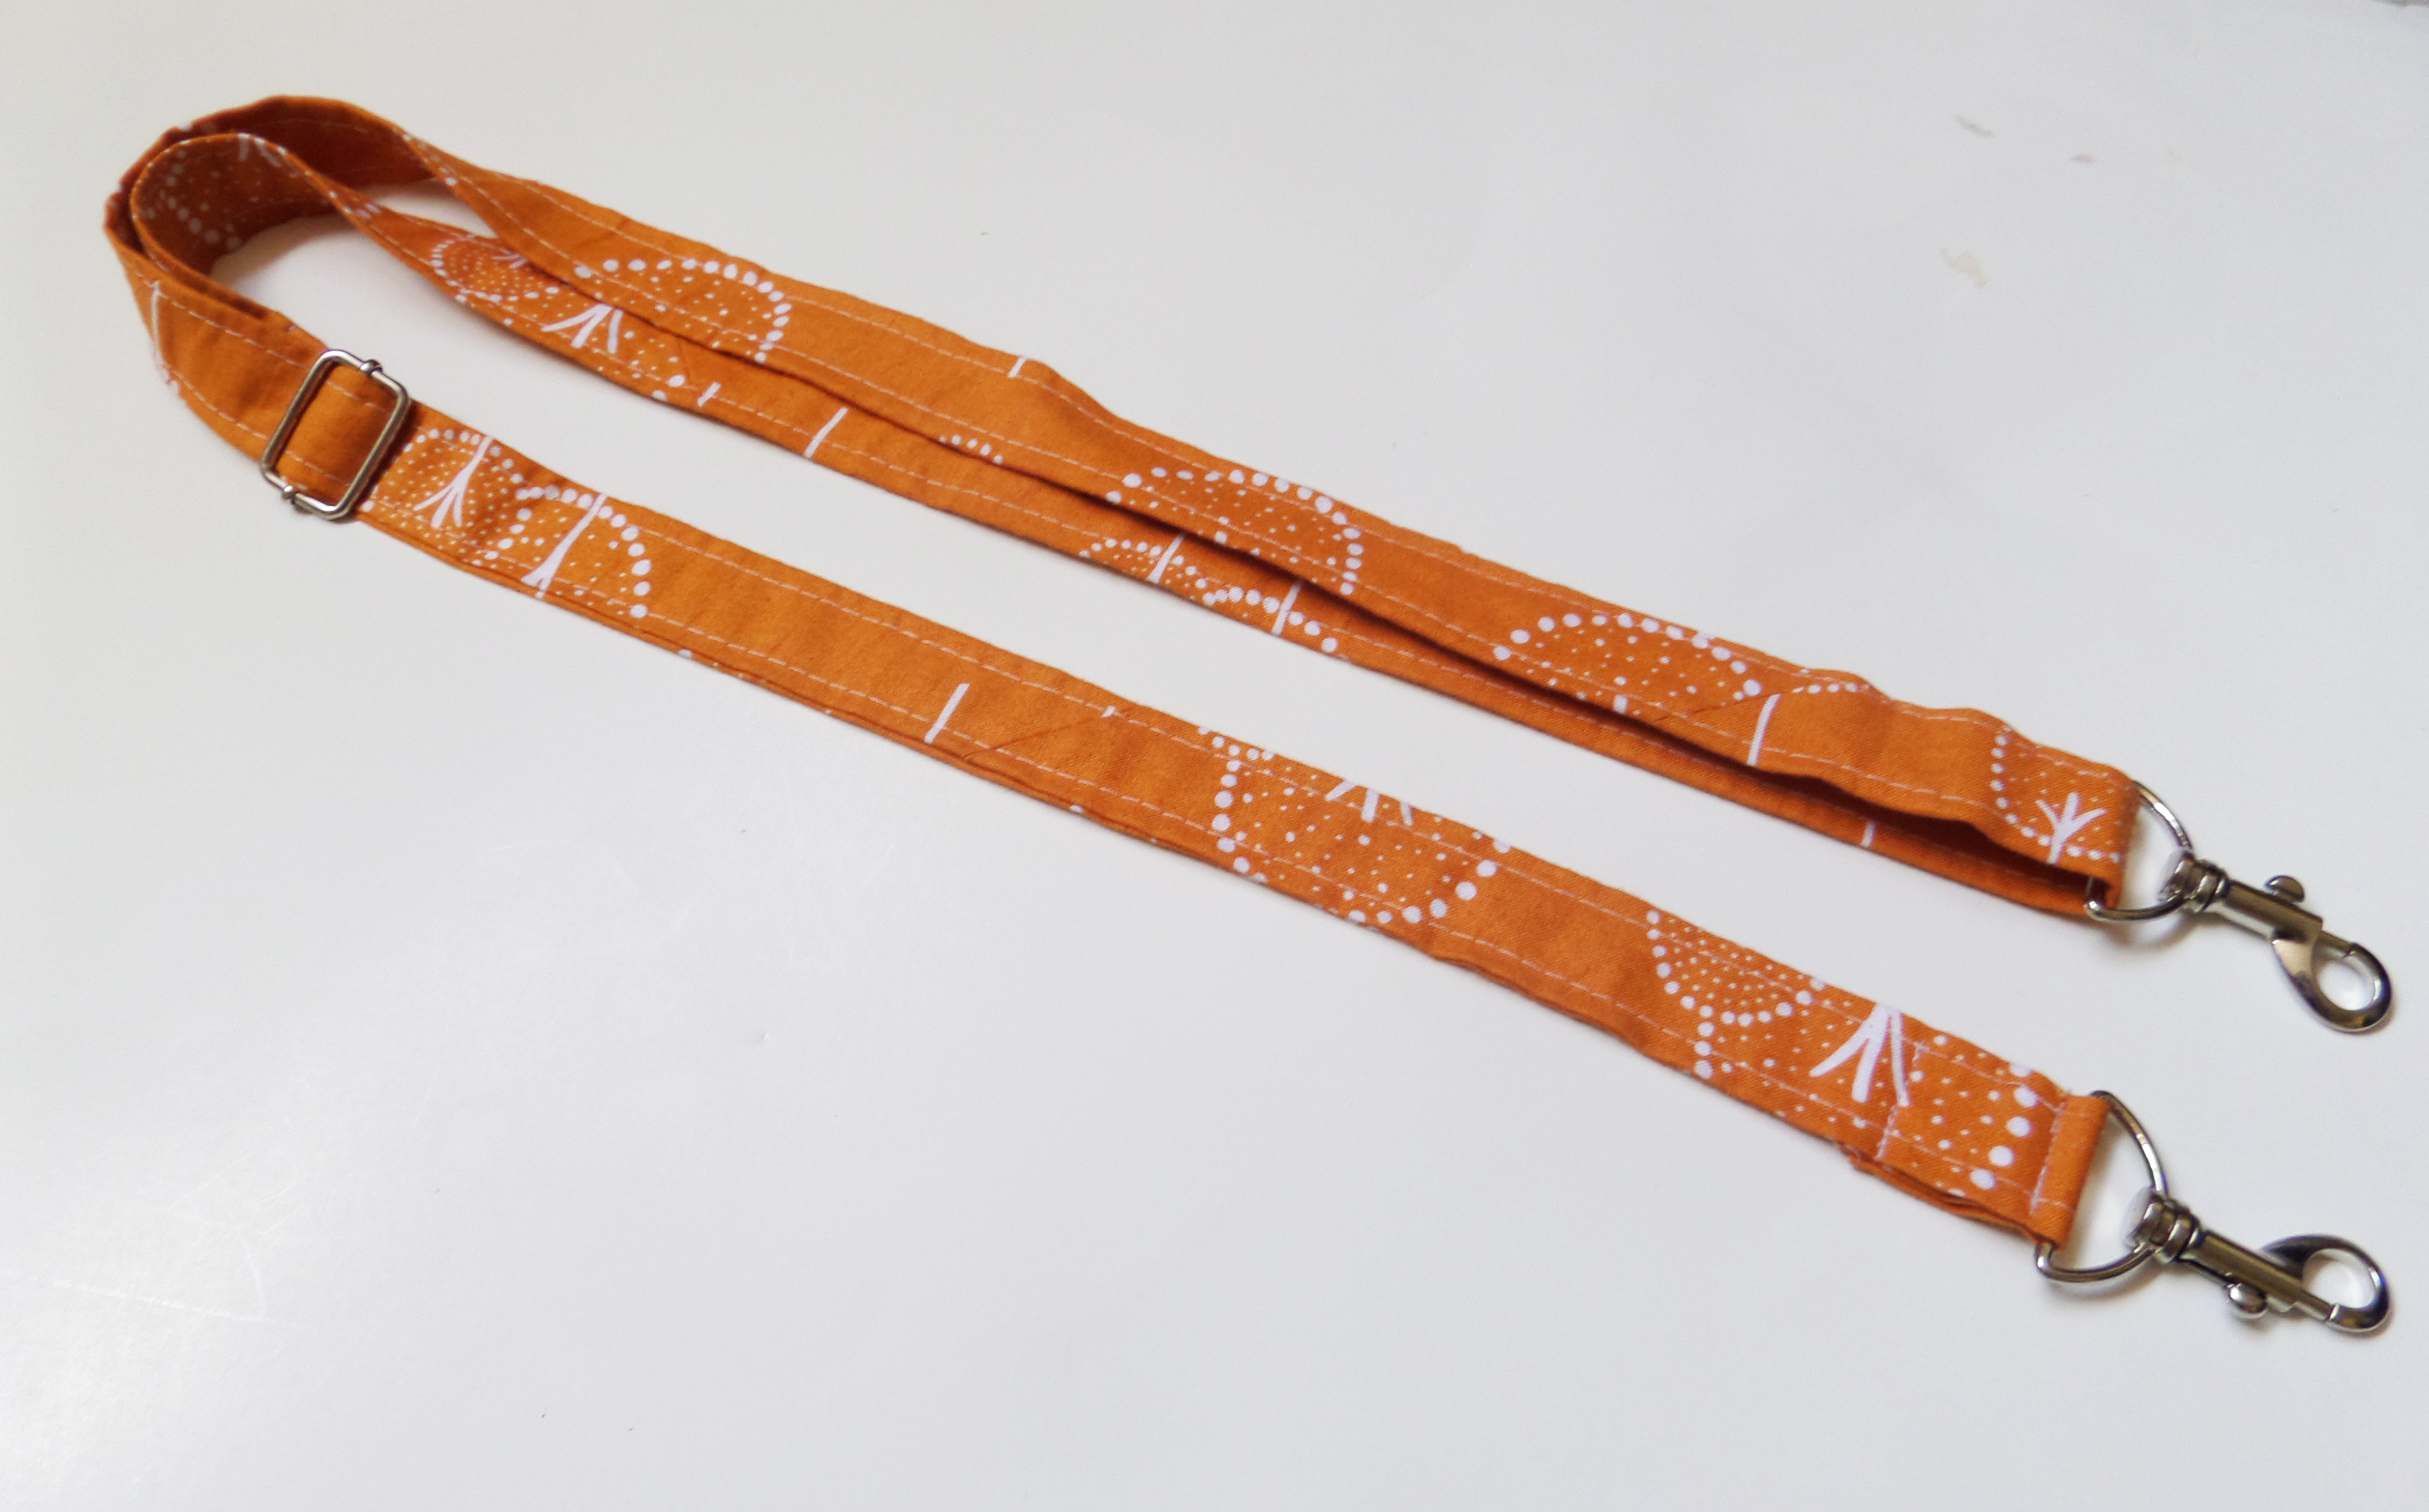
This tutorial will show you how to make the strap  of your Convertible/Reversible bag adjustable so you can change your bag from a crossover to a shoulder bag with a quick slide of the hardware. The strap will also be removable so you can take it off when you want to carry your bag as a clutch.  We will cover steps 11 -13 in the Convertible/Reversible bag pattern.

At this point you should have your strap all folded up and topstitched.

SAMSUNG CAMERA PICTURES

Here’s the hardware you will need to make the strap adjustable and removable:

hardware

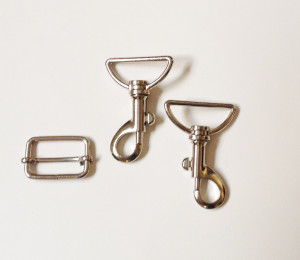
The object on the left is called a slide or a tri-glide.  These can have a stationery center post or one that slides back and forth like the one pictured above.  The strap in the pattern is 1″ wide so be sure your slide is enough.  The other objects are called swivel hooks.  Hooks can swivel or be stationery and the closures (the part of the hook that opens and closes) can come in a variety of types.  Again, be sure you have the correct size for you strap.

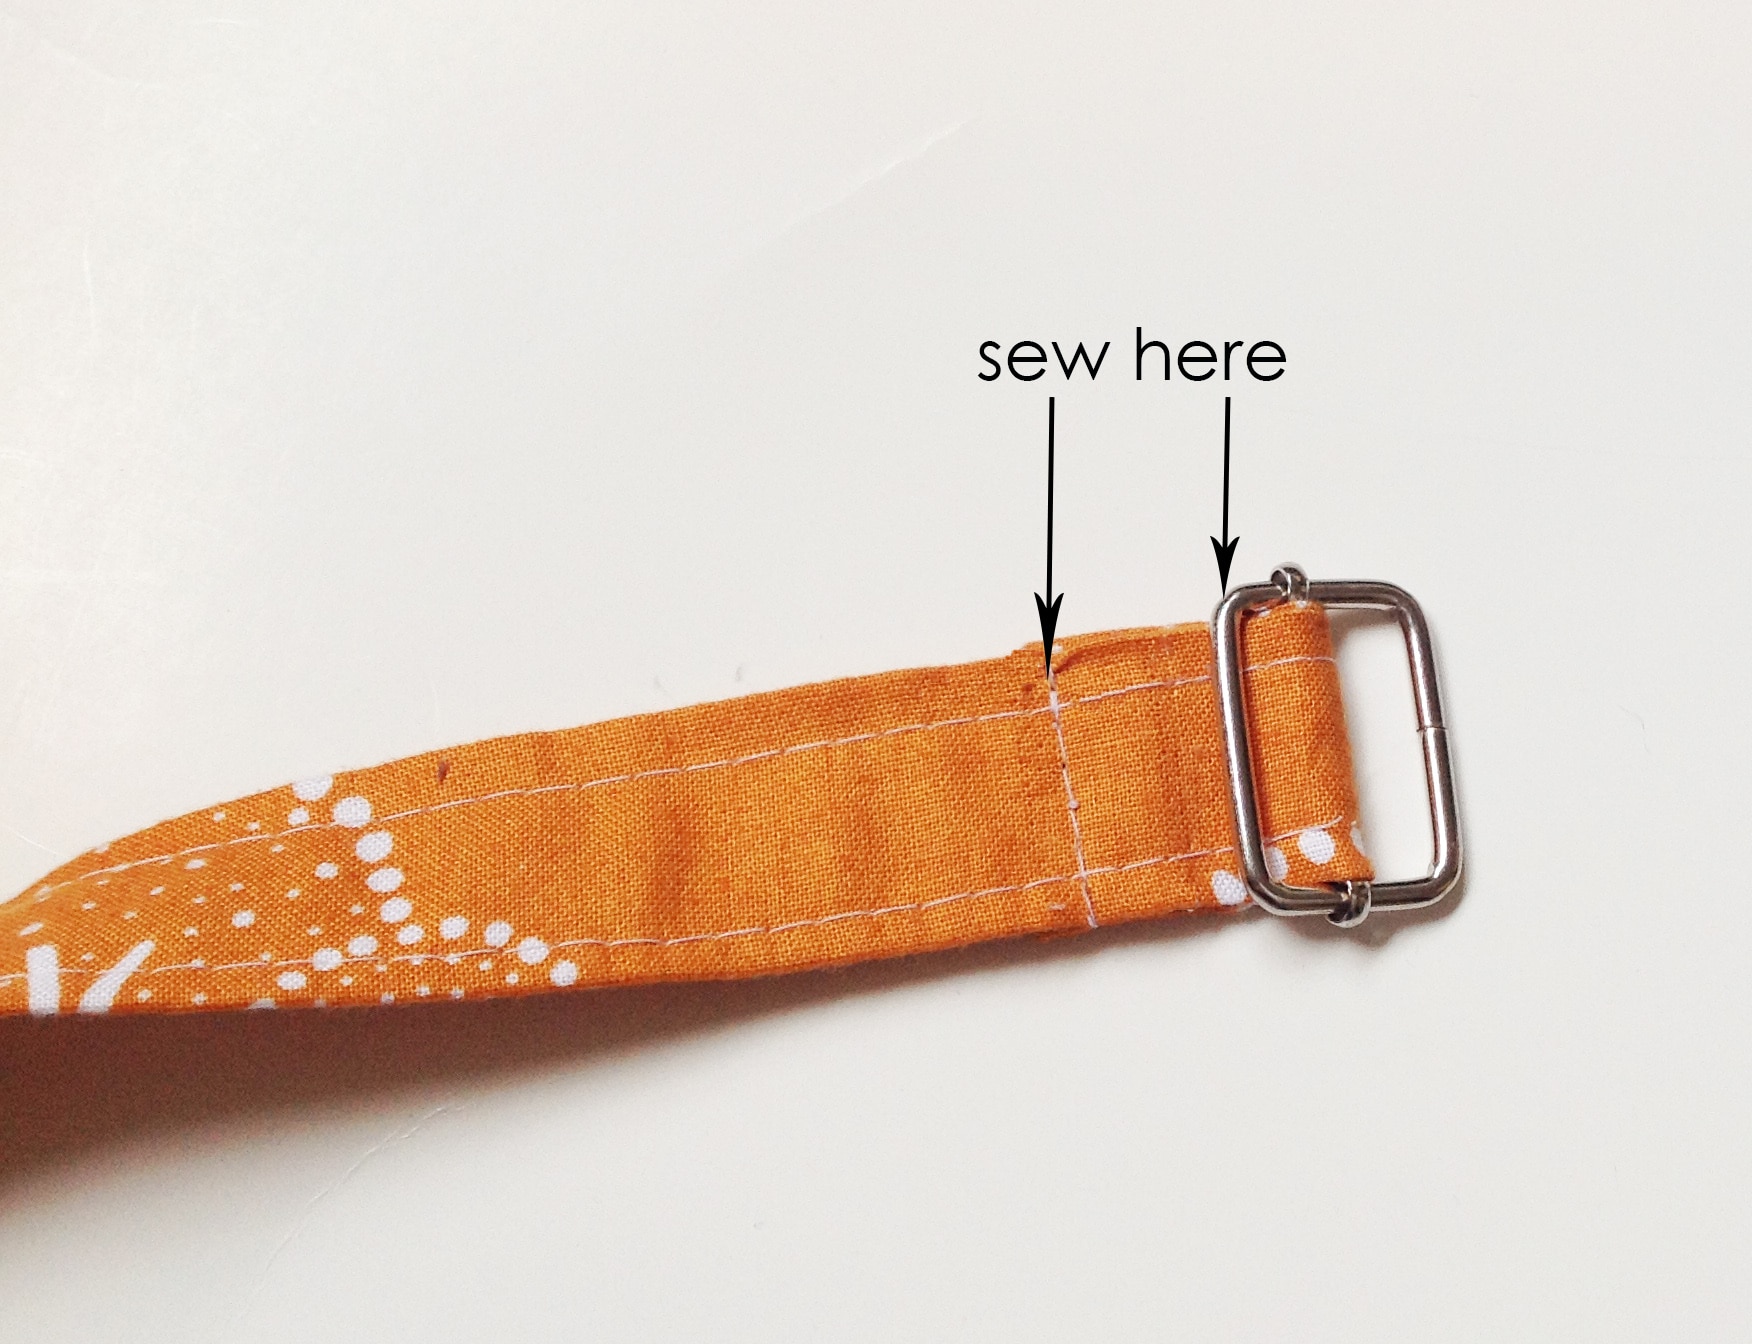
Here we go…wrap one end of the Bag 1 Strap around the center post of a slider (tri-glide) about 2″ from the end.

2014-06-08 09.46.05

Stitch the tail to the strap using a zipper foot to get as close as possible to the slider and then stitch again 1/4″ from the end of the tail (sorry you can’t see that – I covered it up with the slider!). You might also want stitch an X shape between these two seams for extra reinforcement.

first swivel hook

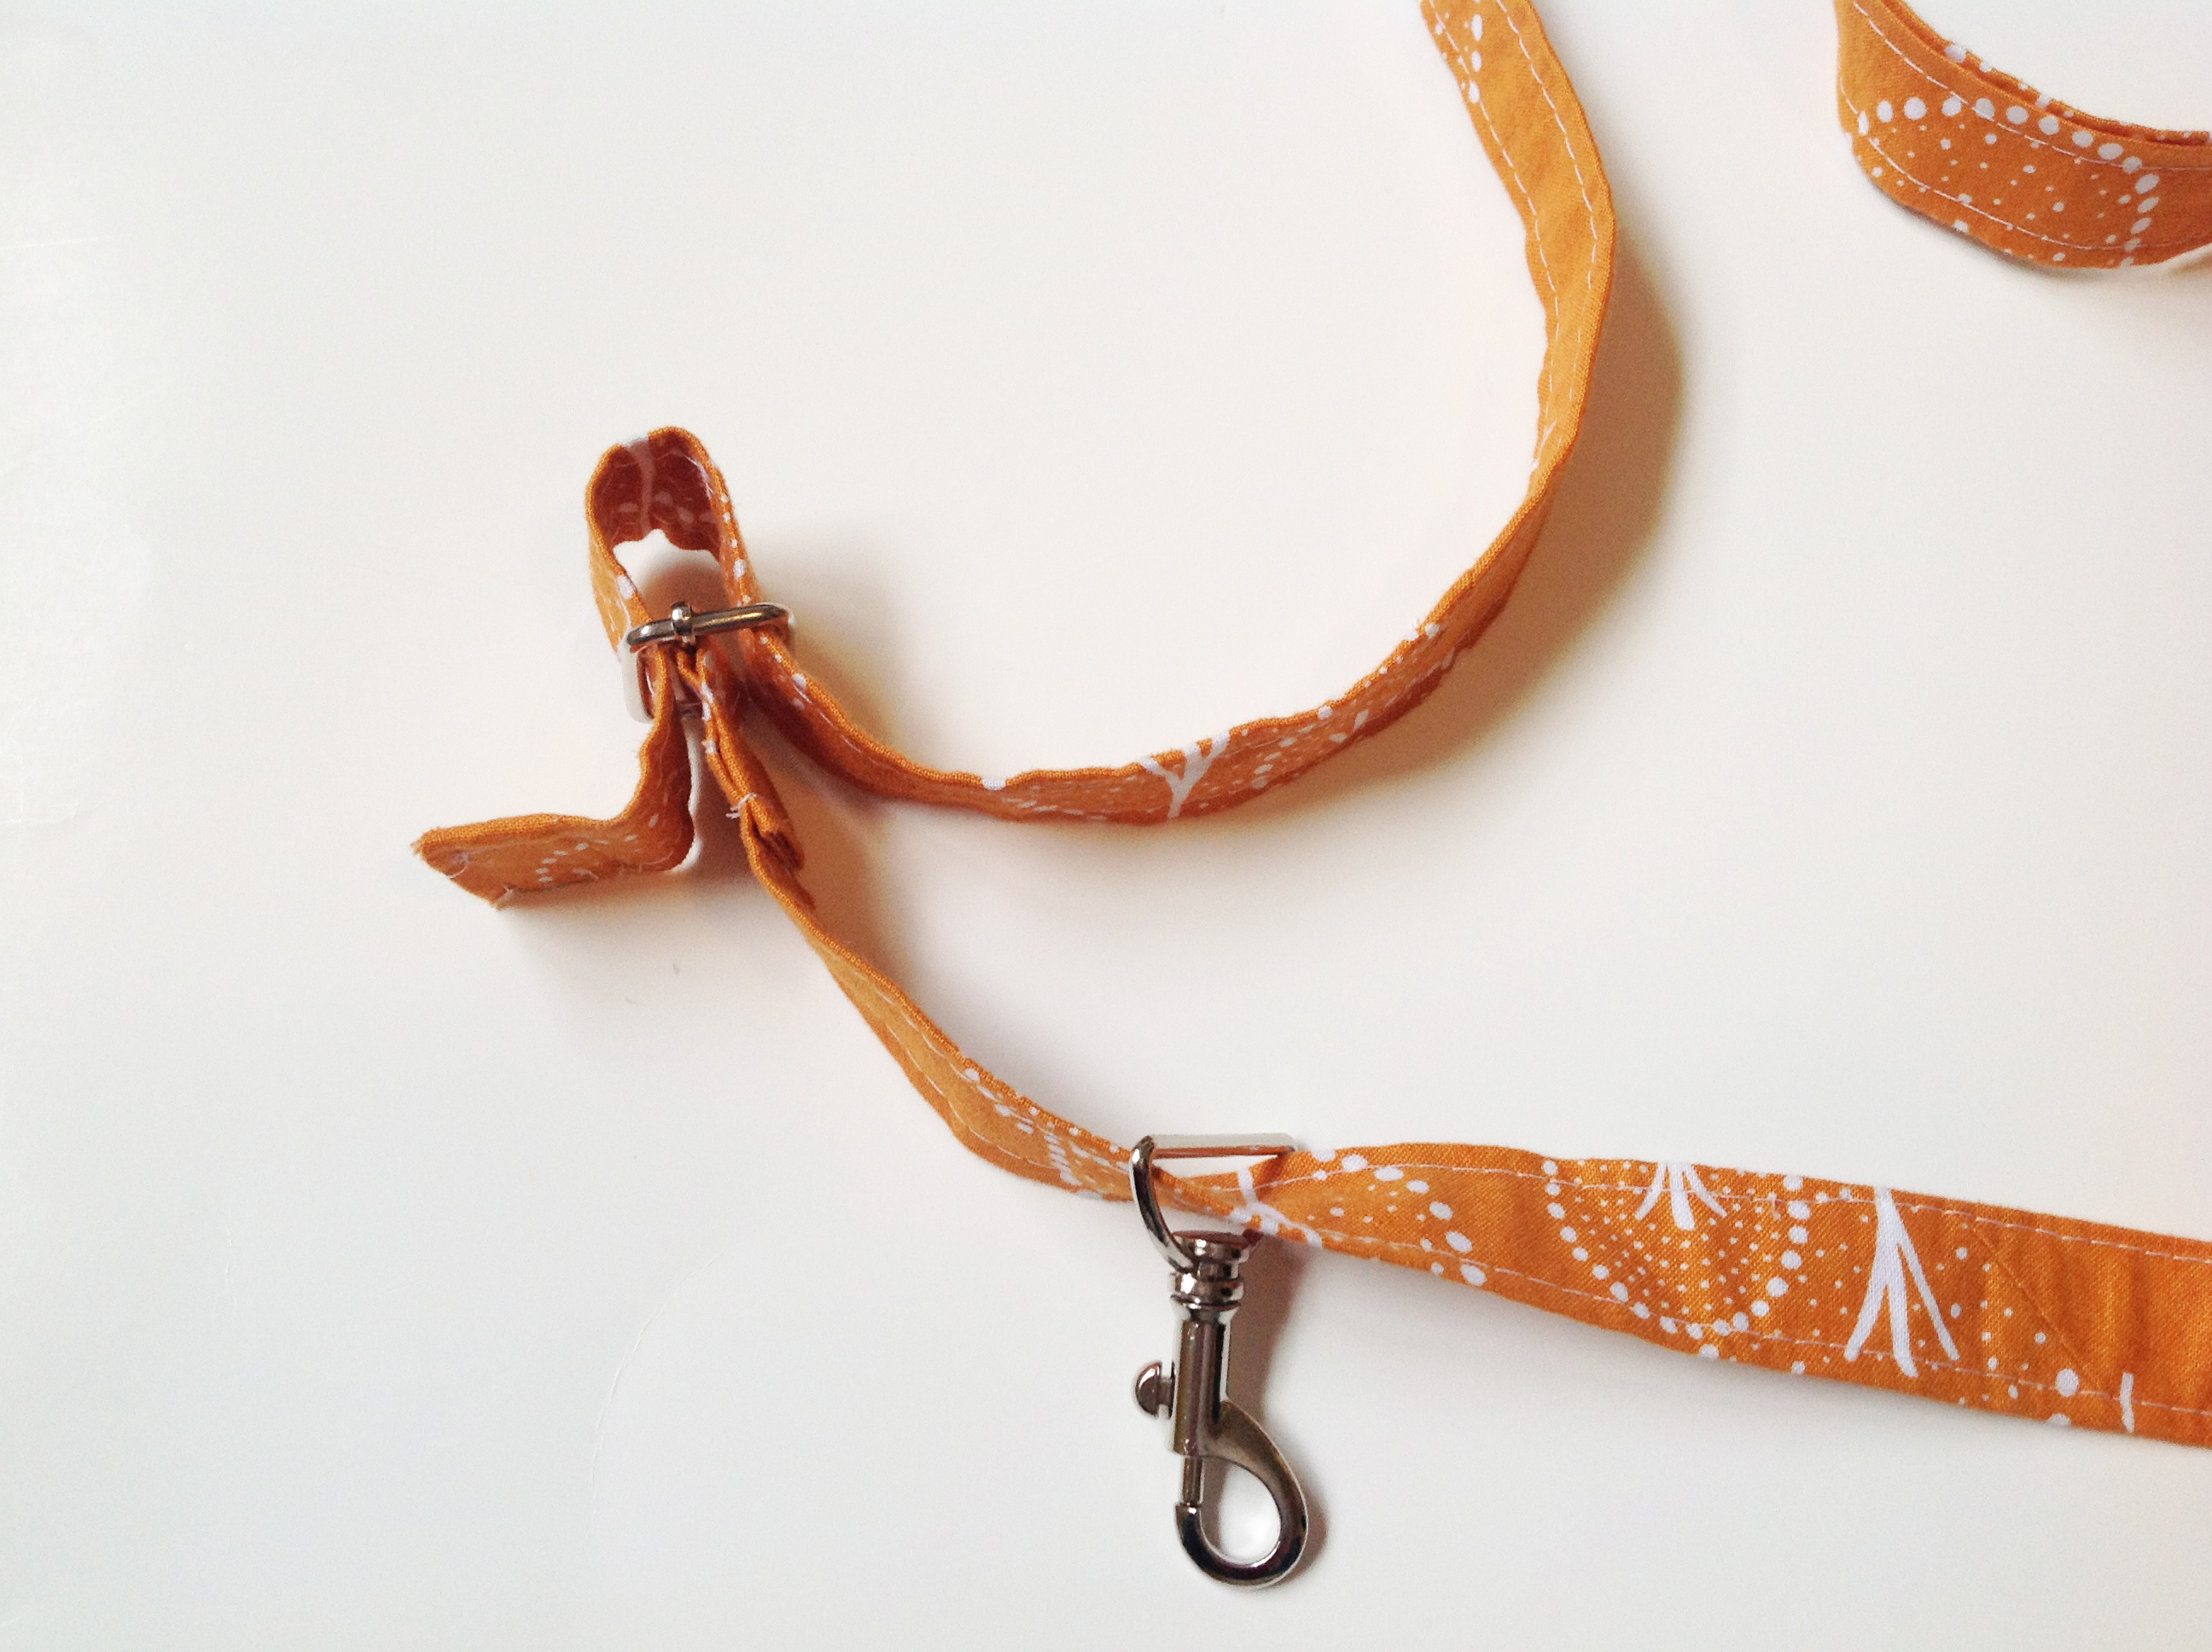
Next, thread the free end of the strap through the loop of one of your swivel hooks. You will want do this so the hook is sitting on the front side of the strap.

first swivel hook

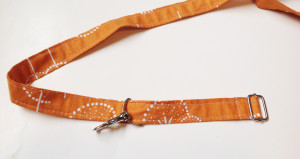
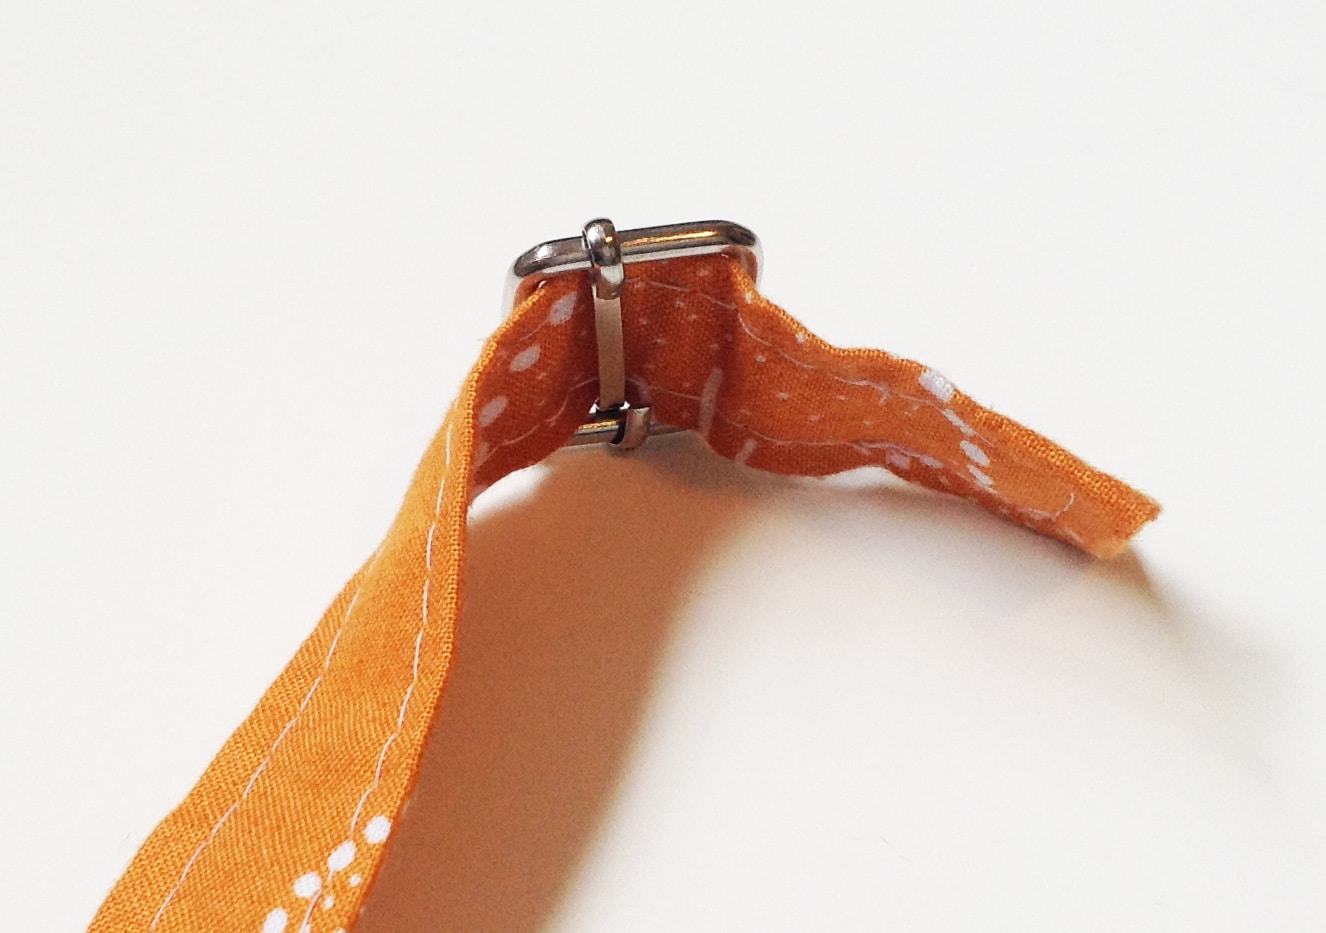
Then thread the end through the slider; coming up from the bottom, over the center post, and down through the second opening. I’ve posted two photos for this step one with arrows and then one without in case the arrows get in the way!

threading with arrows

threading without arrows

Now all that is left to do is attach the second swivel hook onto the free end of the strap!  Do that just like you did when you sewed the opposite end to the center post of the slider.

SAMSUNG CAMERA PICTURES

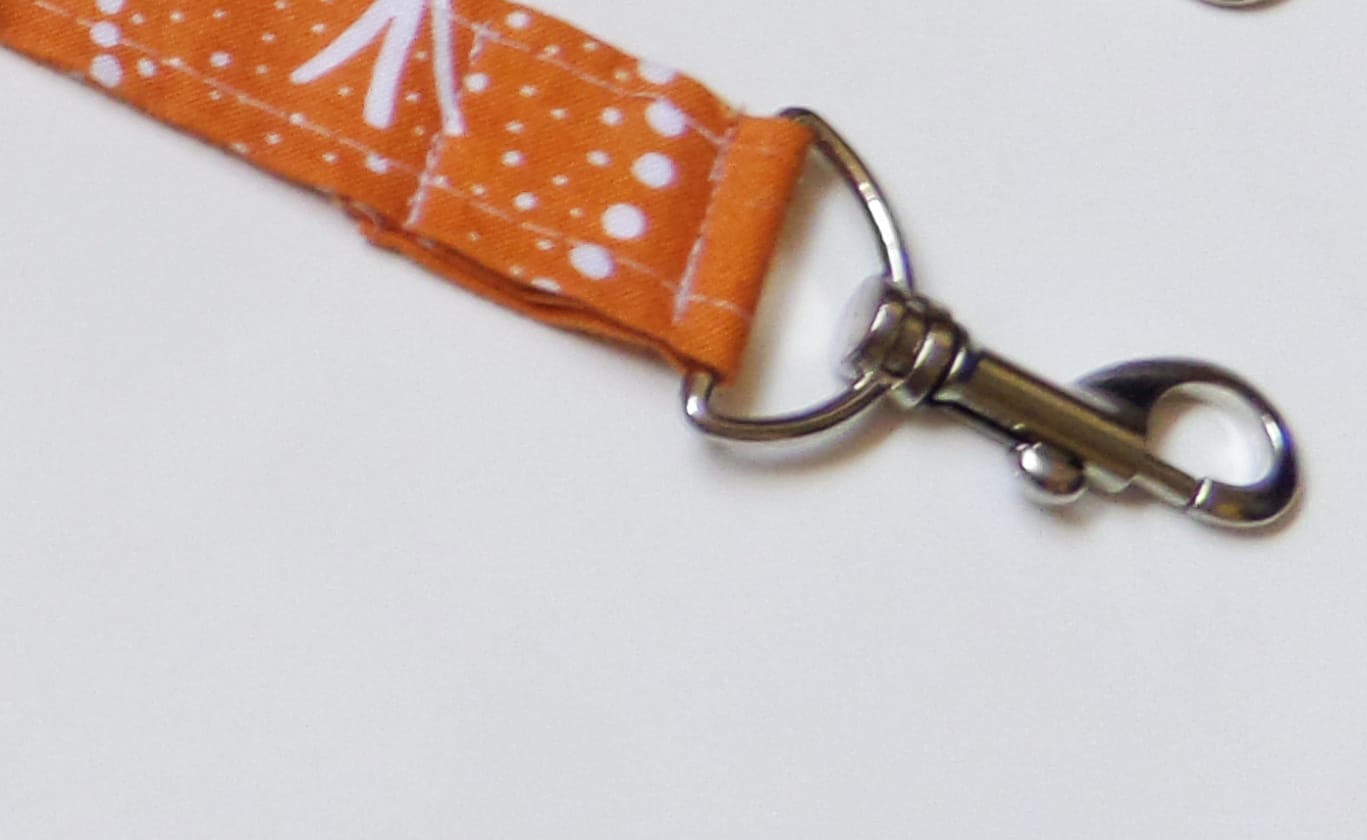
Ta Da!  That’s all there is to it!

Here is a link to the next tutorial.

Reader Interactions

Comments

  1. Marlene says

    February 18, 2019 at 10:45 am

    Thanks! Clear and concise. Just what I needed to get my project finished quickly.

    Log in to Reply
    • Sarah Gido says

      February 19, 2019 at 3:25 pm

      Hi Marlene!
      I am so glad to hear that! I hope you enjoyed your project!

      Log in to Reply

Leave a Reply Cancel reply

You must be logged in to post a comment.

Primary Sidebar

Hello!

Thanks for stopping by! I’m Sarah. I love to design and write sewing patterns. It’s a great way to justify the absurd amount of fabric I own! I live in Kansas with my husband, two sons, and a dog named Bear. I hope you find something here that inspires you to break out your sewing machine.

Connect with me!

Facebook Pinterest Email instagram etsy

Don’t miss a post!

Enter your email address to receive notifications of new posts:

Delivered by FeedBurner

Find me on Instagram!

Archives

  • February 2023
  • August 2021
  • July 2021
  • July 2020
  • April 2020
  • June 2018
  • January 2017
  • September 2016
  • August 2016
  • November 2015
  • June 2015
  • March 2015
  • September 2014
  • August 2014
  • July 2014
  • June 2014
  • May 2014
  • April 2014
  • February 2014
  • January 2014
  • December 2013
  • November 2013
  • June 2013
  • March 2013
  • February 2013
  • August 2012

Copyright © 2025 · Cozy Nest Design · Log in

SHIPPING DELAY
Cozy Nest is on vacation.
Physical items purchased between May 13th - June 1st will be shipped June 2nd.
Digital items are still available for immediate download.
Dismiss