Before we officially start our sew-along I wanted to share a shortcut for cutting and interfacing the 9 – C pattern pieces that make up the front of the cupcake wrapper. 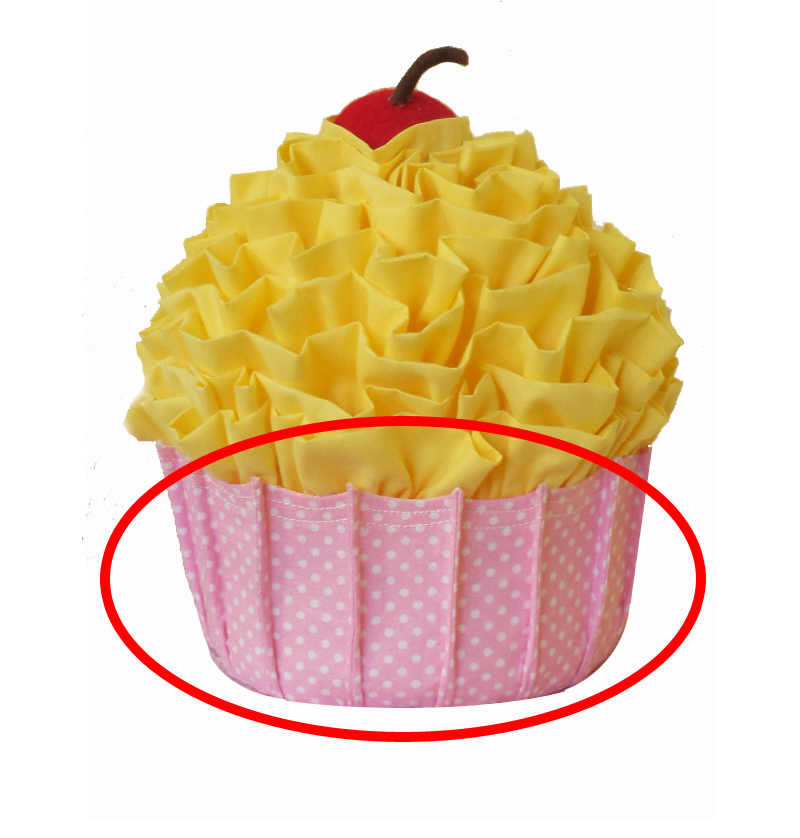 Not only will this make cutting and interfacing them quicker, but it will take you through step #2 in the pattern.
Use this shortcut if:
- — you have extra medium weight interfacing (at least 1/2 yard) and you don’t mind using more than with the usual pattern layout.
- — you are using interfacing that is somewhat see-through ( I use Craft-fuse by Peltex, which is see through enough)
- — you have access to a printer
- –you want to get down to the business of sewing as quickly as possible
If you love cutting and interfacing then this shortcut isn’t for you (but we still like you as a person and admire your dedication)
Here’s the process:
You will need to download these pattern sheets: Shortcut C Pattern pg 1 Shortcut C Pattern pg 2
Now, you’ll need to print out the shortcut pattern sheets. Note: Please download the files. Do not print from your browser window. Print after you have downloaded them to your computer. There appears to be a sizing issue within the browser window – anyone know anything about this by chance?
You will use the “C’ pieces in these downloads instead of the ones in the pattern. You will still need to cut all the other pieces using the ones from the pattern. This is for the C pieces only.
You have 2 choices at this point:
Option 1. Print patterns sheets directly onto you interfacing – this way is my favorite because it is the fastest. If you are uncomfortable with running interfacing through your printer or you get the stink-eye from your husband (you know the look) when you tell him of your plan, there is always options #2.
Option 2. Print the pattern sheets onto regular paper.
Once you decide what you are going to print on, open up the shortcut pattern sheets on your computer and check your print menu to be sure it isn’t set to scale the print size – in other words, you want to print at 100%. Also be sure that the “fit to page” option is off.
- If you are going to print on interfacing: cut 2- 8.5×11″ and 1 – 8.5 x 5″ pieces from your medium-weight interfacing. These will need to be loaded into your printer so that once printed, the printing is will be on the dull side (not the shiny side with the glue). If you find your printer doesn’t want to feed the interfacing easily, use a little glue stick along the top edge of a regular sheet of paper and then layer your interfacing onto it with the shiny side of the interfacing facing the paper.
- If you are printing on paper: just load your printer with standard size paper.
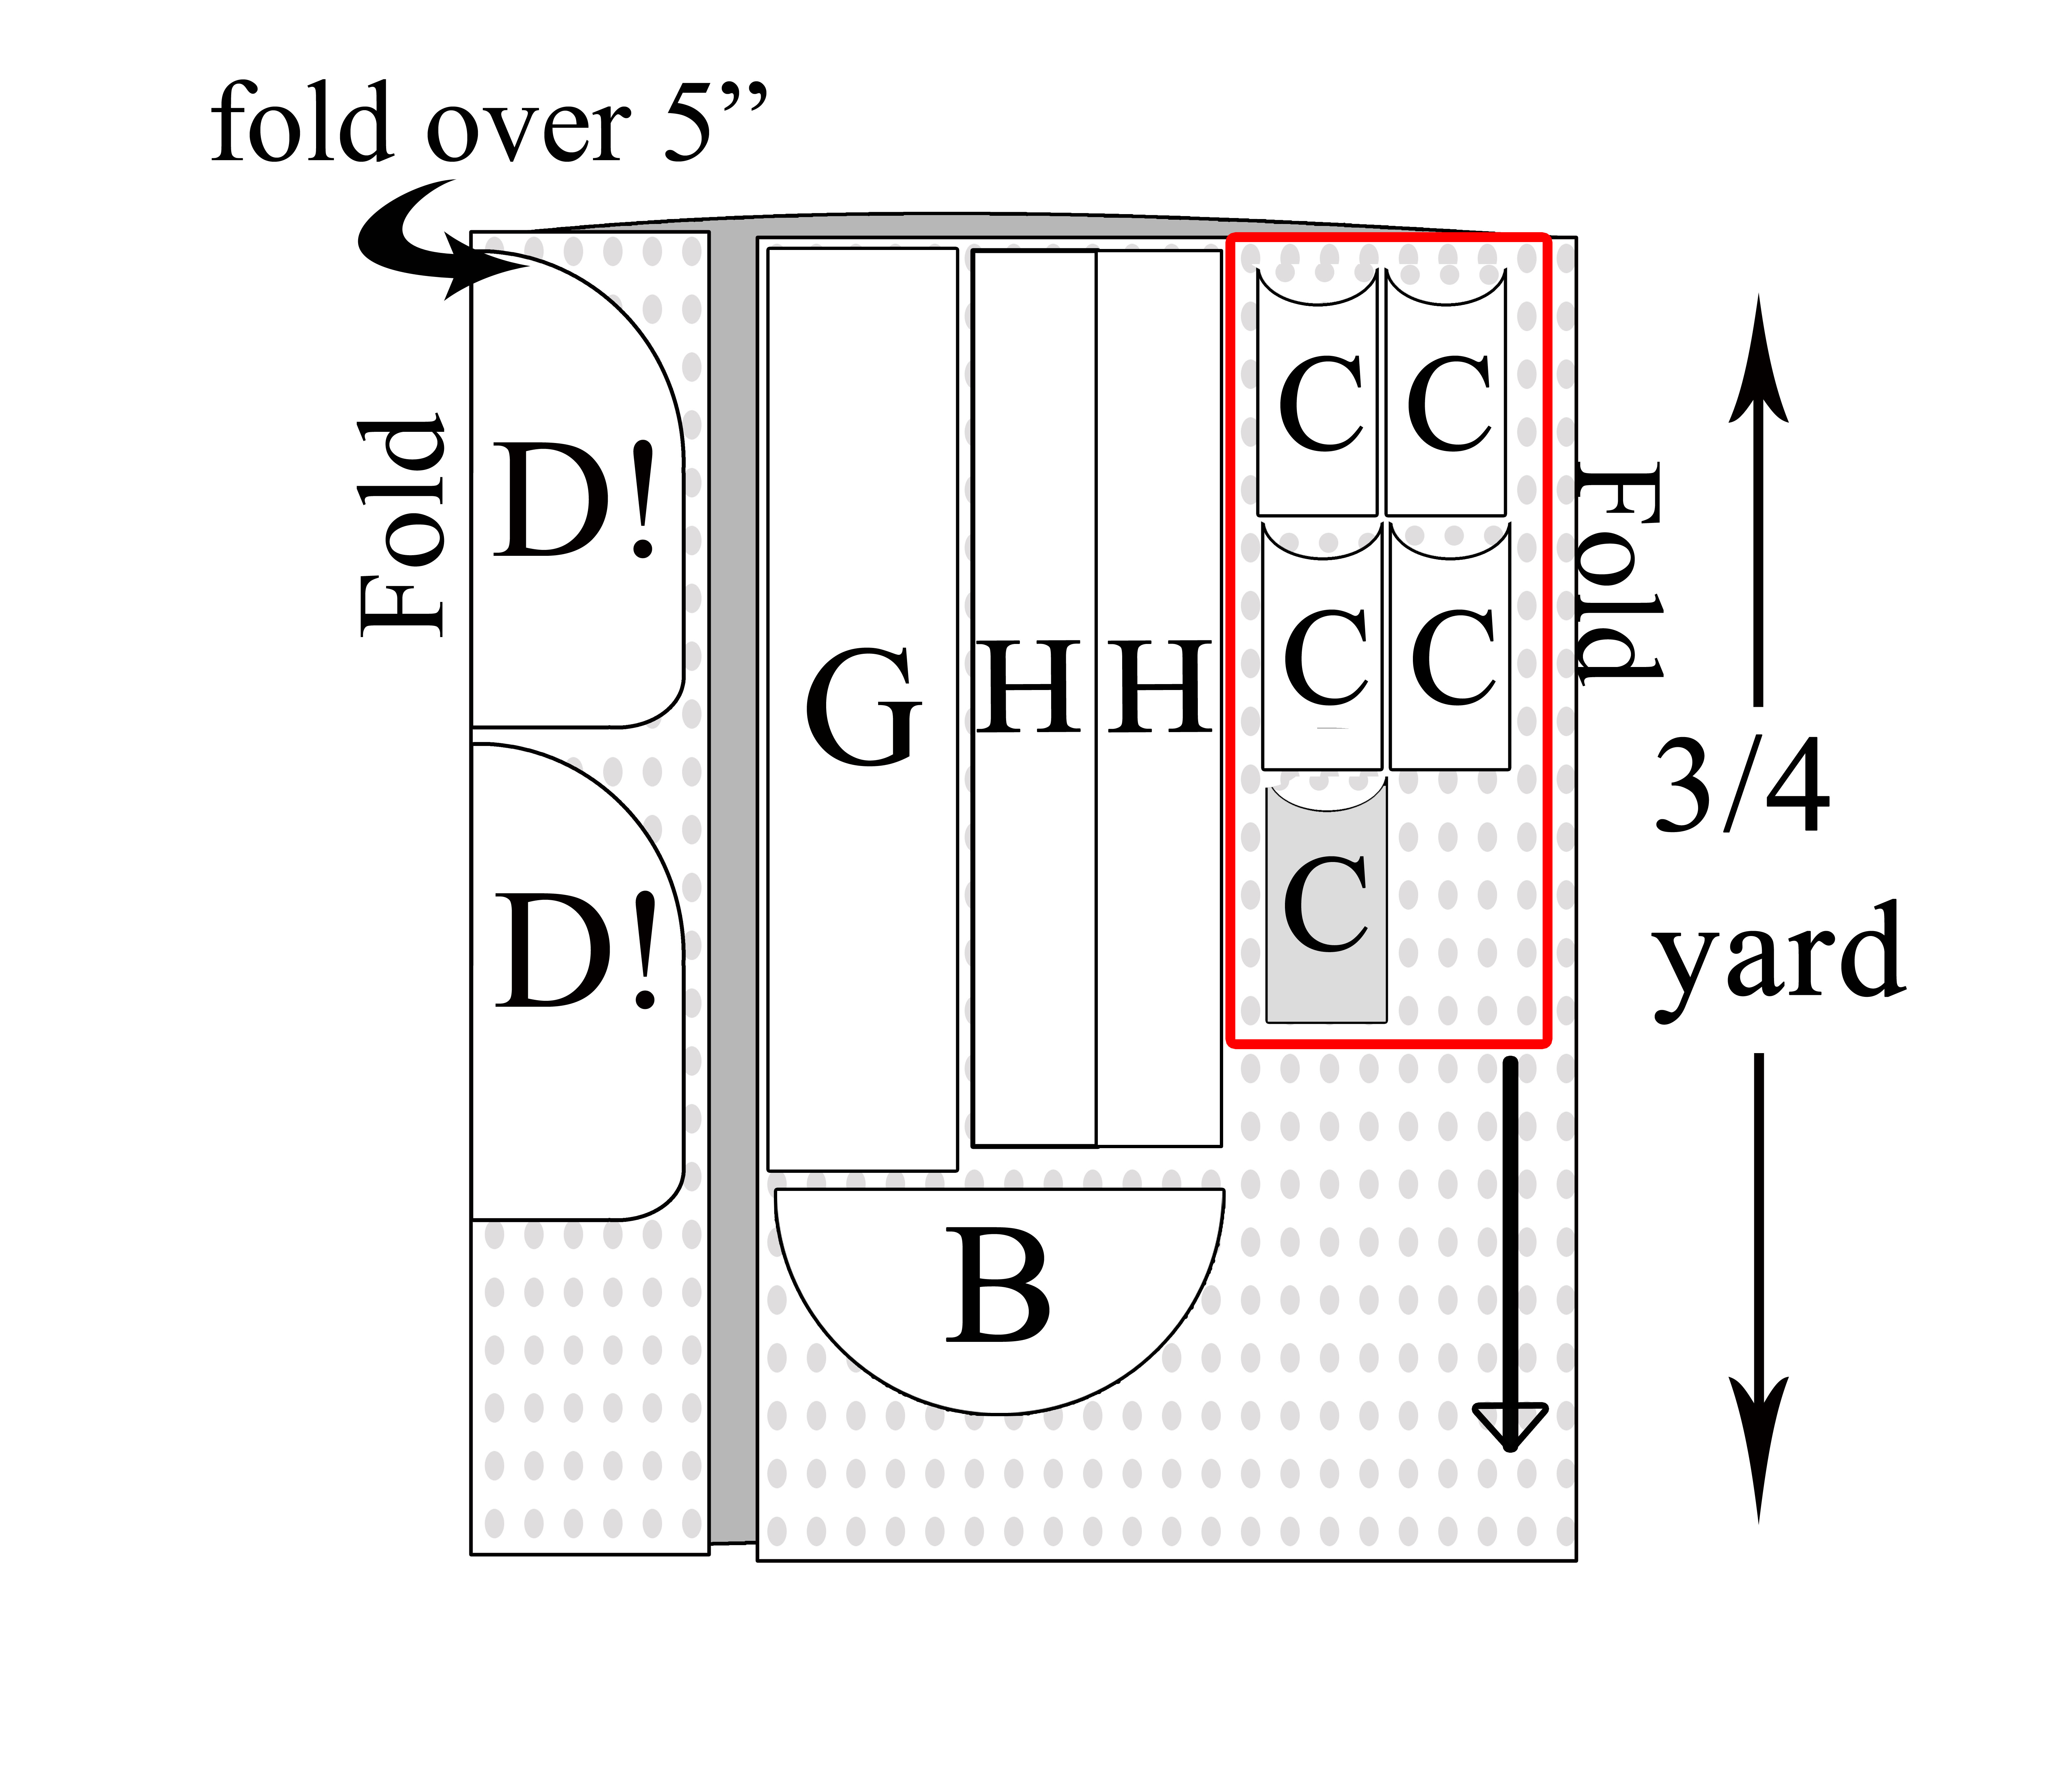
Print out two copies of page 1 and one copy of page 2 (use shorter piece of interfacing for page 2). Once printed, measure the 1″ square printed on the interfacing or paper to be sure it was printed to the correct size. Trim the pattern sheets along the blue lines- don’t cut the pattern pieces apart.
Cut 3 pieces from Fabric #1 that are the same size as the pattern sheets. If you printed to paper, cut same sized pieces from your interfacing as well.
If you are following the sample fabric layout in the pattern, the area that the C pieces cover should be enough:
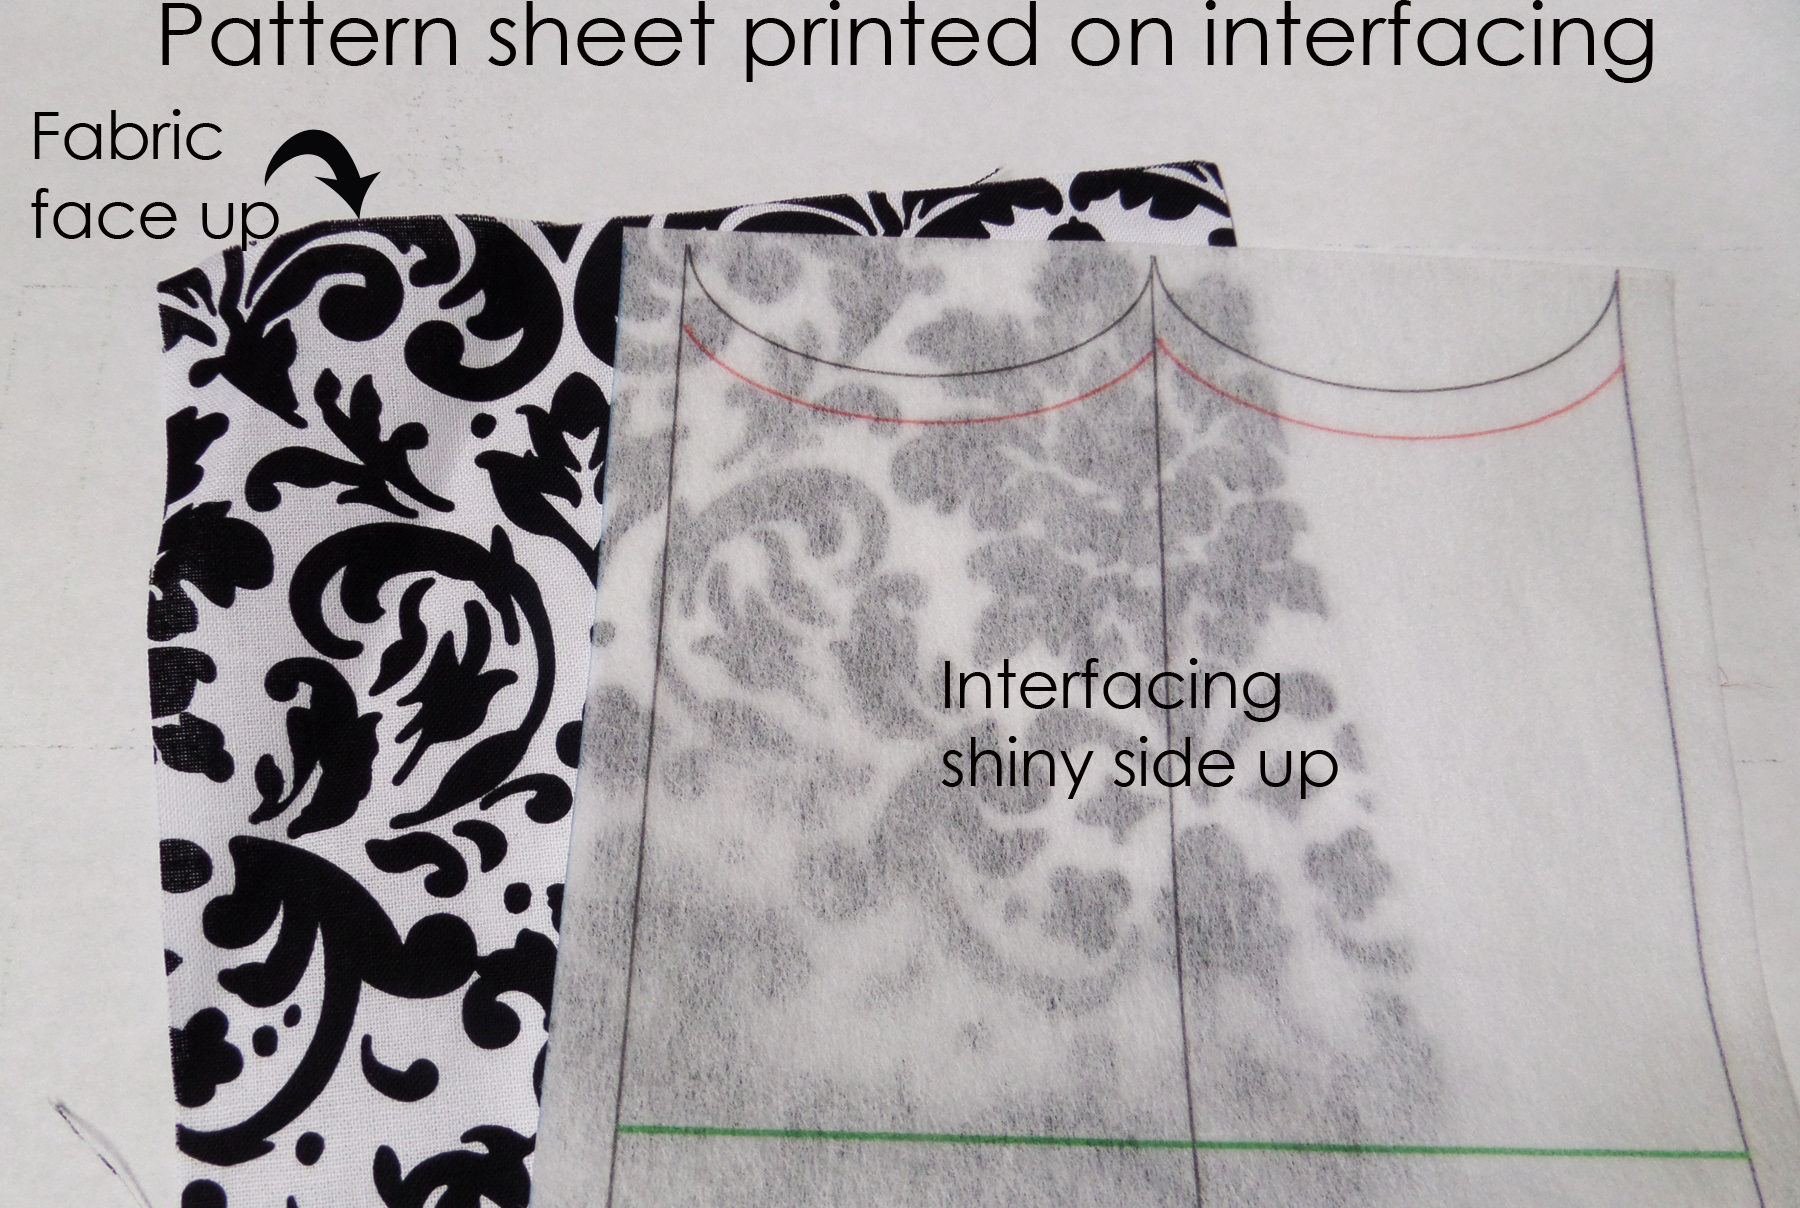
Now we are going to layer:
- If you printed on interfacing, layer as follows: Fabric on the bottom, right side up. On top of that, your interfacing, so that the shiny (glue) side is facing up and the printed side is facing the fabric.
 If you printed on paper, layer as follows: Fabric on the bottom, right side up. On top of that, your pattern sheet, right side up. And lastly, your interfacing with the shiny (glue) side up.
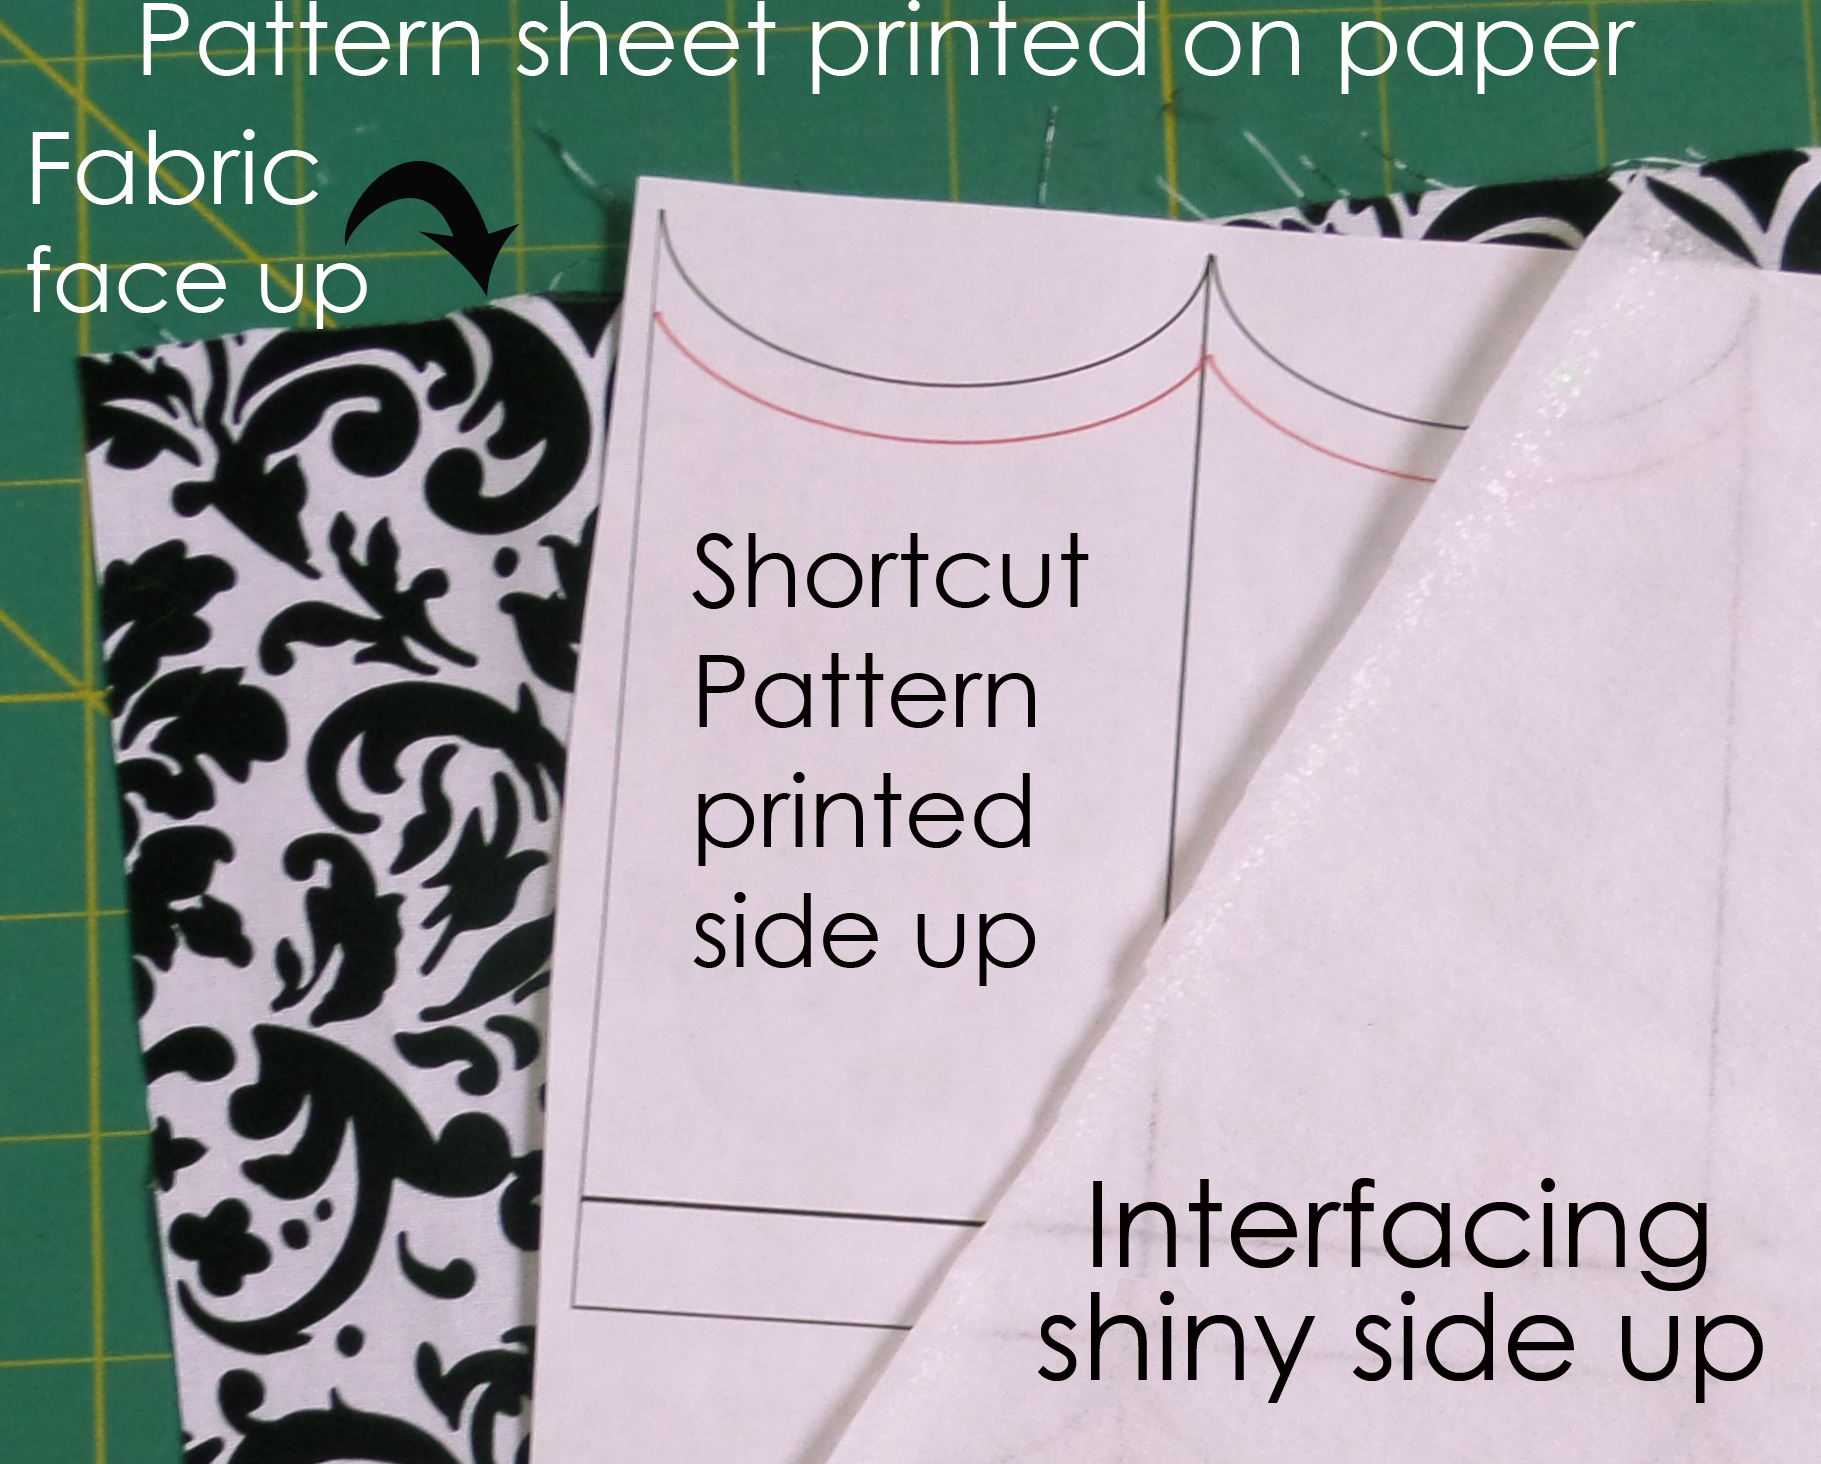
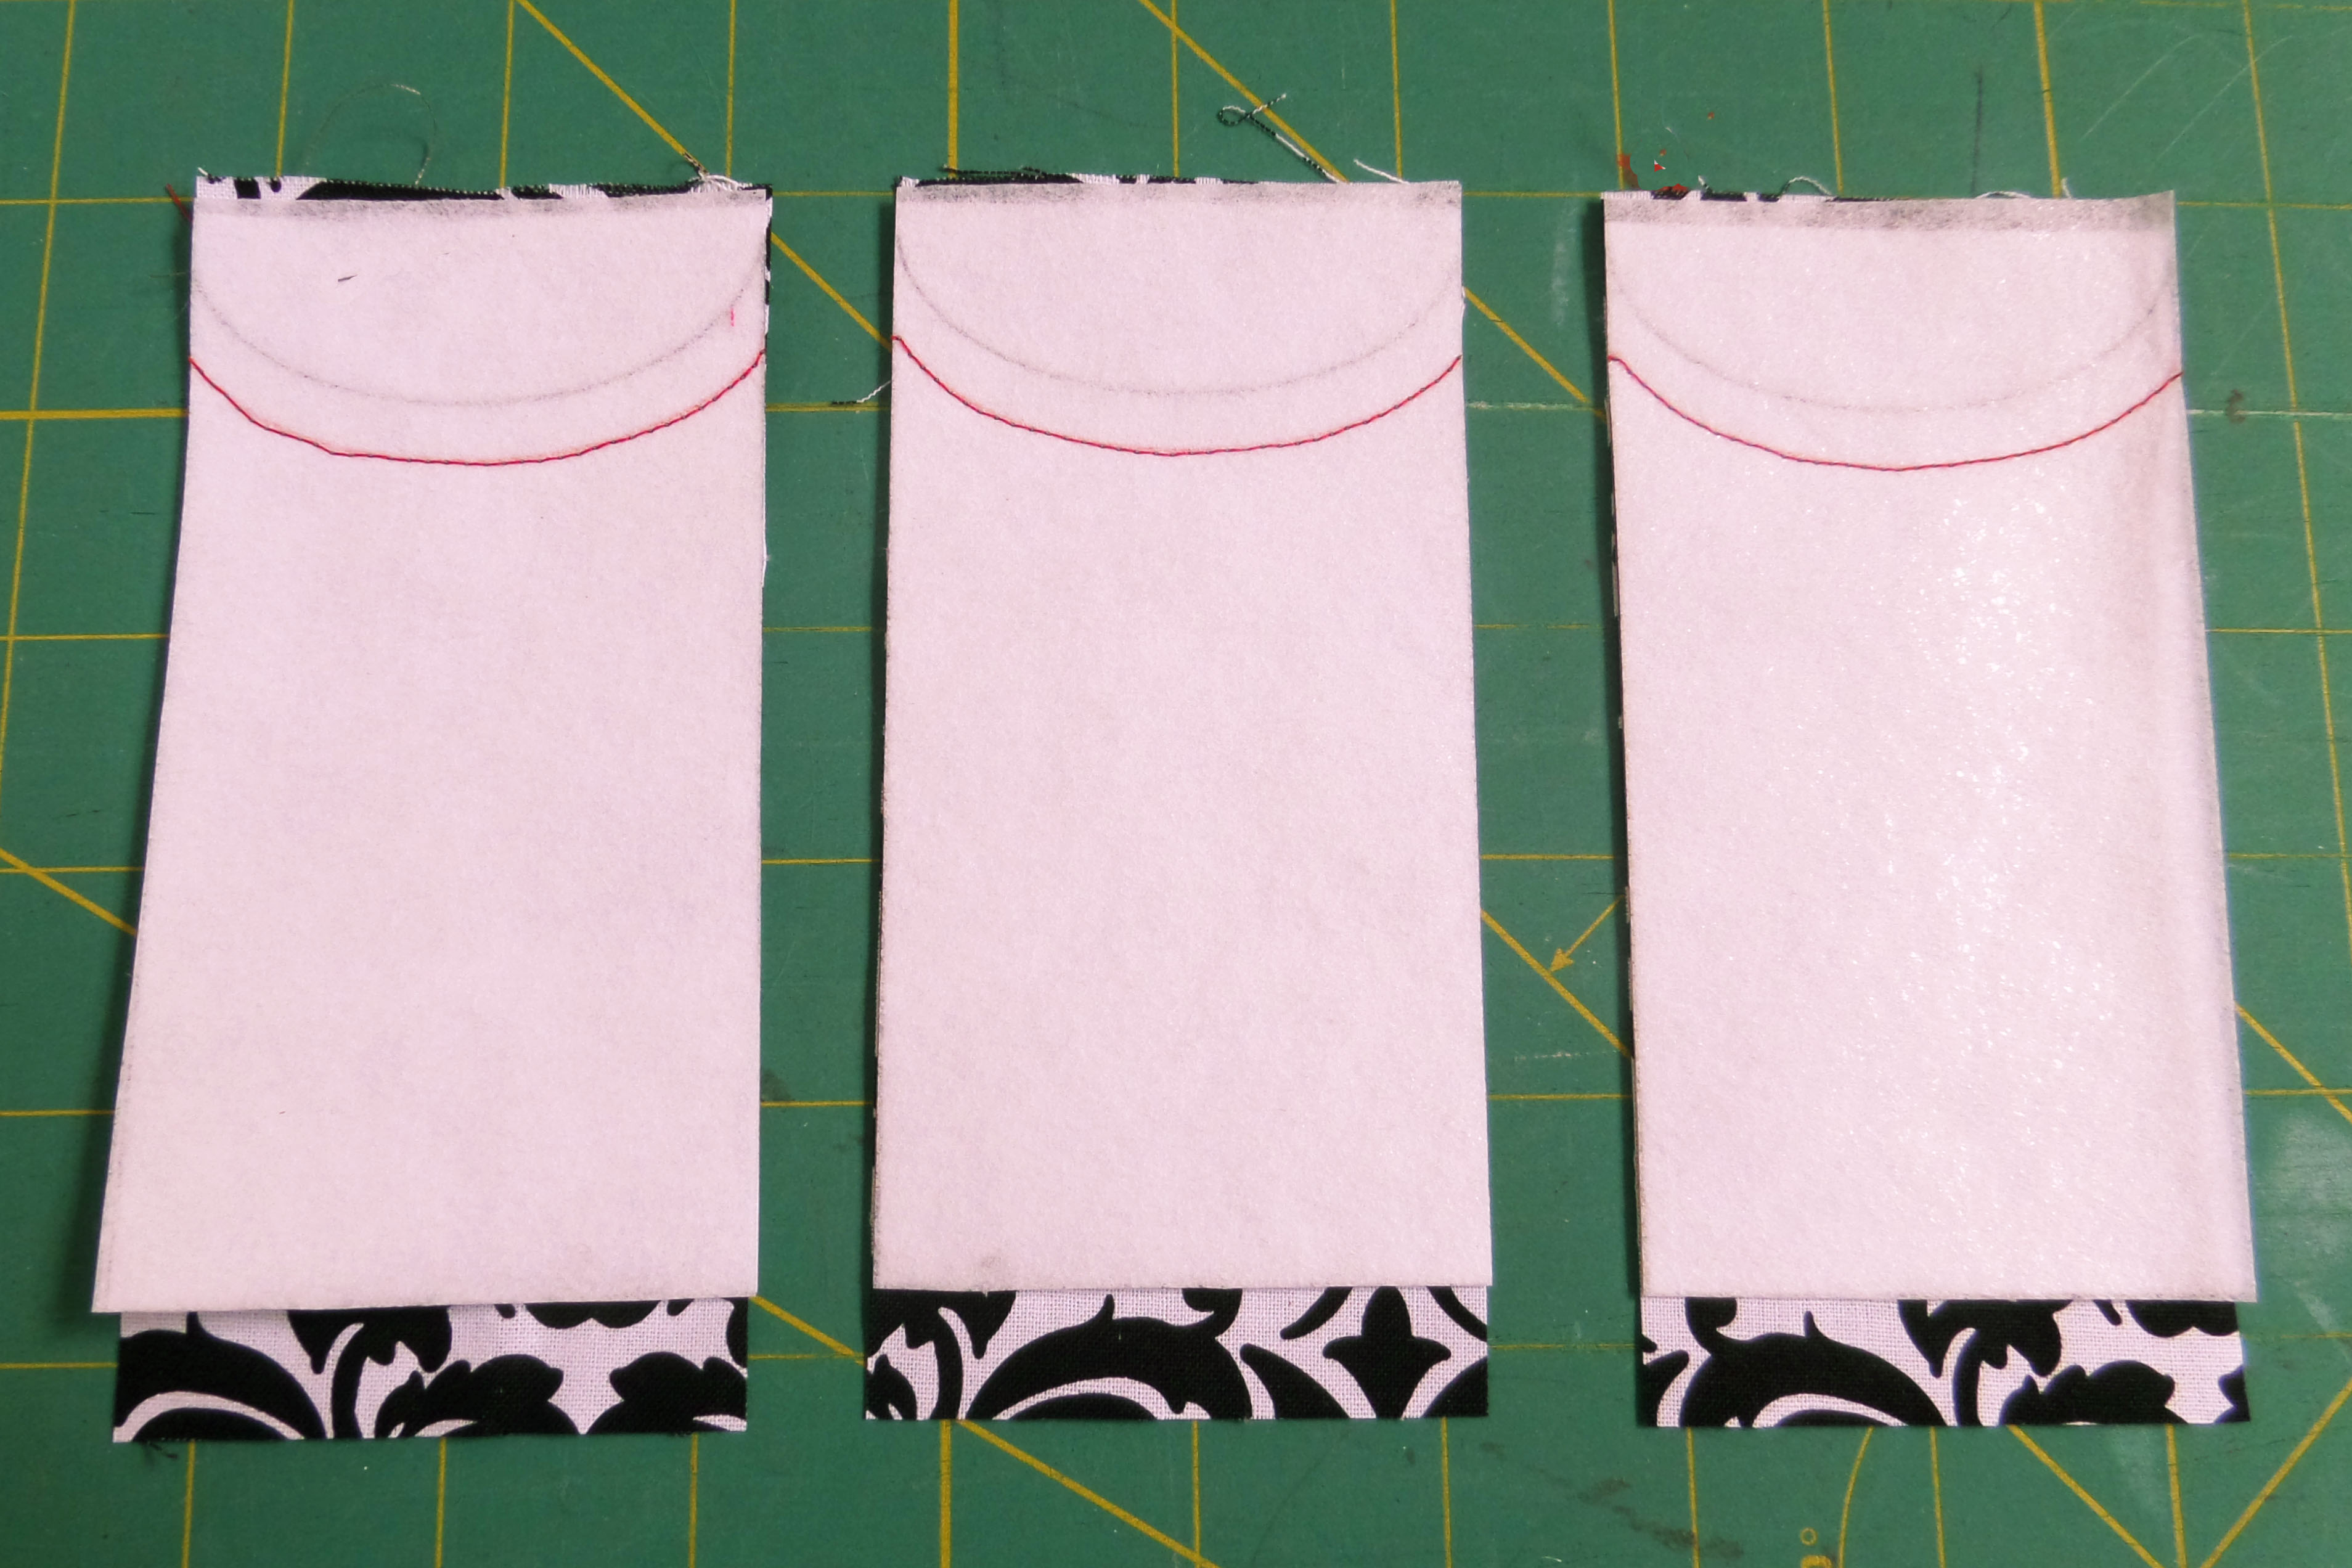
The rest of the photos illustrate the paper option, but the process is the same for the interfacing method. Make sure the edges of the layers are aligned. You can pin the layers together but I never do. Sew through the layers along the red line. (btw, in this photo I have 3 pattern pieces in a row where yours will only have 2 – just ignore it)
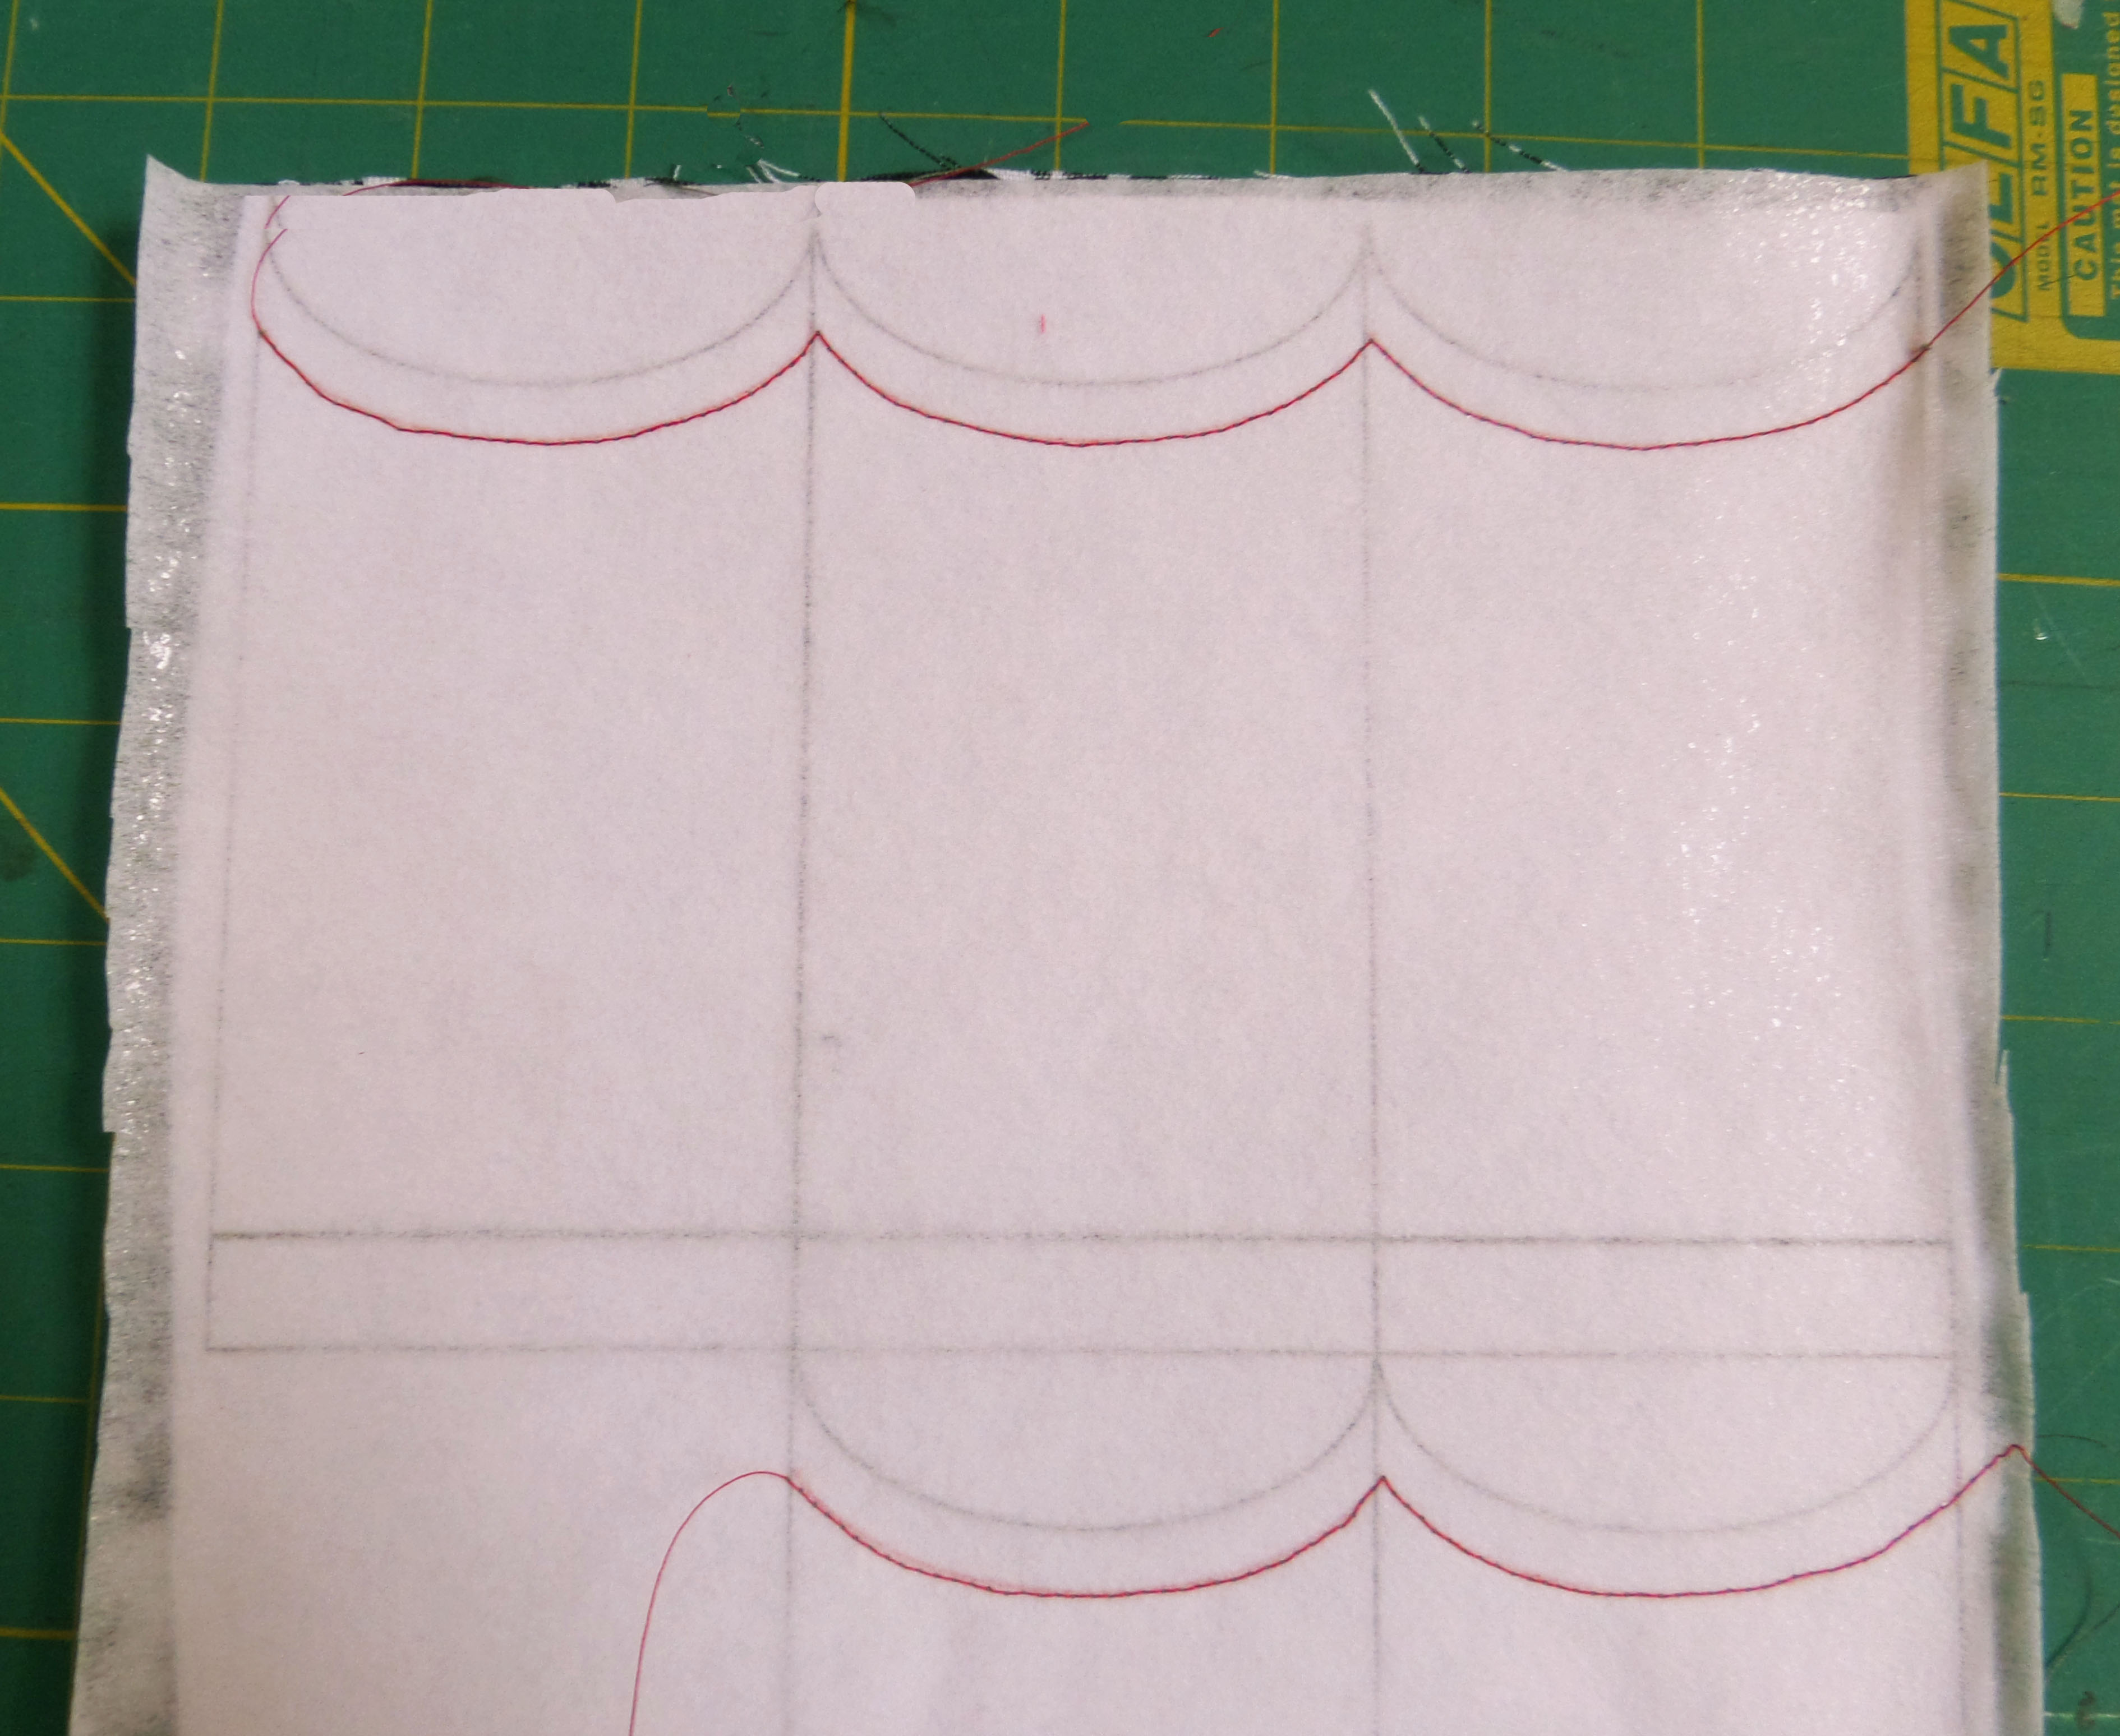
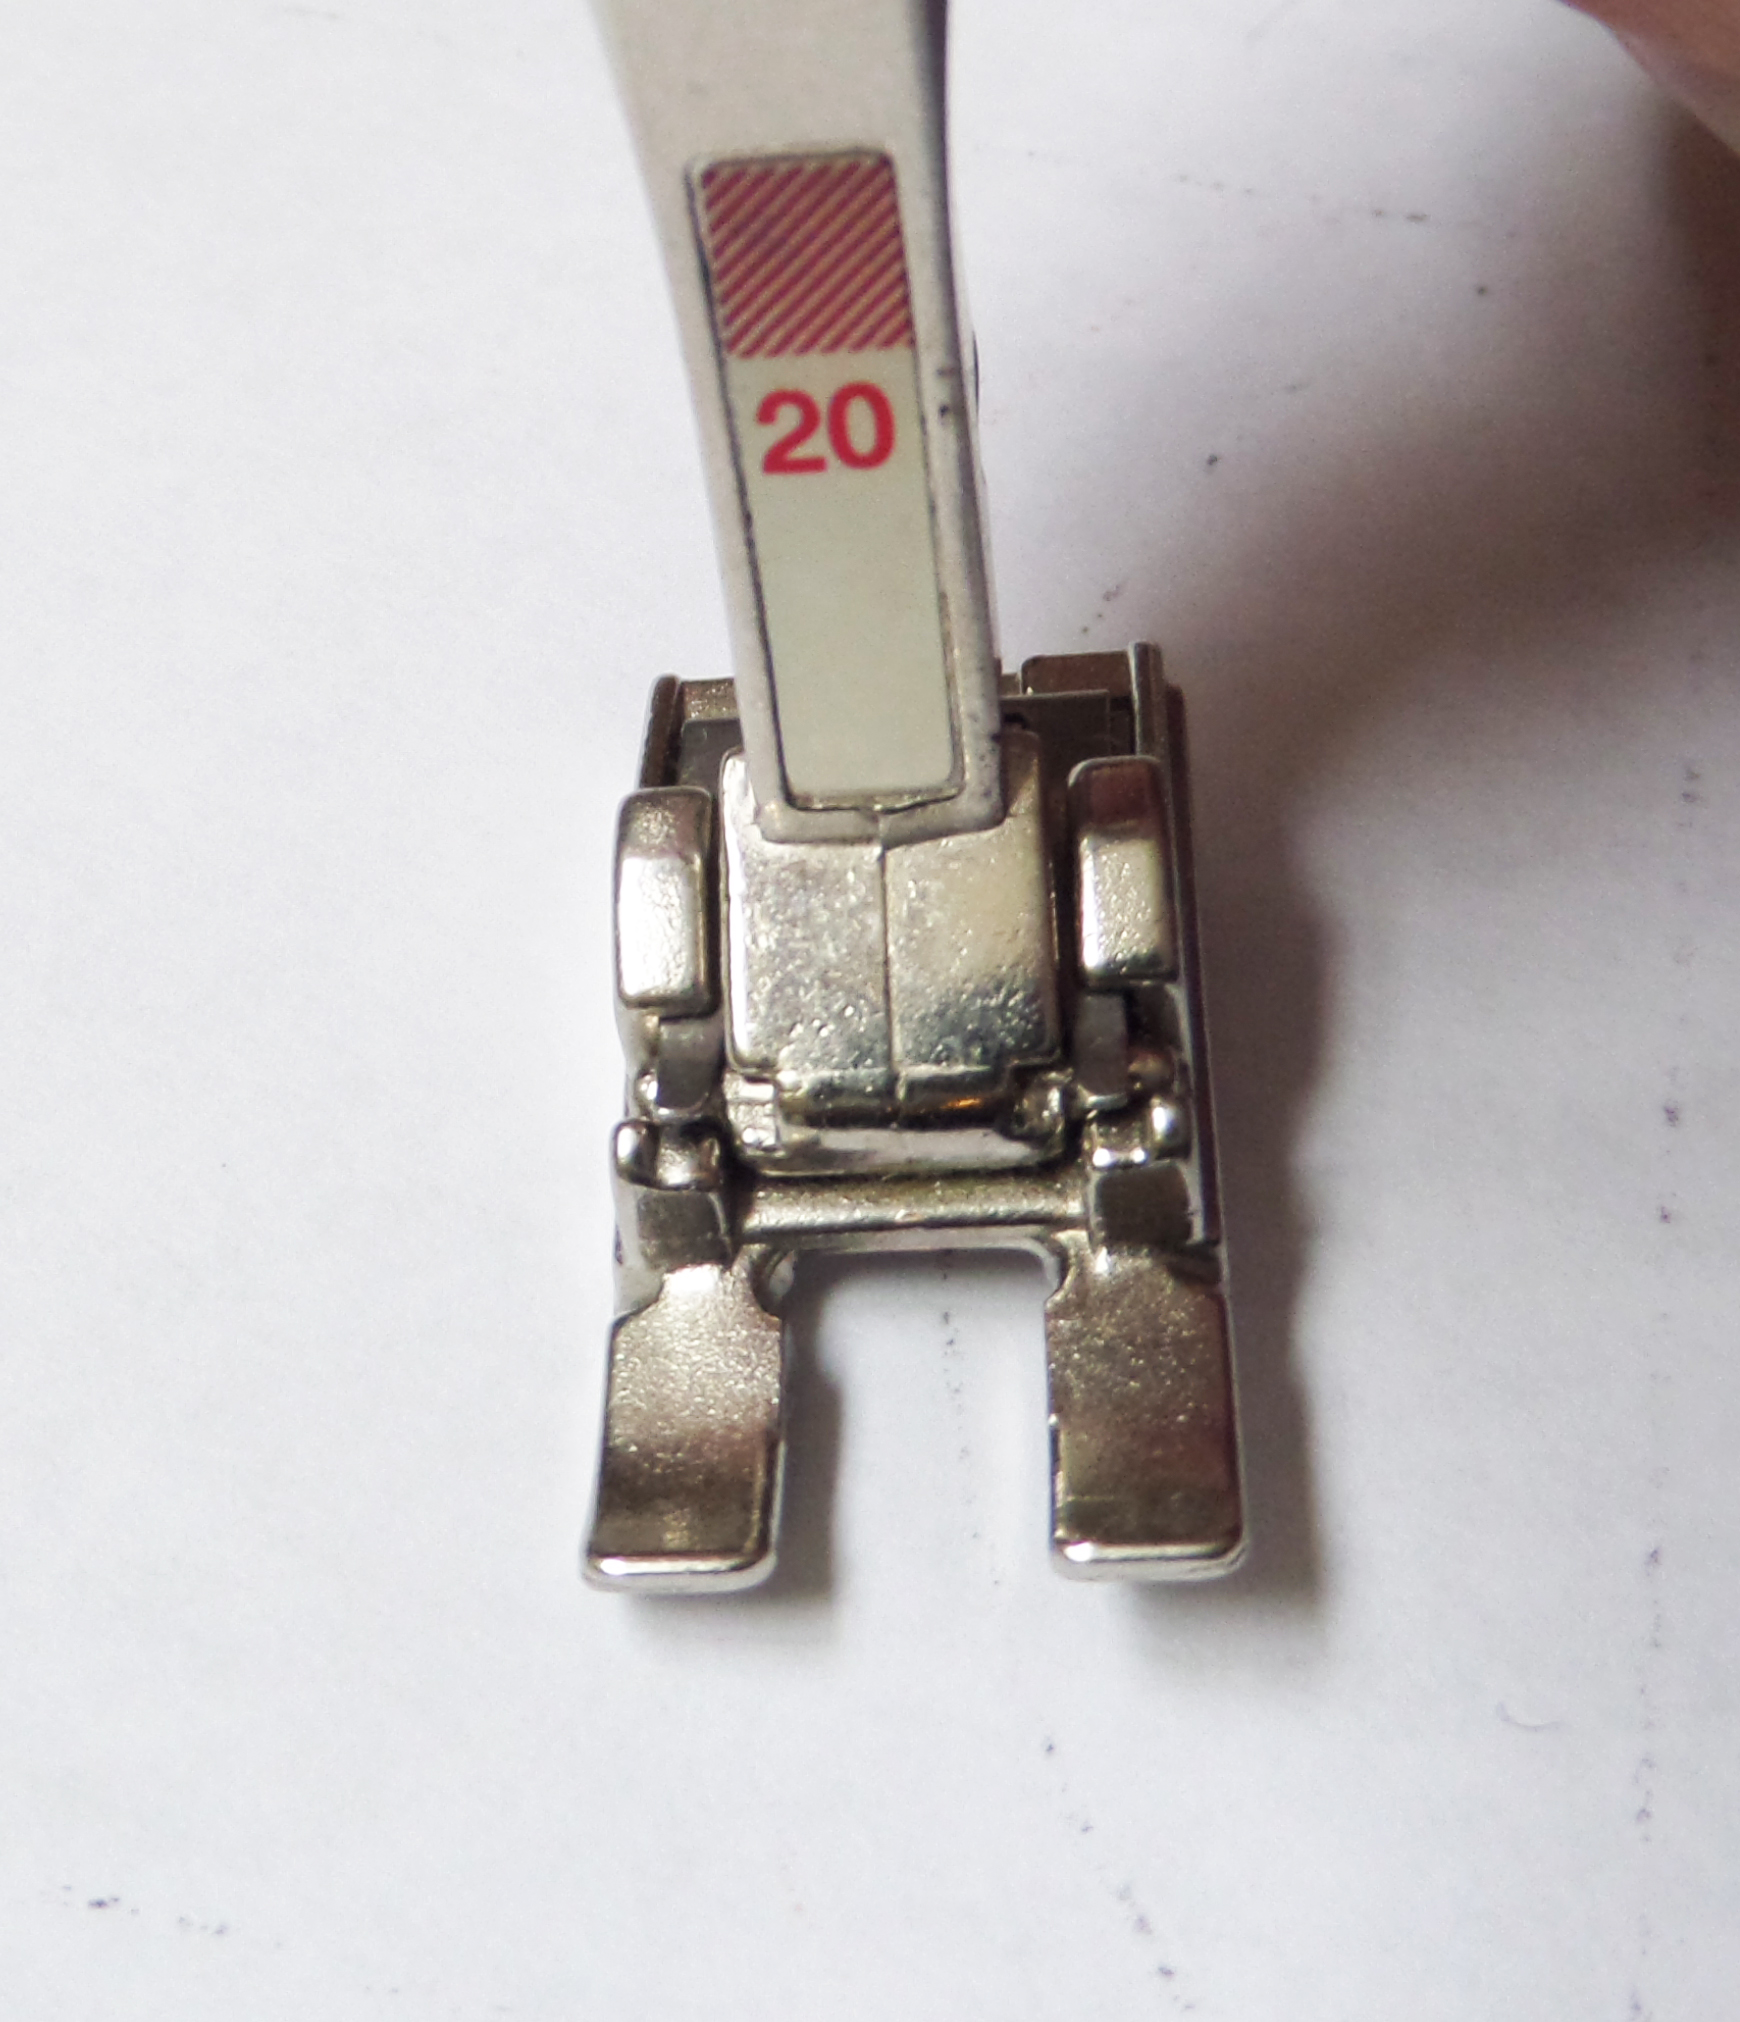
I have found that sewing along this curve is far easier and more accurate when I use my open toe embroidery foot. It is much easier to see where you are stitching. Mine looks like this:
 Cut s along the purple line to separate pieces into rows.
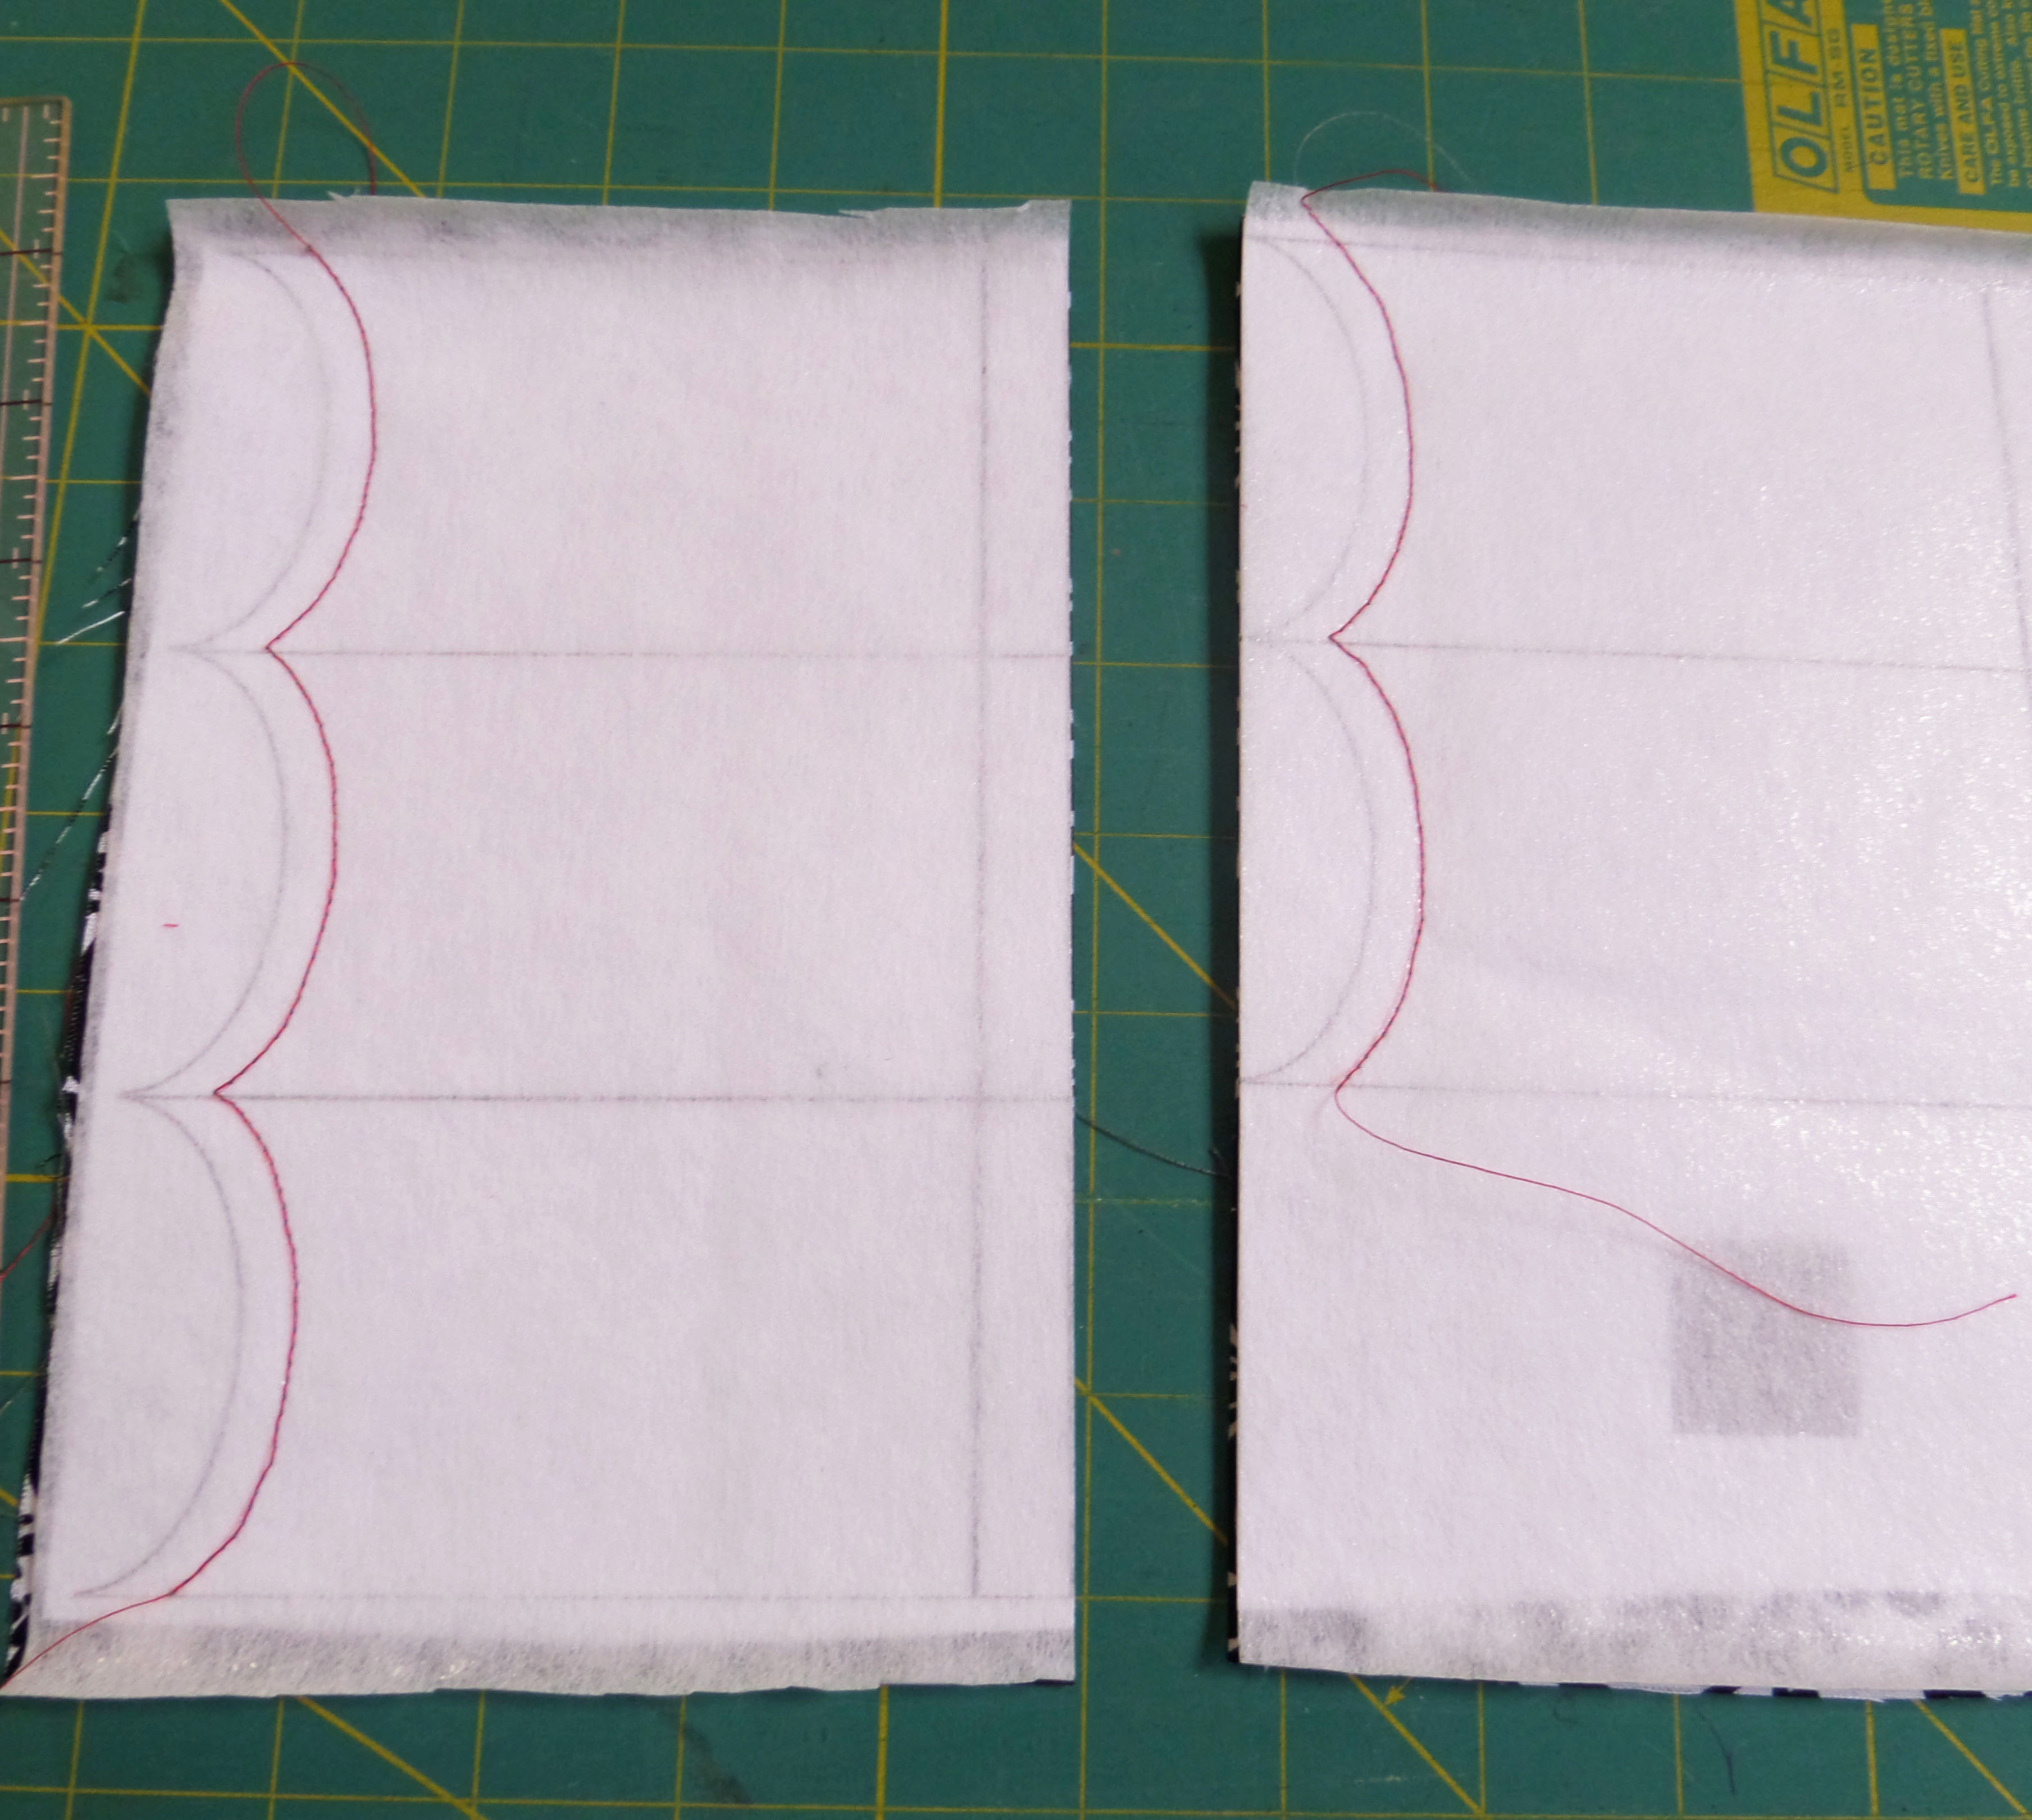
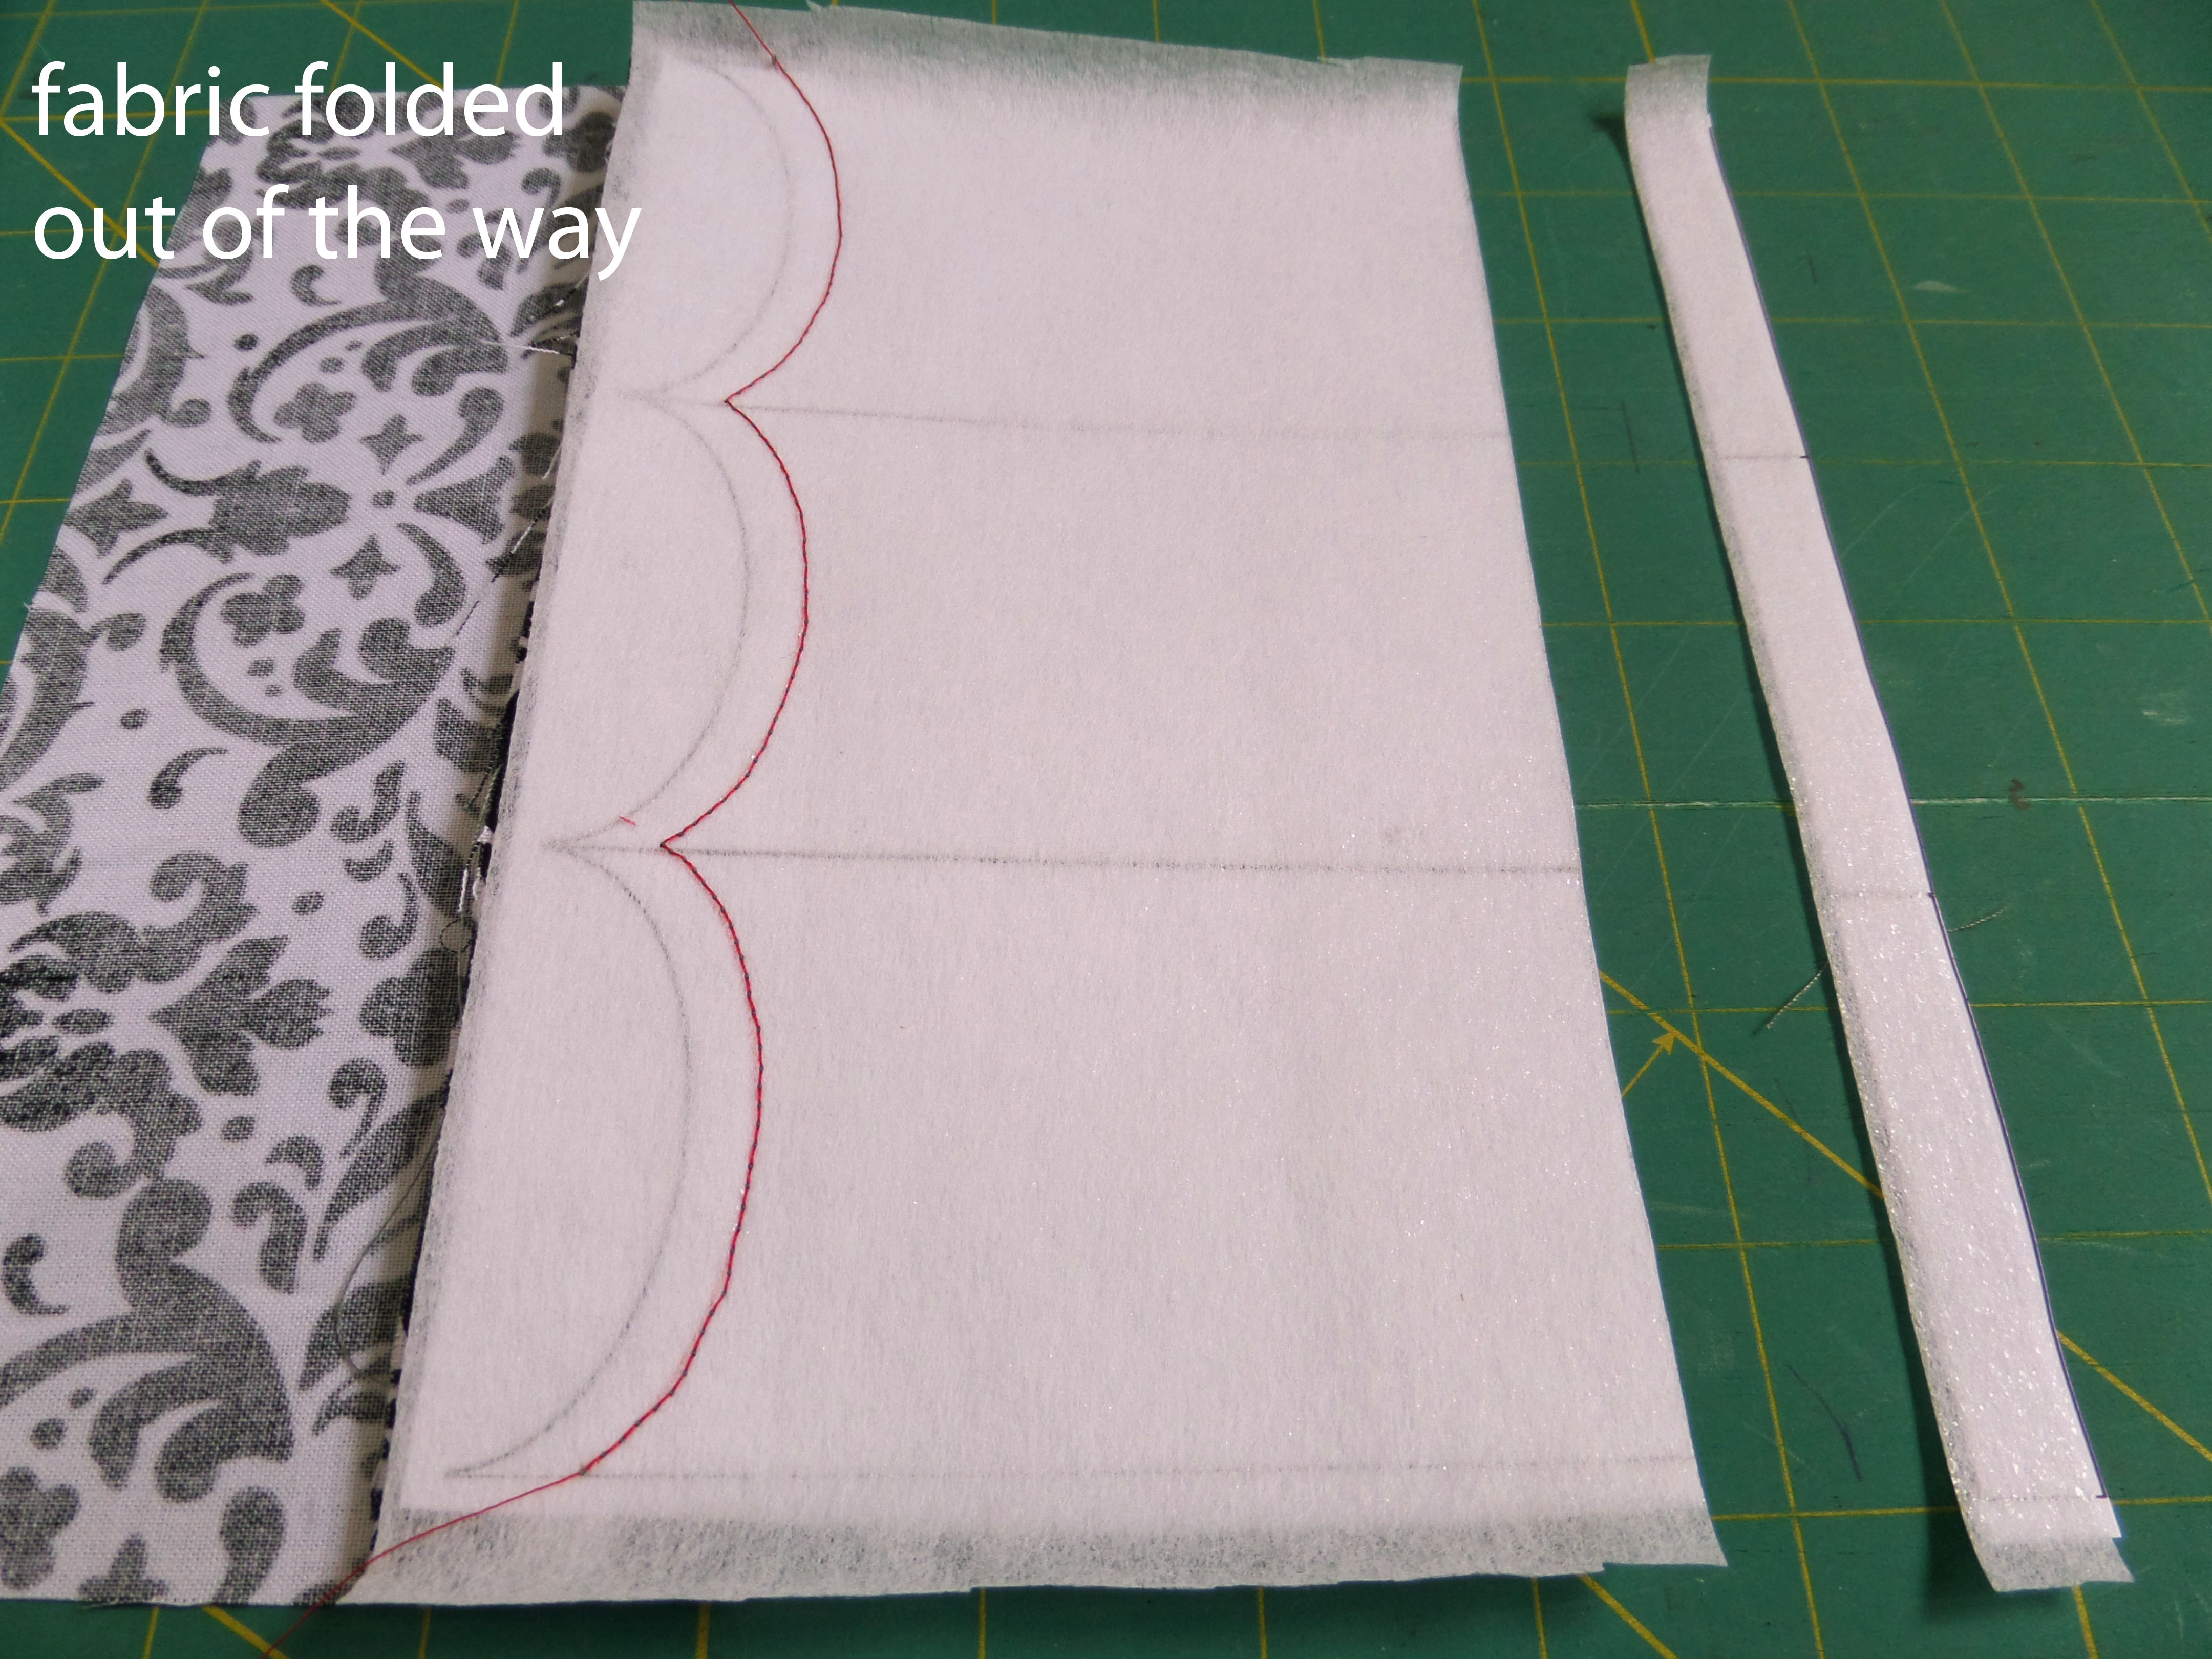
Now, fold the fabric out of the way and cut the interfacing (and paper, if it’s there) on the green line. We want the interfacing shorter than the fabric.
At this point you need to finish the bottom edge of the fabric by either serging, or using a zig zag or overcast stitch. Sorry but you won’t see the bottom edge finished in the following photos because I wrote that you should do it and then forgot to do it before I took the pictures for the next step!
Fold the fabric back down behind the interfacing. Cut the pieces apart from one another along the side edges (the lines in black).
If you have printed to paper, you will need to remove it from between the interfacing and the fabric. Hopefully, your stitches perforated it well enough to just pull it out, if not, just wet it a little.
Trim the 1/8″ above the red line.
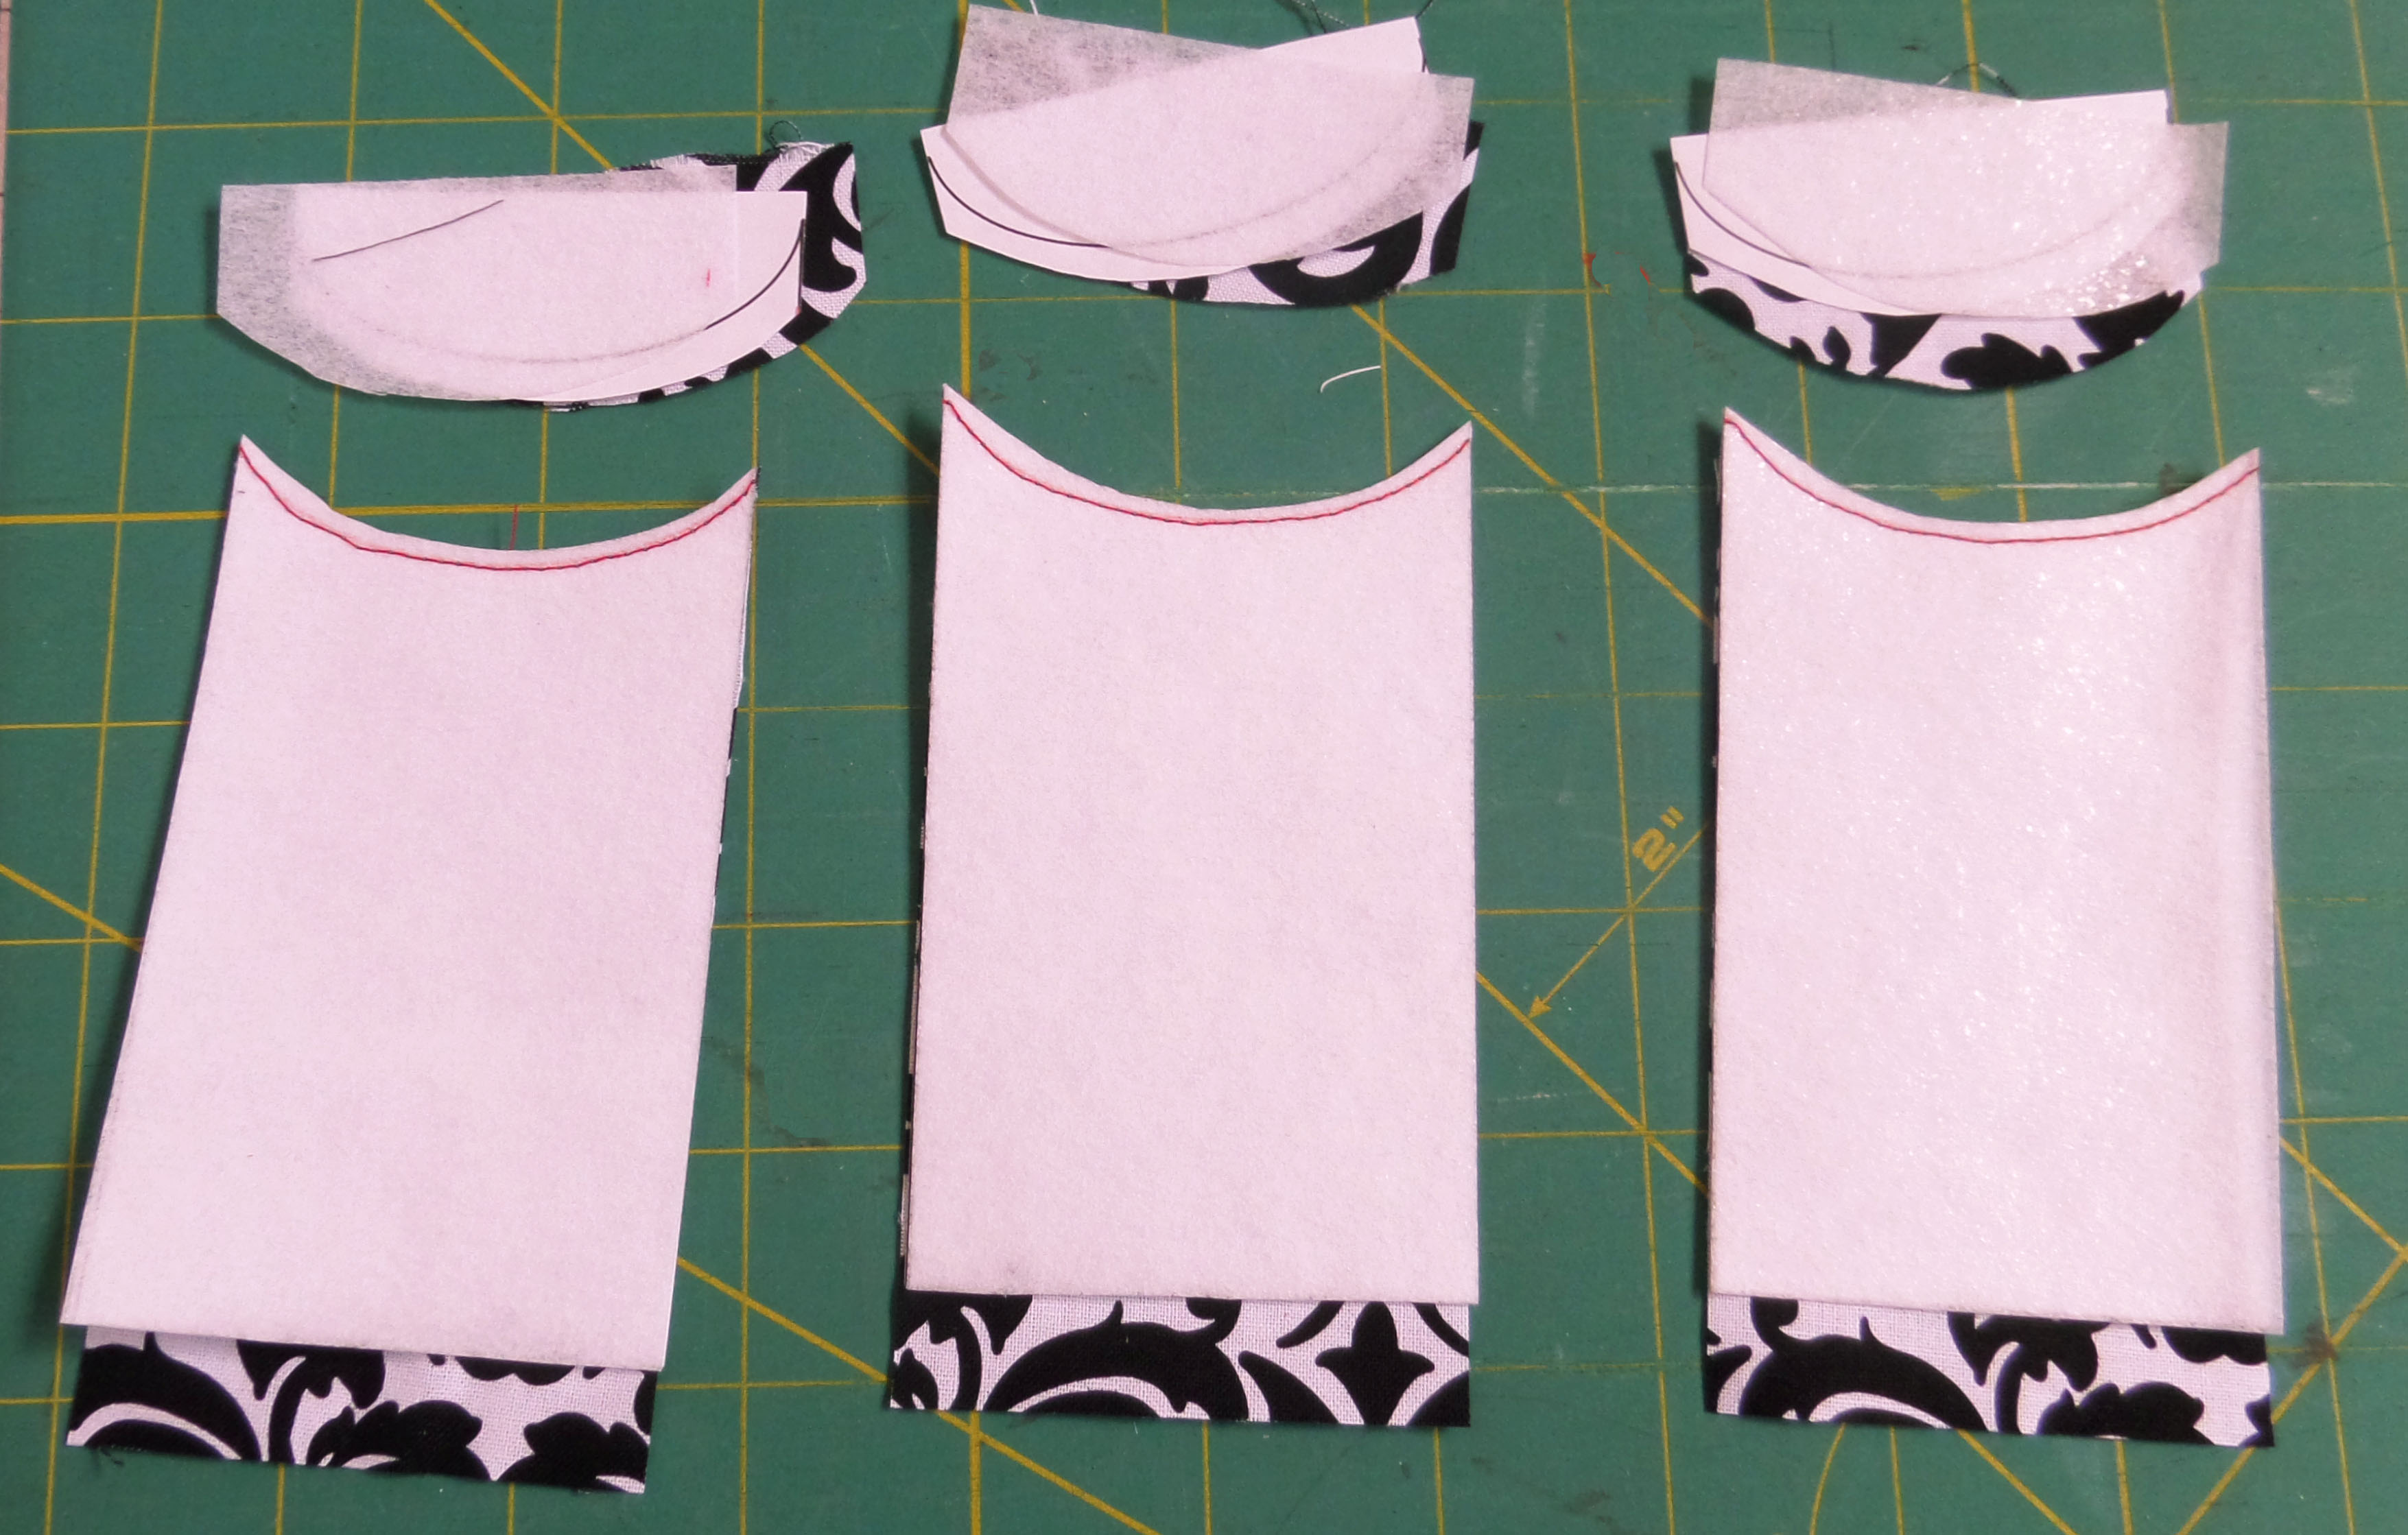
Repeat with the second copy of page #1 and the copy of page #2.
Quick, huh?
This went so much quicker! So intuitive! 😉