Hello!
Today we are going to start to construct the inner frame for our basket.
Cutting the Pieces:
There are a few points I want to make about cutting out the plastic canvas pieces. First, always cut the pieces so that they have flat edges on all sides once they are cut out. 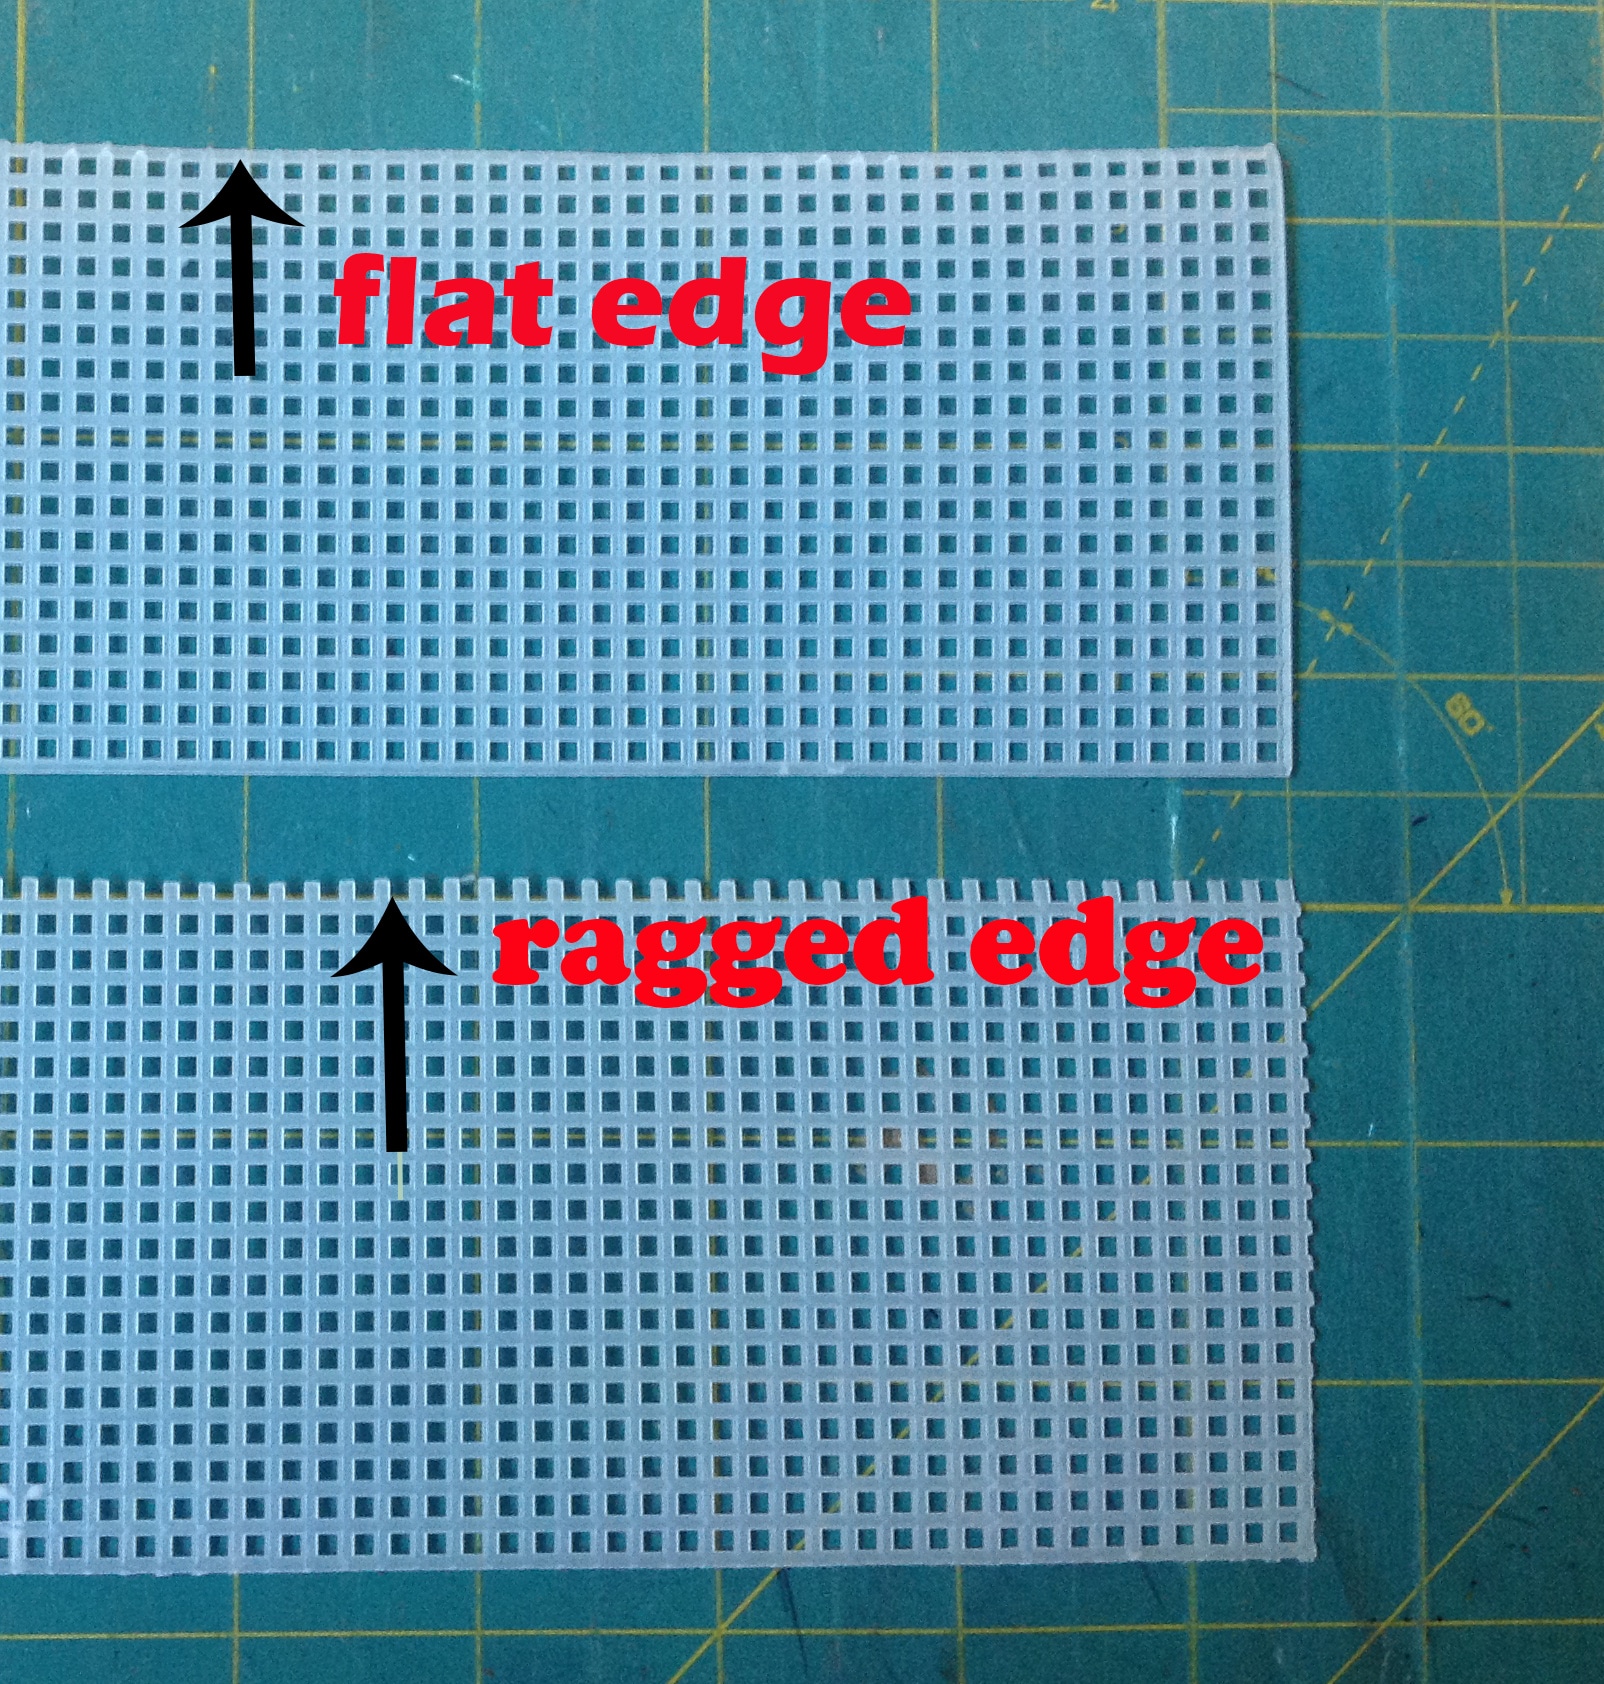
This may mean that you have to make a piece slightly larger or smaller than what the pattern calls for to keep that edge flat. Pick one (larger or smaller) and stick with it throughout. I usually go with the larger.
The second thing is that you should measure pieces that have similar dimensions against one another. In other words, of two pieces have a 6″ side, measure and be sure that they have the same number of holes on that 6″ side.
I am going to be ng using 5 sheets of our plastic canvas sheets for my basket but you can use 3 if you wish.
I also am going to use the 1/8″ cable ties I told you about in the first post to put my frame together, but you can use yarn to secure these together as well.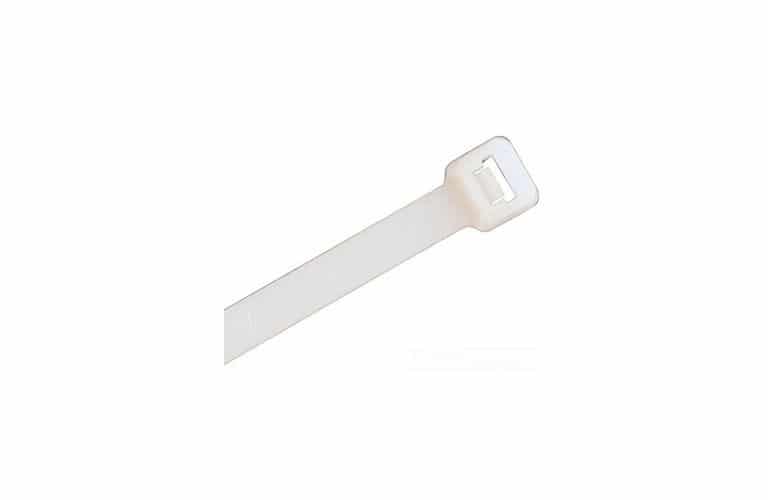
I am using 5 pieces of plastic canvas for my frame. Here are my pieces: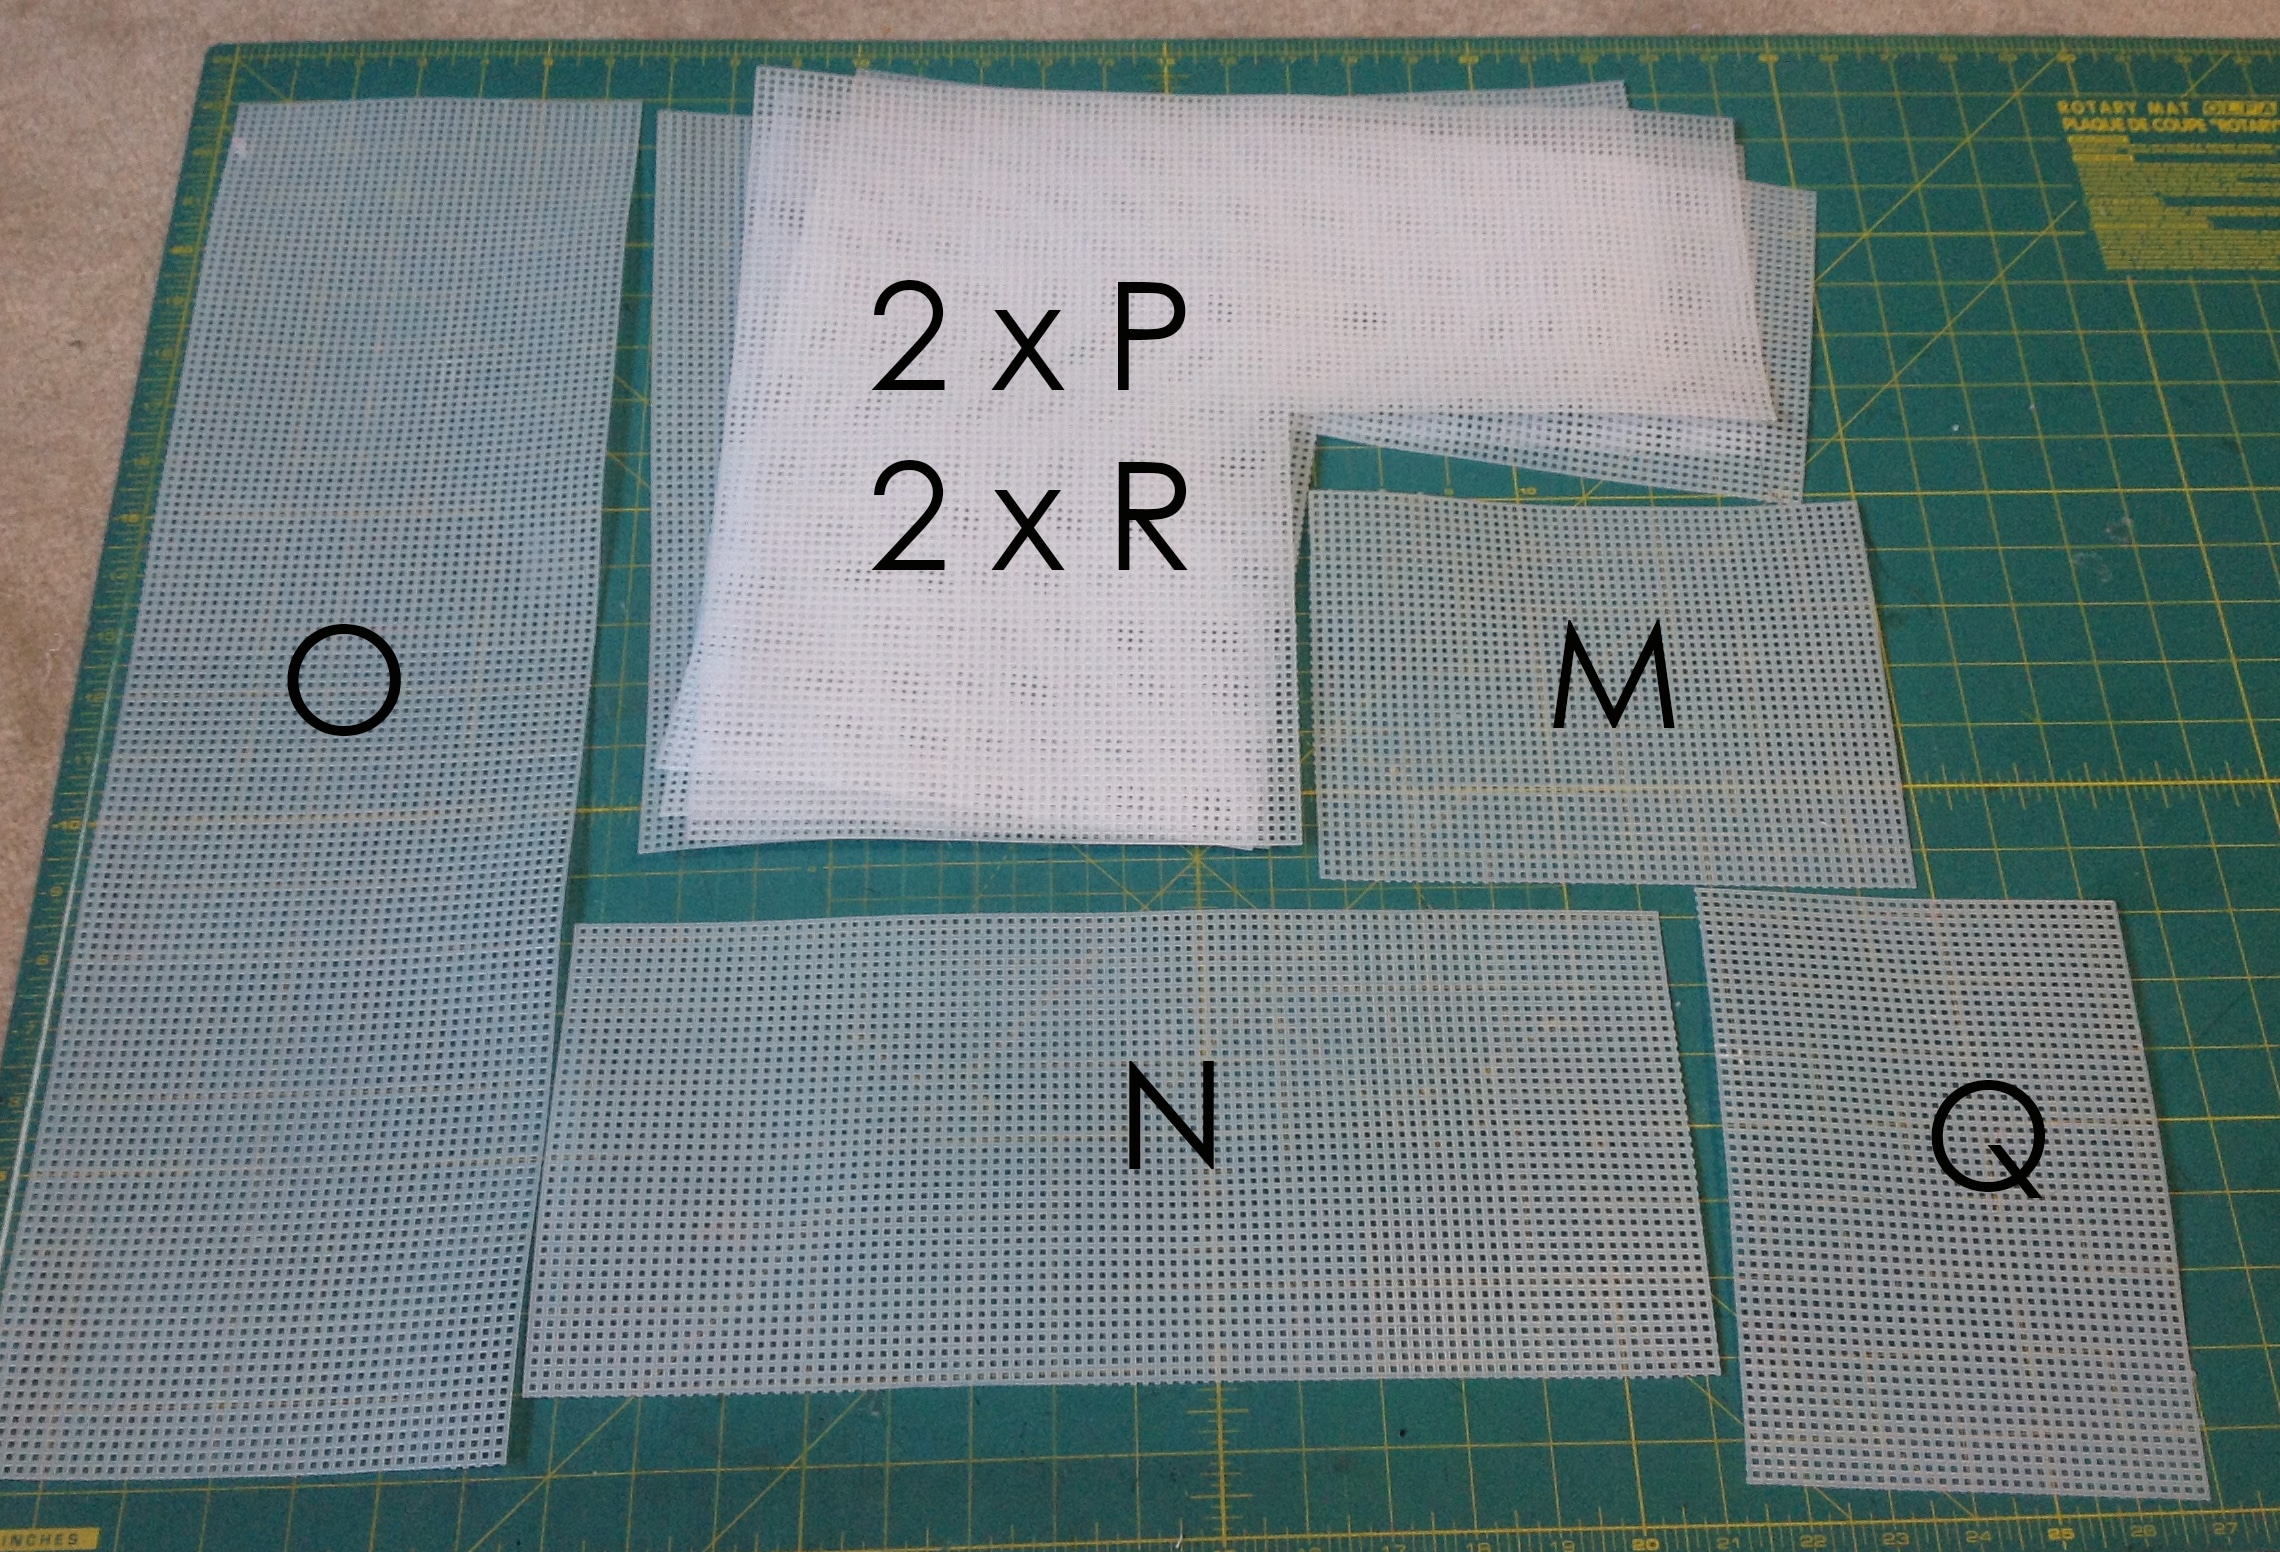
If you are using 3 sheets, you will have the same pieces as above except you will only have 1 each of P & R.
Construction:
The first thing we are going to work on are the Side Panel pieces (P & R). We need to extend the bottom portion of each because they are not quite long enough for the basket.
So, if you haven’t already done so, cut your Q piece in half.
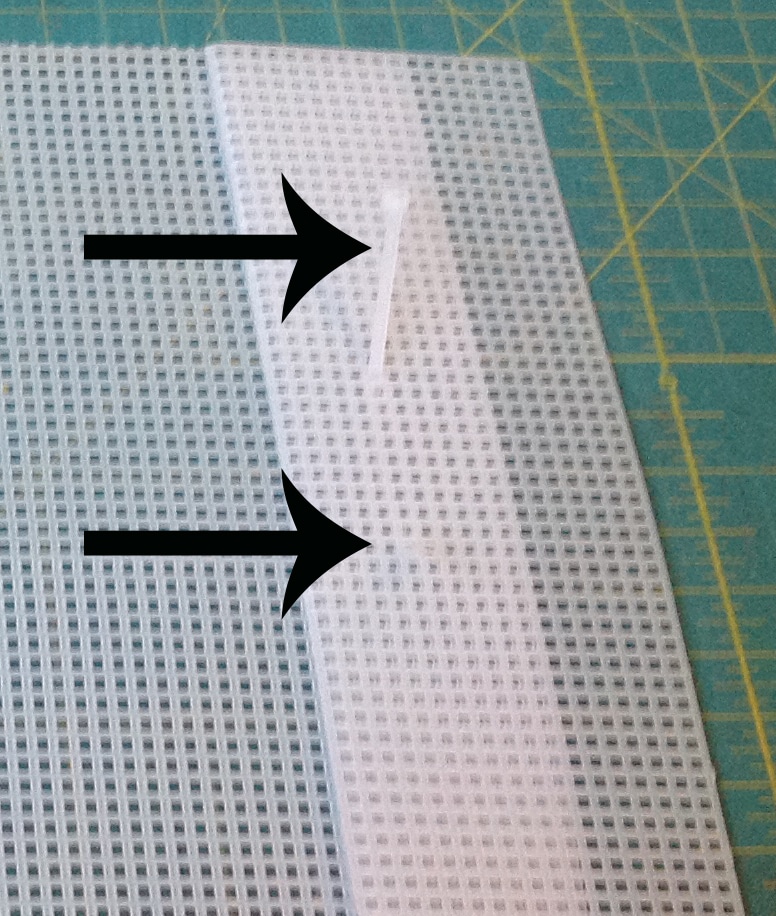
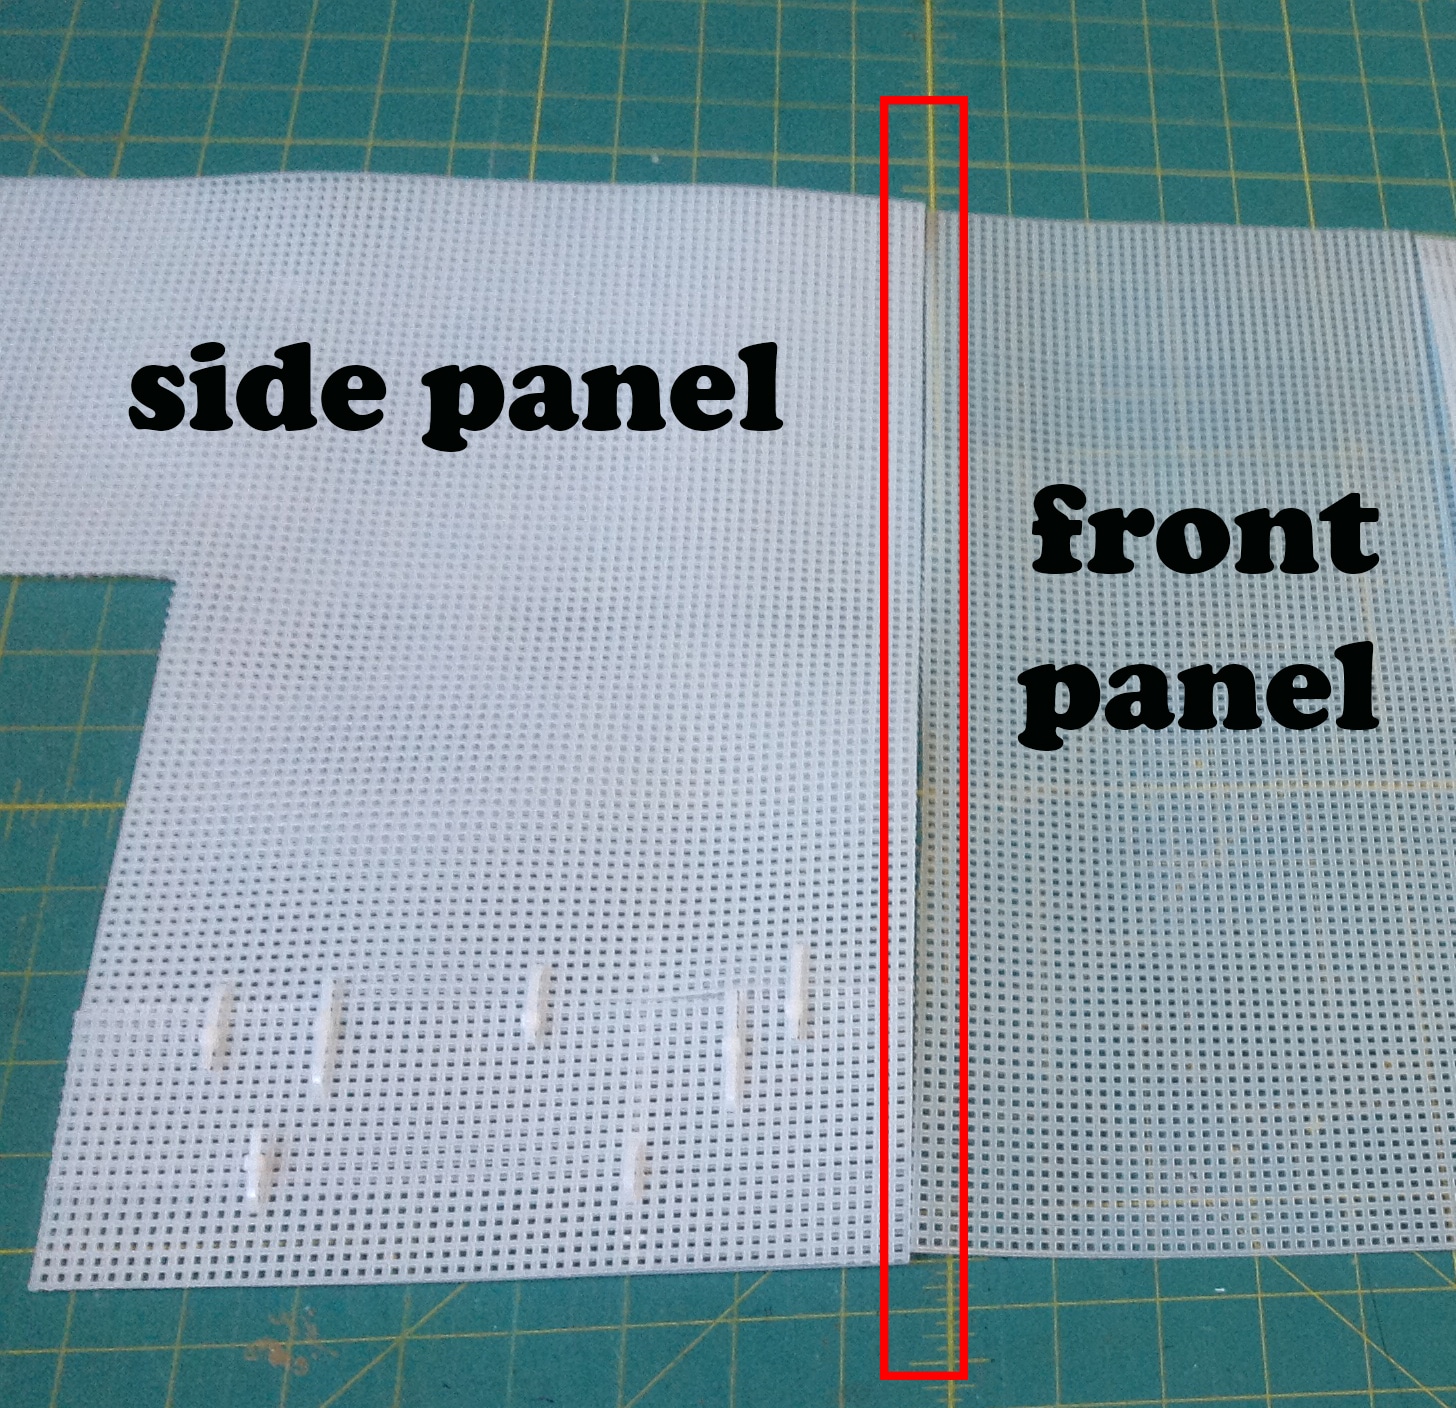
Lay one of the P or R pieces on a large cutting mat or beside a ruler and lay the Q piece on top, overlapping the bottom edge of the P (R) panel until the overall height is 14 1/2″. The black rectangle below shows where mine overlap.
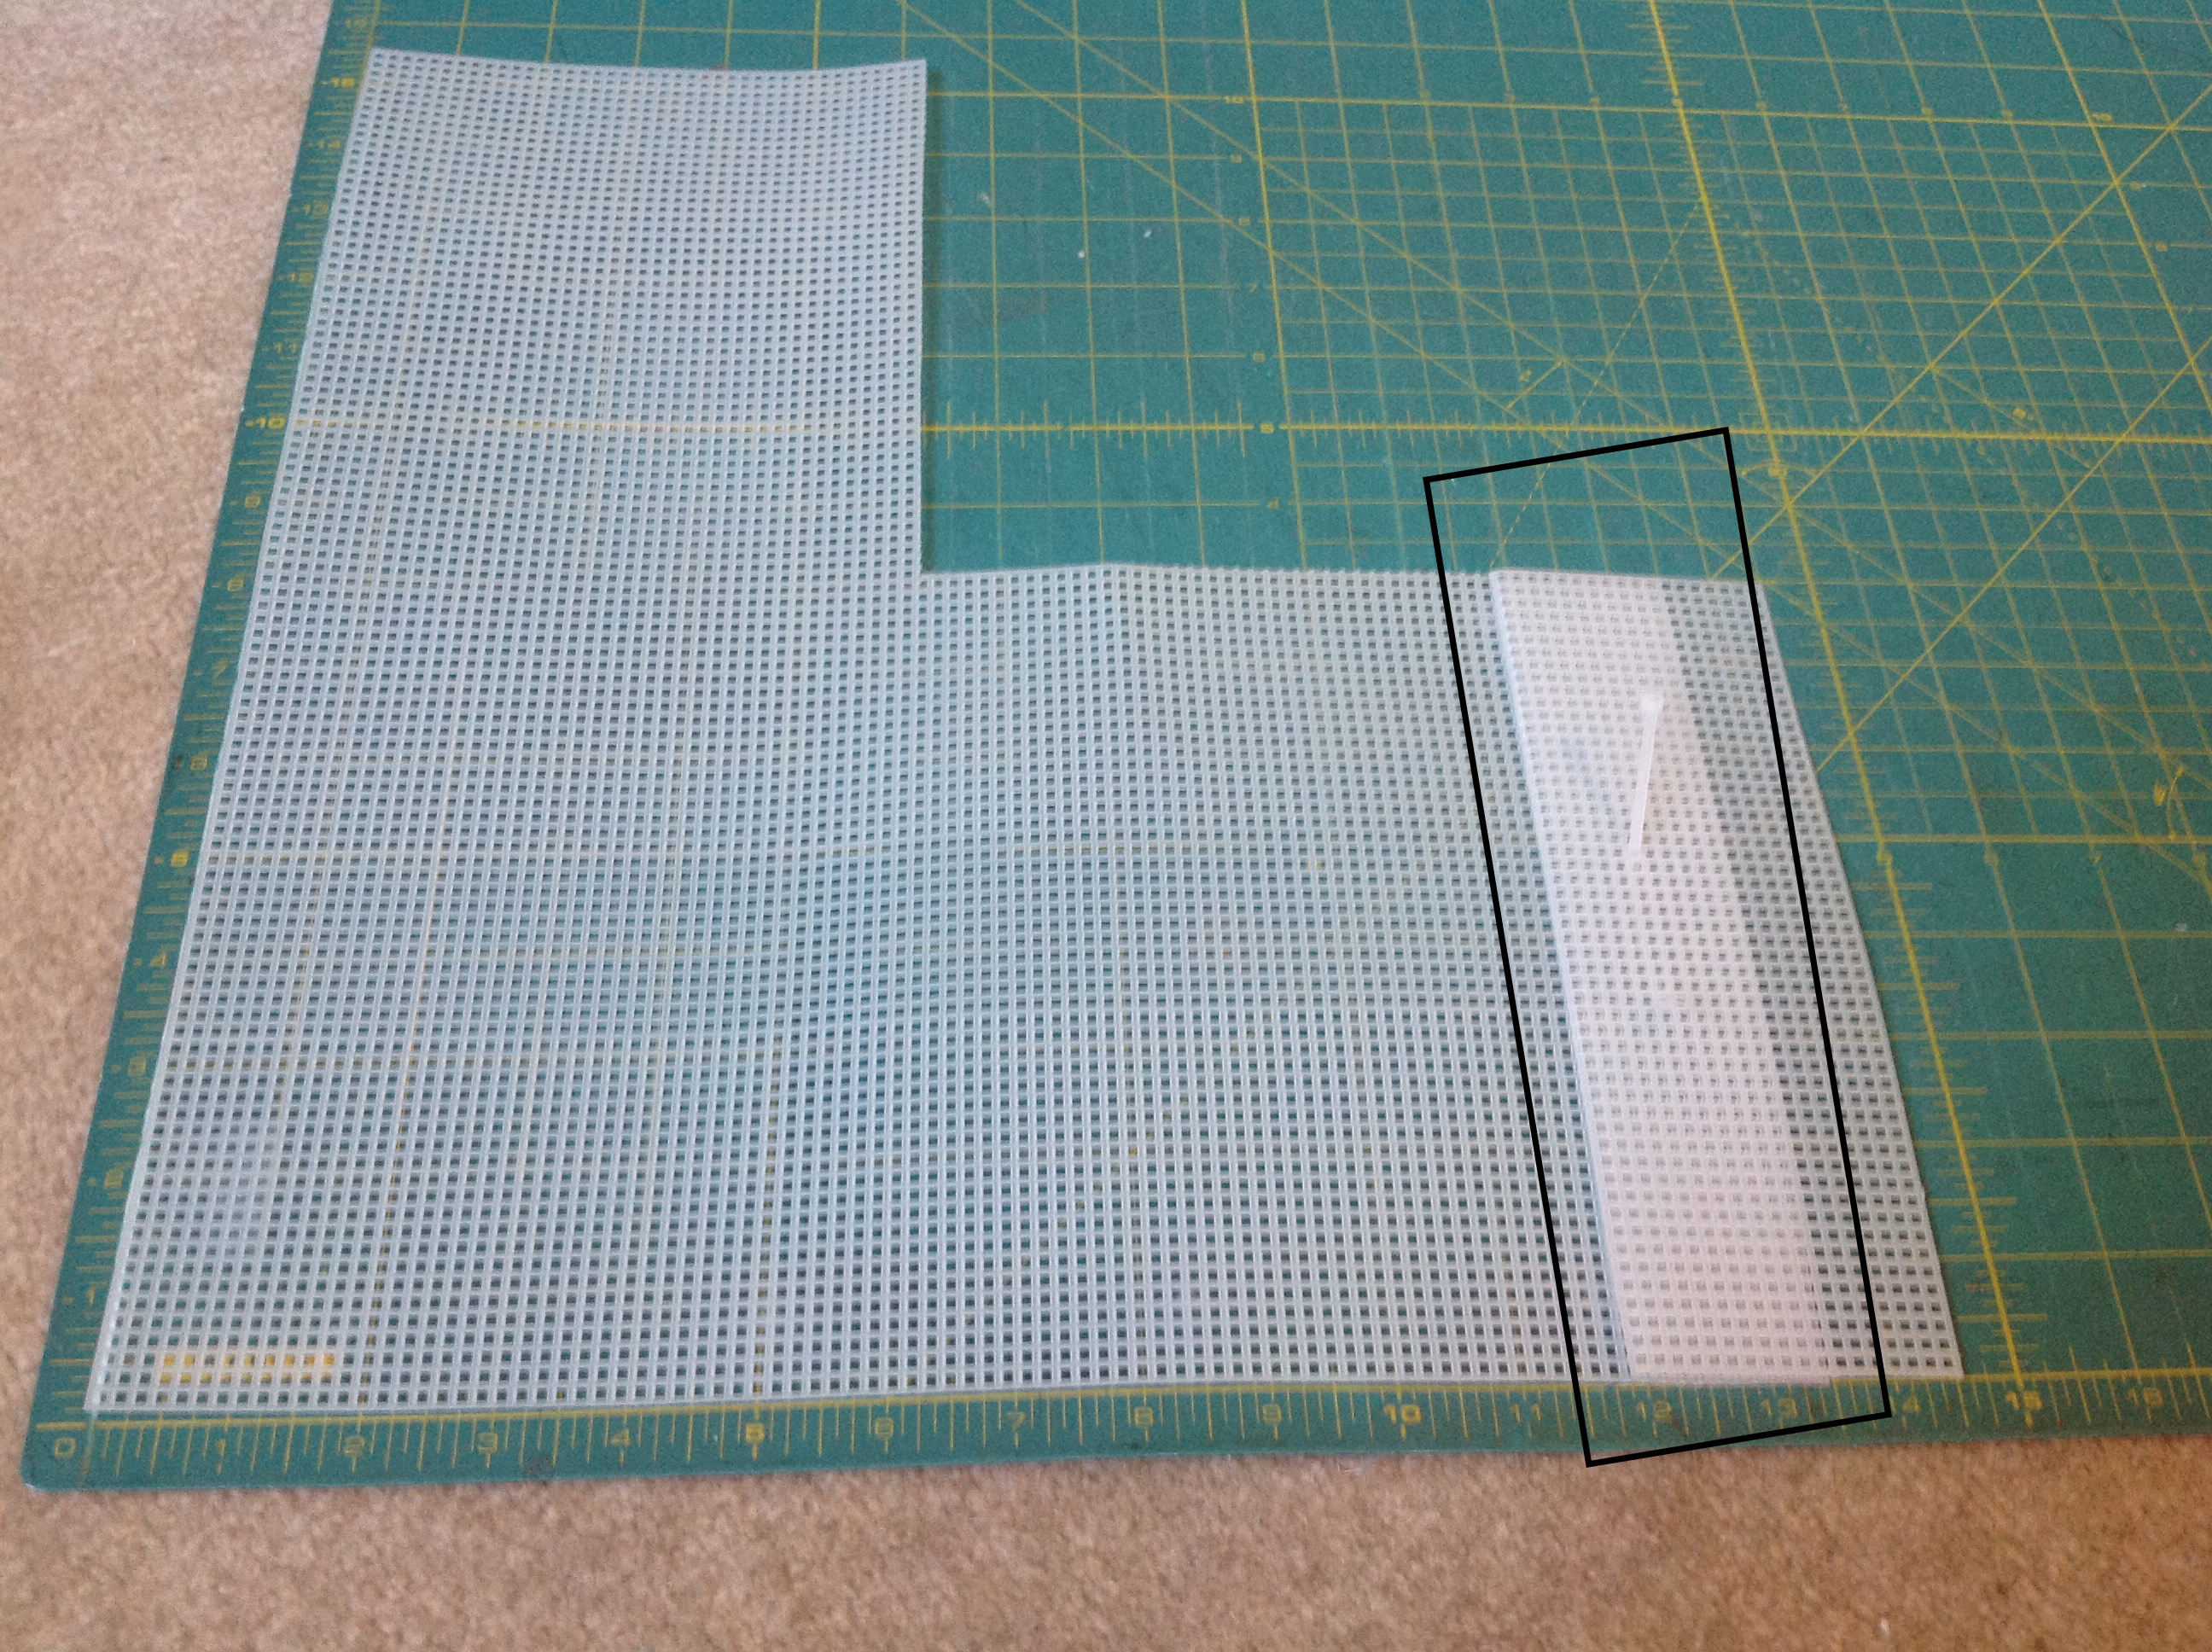
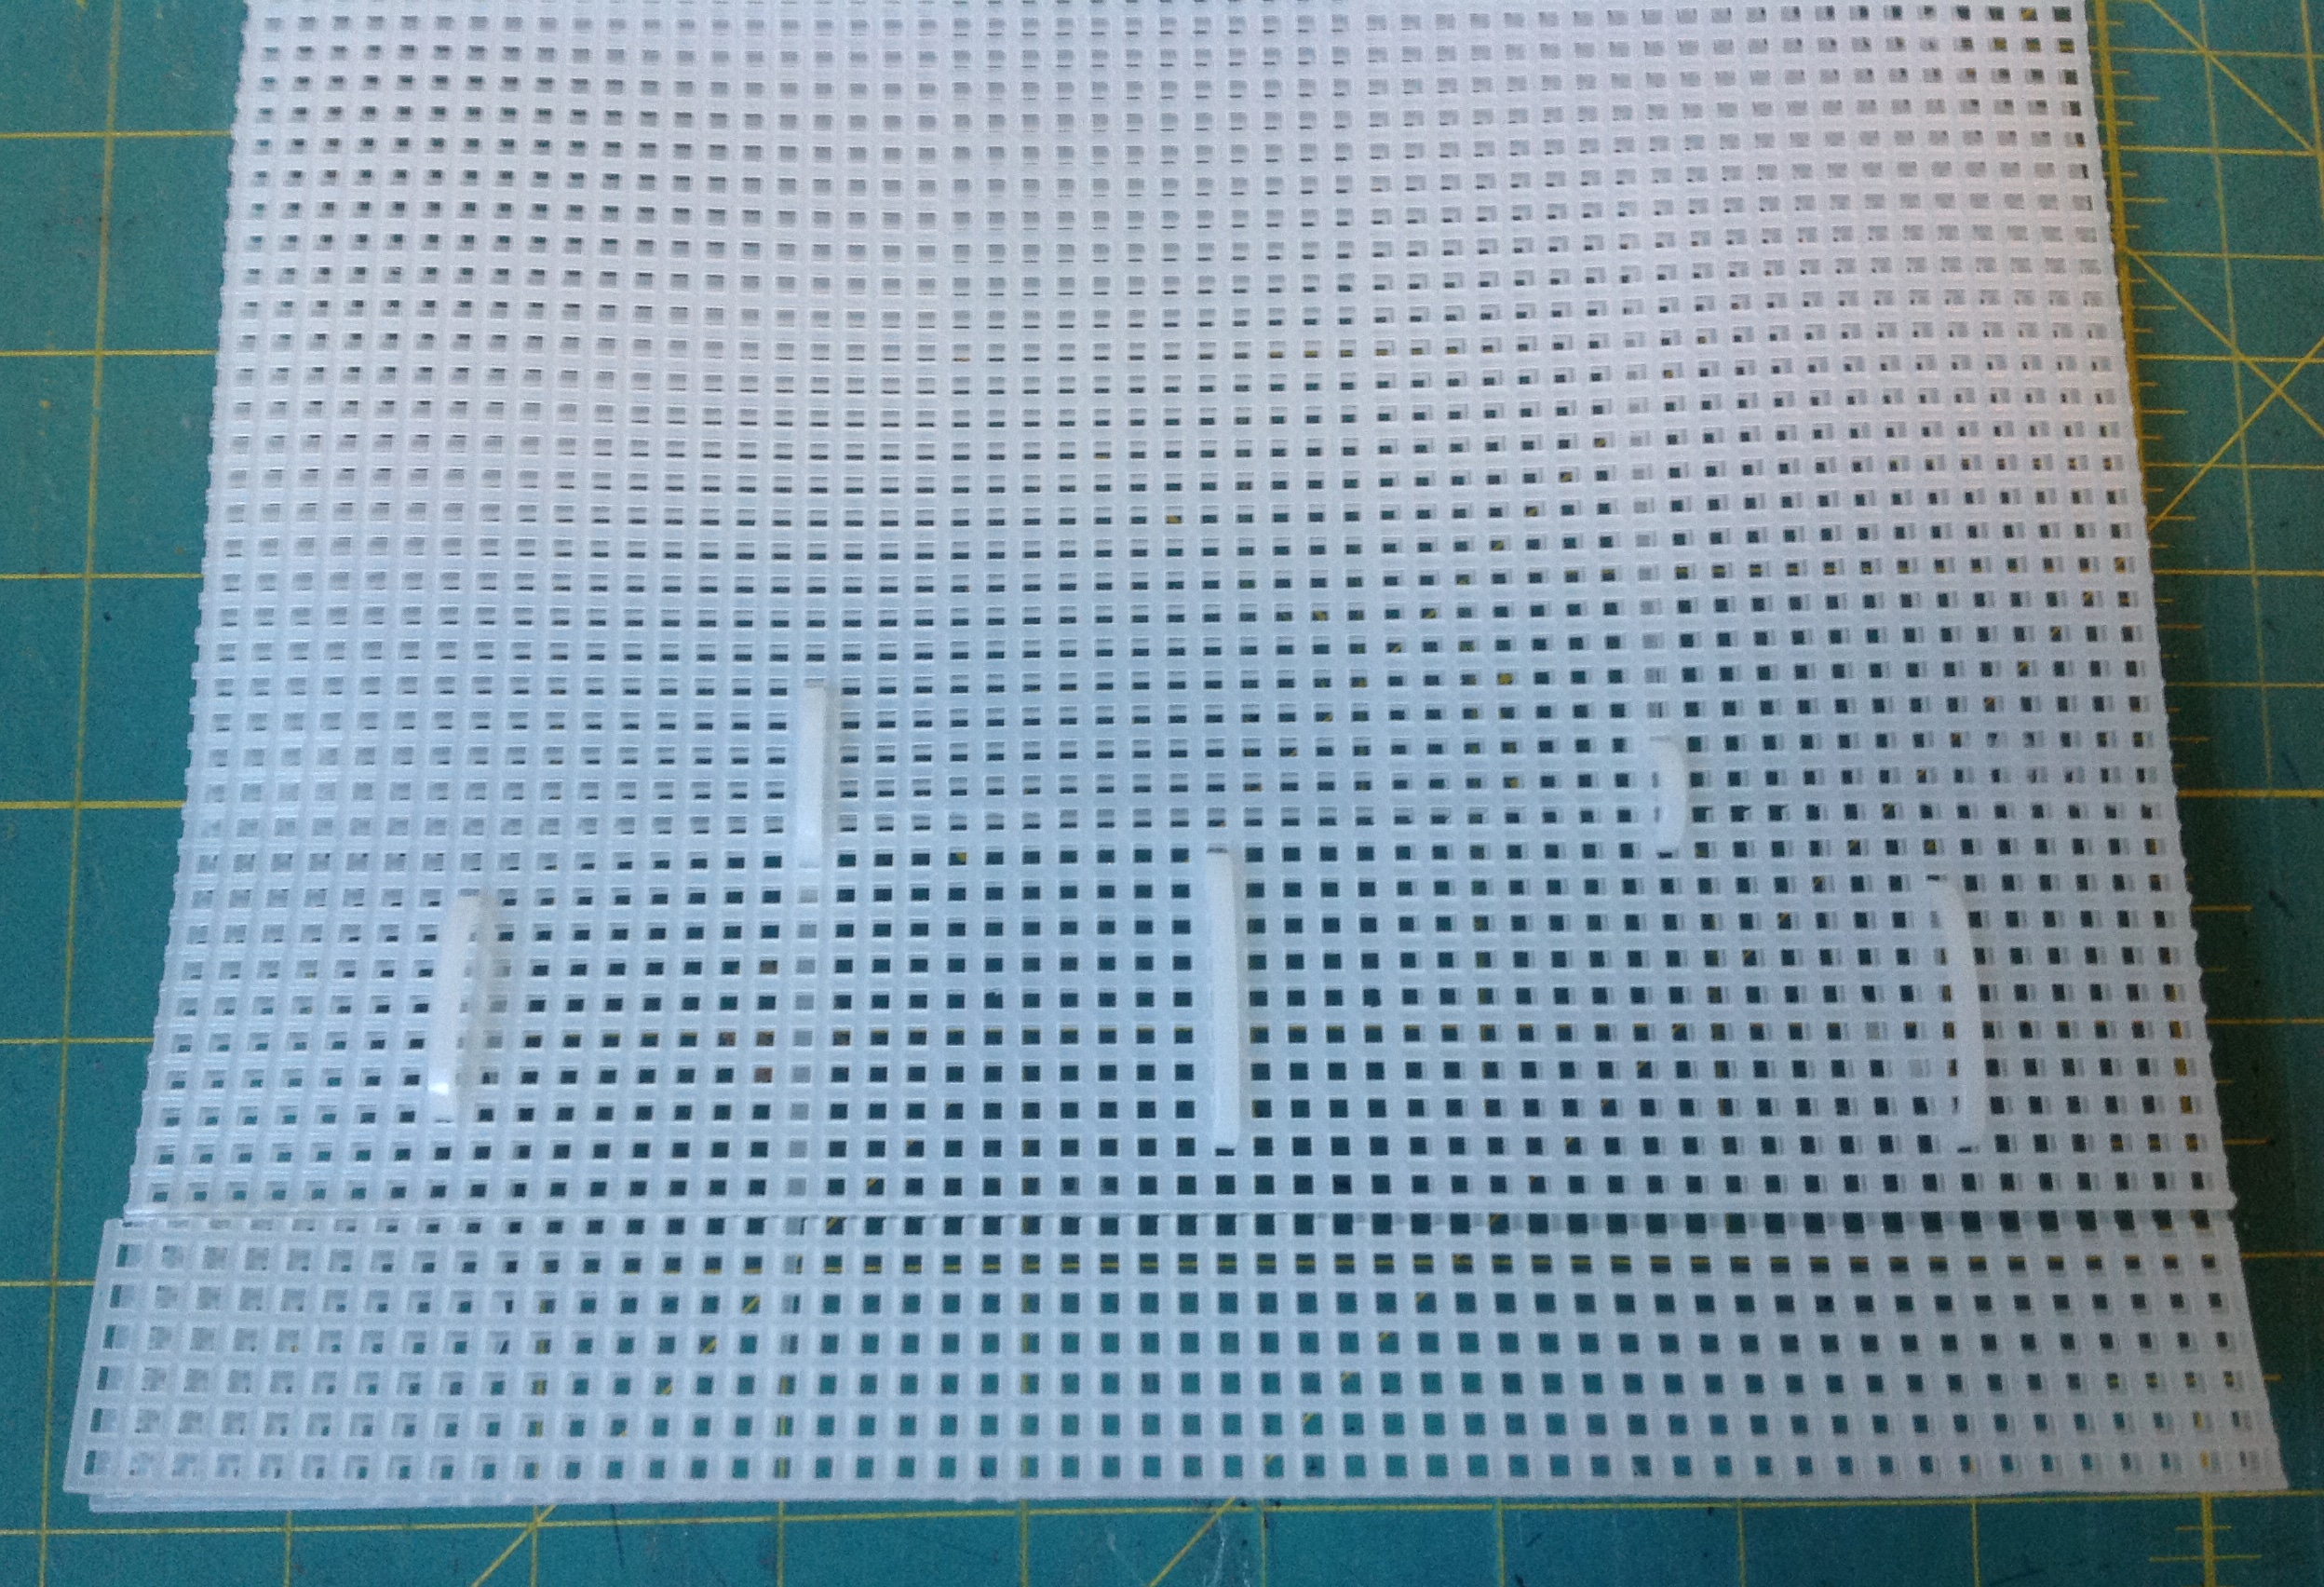
It’s very important as we construct this basket that we keep the holes of pieces we are joining lined up correctly. One of the reasons I like using the cable ties is that I can thread a cable tie through 2 holes in the same row and that holds the canvas sheet together while I working with them. It may be a little hard to see but that is what I did to hold these overlapping pieces together until I can get them secured.
If you are only using 3 sheets – repeat these steps on the other Side Panel and scroll down to the section titled “Add the Front Panel”. If you are using 5 sheets of plastic canvas, read on!
It’s important to note that we want the cable tie locks (the part you slip the end of the cable tie into) to be on the INSIDE of the basket. If the cable tie locks end up on the outside of the basket, you will be able to see them through the fabric. Keep this in mind as you are constructing your basket.
Repeat this overlapping step with the other on the other Side Panel piece.
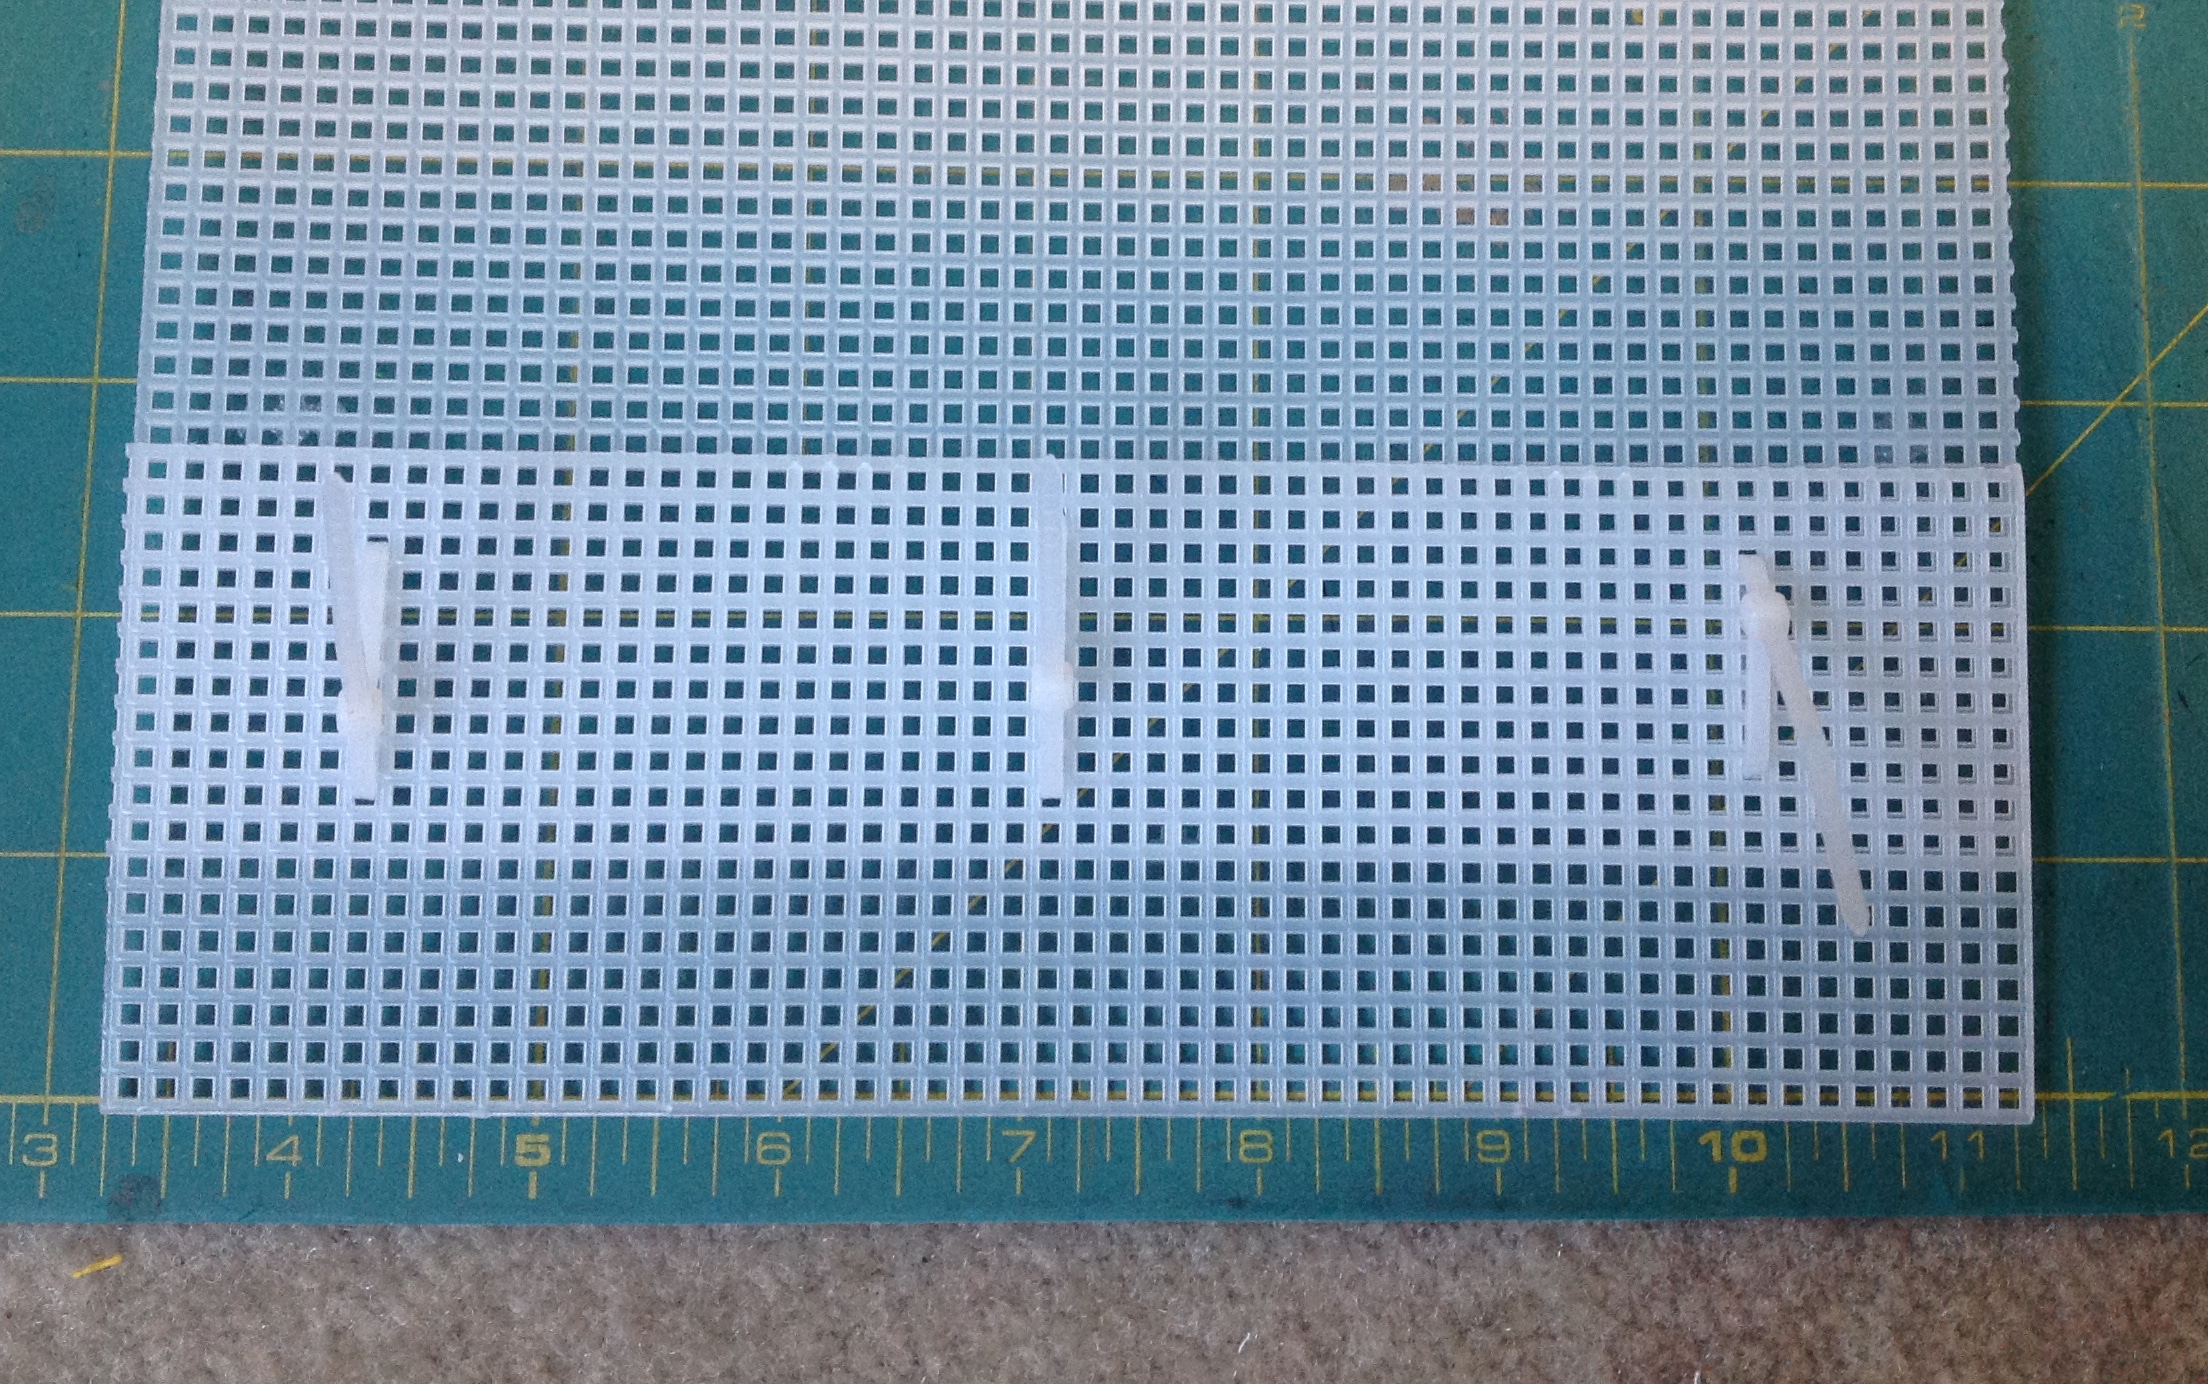
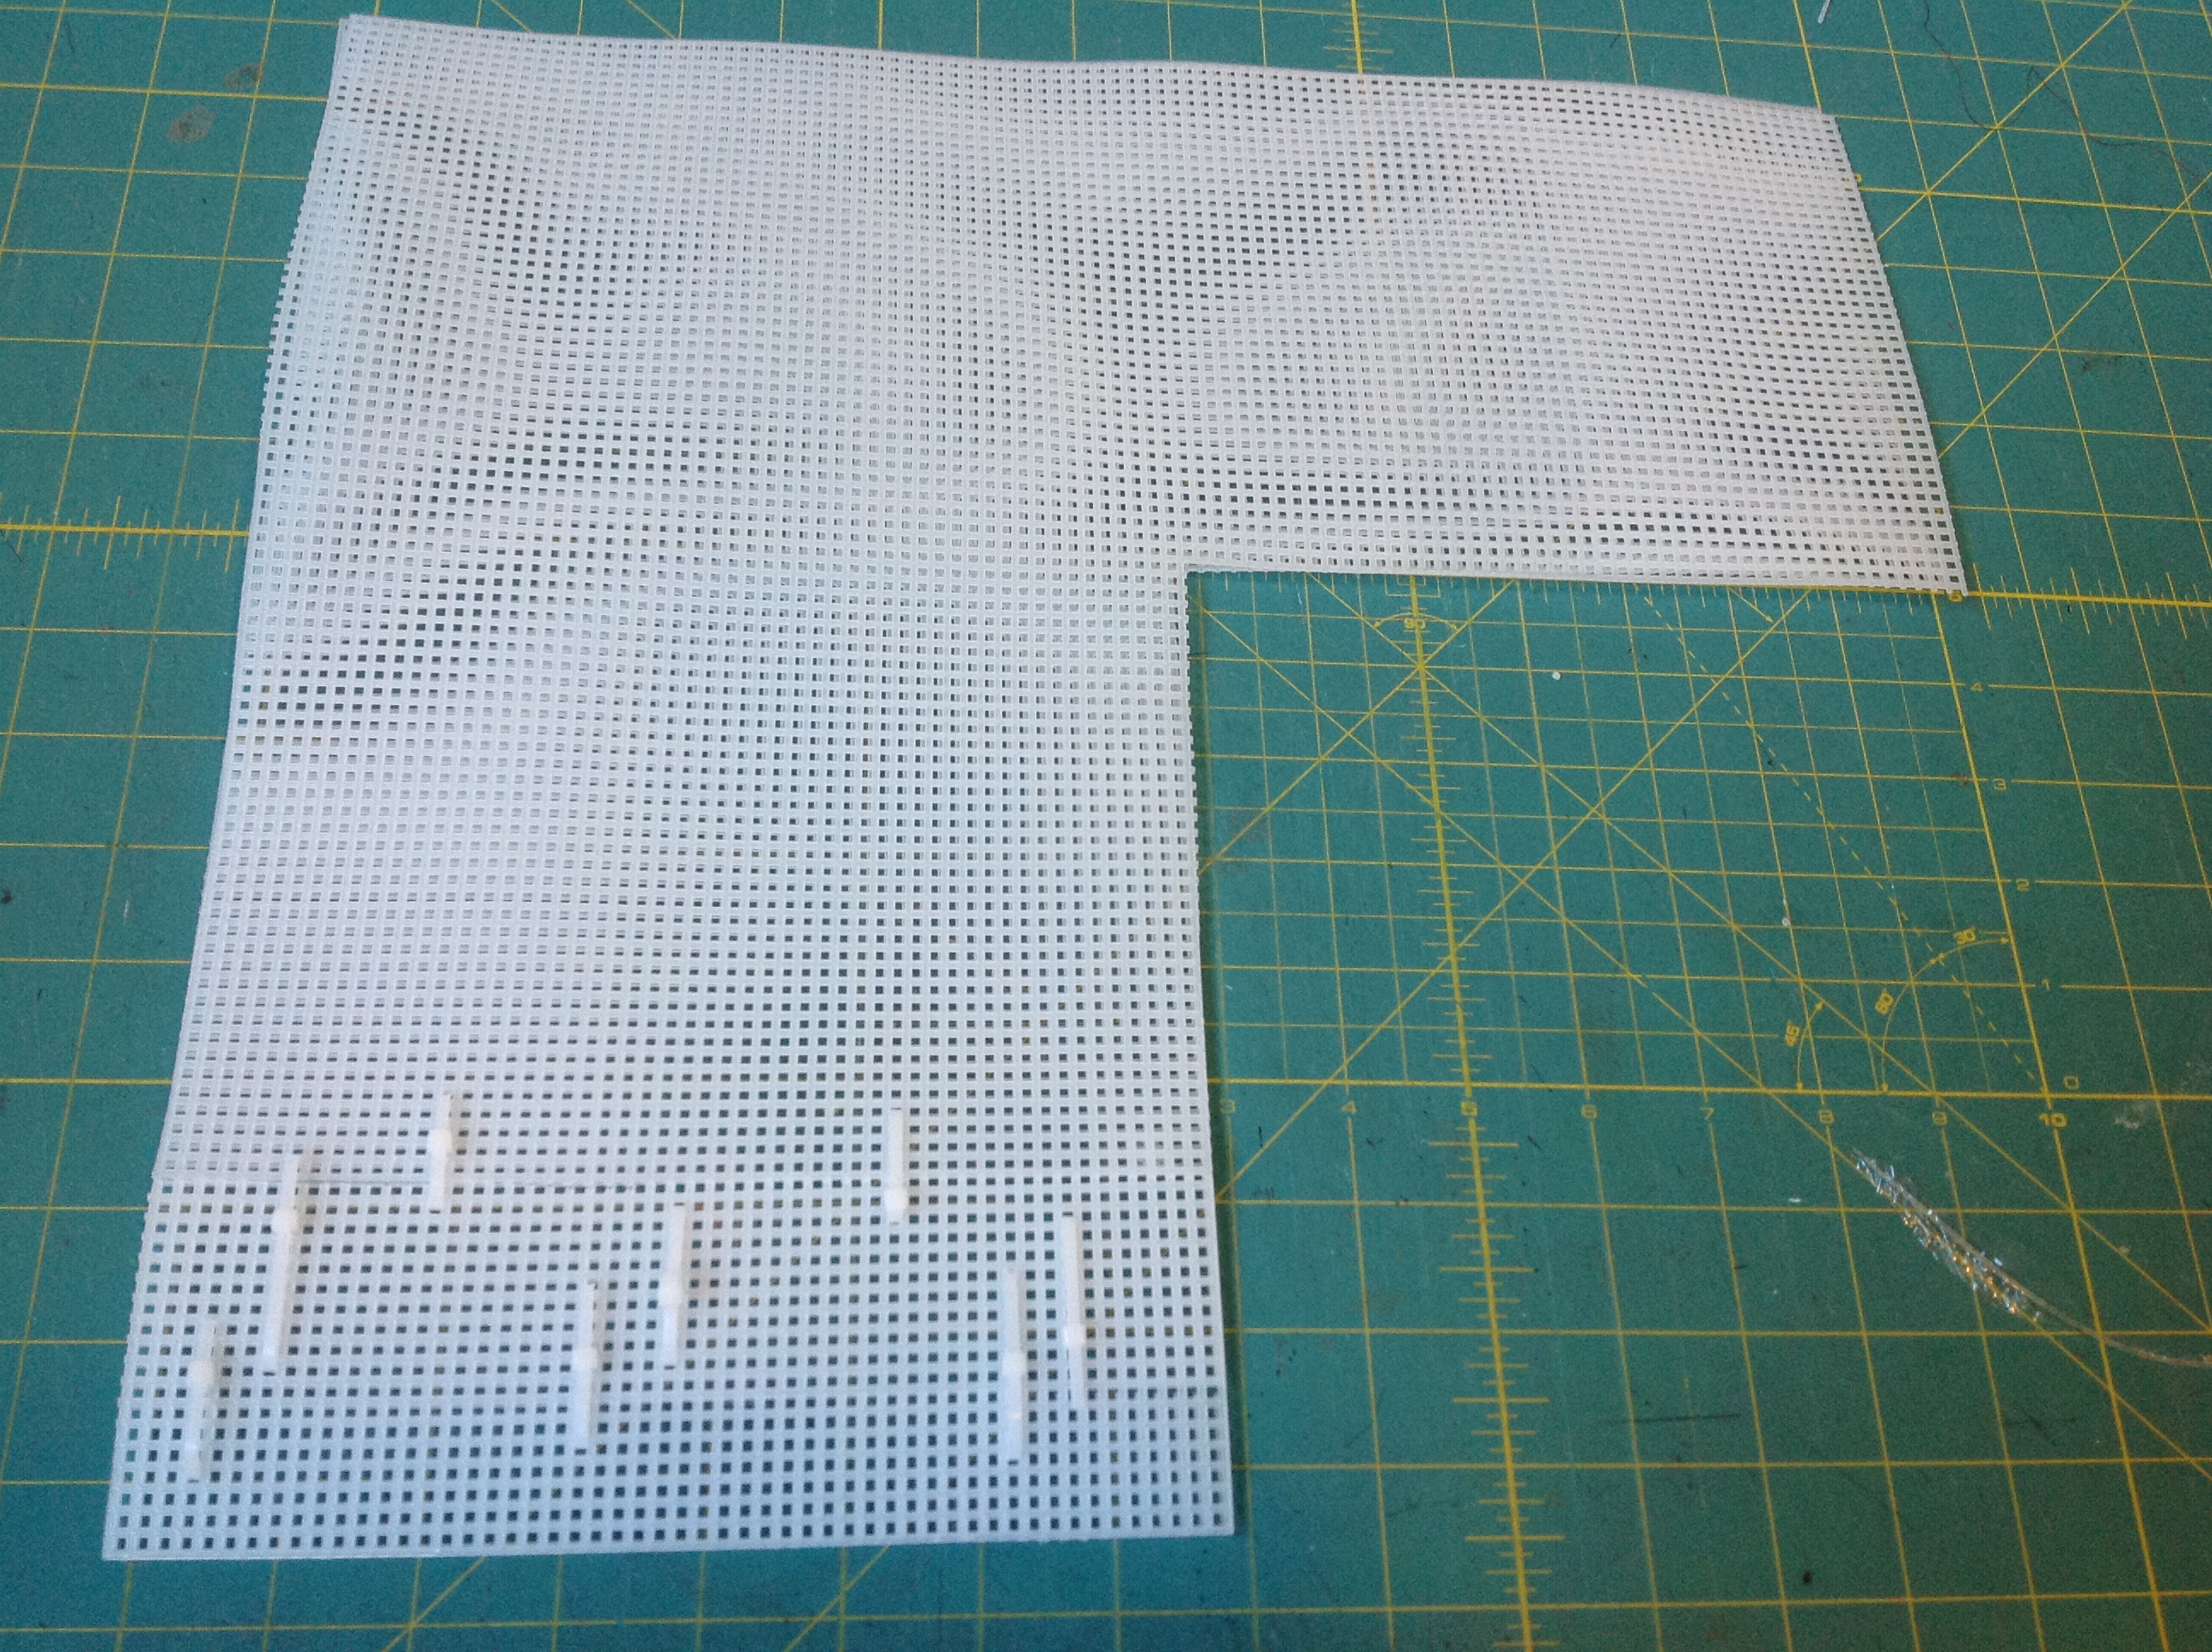
Now, if you are using 5 sheets of plastic canvas like I am, you will add another layer to these side panels. So, lay one of your side panels down so that the small overlap piece (Q) is facing up. Lay a second side panel down on top and align all the edges (holes). You’ll notice this piece is too long, since we added the overlapping piece. (you can see in the photo that I have folded up the portion that is too long). 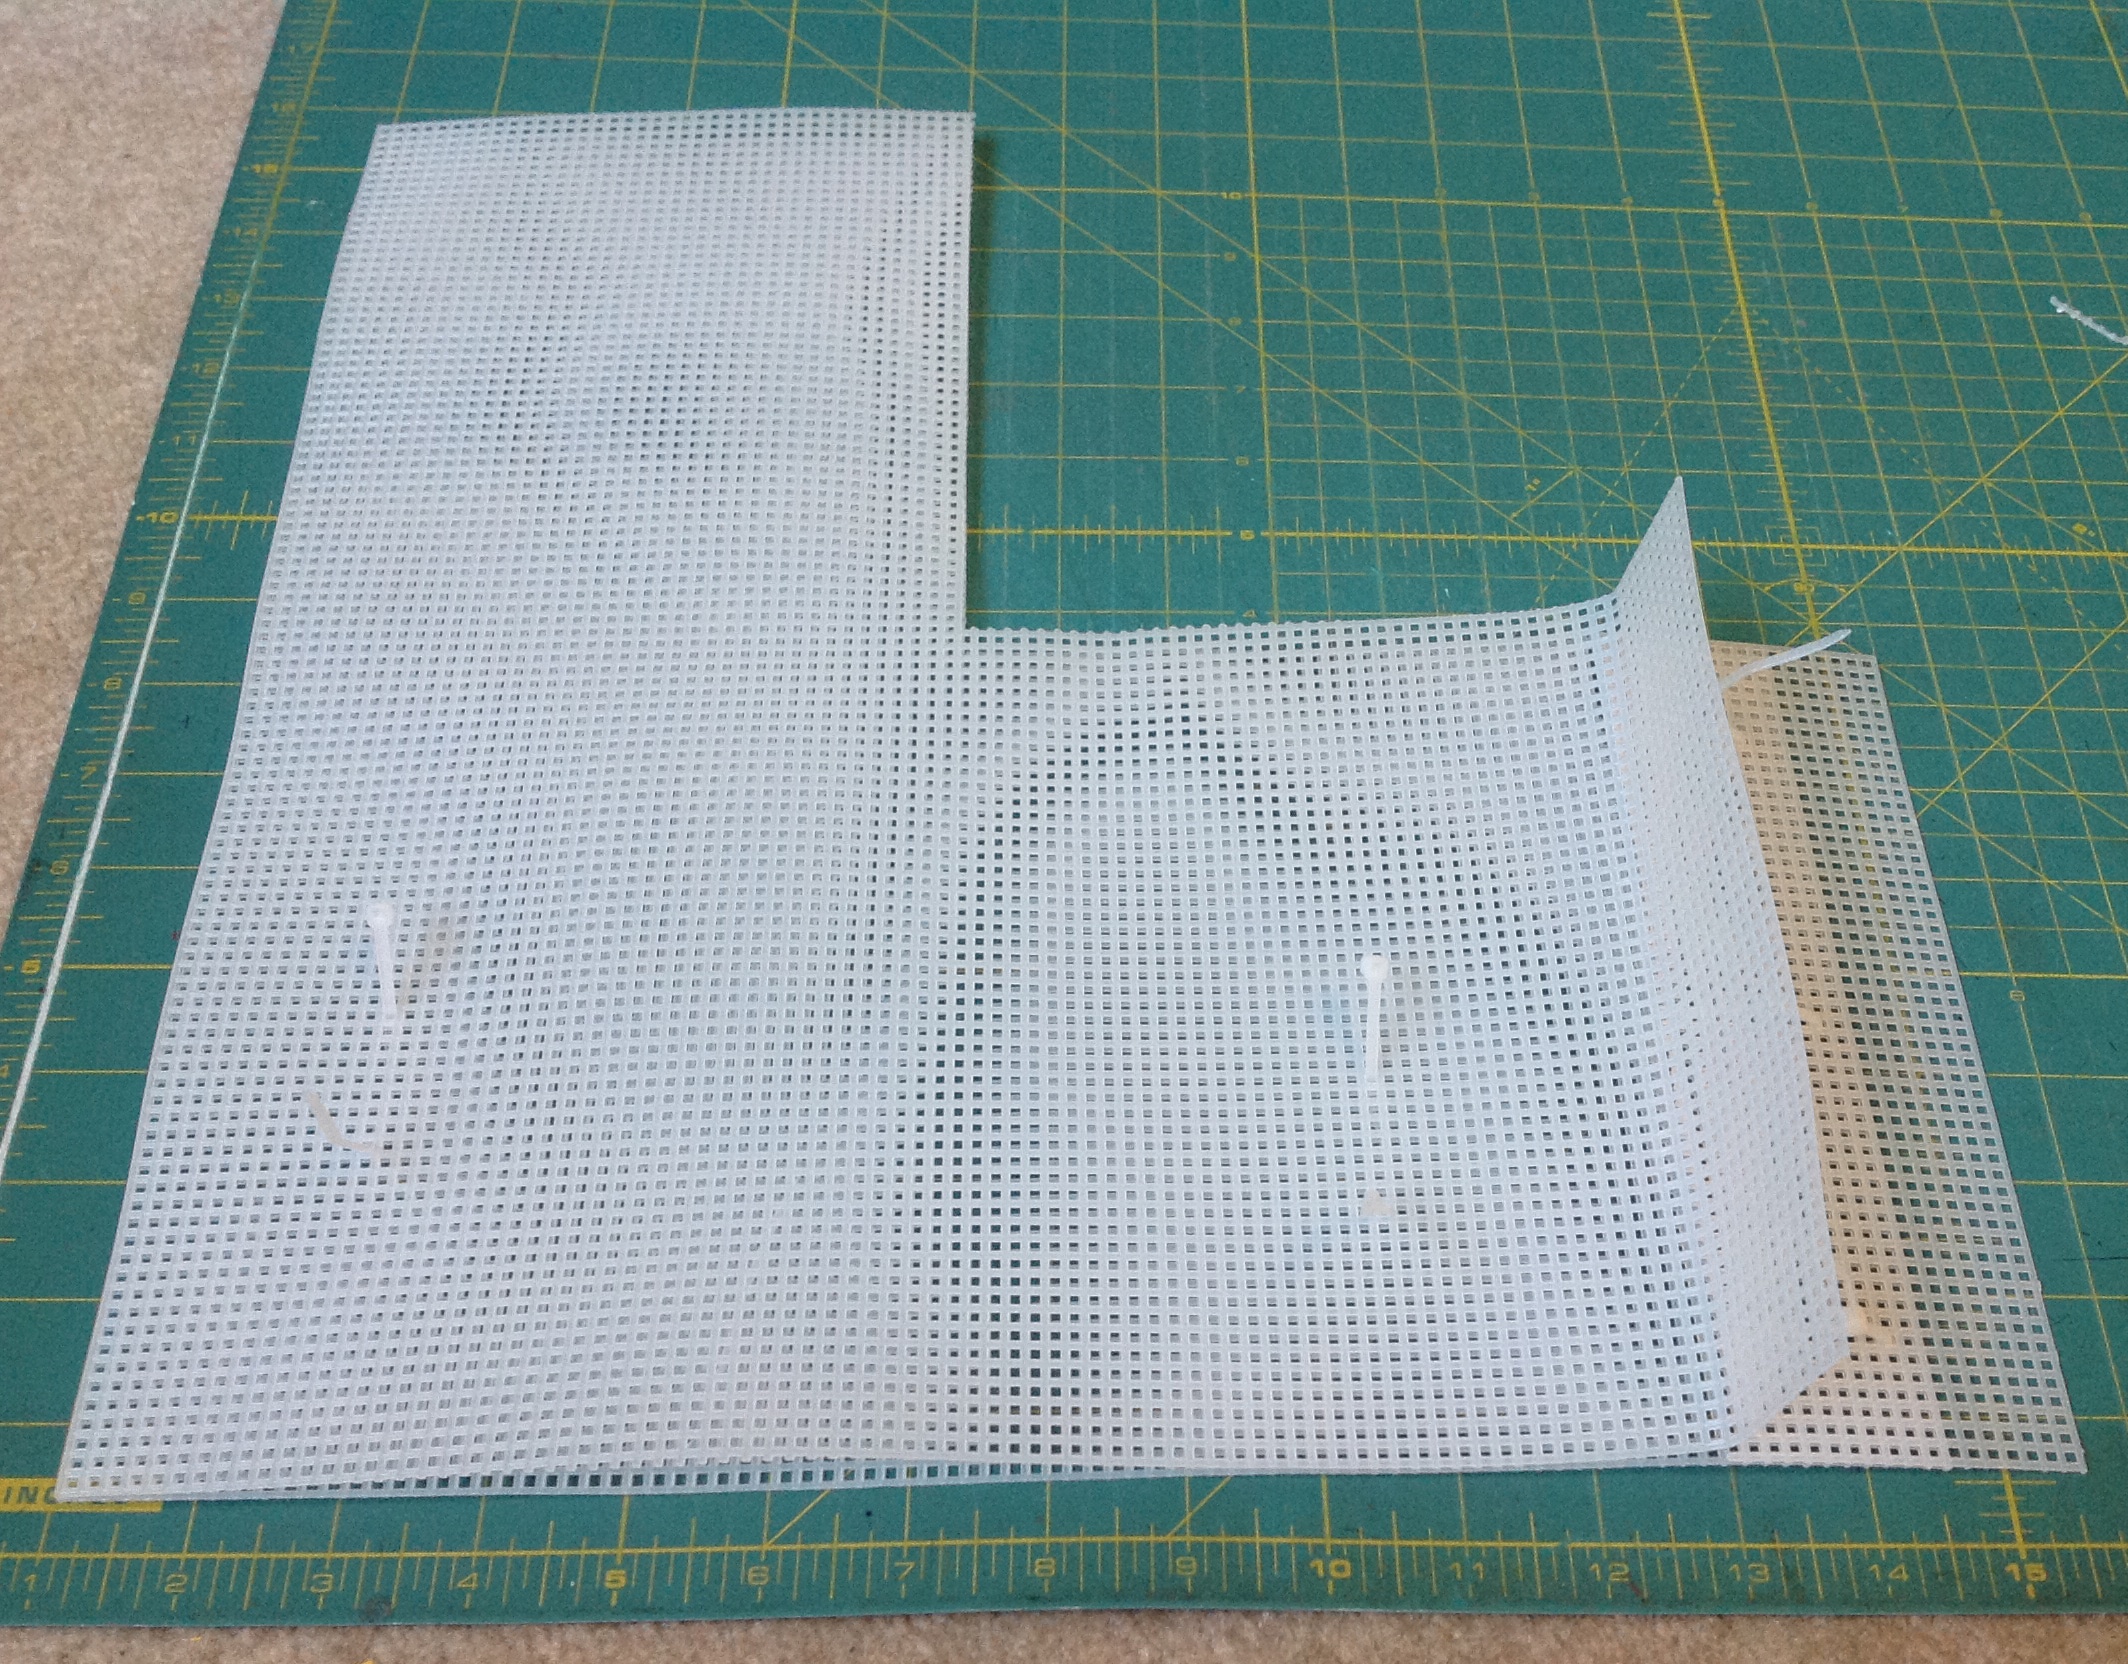
Determine how much you need to cut off so that the piece will but up against the overlap piece and cut. Here, we don’t have to worry whether the edge ends up ragged or straight (in fact, it should end up ragged).

Add a few cable ties to secure this new section – the red circle below show this on mine. The cable ties overlap the seam of the panel I just added and the first overlap (Q).
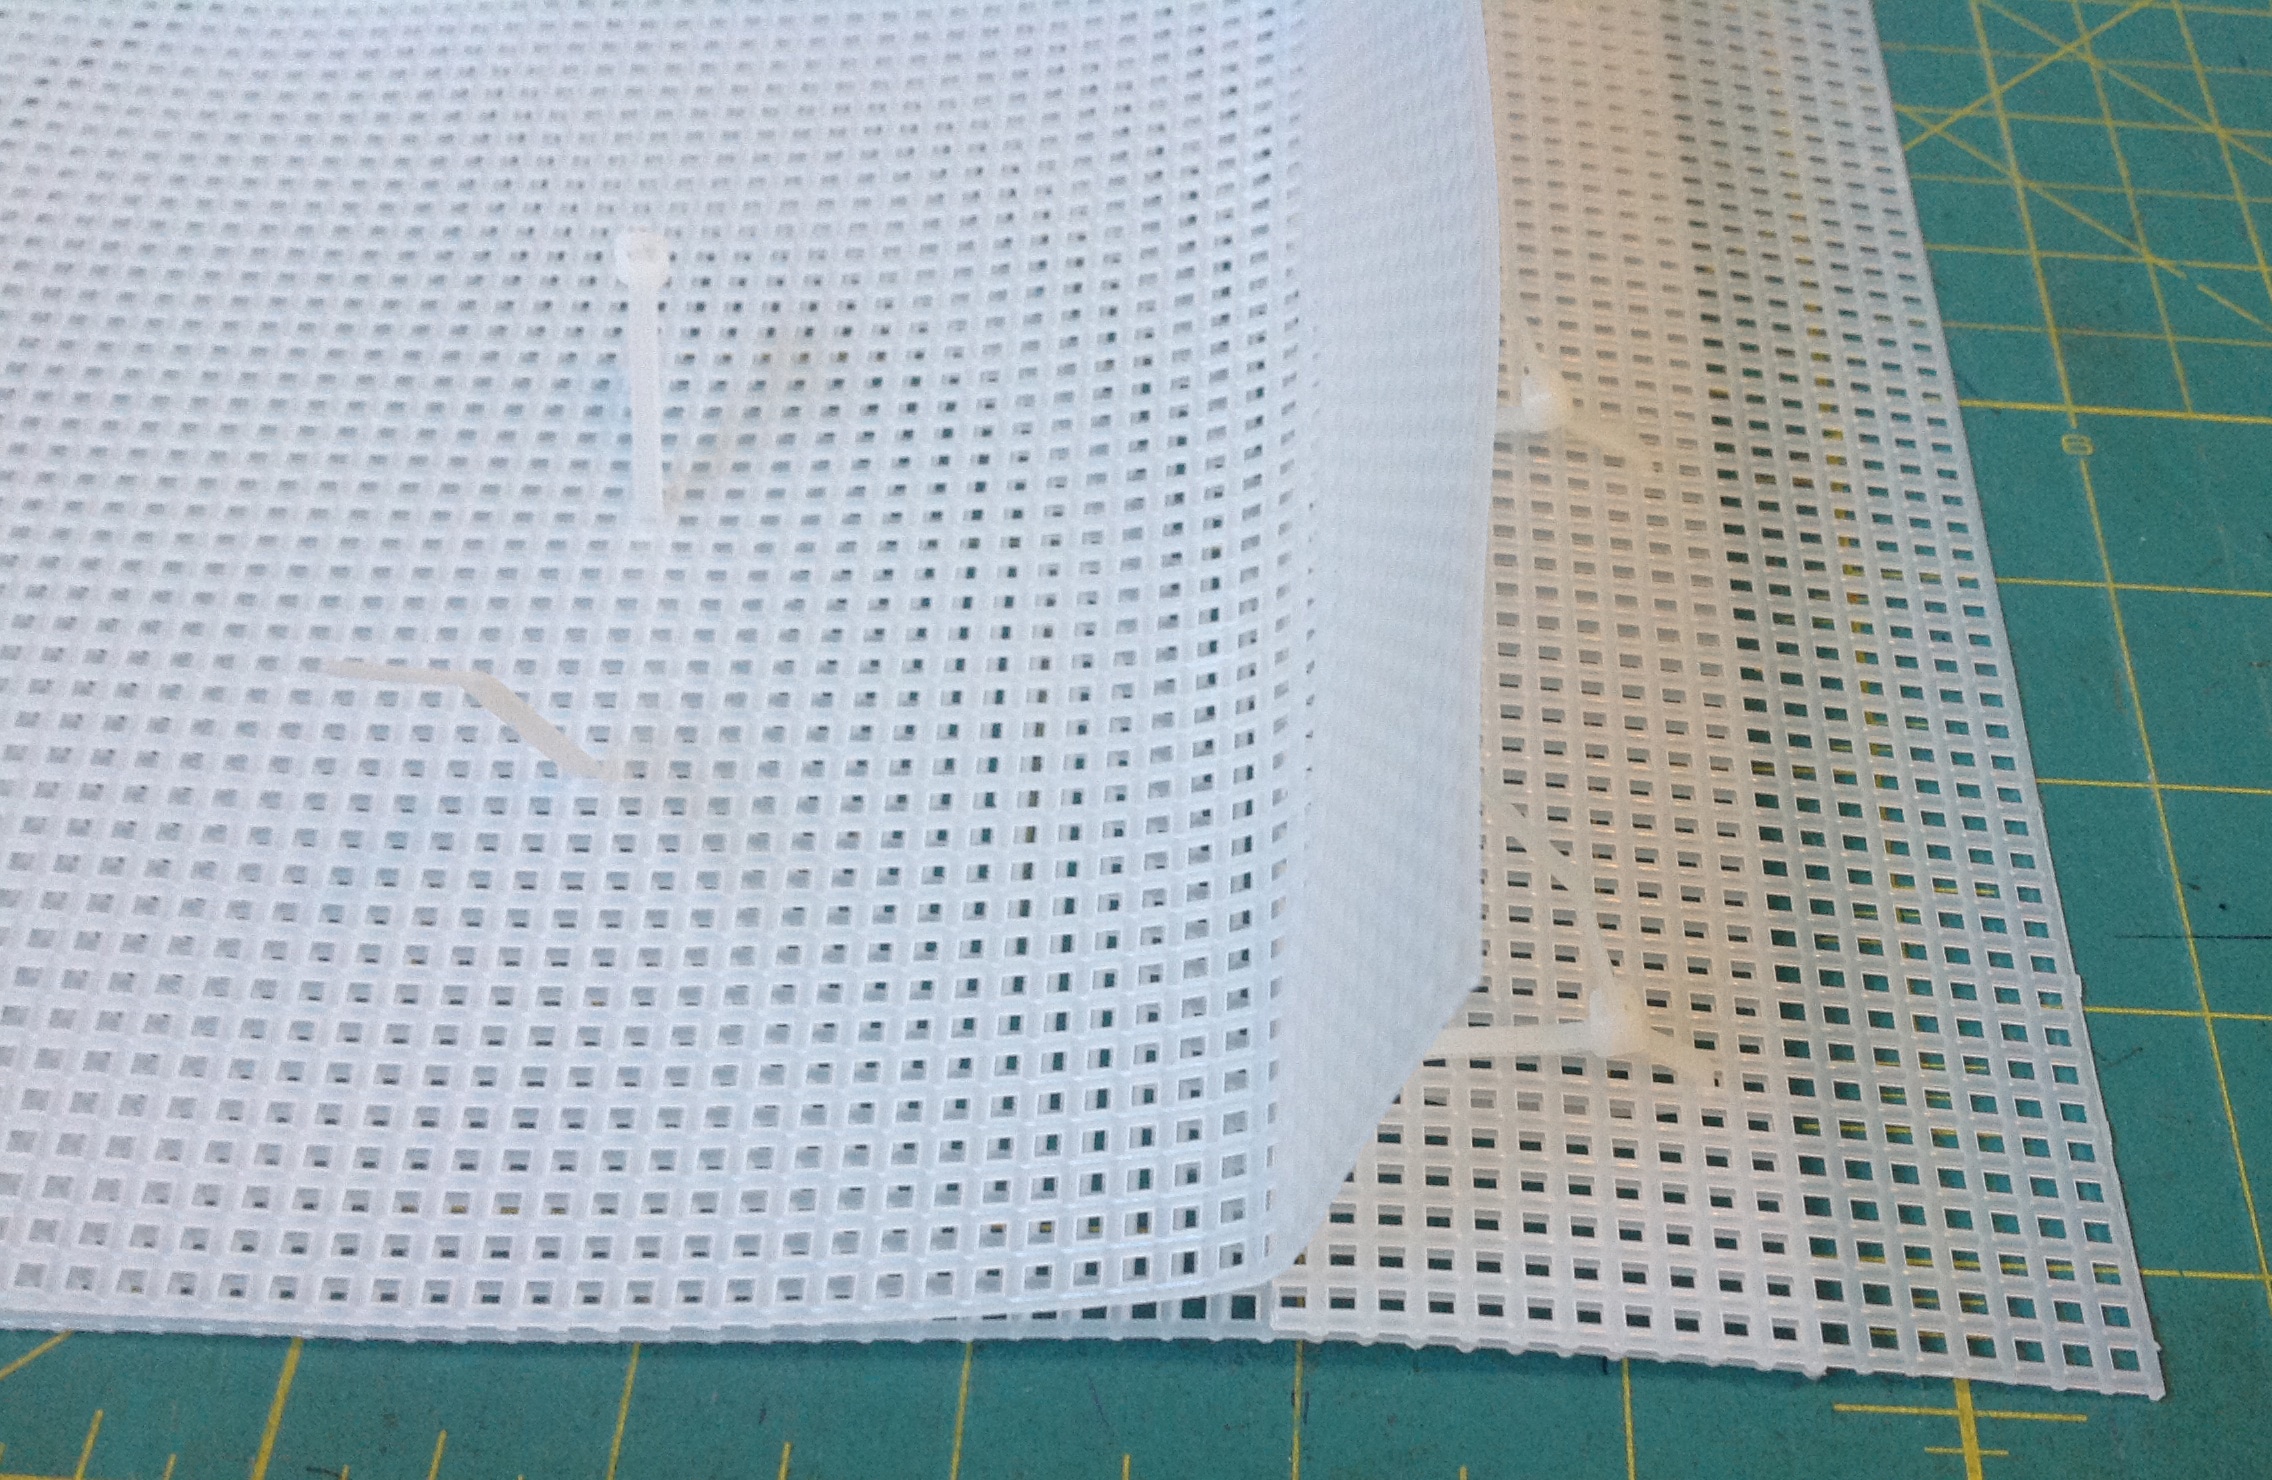
Now, flip the panel over. We need to add another piece to the very bottom edge where there is only one layer of plastic canvas. So grab one of your plastic canvas scraps and cut a piece that will fit this area.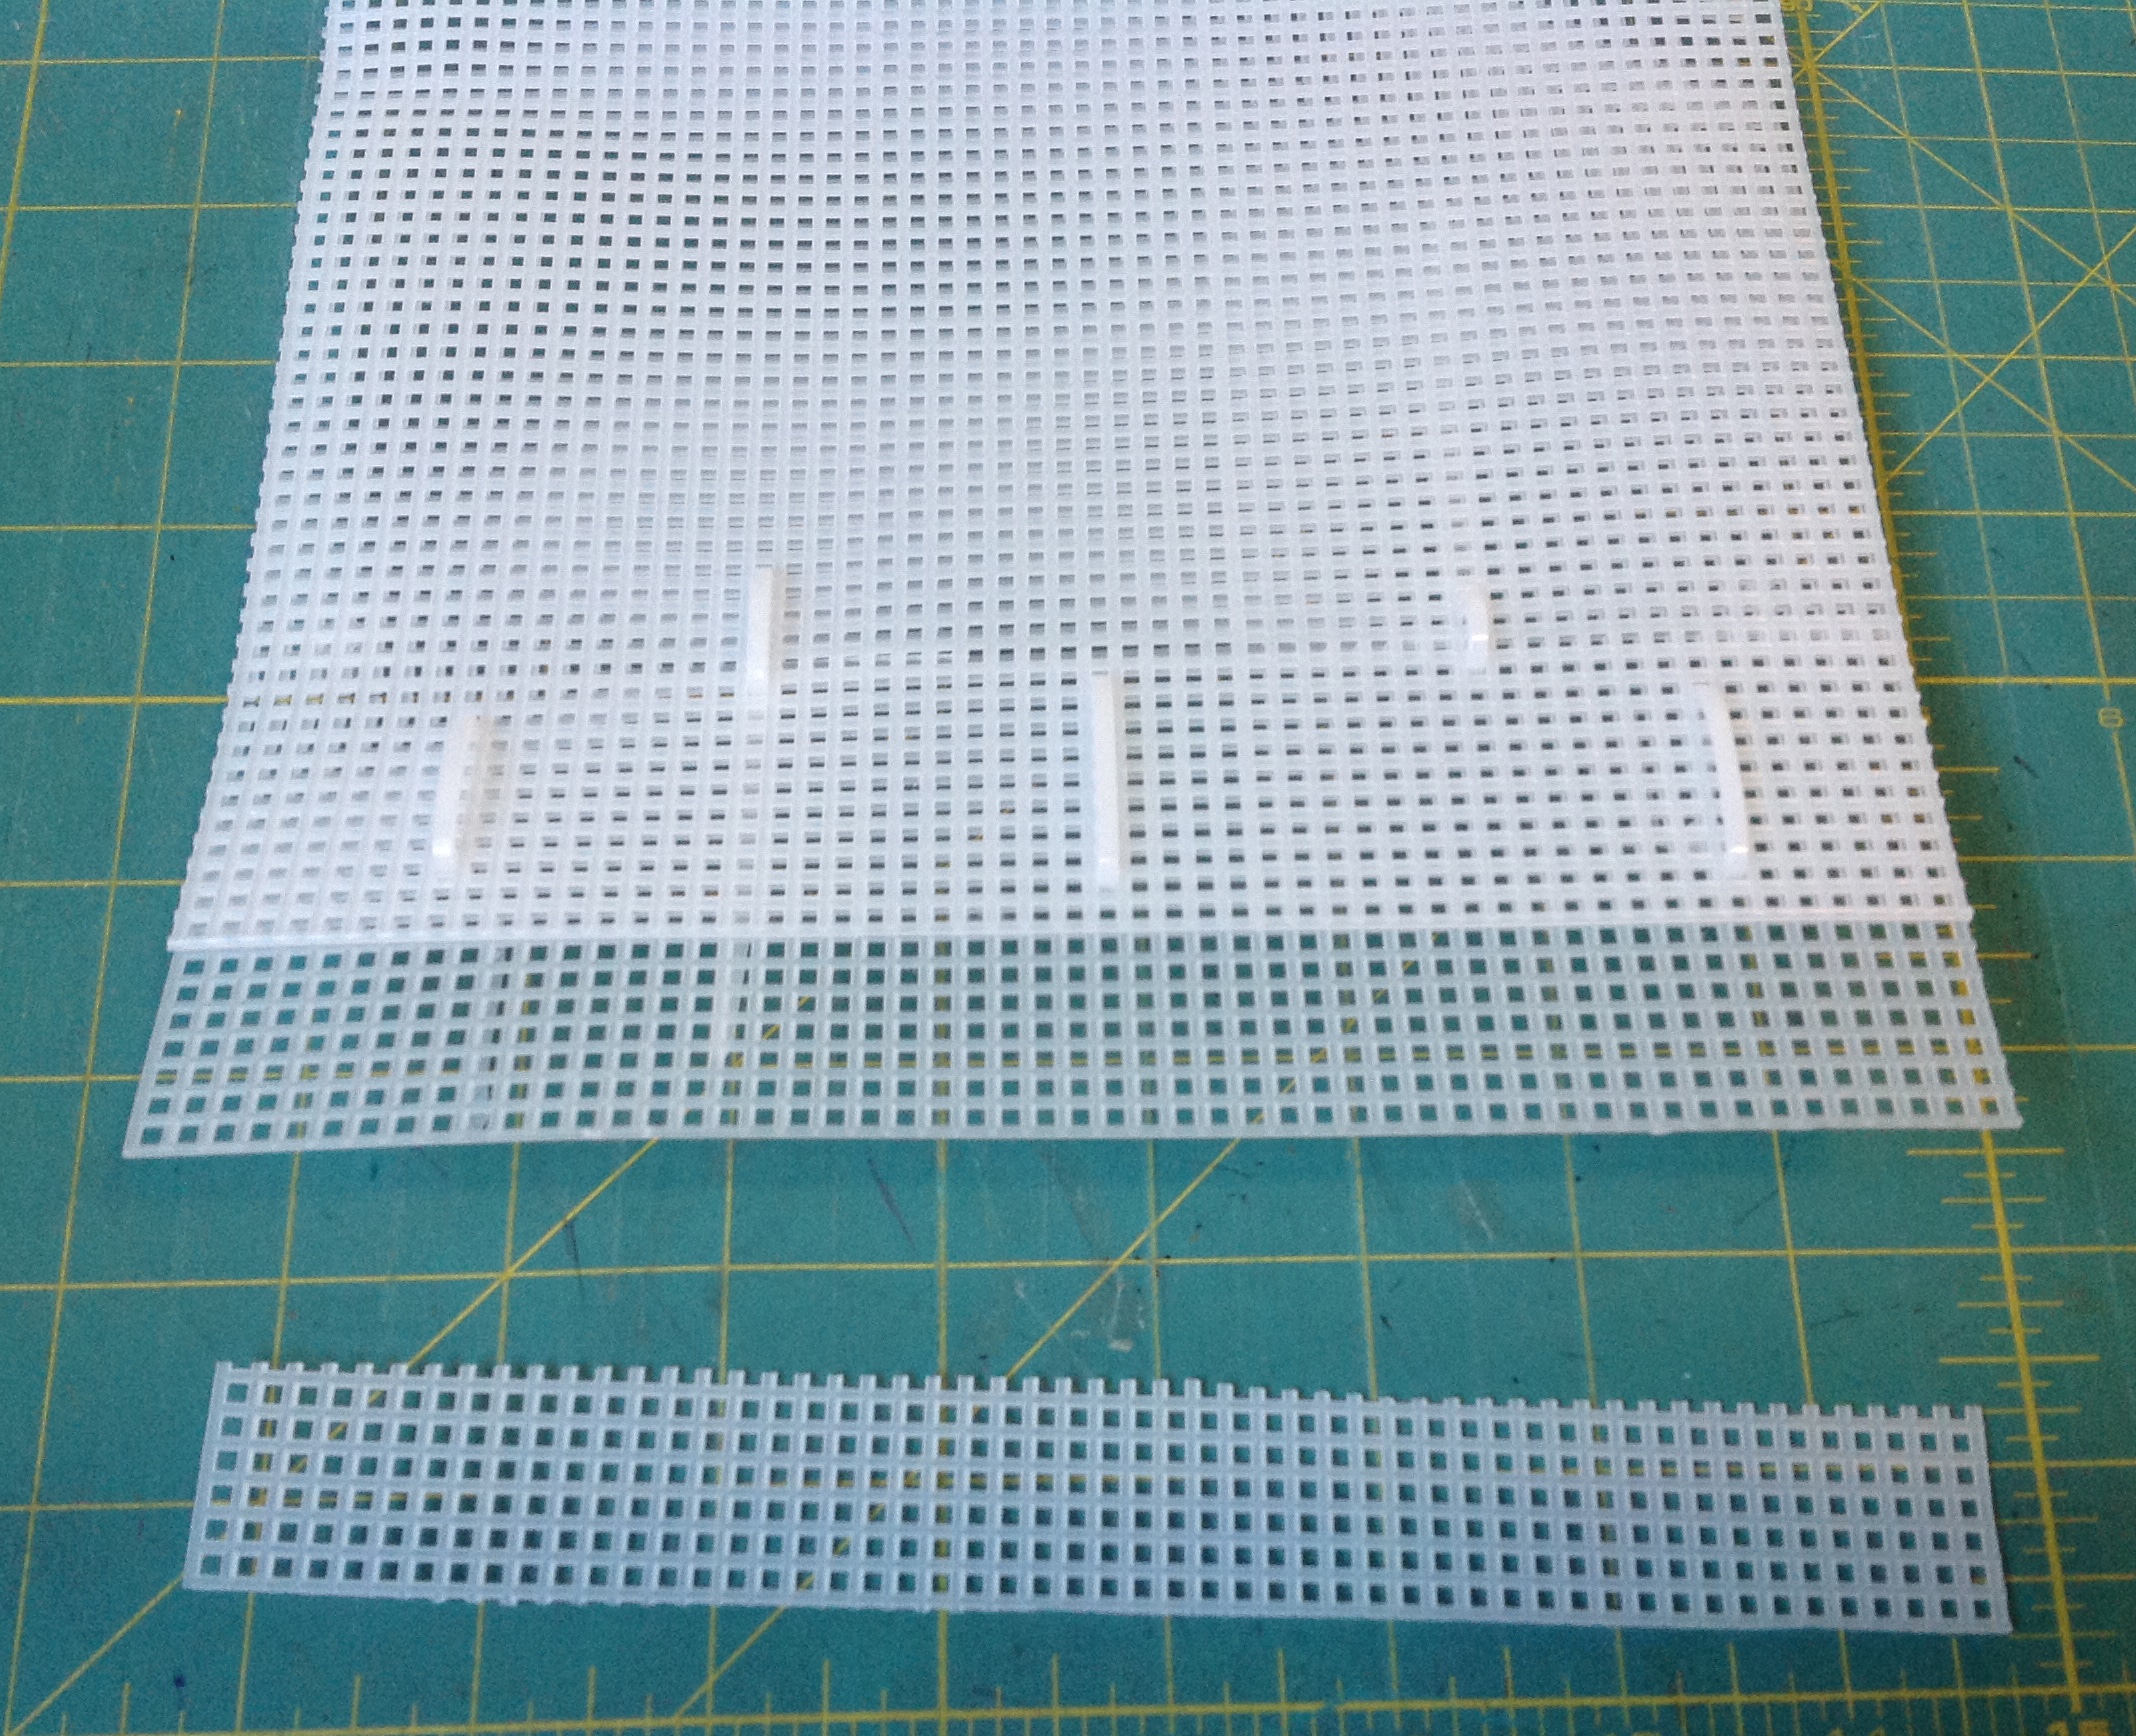
And secure it down as before (be sure to keep your cable tie locks on the same side as the previous ones). Here is my side panel all finished.
If you are following along in the pattern, the next step (page 5 step#4) is to mark and fold the long O panel. I am going to skip this and encourage you to as well. We can be more accurate if we make these folds as we attach the panel.
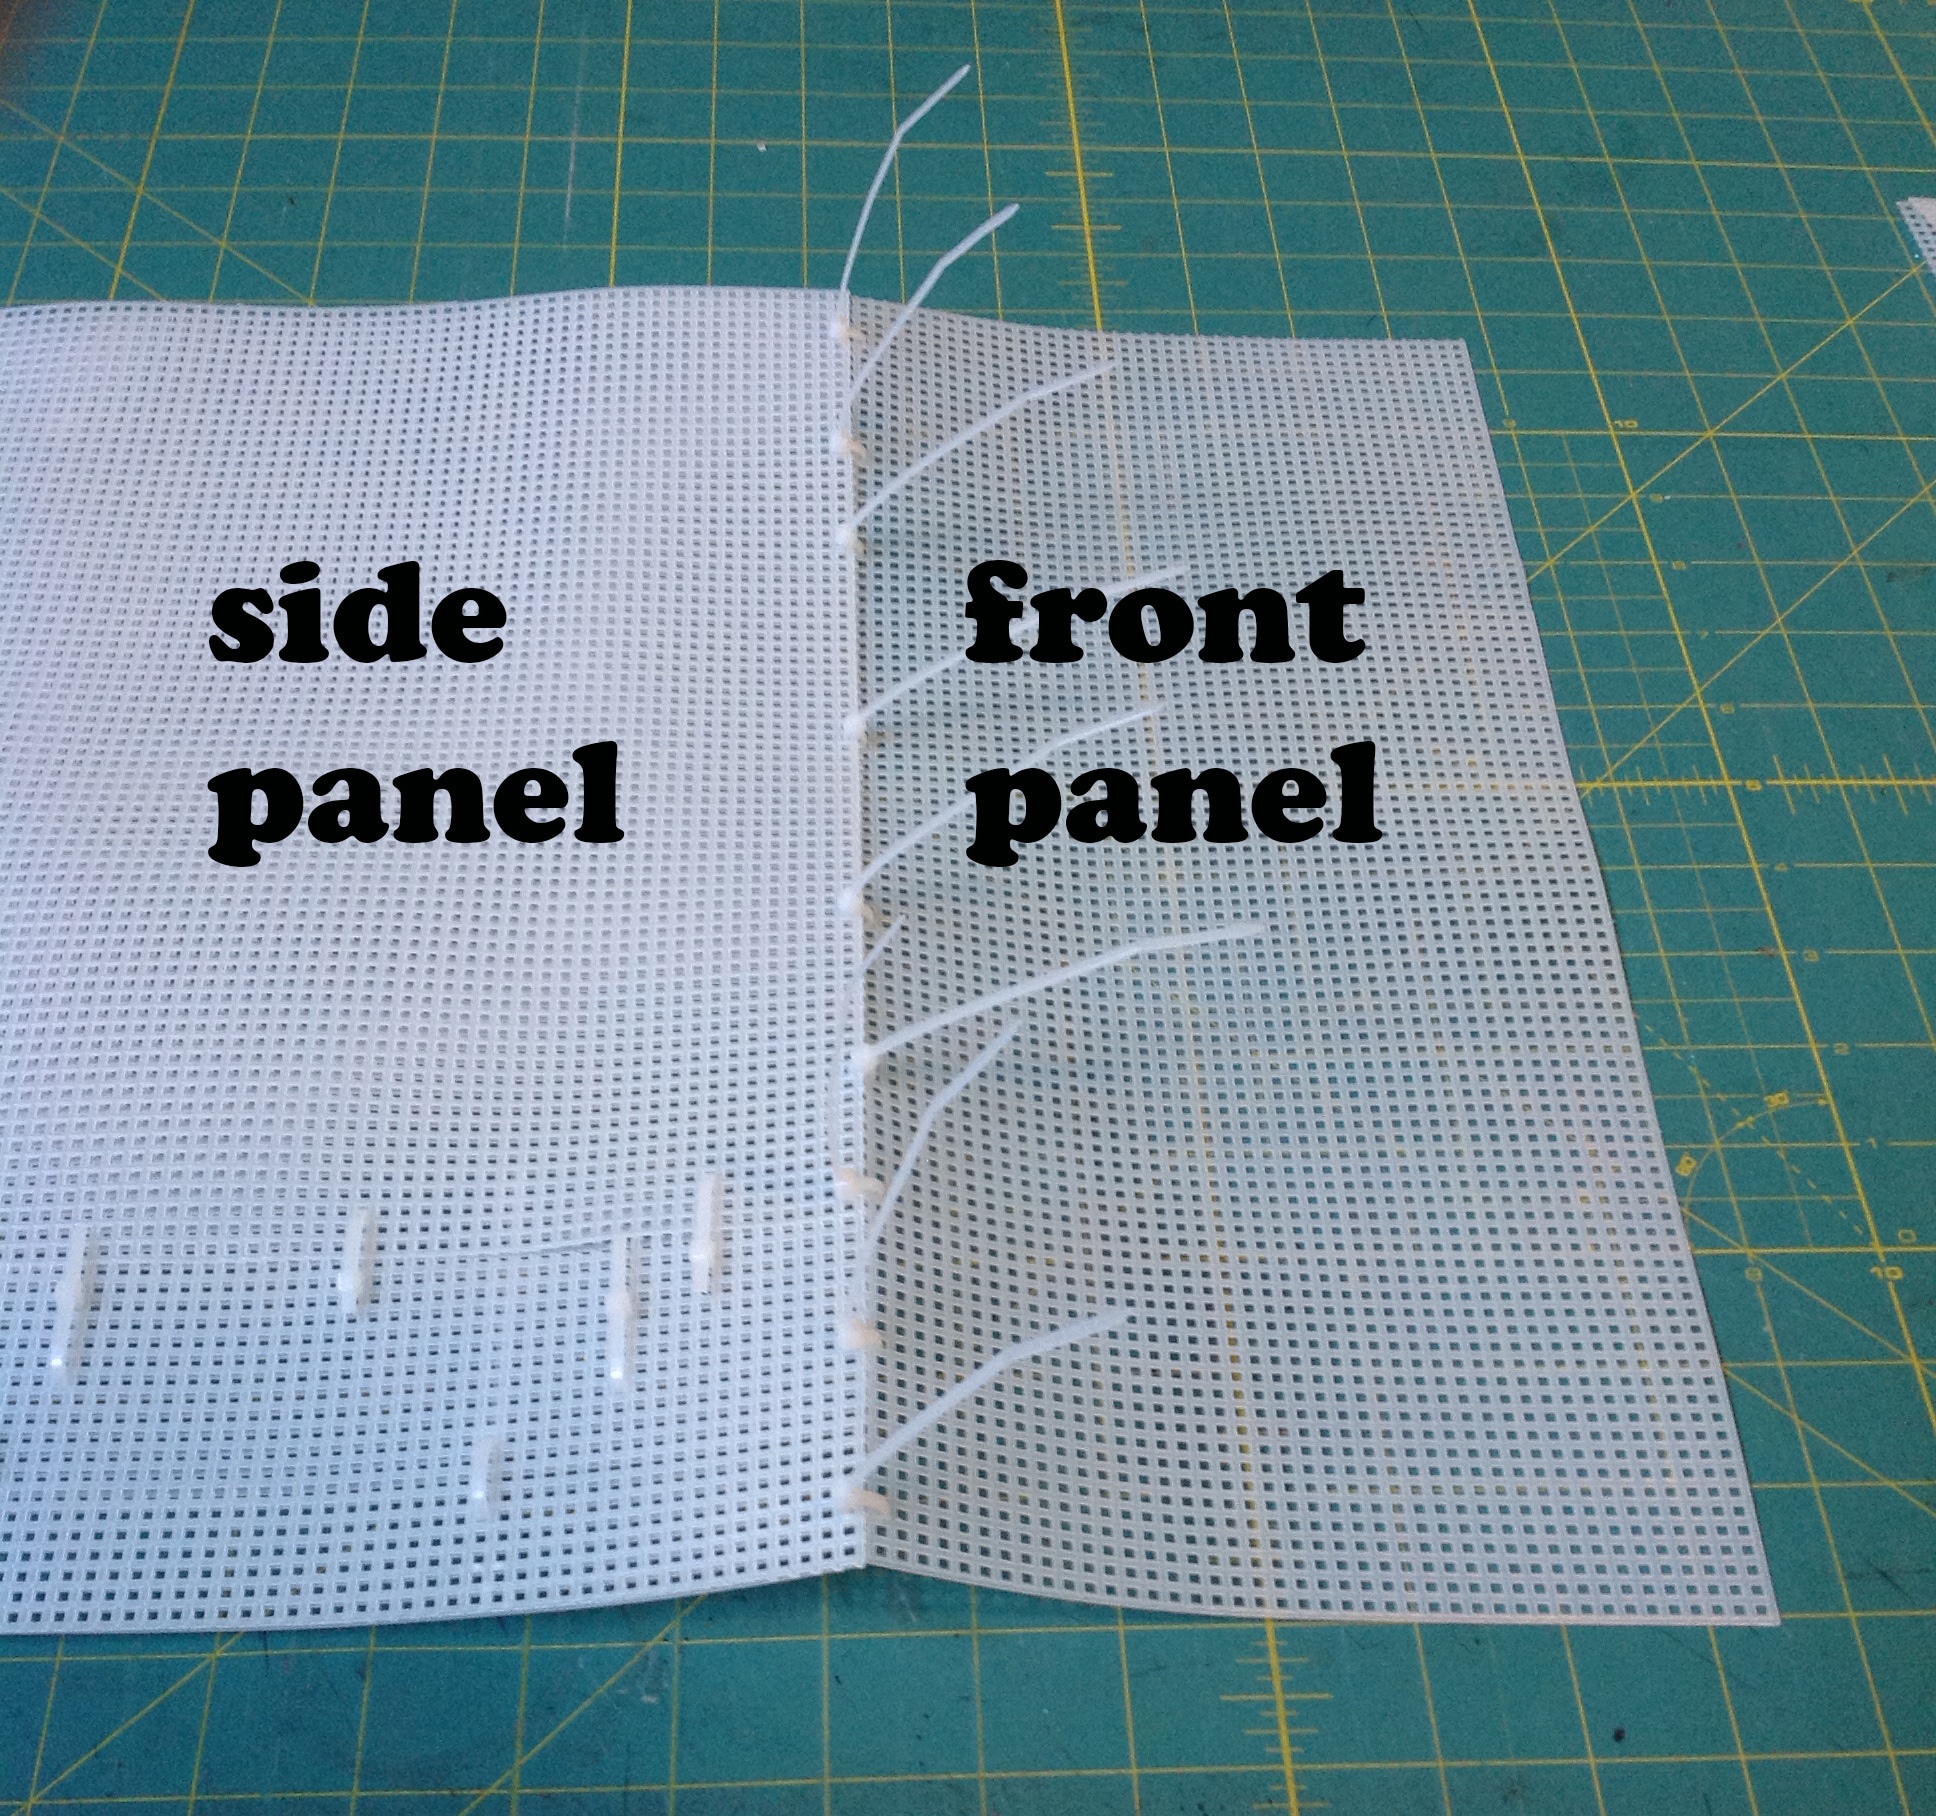
Add the Front Panel
Now we are going to attach the Front Panel R) to these side panels.
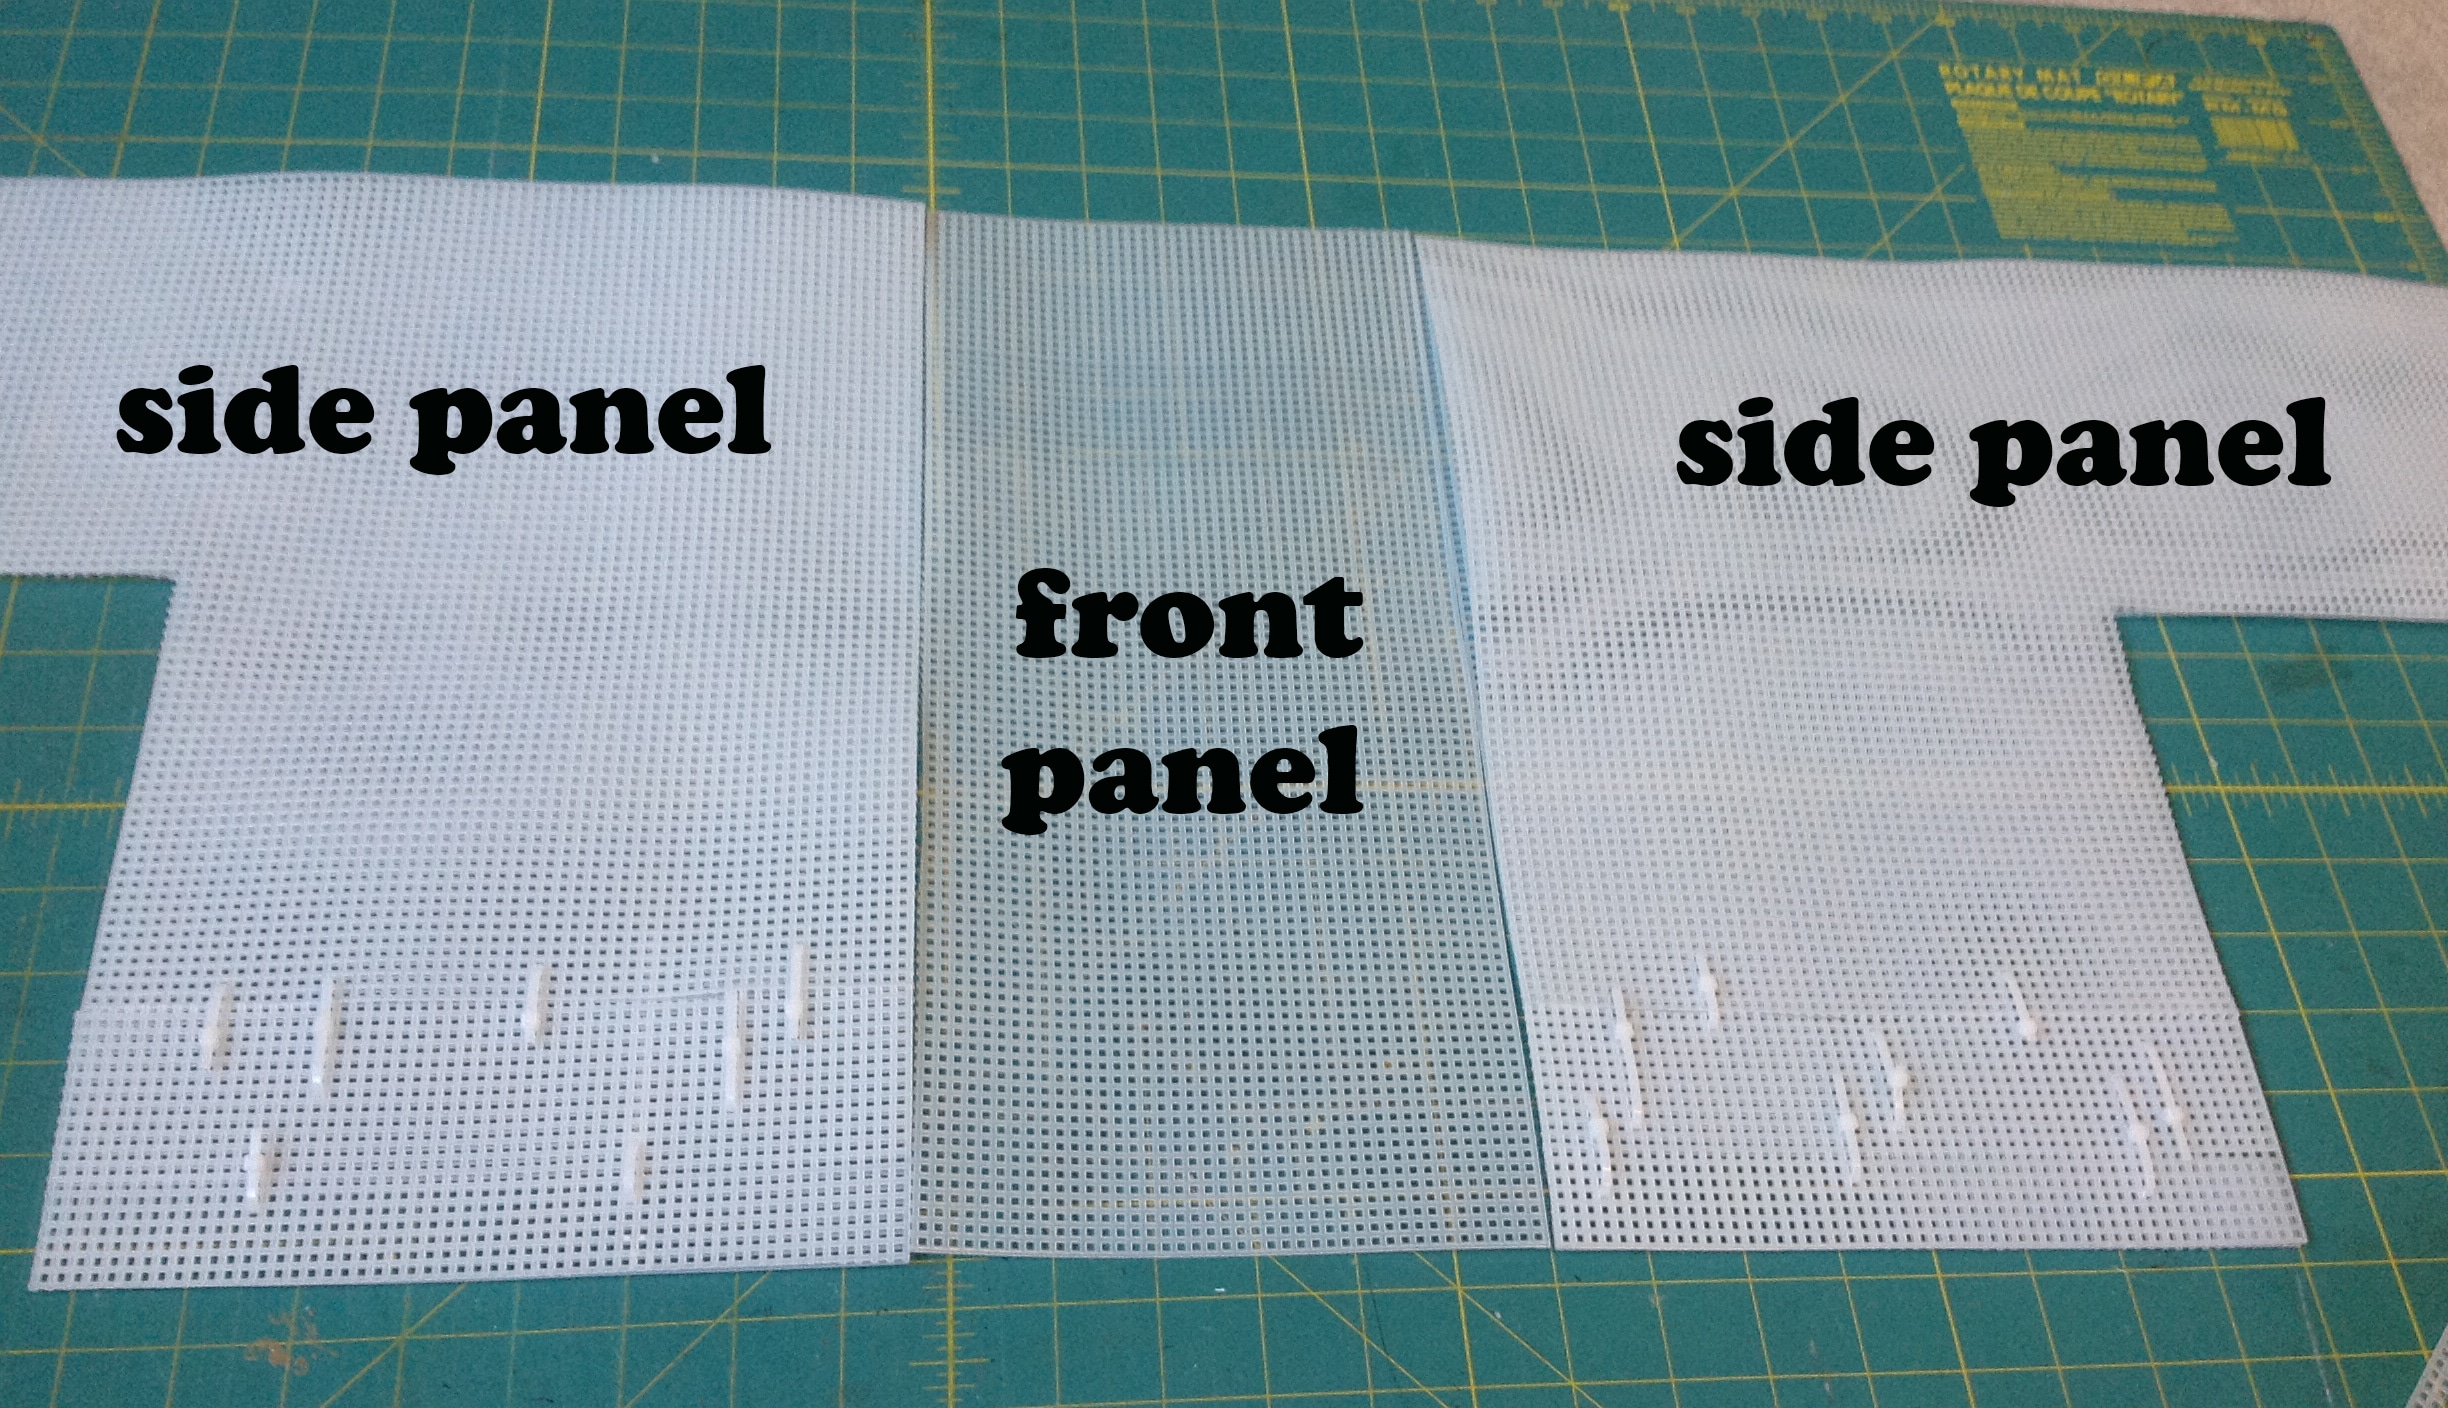
If you are sewing your basket together with yarn, just sew the long edges of the side and front panels together (edges in the red rectangle below). I have found that you don’t need to thread your yarn through each and every hole to get a sturdy basket, every 5-6 holes is sufficient). Even though I am demonstrating the cable ties, continue to follow along because the sequence is the same.
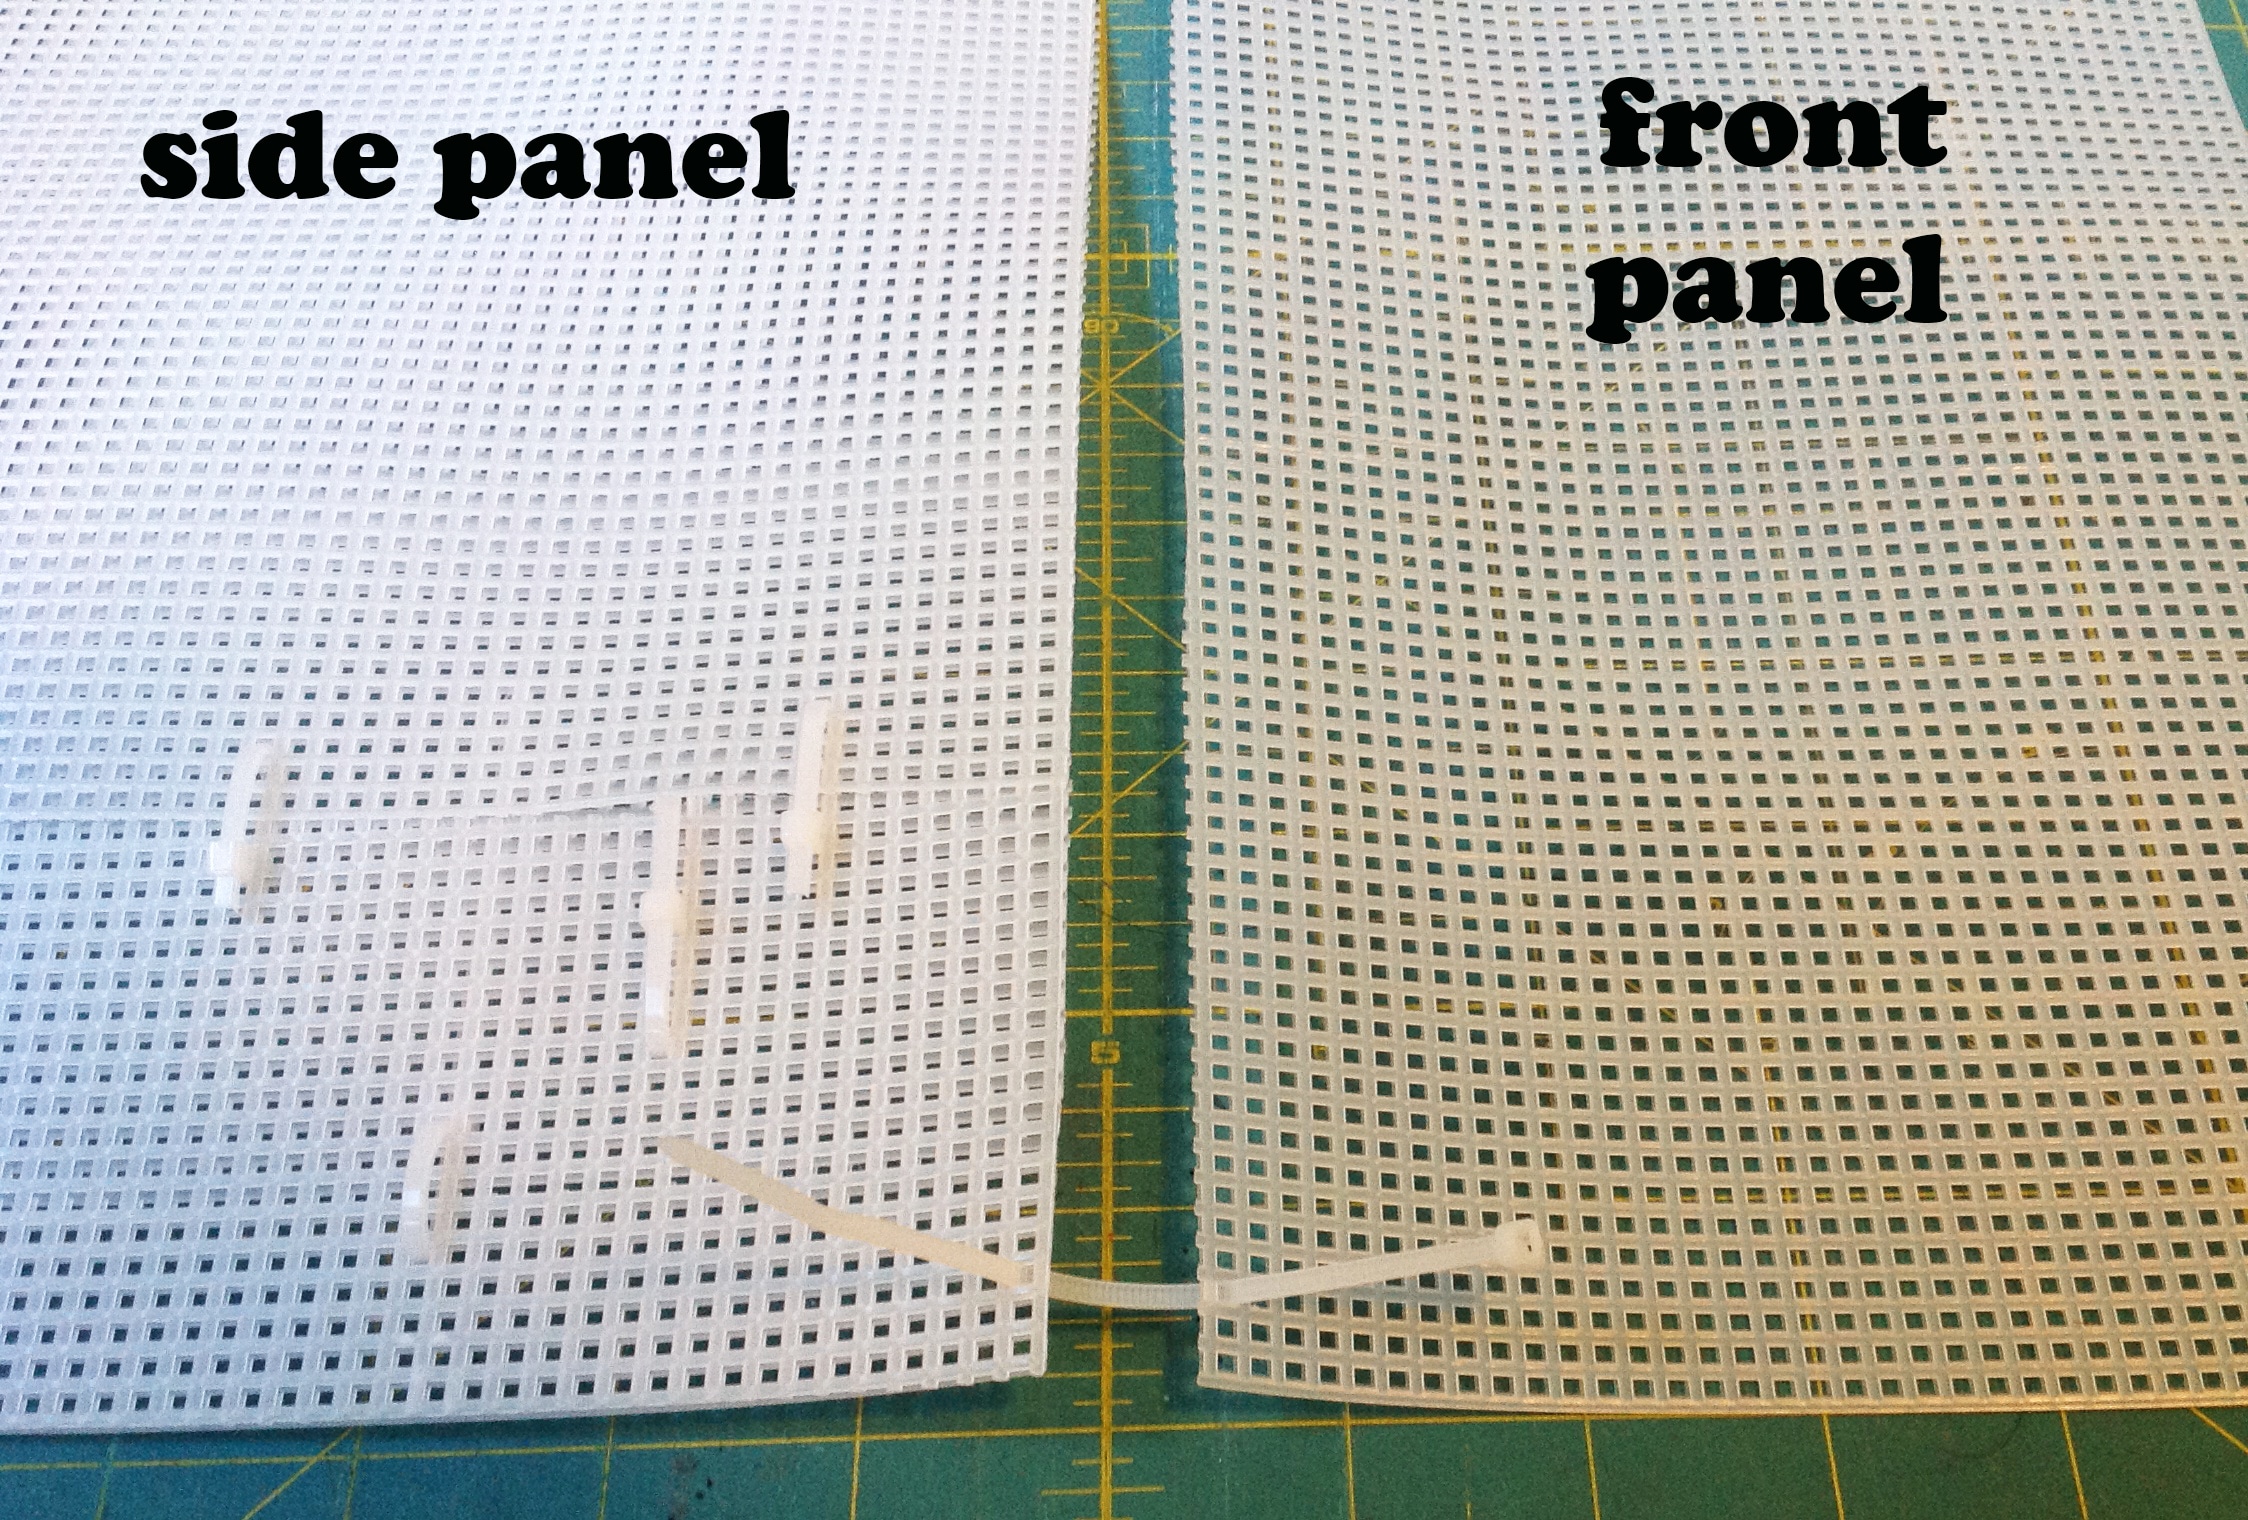
Now put a cable tie 3 holes down from the top edge. In this photo the front panel is underneath the side panel. While these pieces are still flat it’s easier to treat them like you would fabric and stack them “right sides together” while threading your cable ties. Once they start taking a three dimensional shape, this is no longer possible. 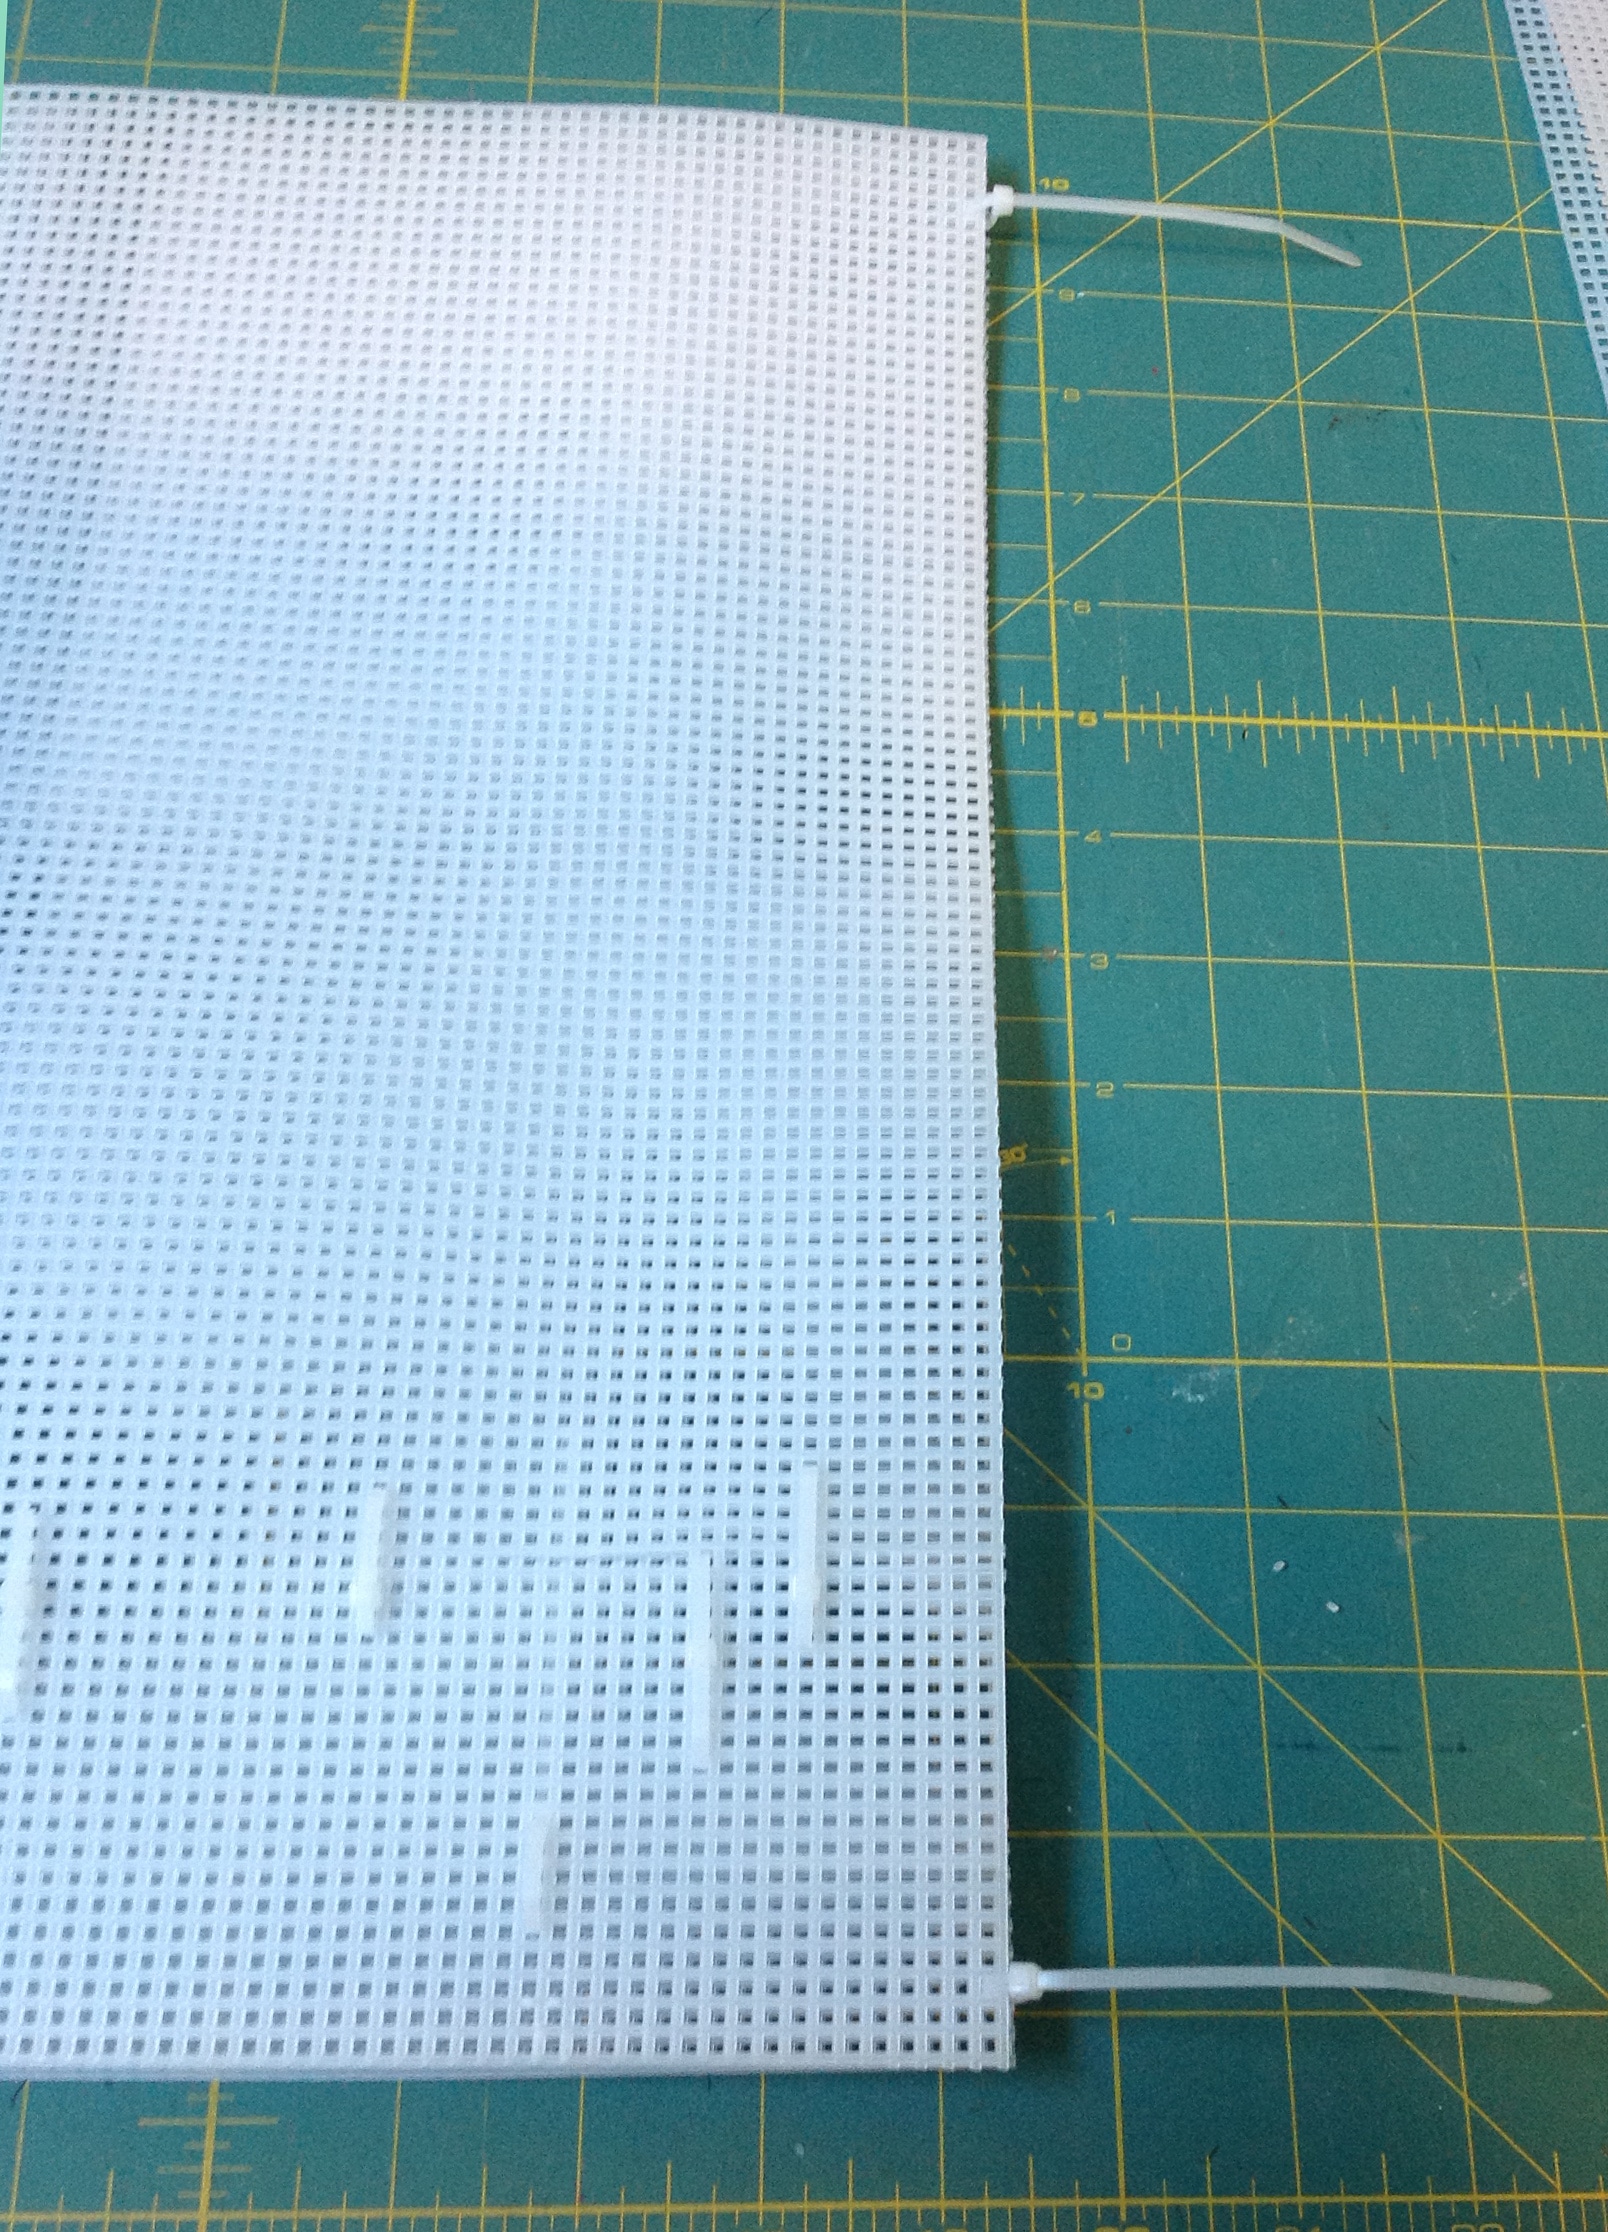
Now fill in the interior of the edge with cable ties. How many you use is up to you but I find that every 7- 9 holes is sufficient.
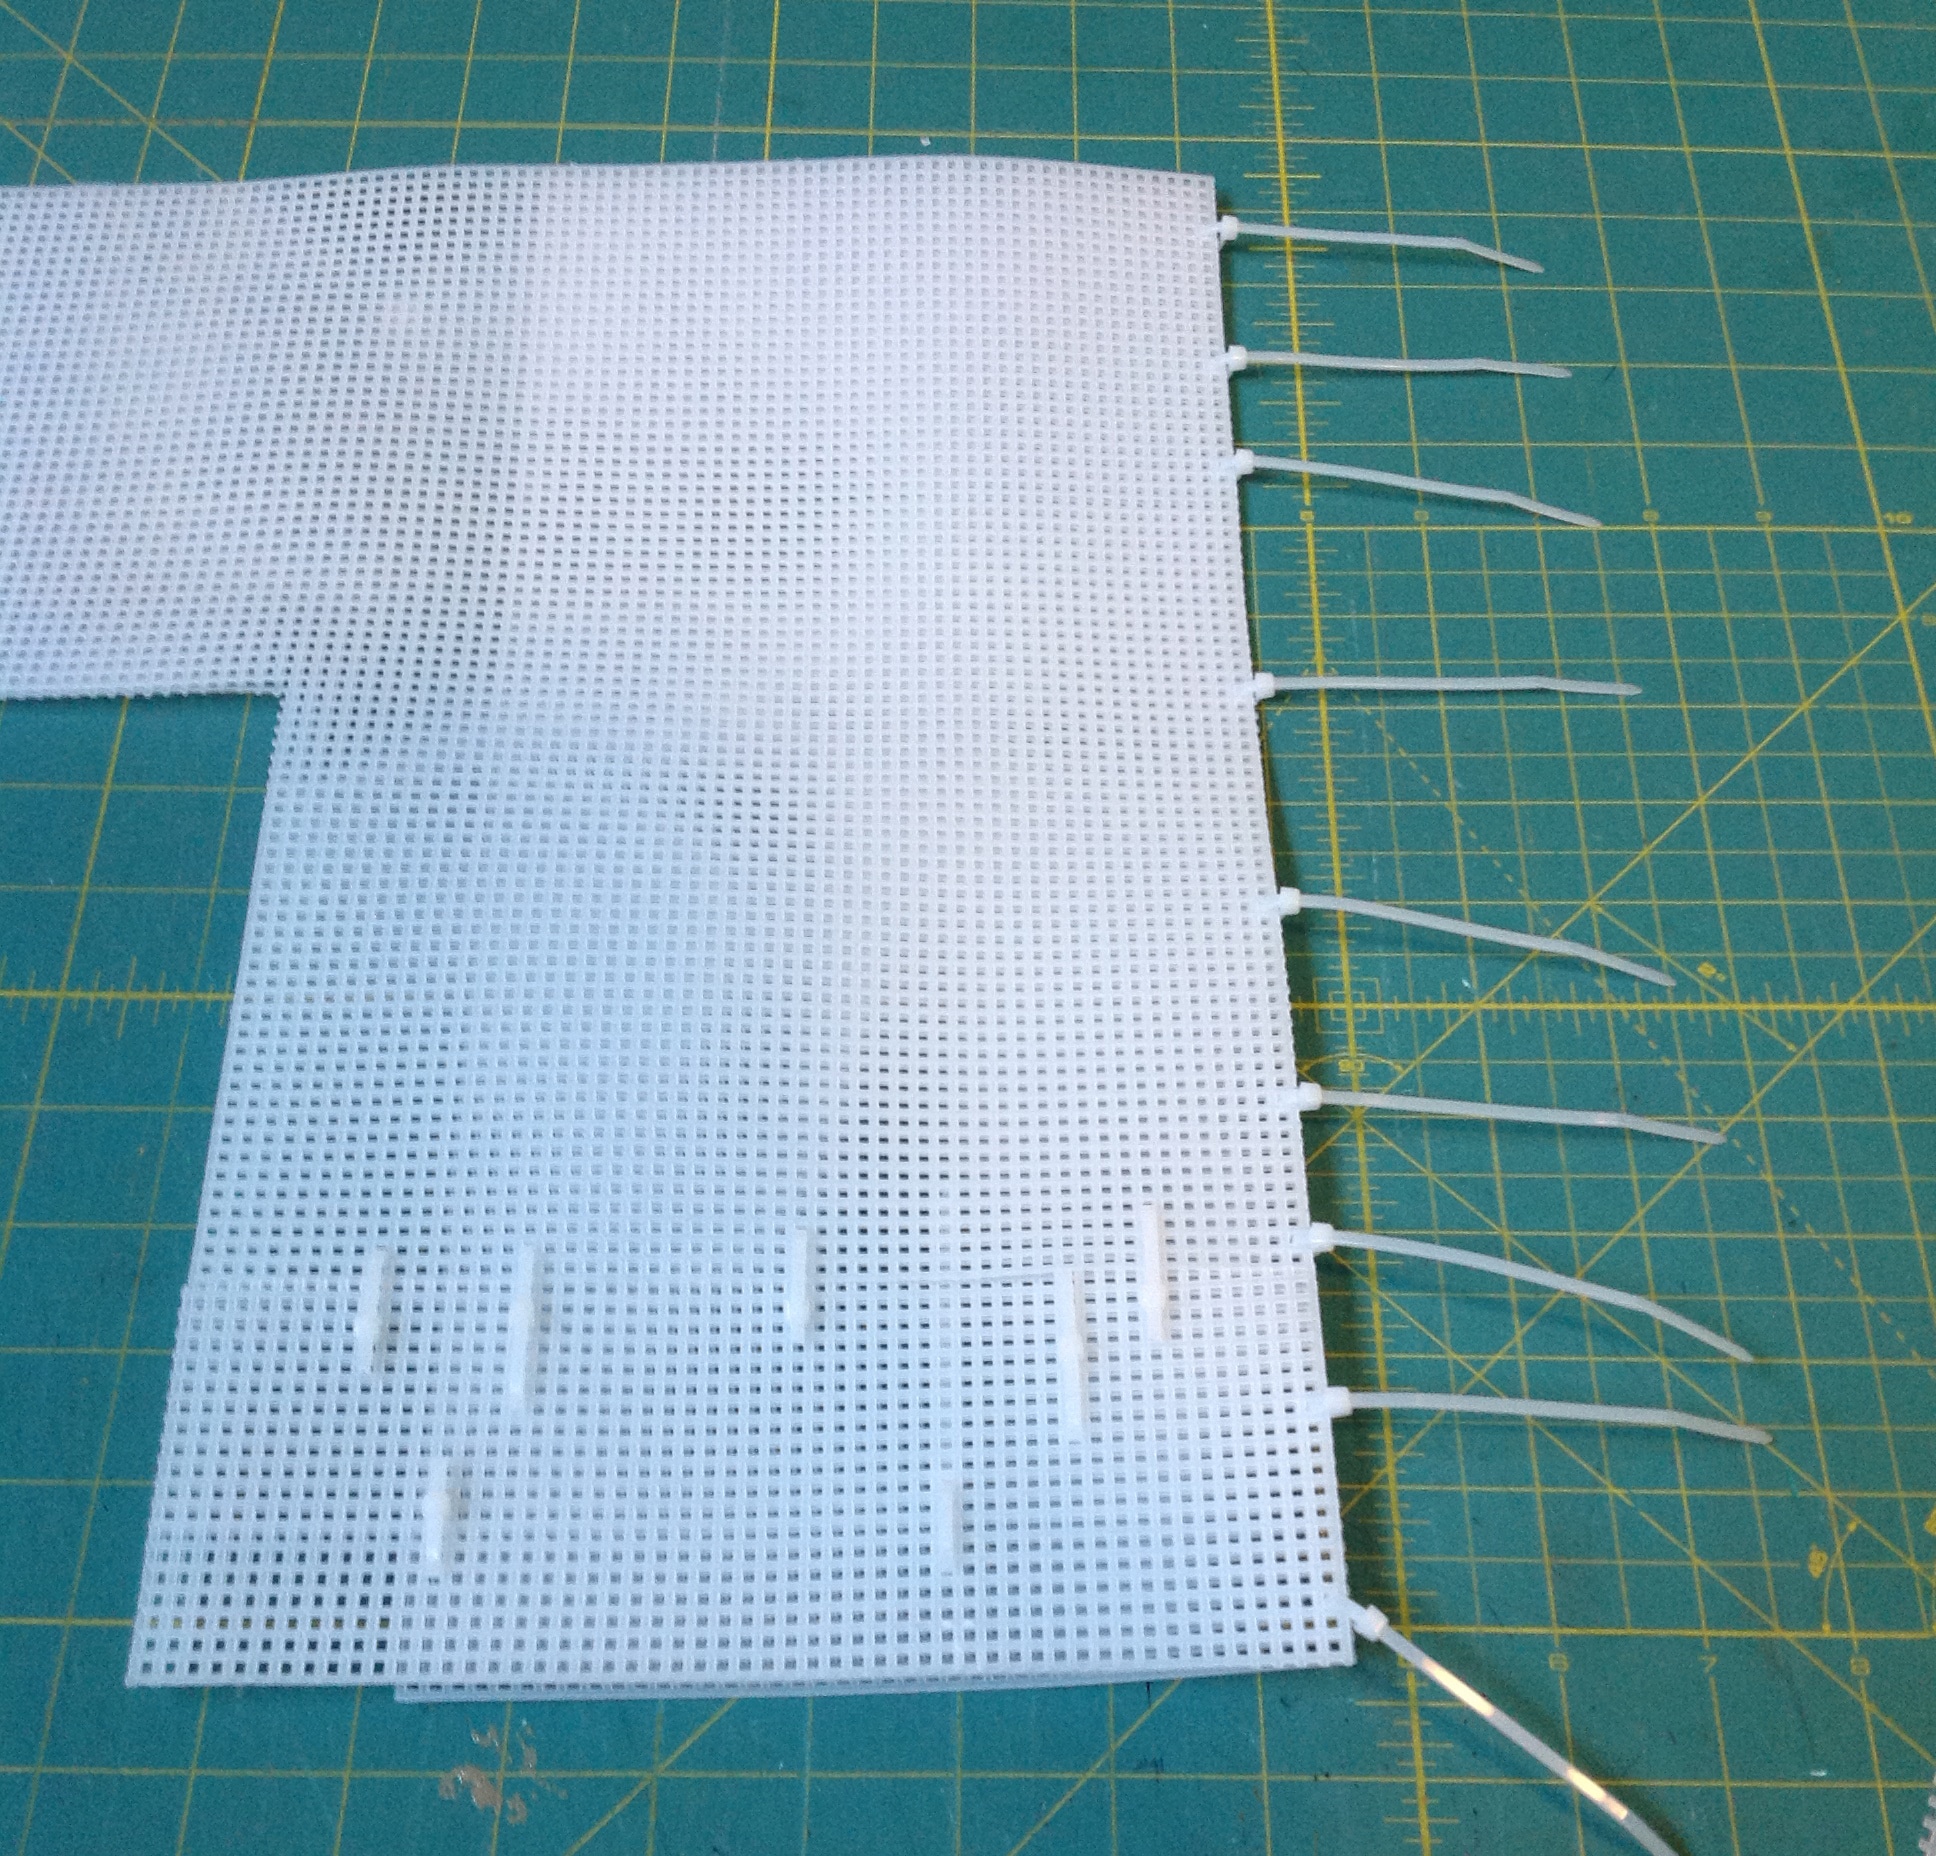
Here’s what it will look like when you are done. BTW, you should cut the tails off as you go along. I am leaving mine long for now so you can distinguish the inside of the basket from the outside.
Add the second Side Panel to the other edge of the Front Panel.
That’s all for today – please let me know what questions you have!! The next post will be on Thursday, July 24th. You can find it here. See you then! Sarah
Leave a Reply
You must be logged in to post a comment.