***UPDATE: PDF patterns purchased between July 2015 -Januaray 2016 – need an additional pattern piece called B-Interfacing. You can download it here. ***
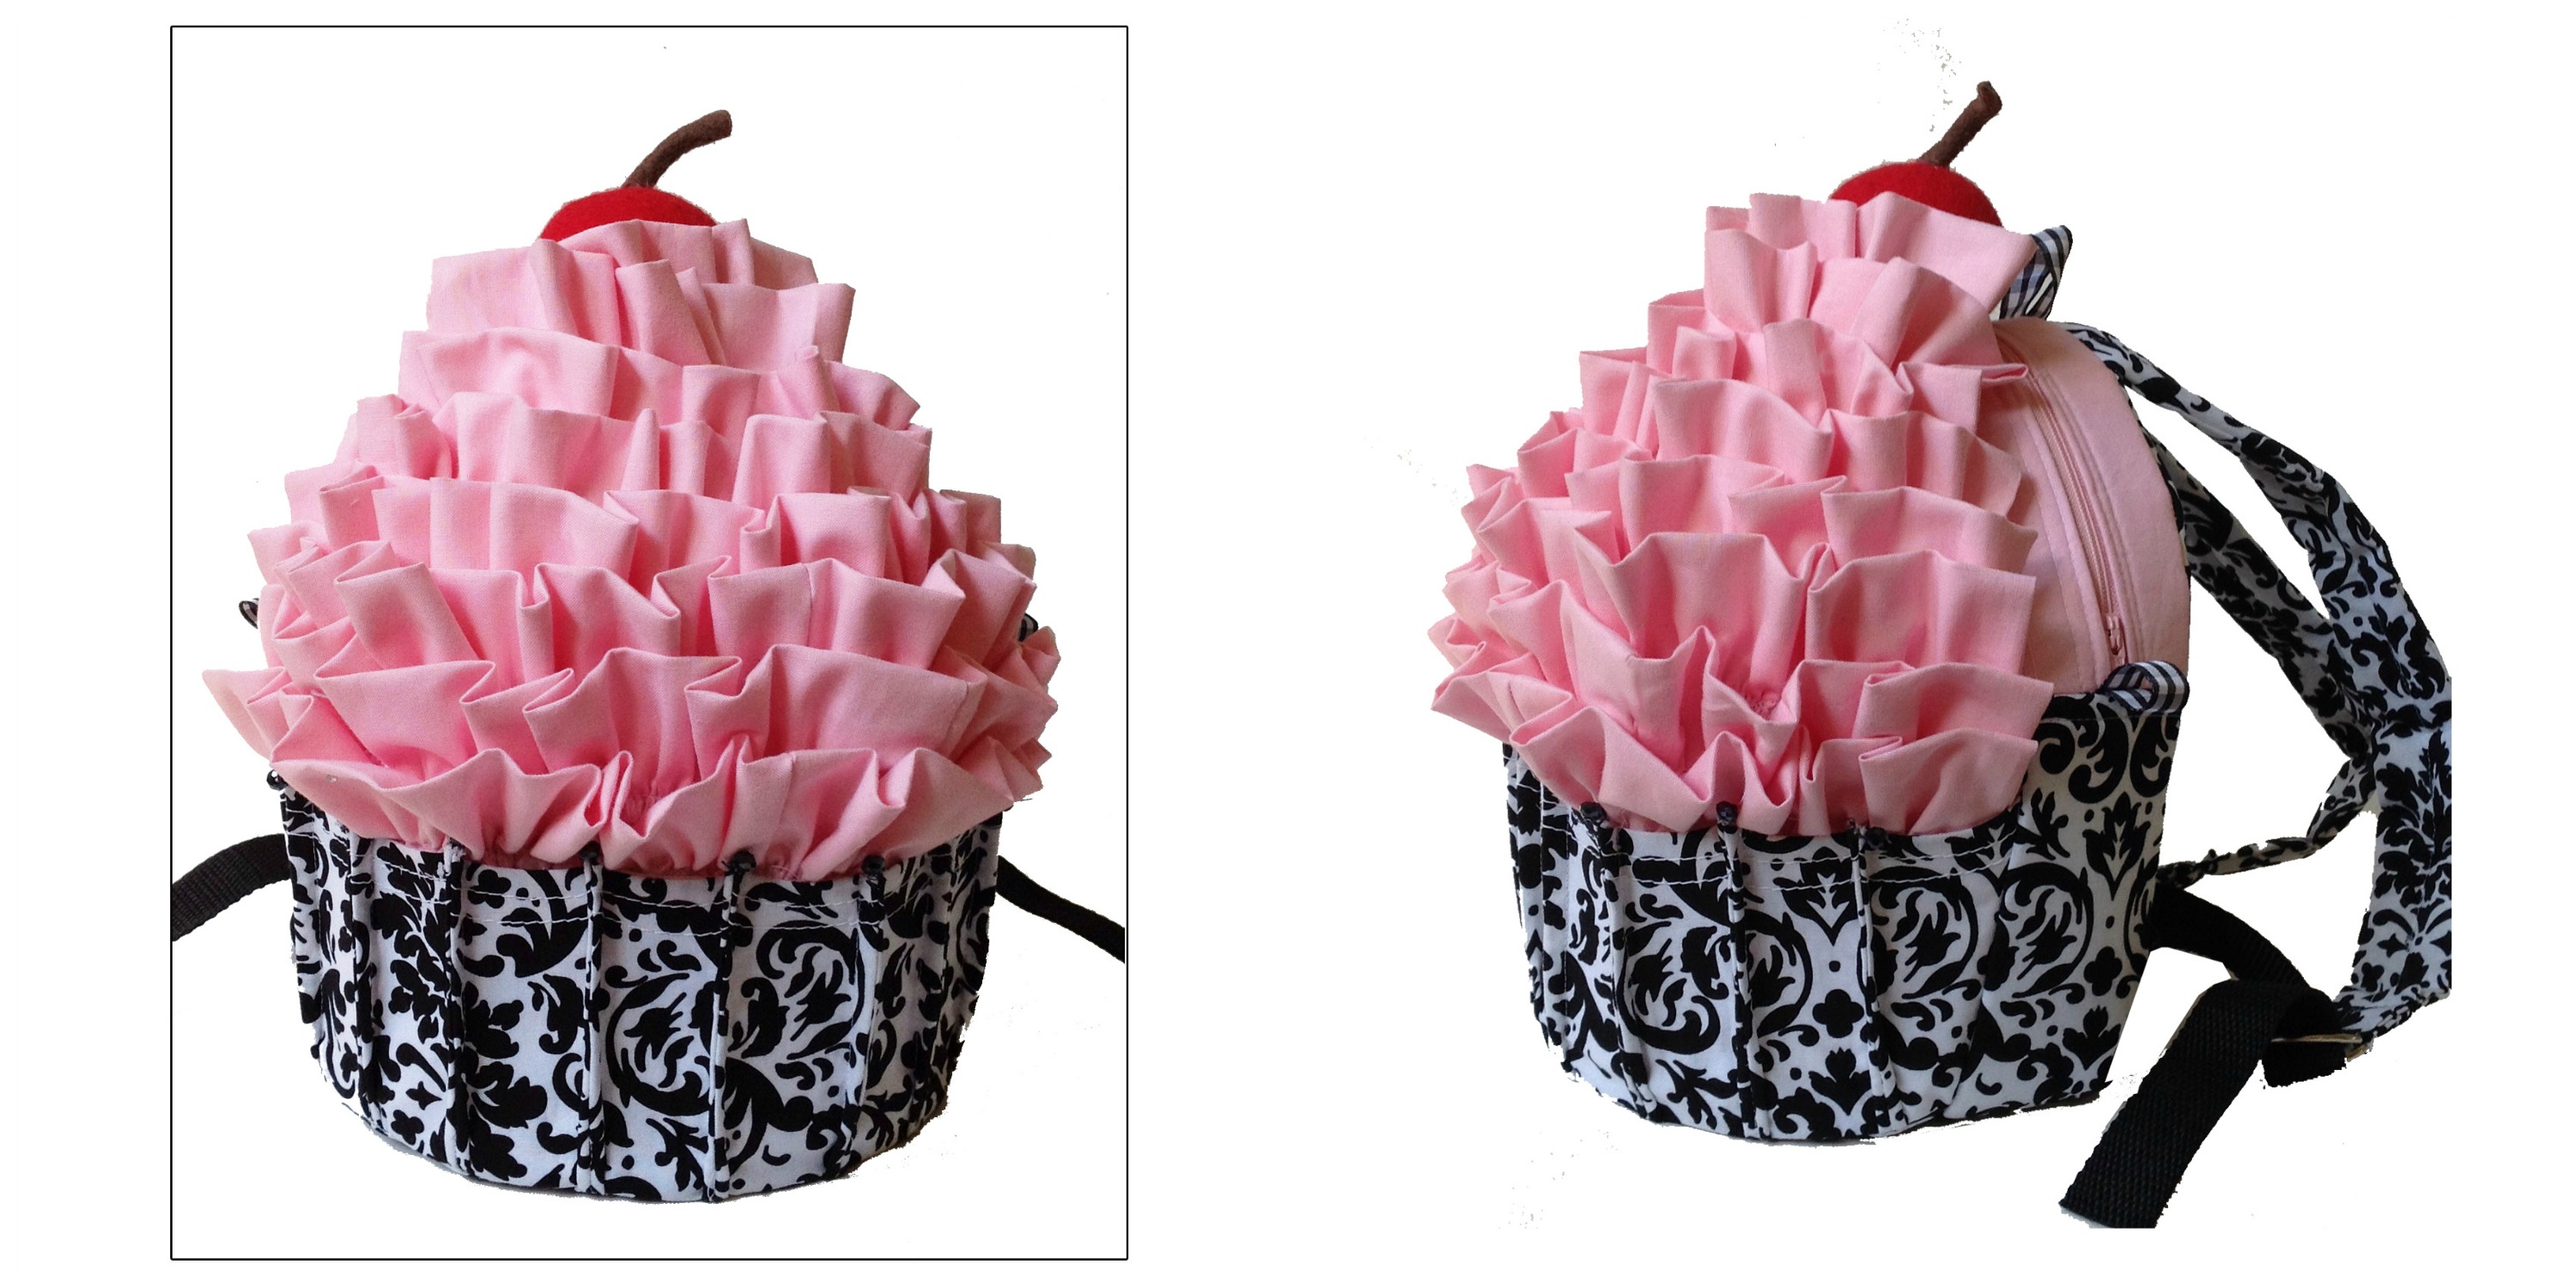
Do I smell cupcakes baking! They are so cute, I can almost believe I do. By the end of today you can collect all those well-deserved hugs and kisses from whoever is lucky enough to get your masterpiece! Today we will cover the rest of the pattern; steps 40-43.
You will need:
stuffing
red and brown felt
hand needle and thread
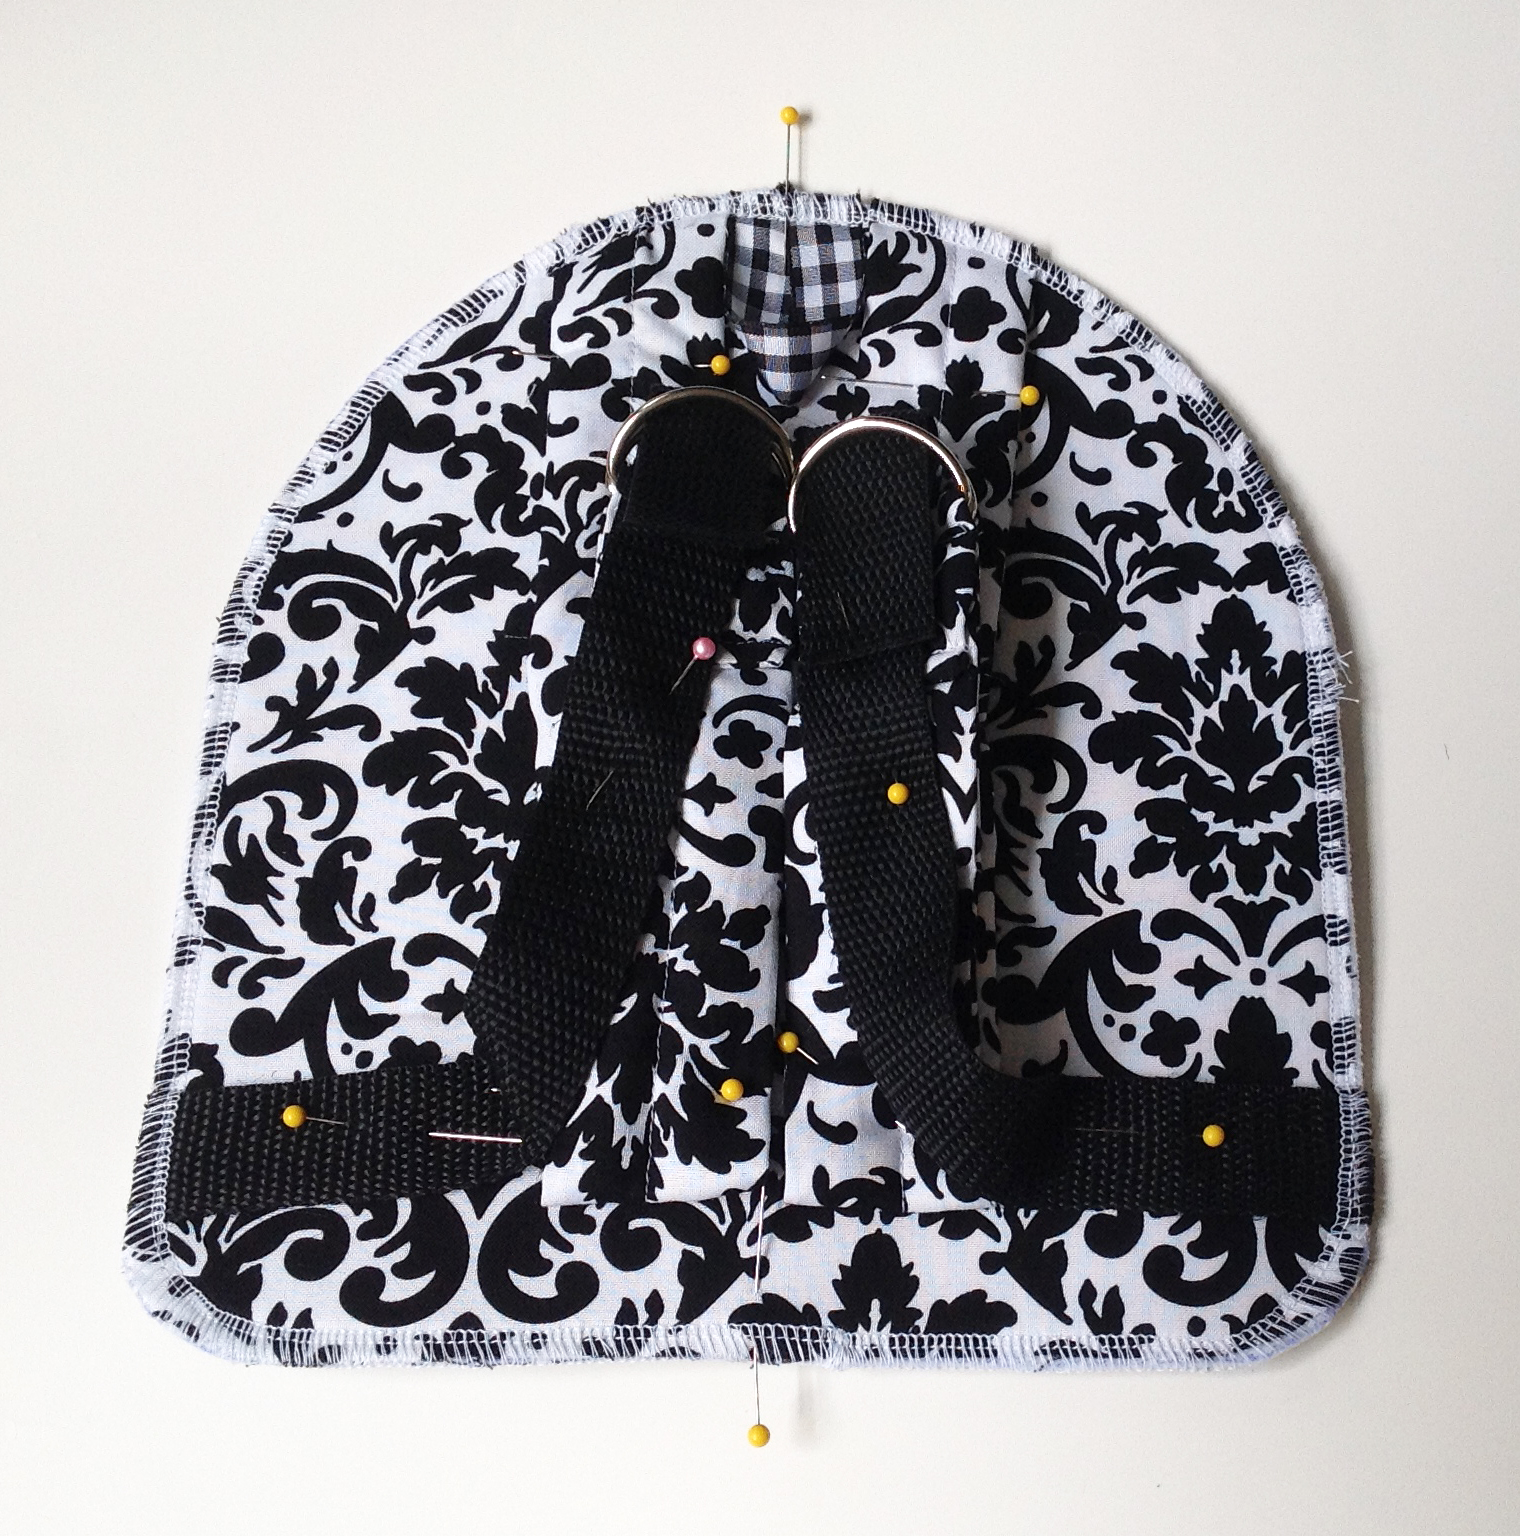
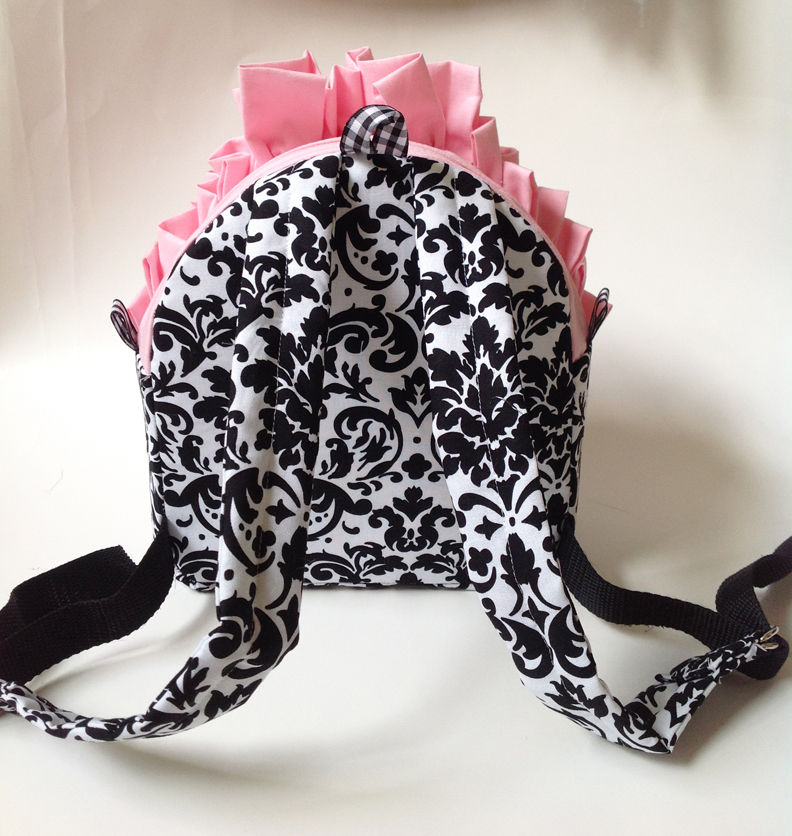
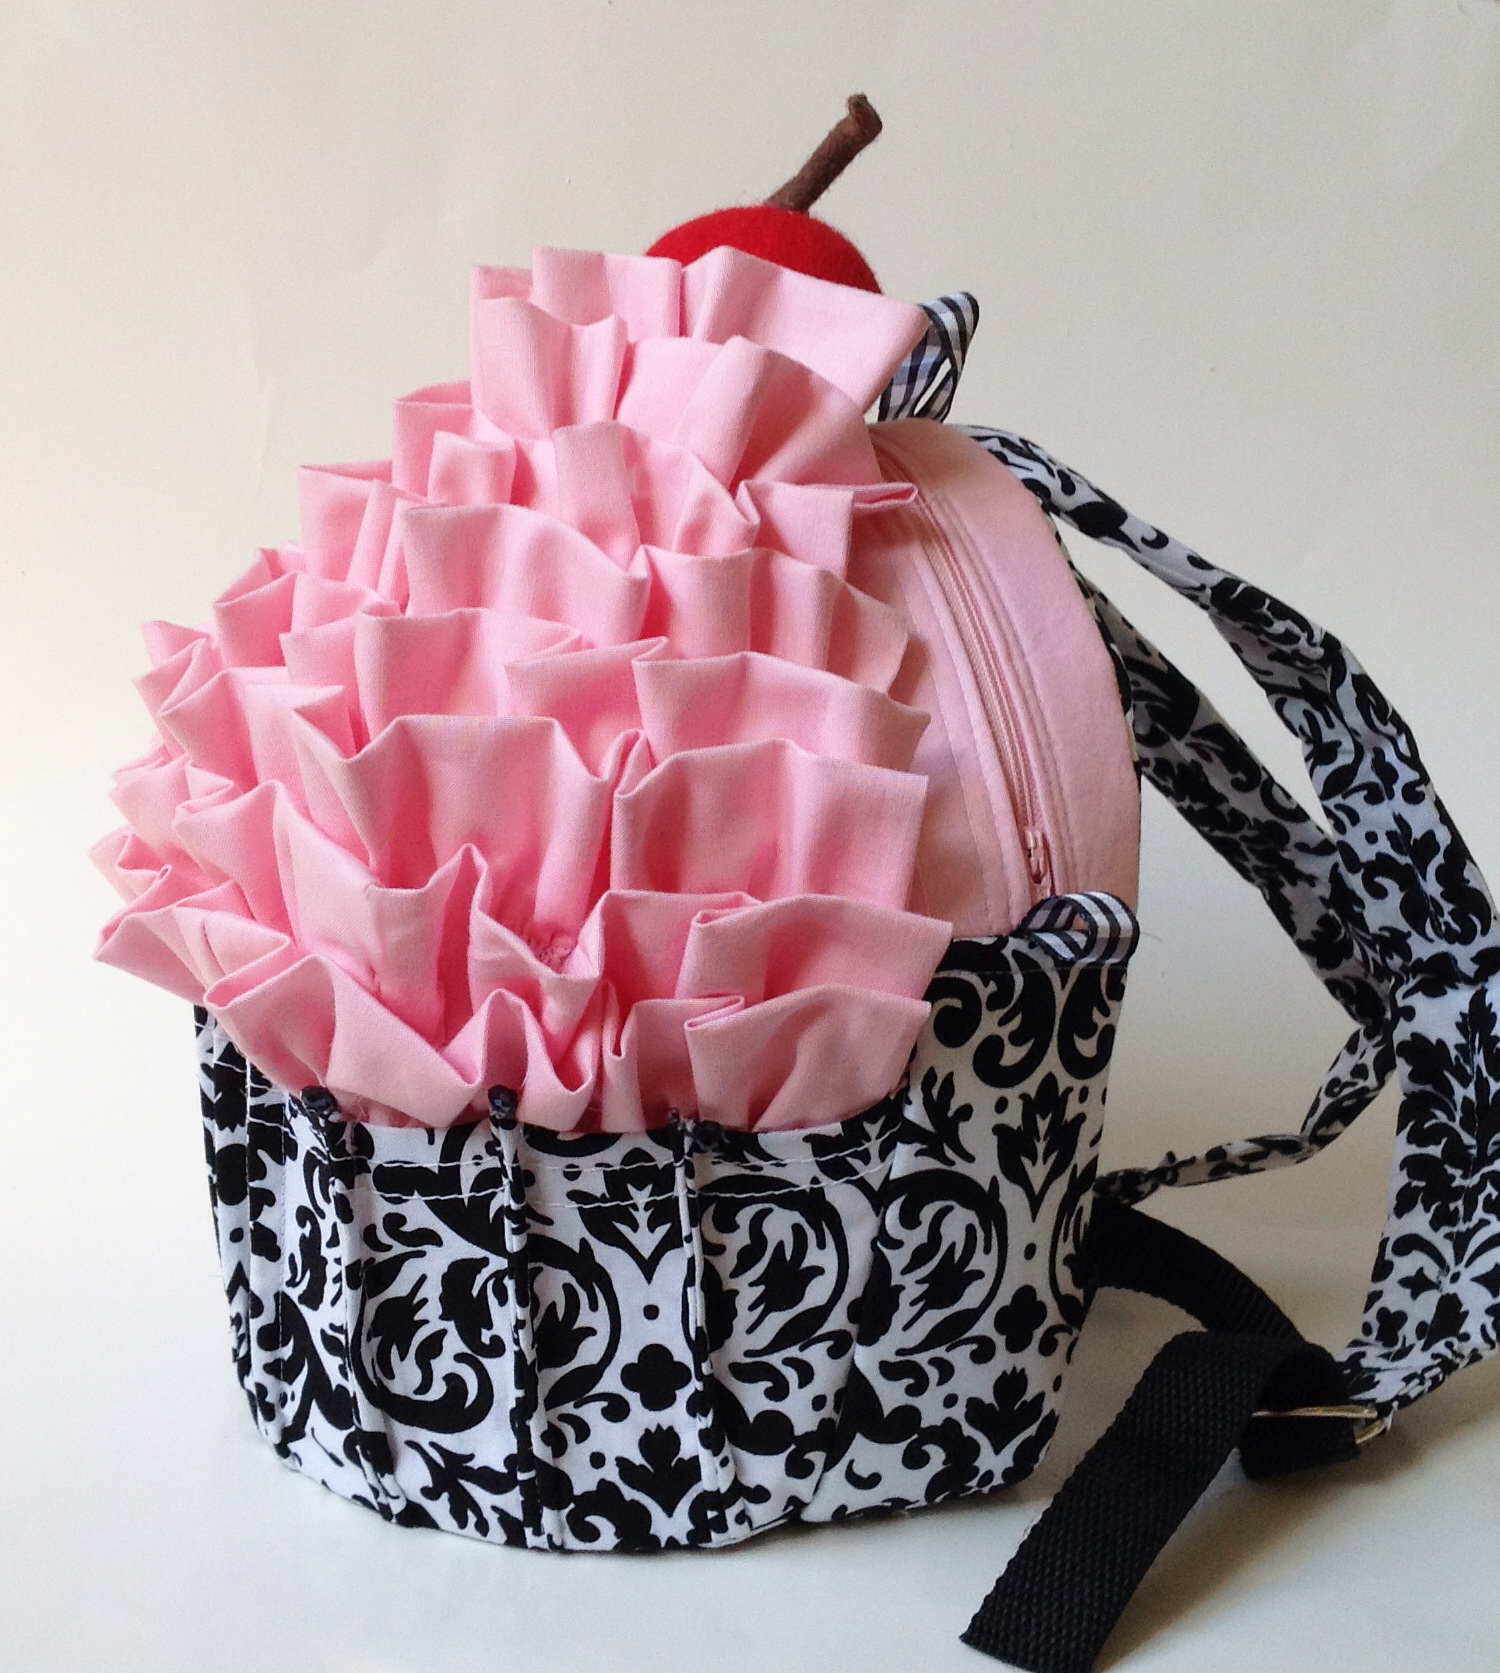
We are going to sew the back panel to the cupcake. The first thing we need to do is get the straps out of the way from the back panel’s edge, so pin them into the center. Be sure you have your center points marked on the back panel. I put pins in mine because when I put it through my serger, I had to cut off the center notches.
Grab your cupcake and open the zipper all the way. Turn your cupcake wrong side out so that the ruffle is to the inside (I know, it sort of hurts to squish it!). Now you are going to pin the back panel onto the cupcake. Be sure the straps are to the inside of the cupcake. You are going to want to line up the center notches on your back panel with the center marks on your zipper gusset panels. Pin alot!!! If you need to, snip you zipper gusset within its seam allowance to ease the fit if it’s a little snug. (Are you laughing at me because I didn’t open up my zipper? Yes, I did have to rip out some stitches because I forgot to do that and once it was sewn I couldn’t get in there!!)
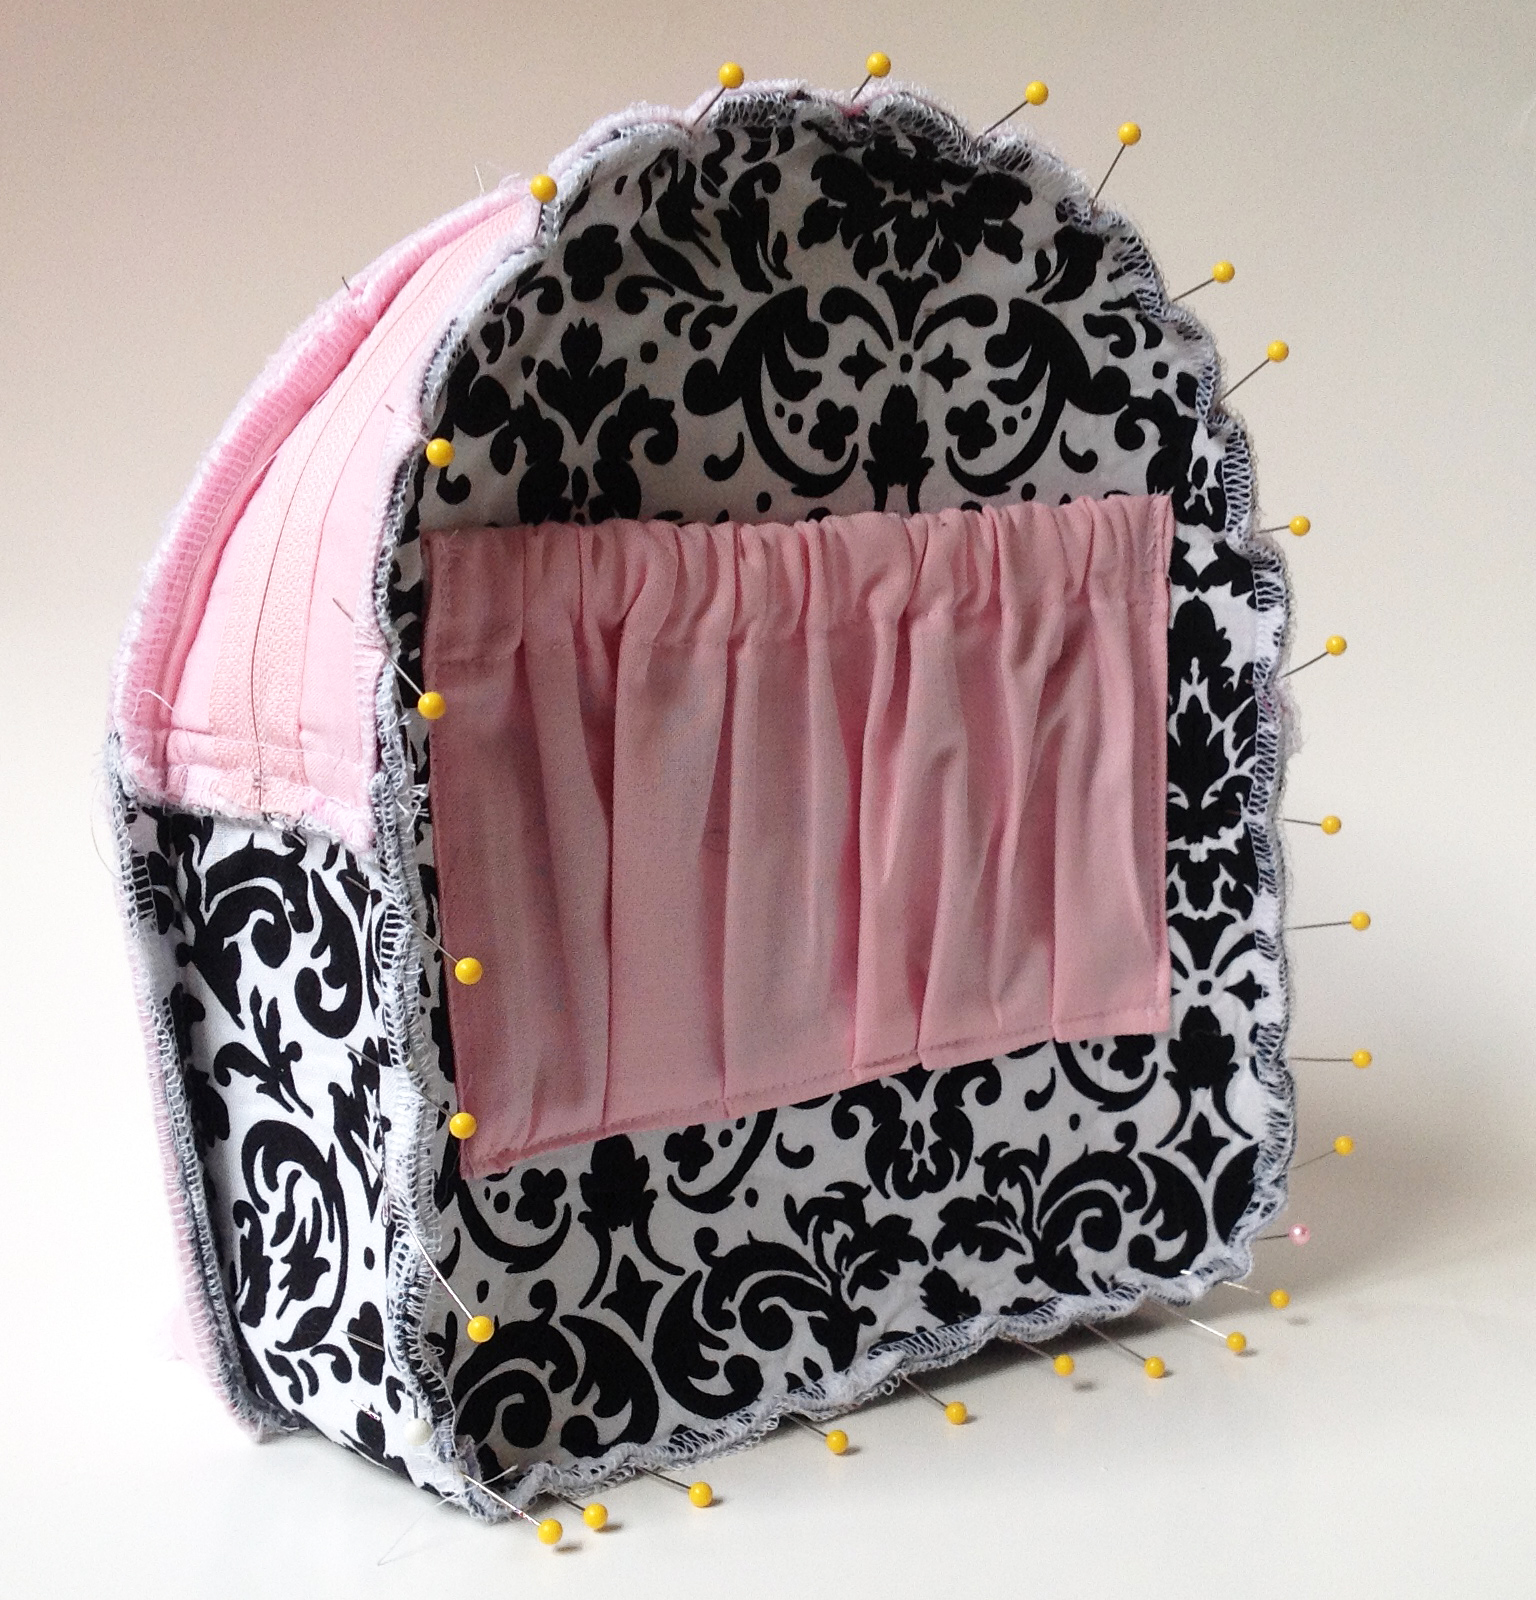
Now you are going to sew them together. I will tell you this is the step that most of the tester found the most challenging. The thing is big, and stiff, and well, shaped like a cupcake! Take your time and adjust as you need to. You might find that it makes it easier to maneuver around if you push the dome a little into a semi-concave position. You also should sew with the back panel facing down.
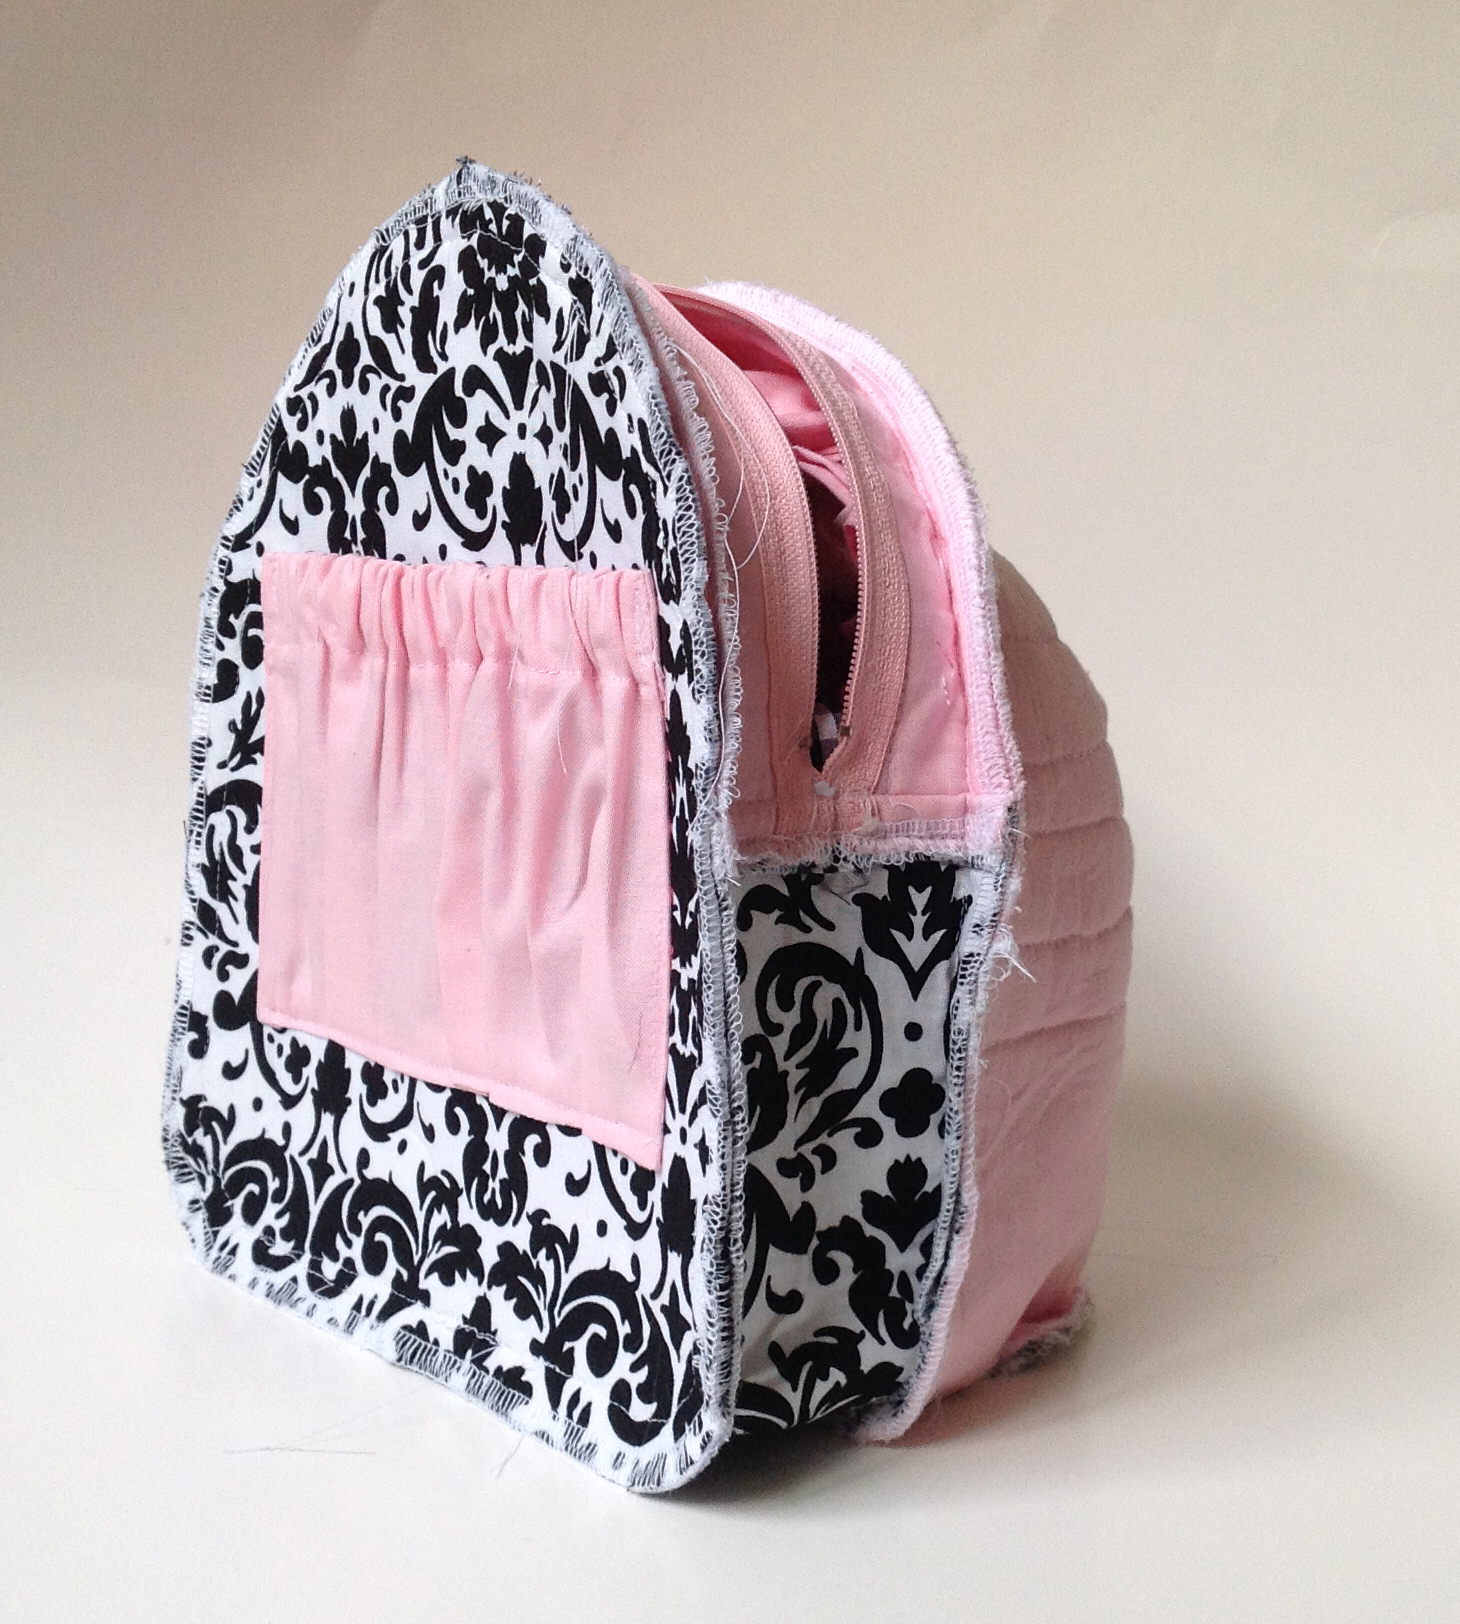
Whew! Turn it right side out through the zipper and then sit back and bask in how talented you are!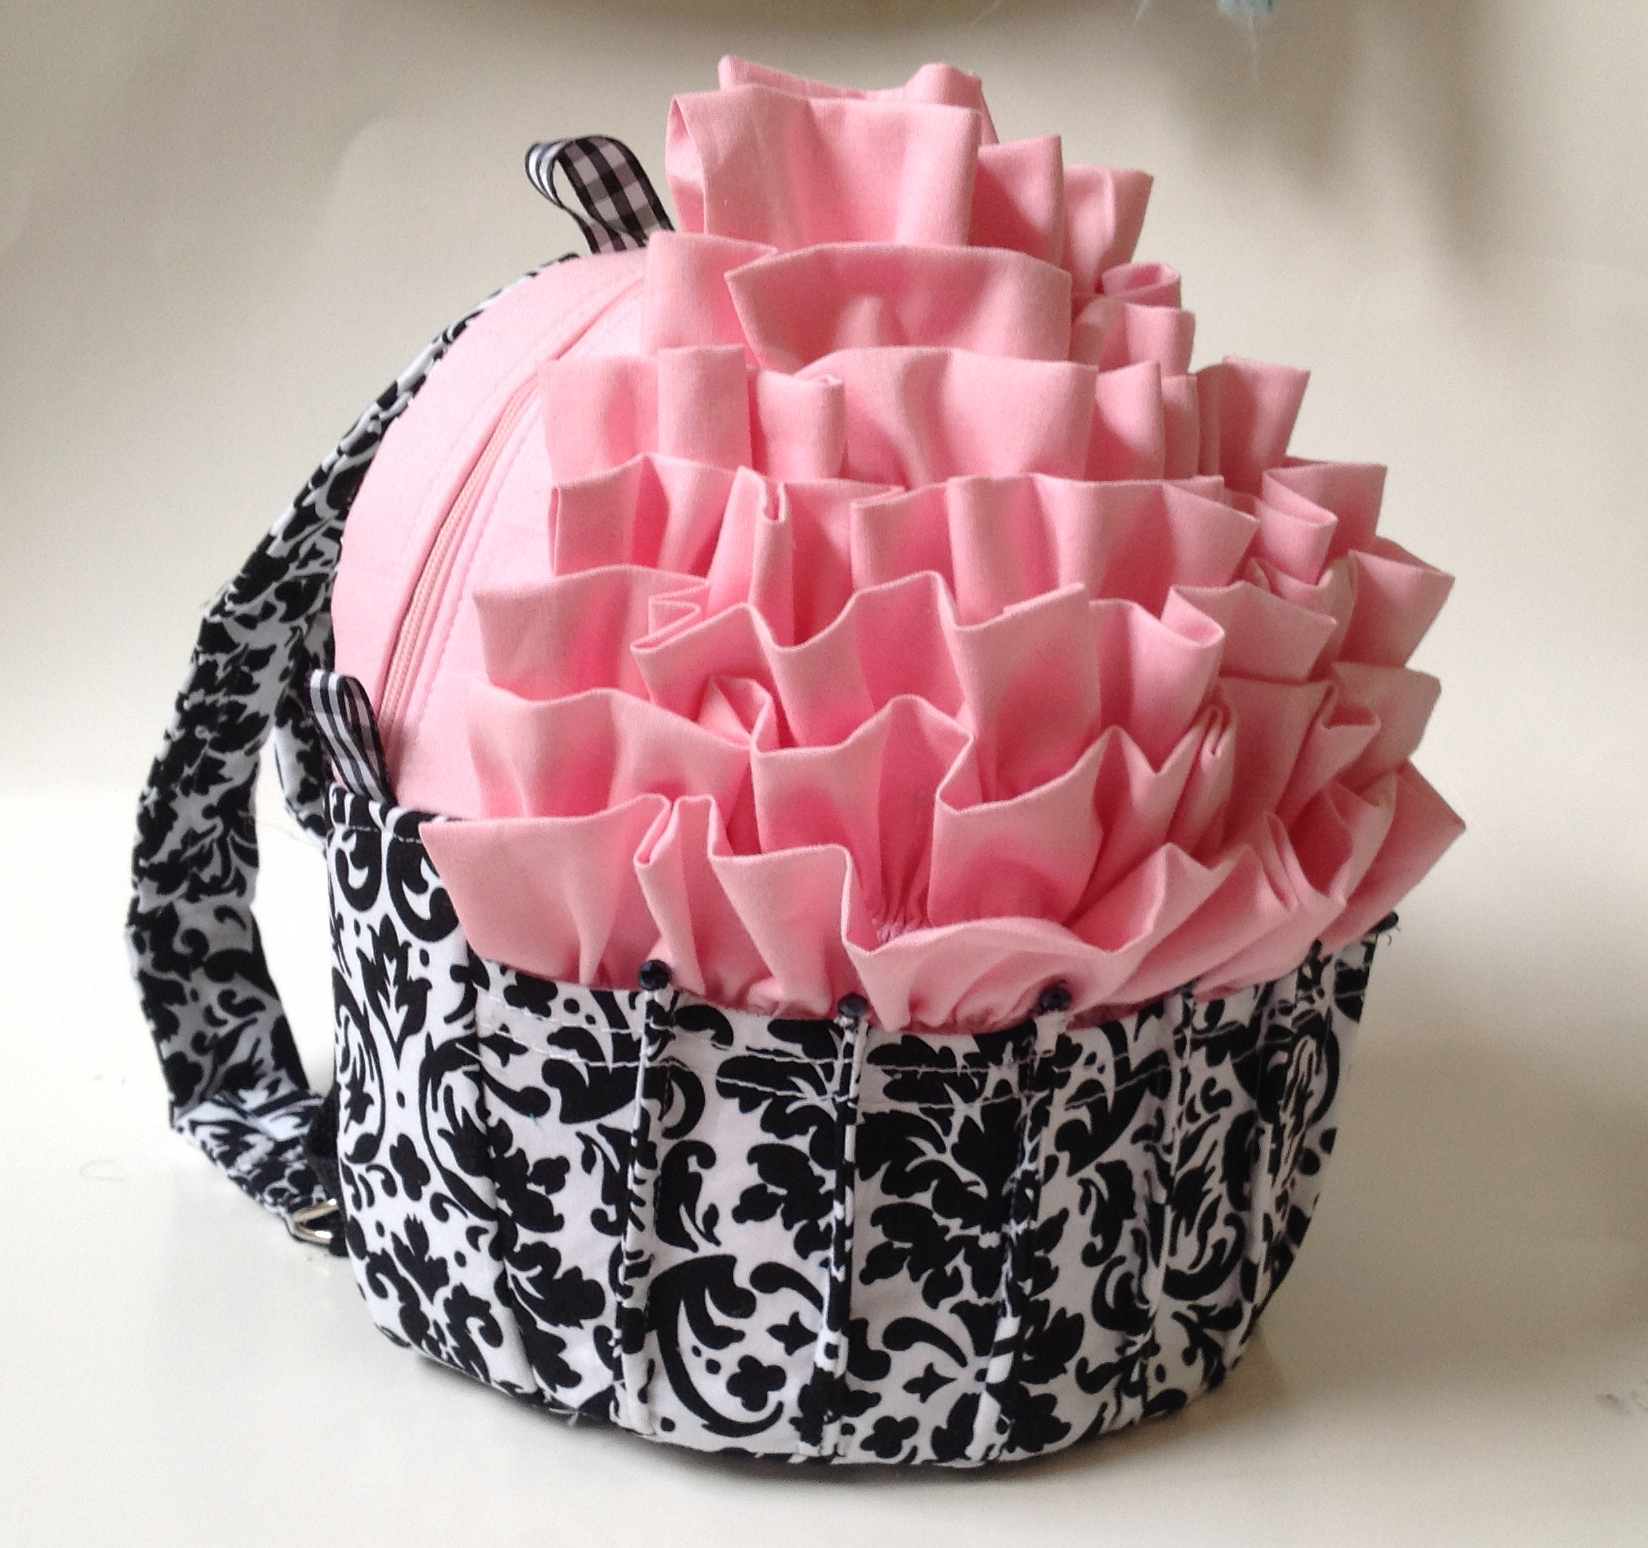


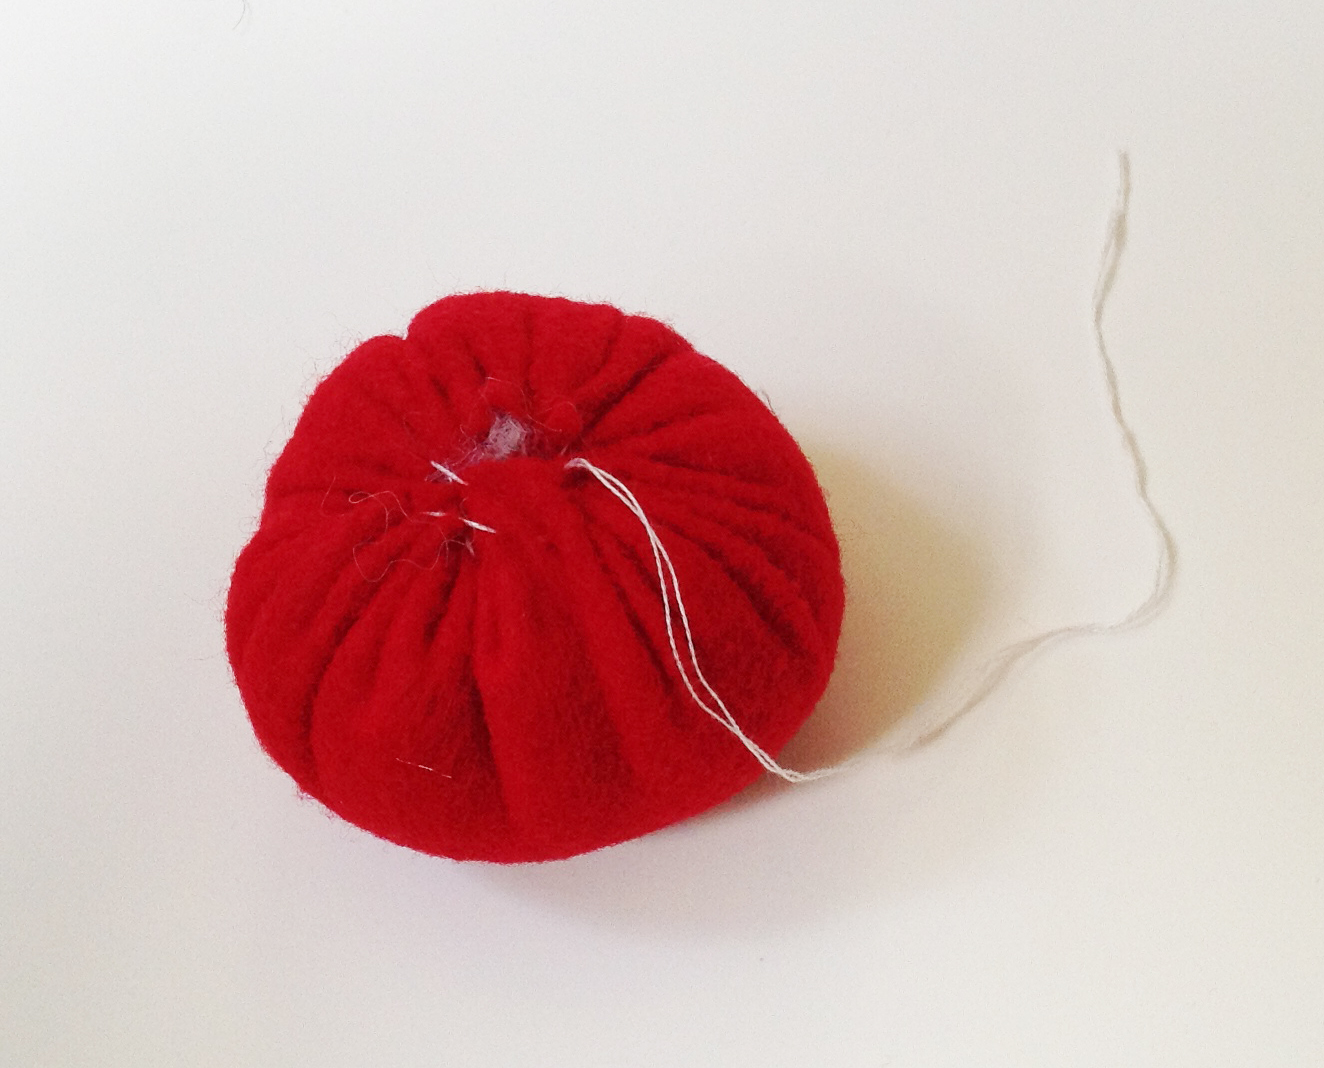
If you want a cherry (and in my mind, why wouldn’t you), grab your red and brown felt and some stuffing.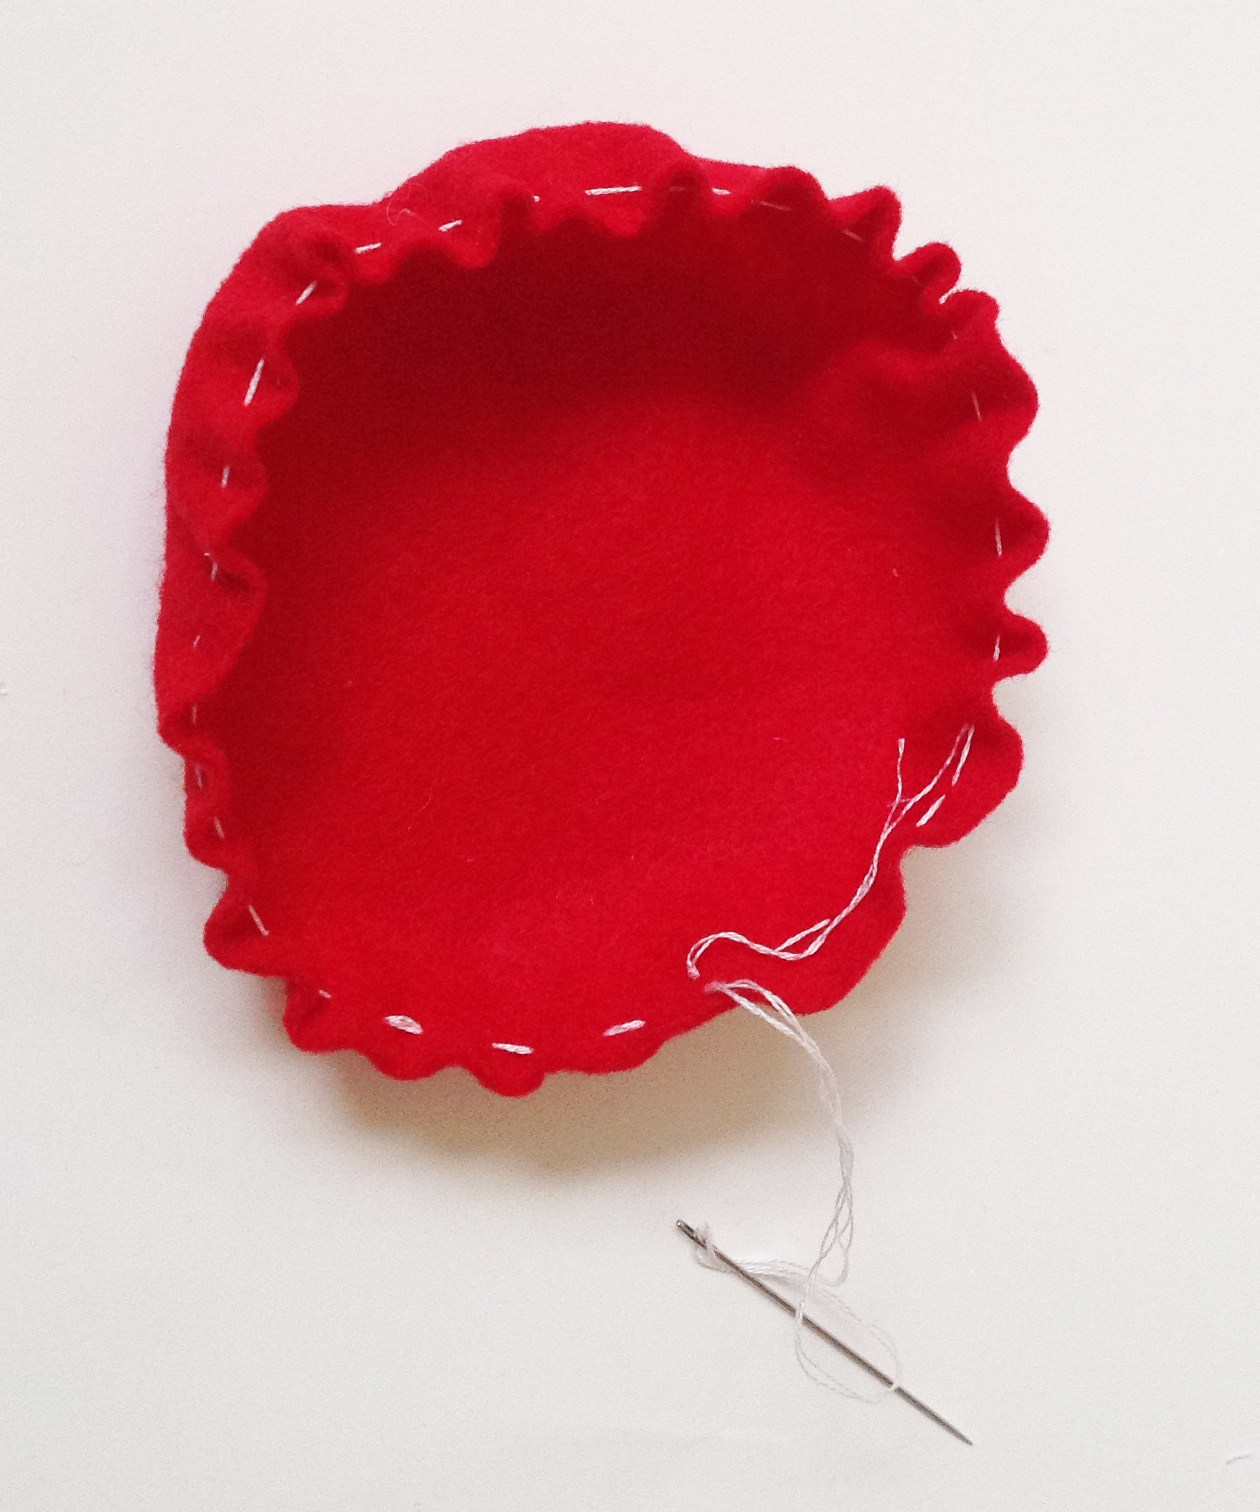
Sew a running stitch 1/8″ from the perimeter of the cherry (K). When you reach the beginning of the seam, don’t tie it off. Put your stuffing in the center and then pull on the thread so that it gathers the edges around the stuffing. I like to run my needle back and forth across the opening to pull in any edges that aren’t pulled in good and tight. Then tie it off.
Cut a 1x 2″ piece from your brown felt. Roll it up along the 2″ side. You can hand stitch it the edge or break out the glue gun. I like to cut the ends at an angle.
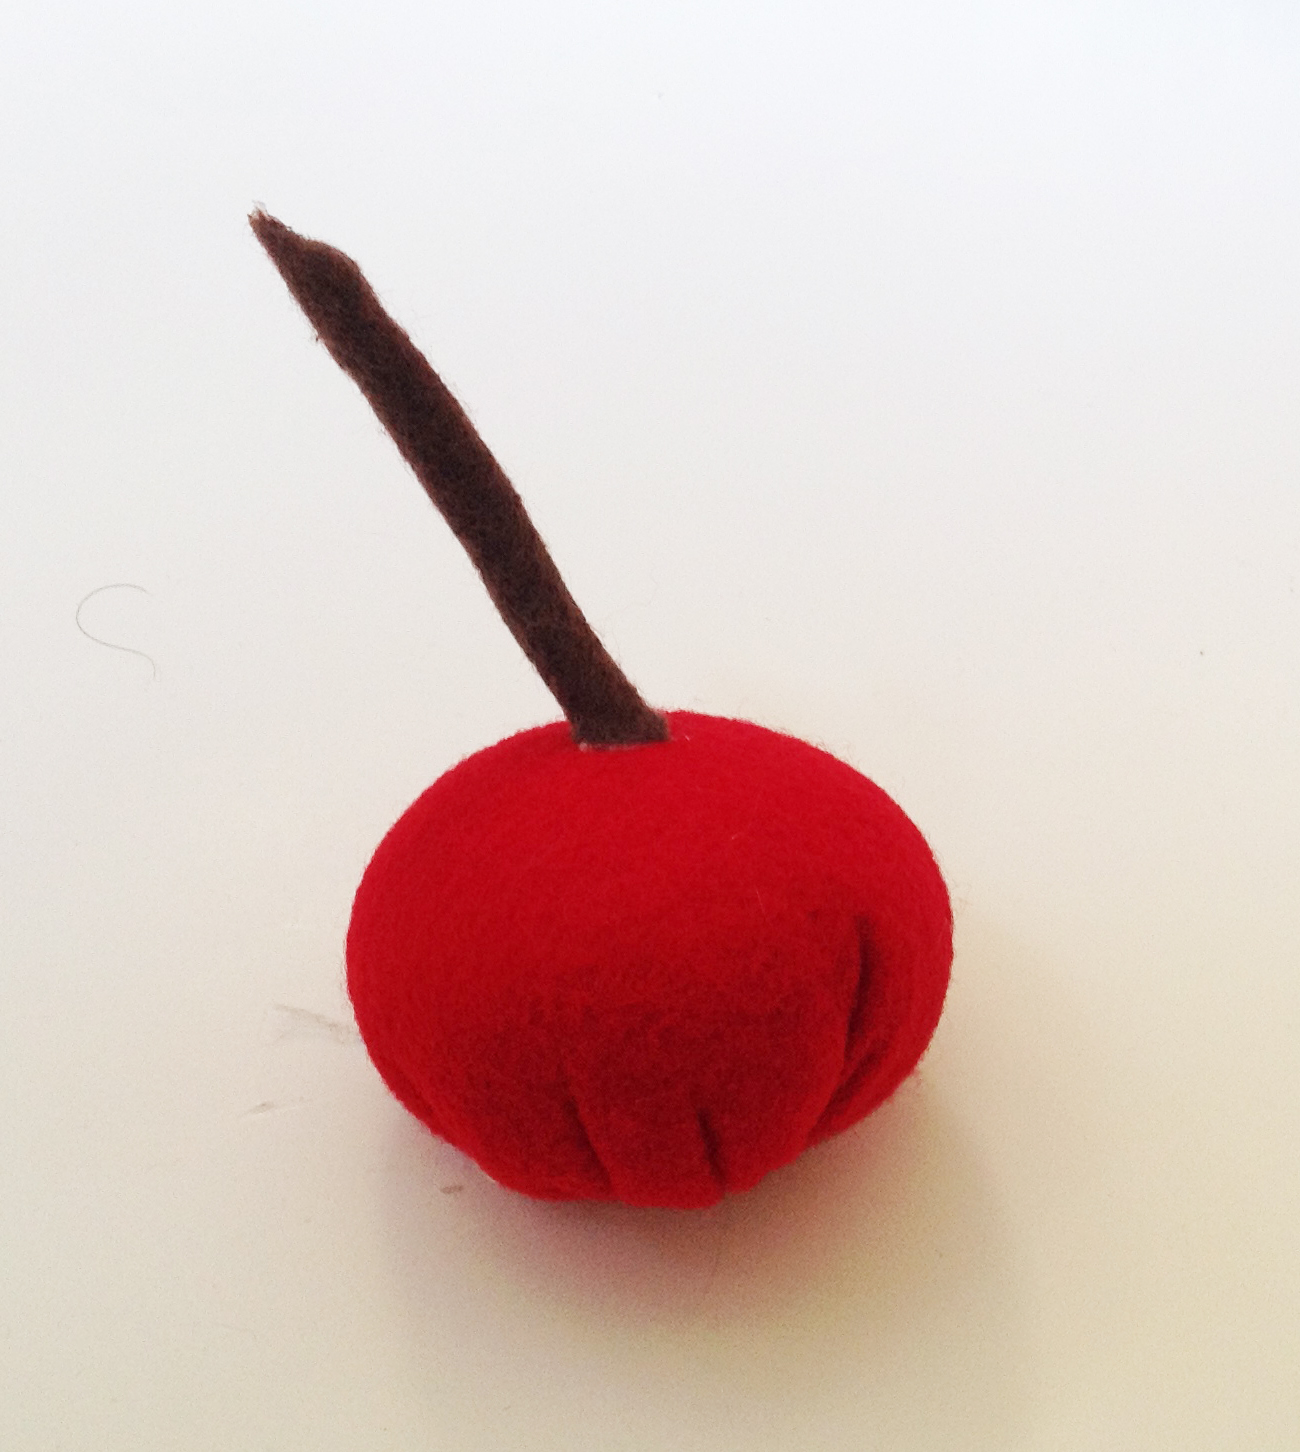
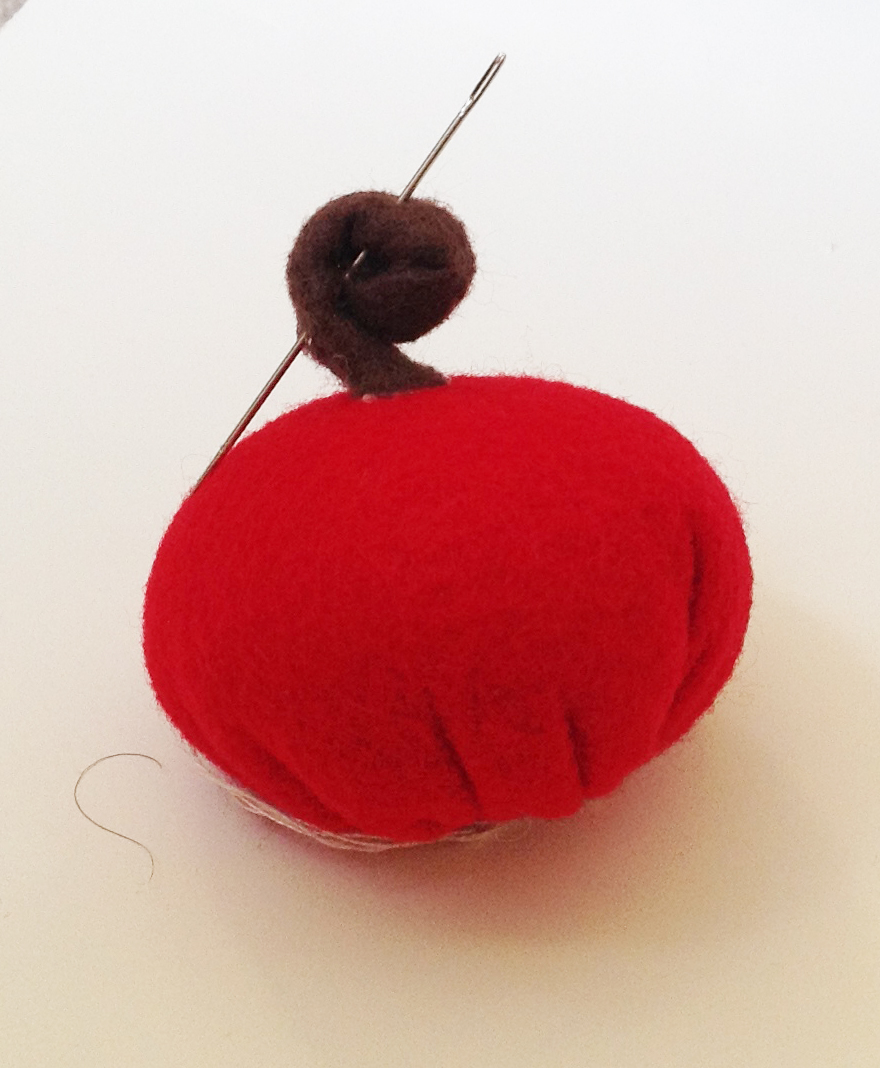
Hand stitch or glue the stem to cherry on the side that is opposite the gathering. Then you can stitch (or glue) the cherry to the backpack above the first row of ruffles.
If your want a bent cherry stem, roll it up into a spiral and put a pin it for a few hours or even overnight (if you can keep it from the kids that long!).
YEAH!! This is a complex design and you did it! 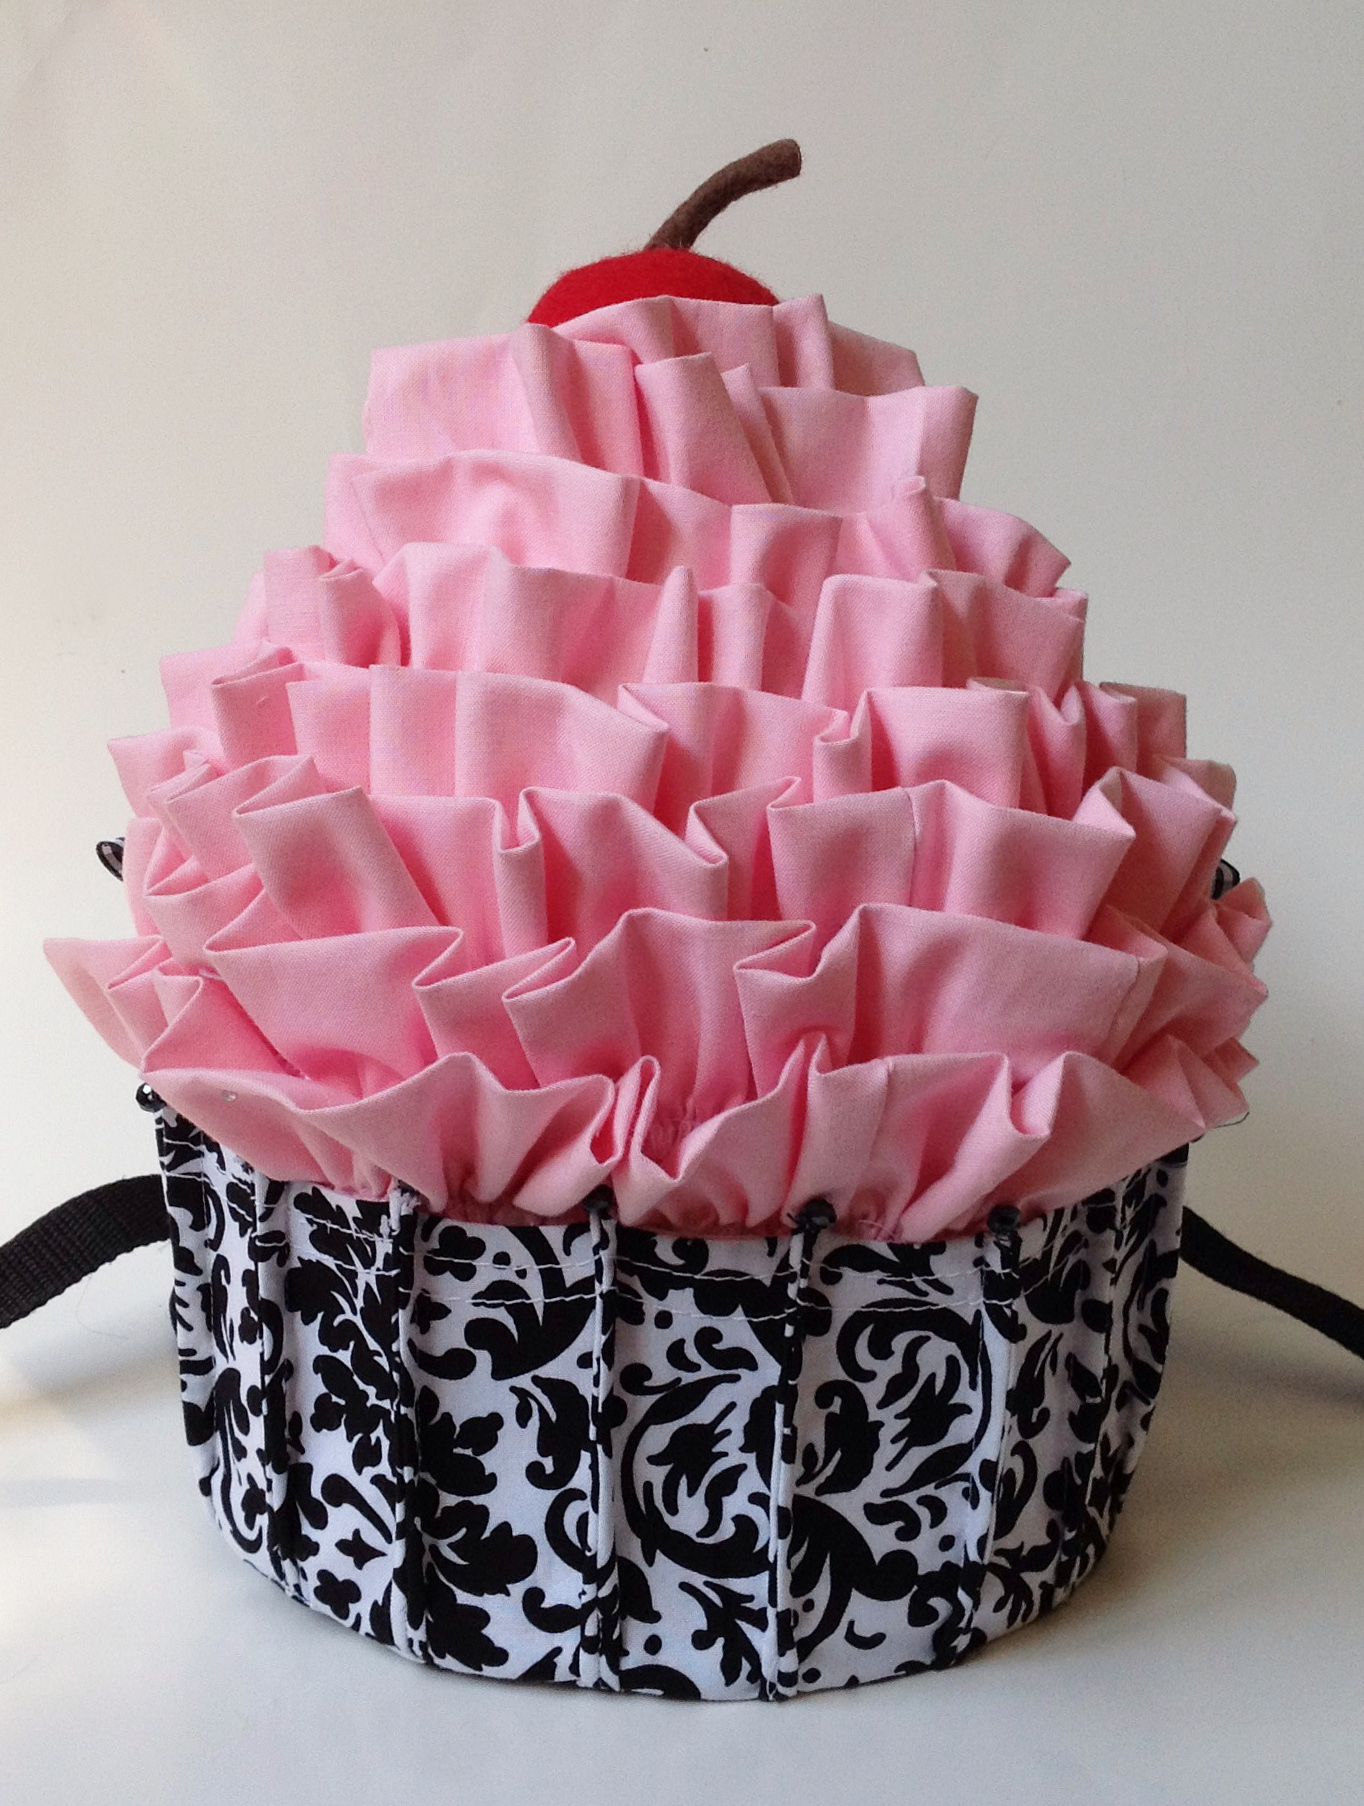
 Thanks so much for sewing along with me. I hope you have enjoyed it!
Please post your photos in the Facebook Group, it’s so fun to see your creations!
Leave a Reply
You must be logged in to post a comment.