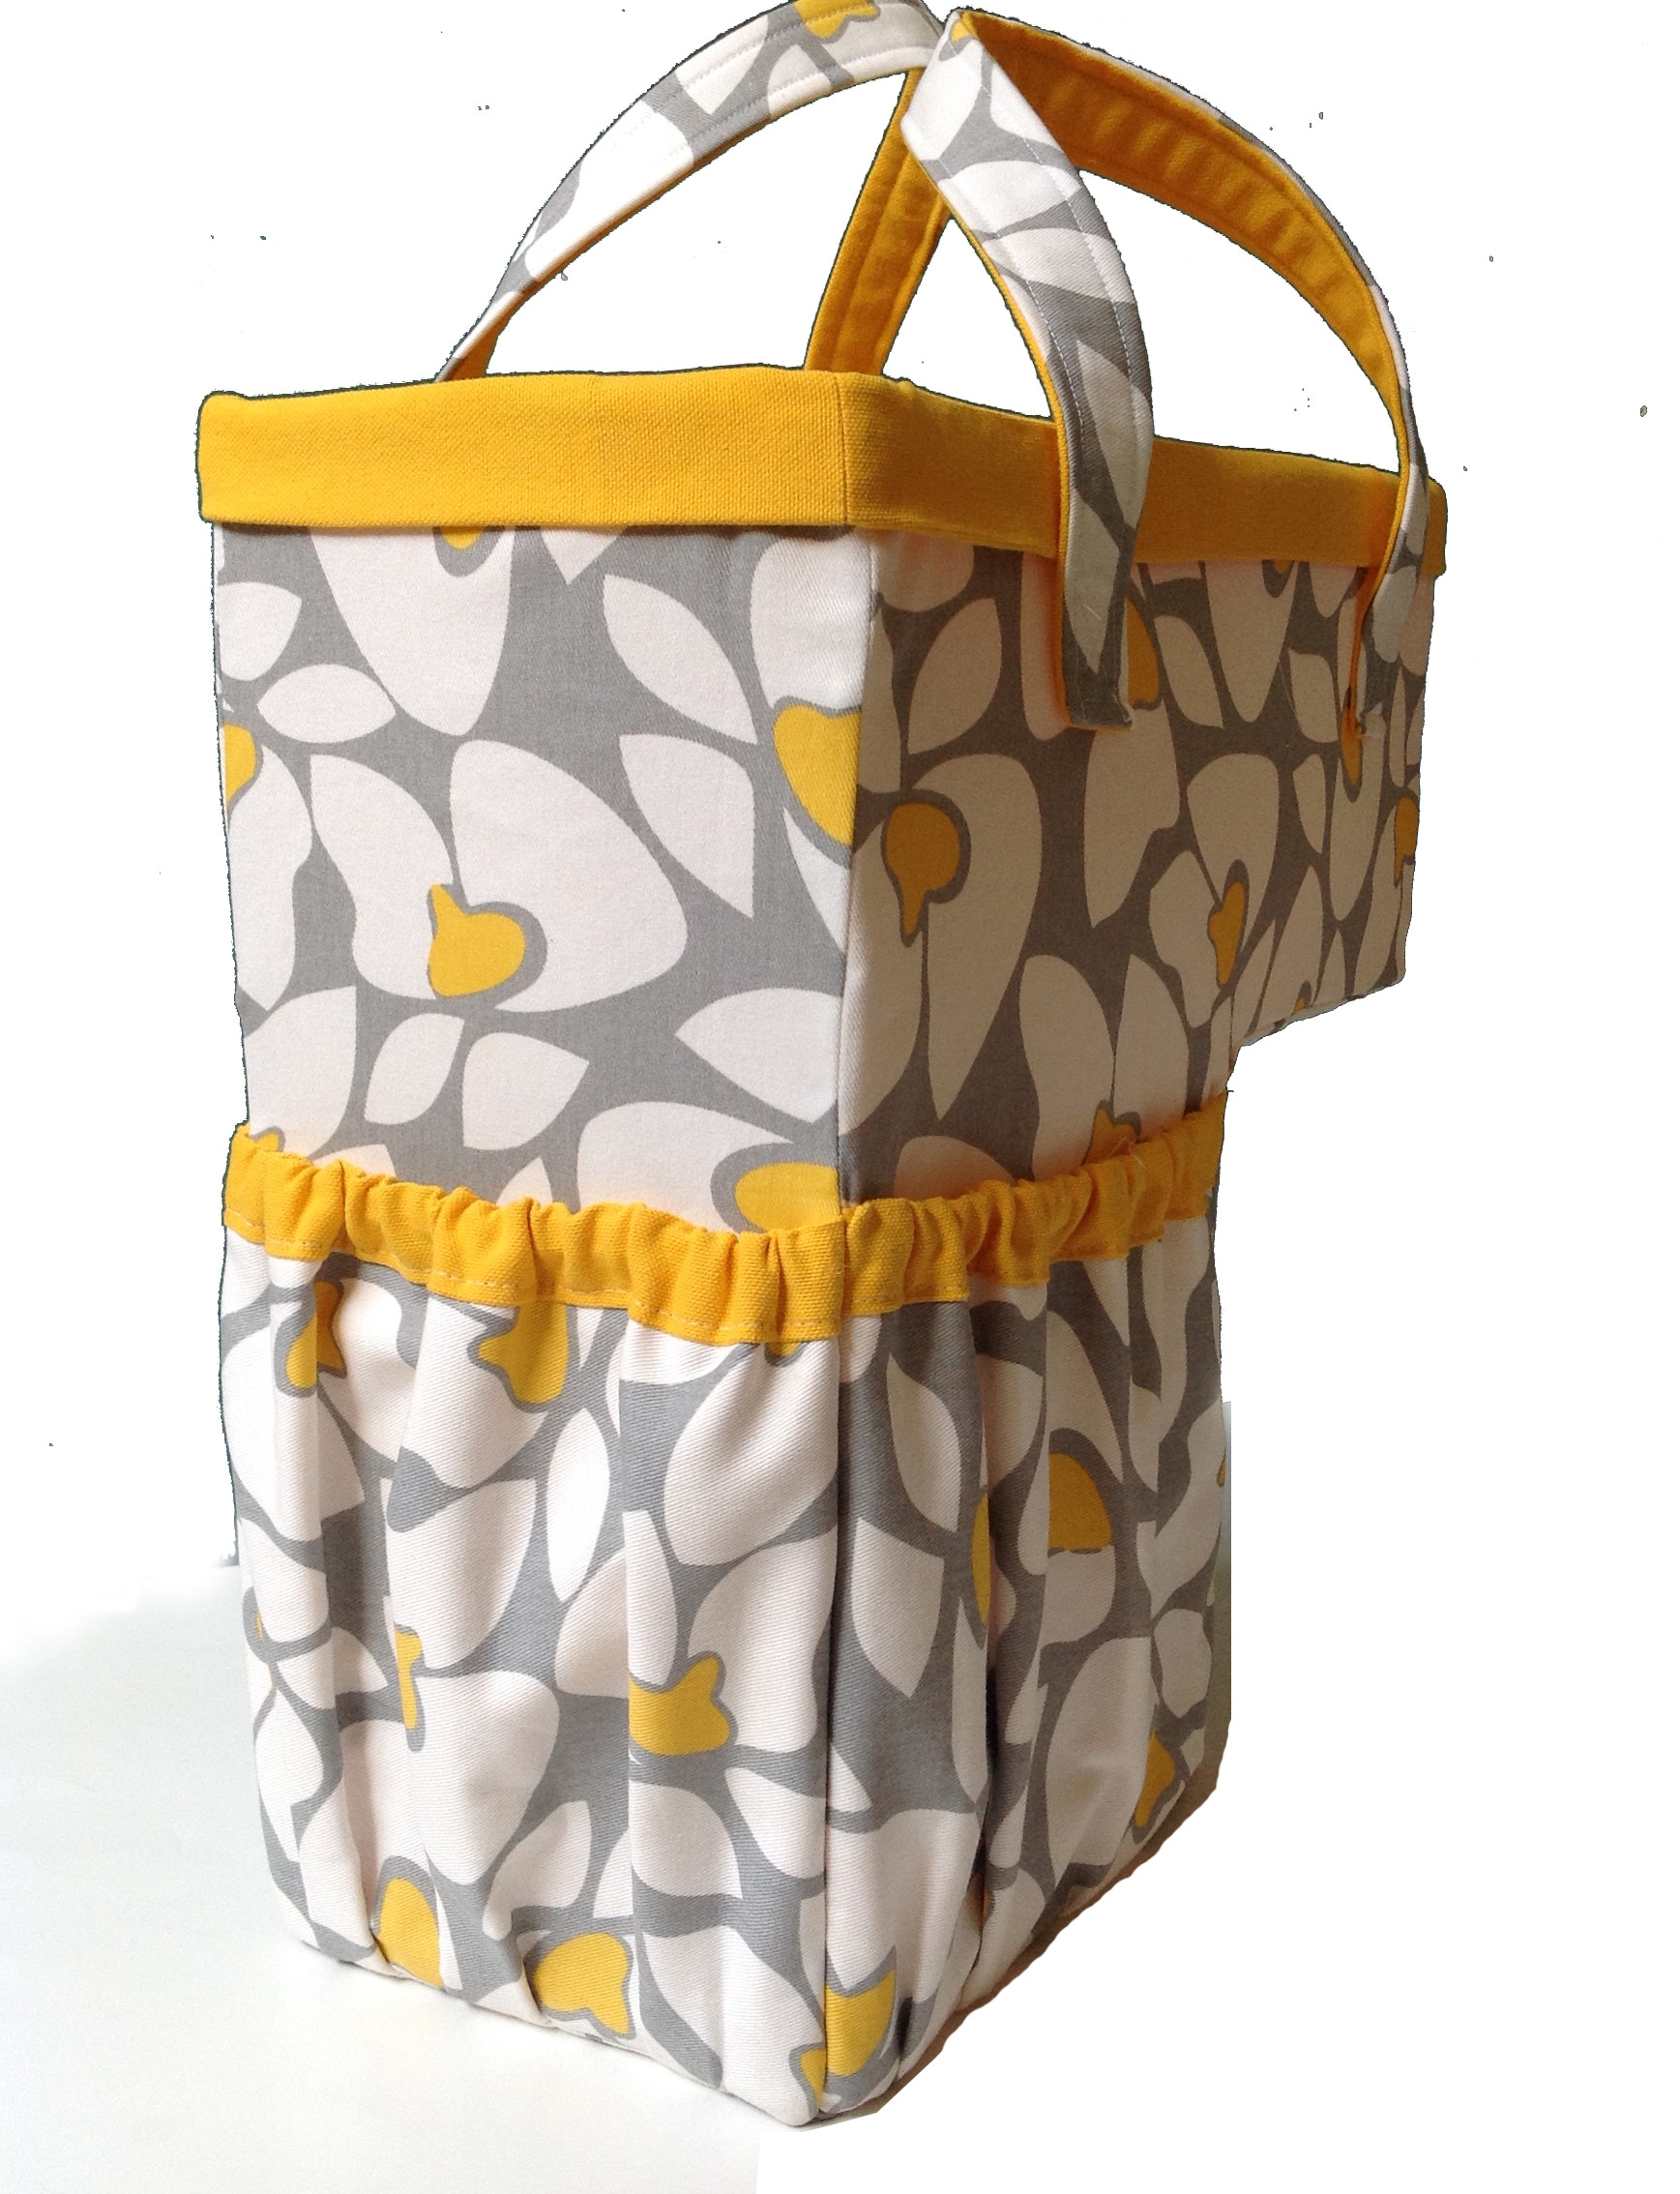
We are going to officially start making our stair basket today! Here’s the one I made for this tutorial…
Also, be sure to read this post for info on the supplies you’ll need for your basket.
With a few exceptions, my plan is to post every three days. For some steps I am going to post early so we can take advantage of the weekends. I hope the schedule gives you enough time to complete the steps. If you find yourself falling behind, the schedule can be reworked, but for now, here’s what I’m planning:
Monday, July 14th: Cutting your fabric & making the handles
Thursday, July 17th: Attaching the handles & making the pockets
Friday, July 18th: Sewing the exterior and lining
Monday, July 21st: Cutting out the frame pieces
Thursday, July 24th: Constructing the frame part 1
Friday, July 25th: Constructing the frame part 2
Monday, July 28th: Putting it all together!
Ok, enough business, let’ get started! Today we will work through the first 4 pages of the pattern. At the end of today we will have the fabric cut and marked and have the handles sewn.
Cutting Your Fabric:
I’m not going to go into a lot of detail about the cutting of the pieces because they are just a bunch of rectangles, but feel free to post your questions.
There are just a few points I want to make:
1. Recently, one of my fabulous pattern tester, Carol, shared a really nice way to do handles that I want to show you in this sew along. I think it makes a cleaner finish on the ends. But to do I this new way, your handle pieces will need to be cut t at 2 1/2″ wide instead of 2″ wide (as instructed in the pattern). If you have already cut your handle and don’t want to or can’t recut – no problem! (I’m not sure who to give credit to for this technique – Carol got it from Sewfearless.com – but its all over the web. So…to whomever was the smart person who came up with it – thanks! )
2. Be sure to mark the top edge of each fabric piece with the word “top” or some other mark to show you which is the top edge. It may seem obvious when you are cutting the pieces out – but trust me on this, mark them!
Marking and Snipping your fabric:
I want to start on page 3 with the section called “Mark and Snip Panels”. We don’t need to make all those marks and snips! I know I say to do it in the pattern but since I have you as a captive audience and I can go into a lot of fine detail as we go along, we can do things a little differently.
So instead of marking and snipping now, we are going to be doing that as we sew. The reason is, I have found that no matter how carefully I mark and snip, there are always variations – maybe the side panels aren’t quite square, or maybe the fabric has some stretch, who knows. But we can far more accurate and skip the tedium of marking these panels if we do it as we go along.
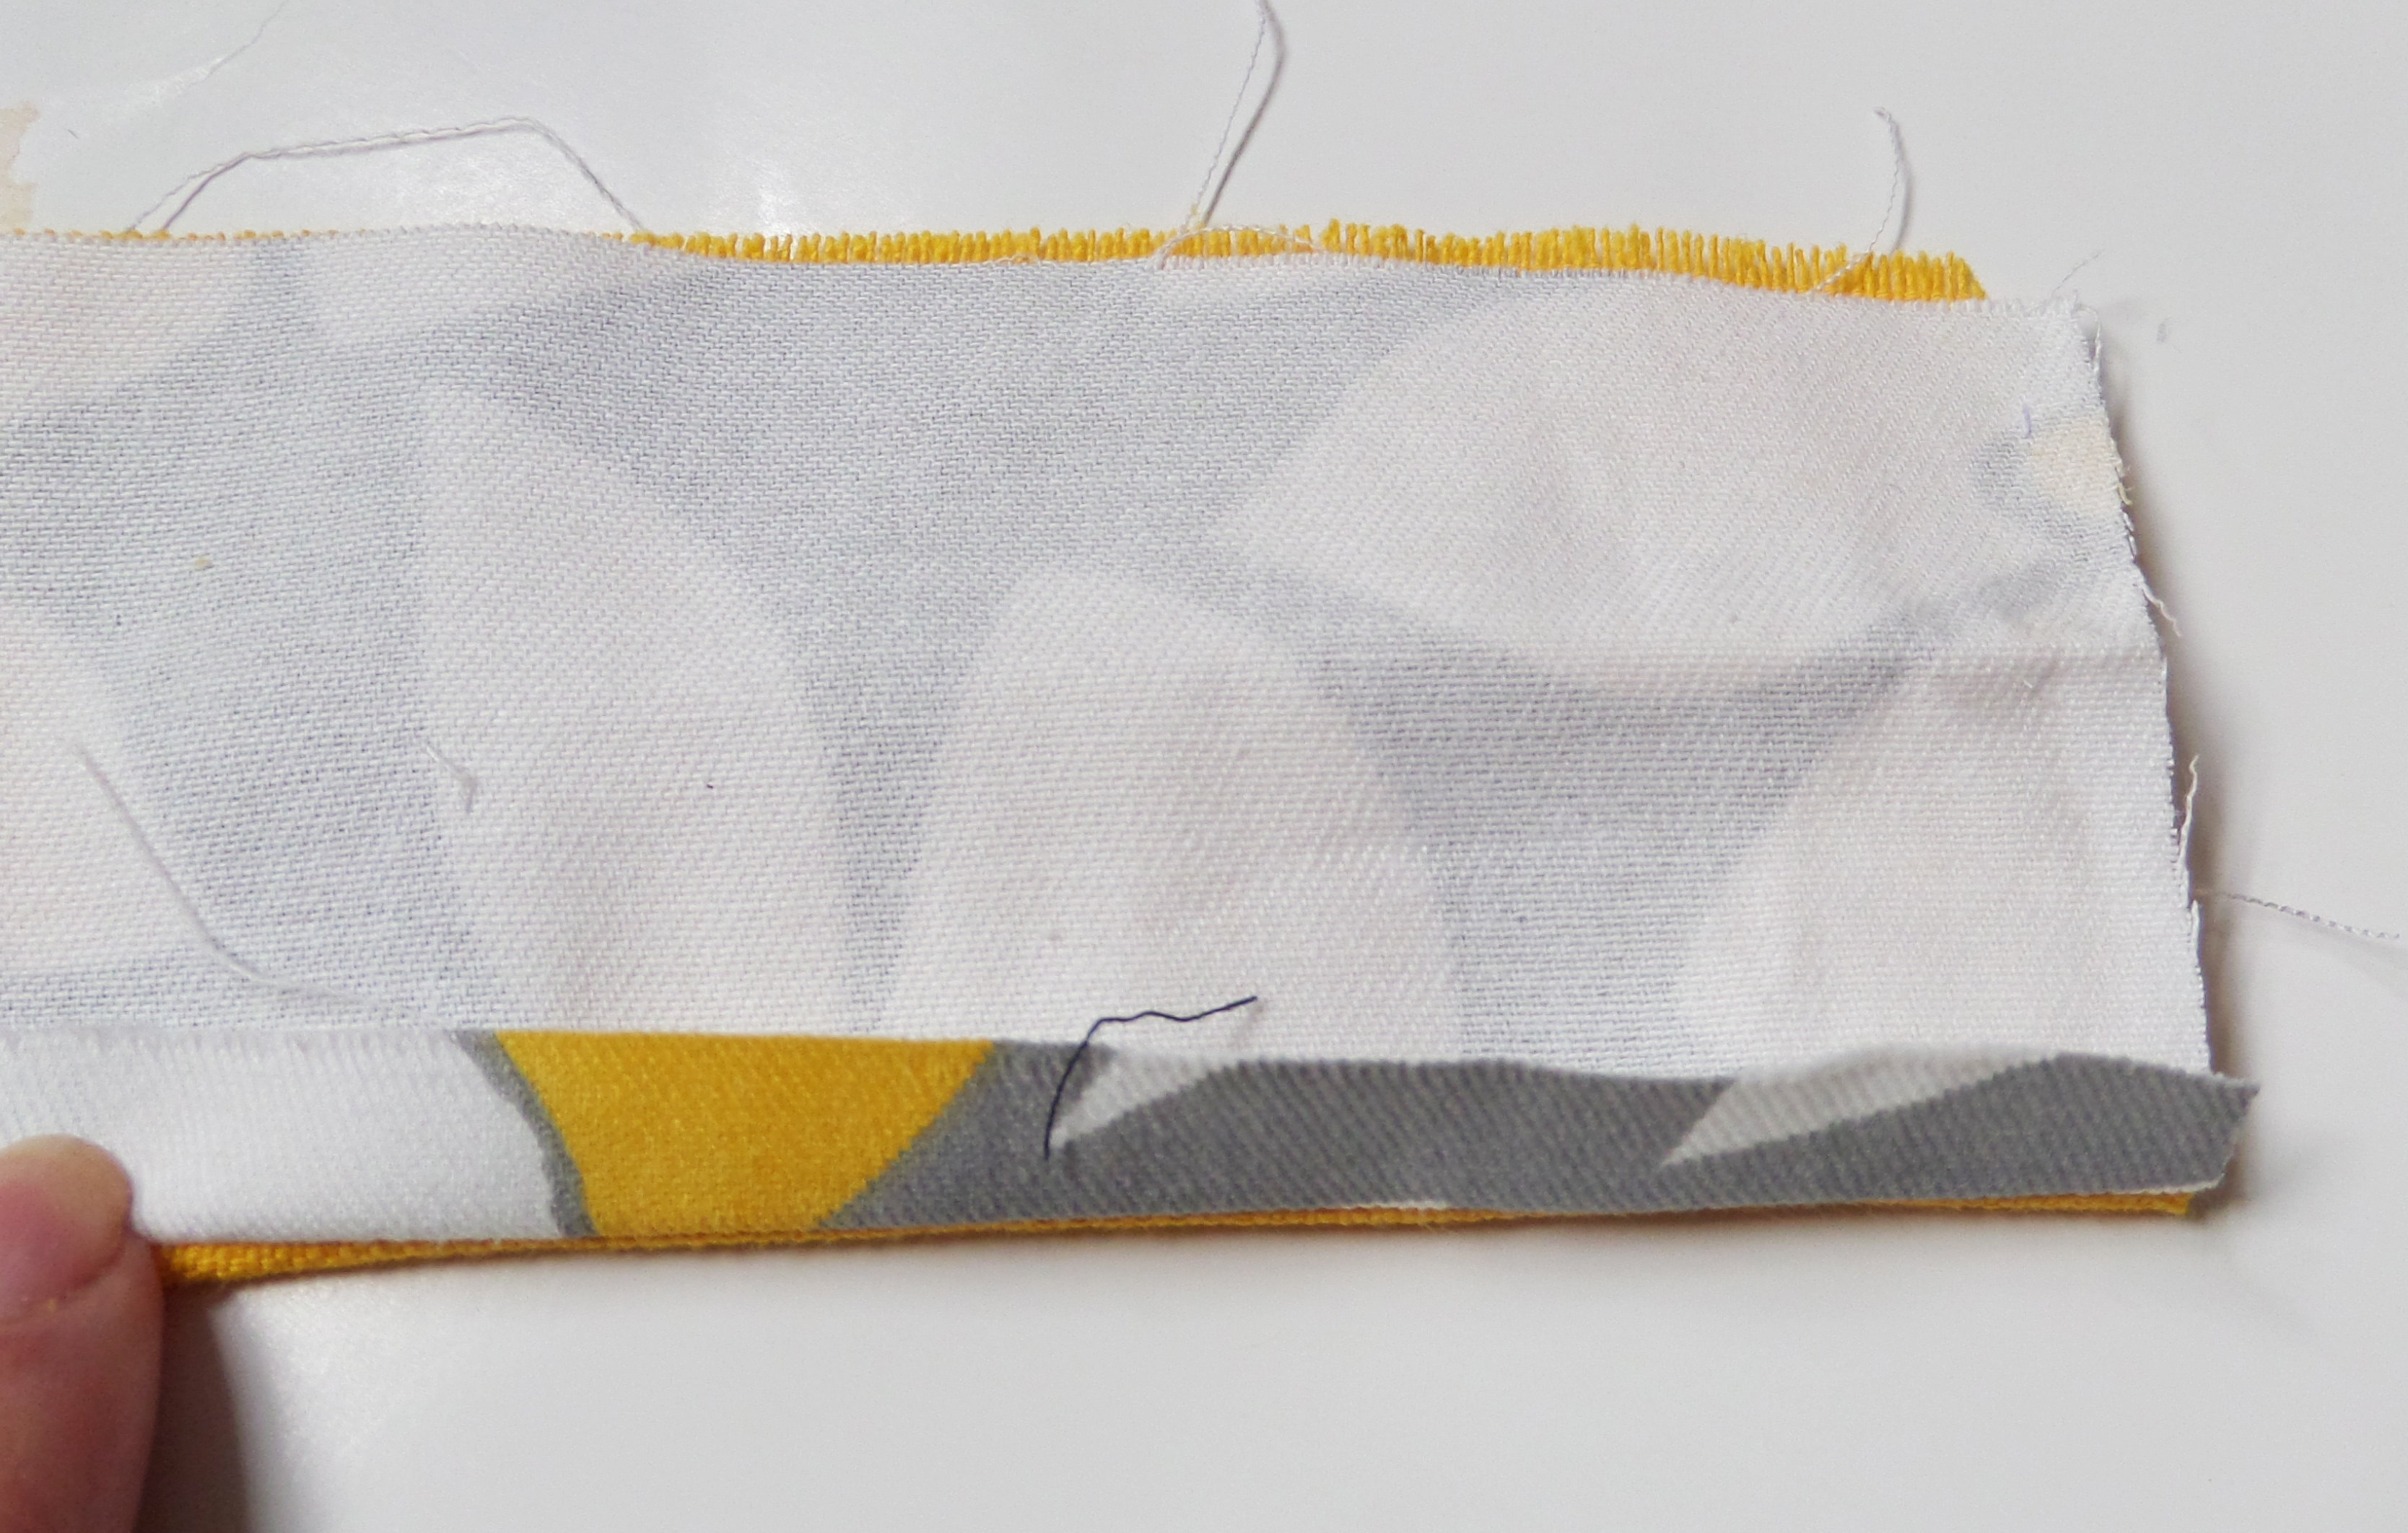
There are only two marks we need to make on each of the Side Panels (B, C, H and I).
Let’s do the B Side Panel first. On the wrong side, measure in 1/2″ from each edge in the corners pictured below (refer to the red dots).
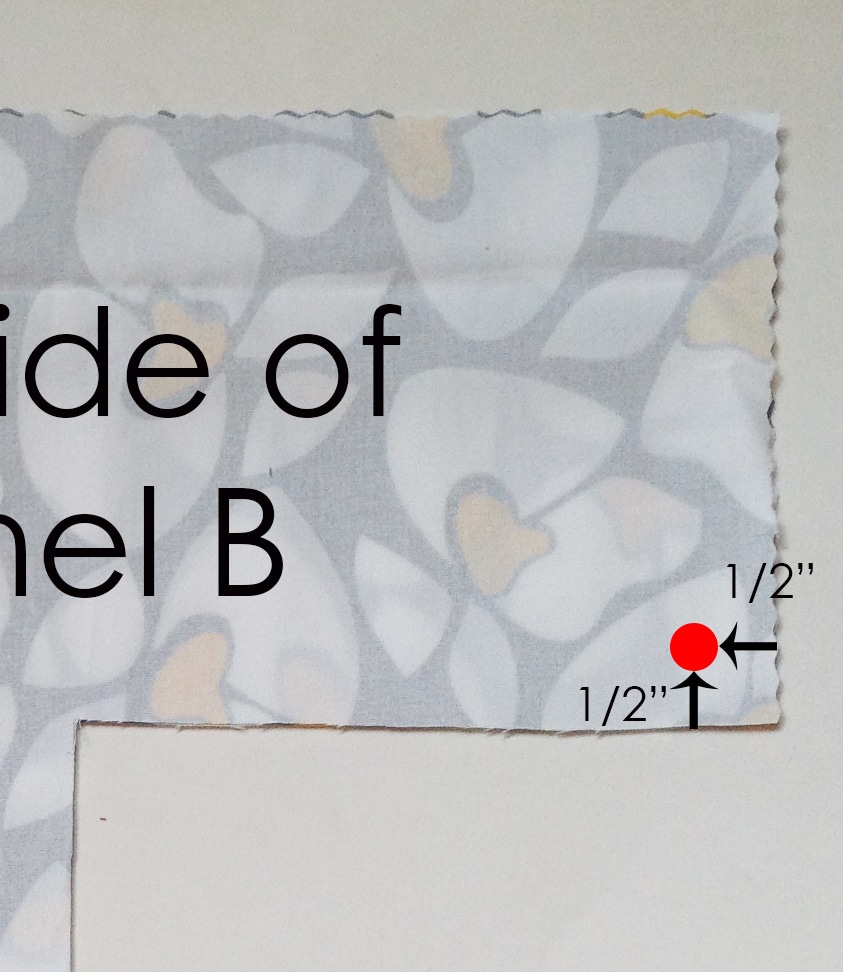 Here’s a close up…
Now grab your C Side Panel and measure 1/2″ from each side edge in the corners pictured below.
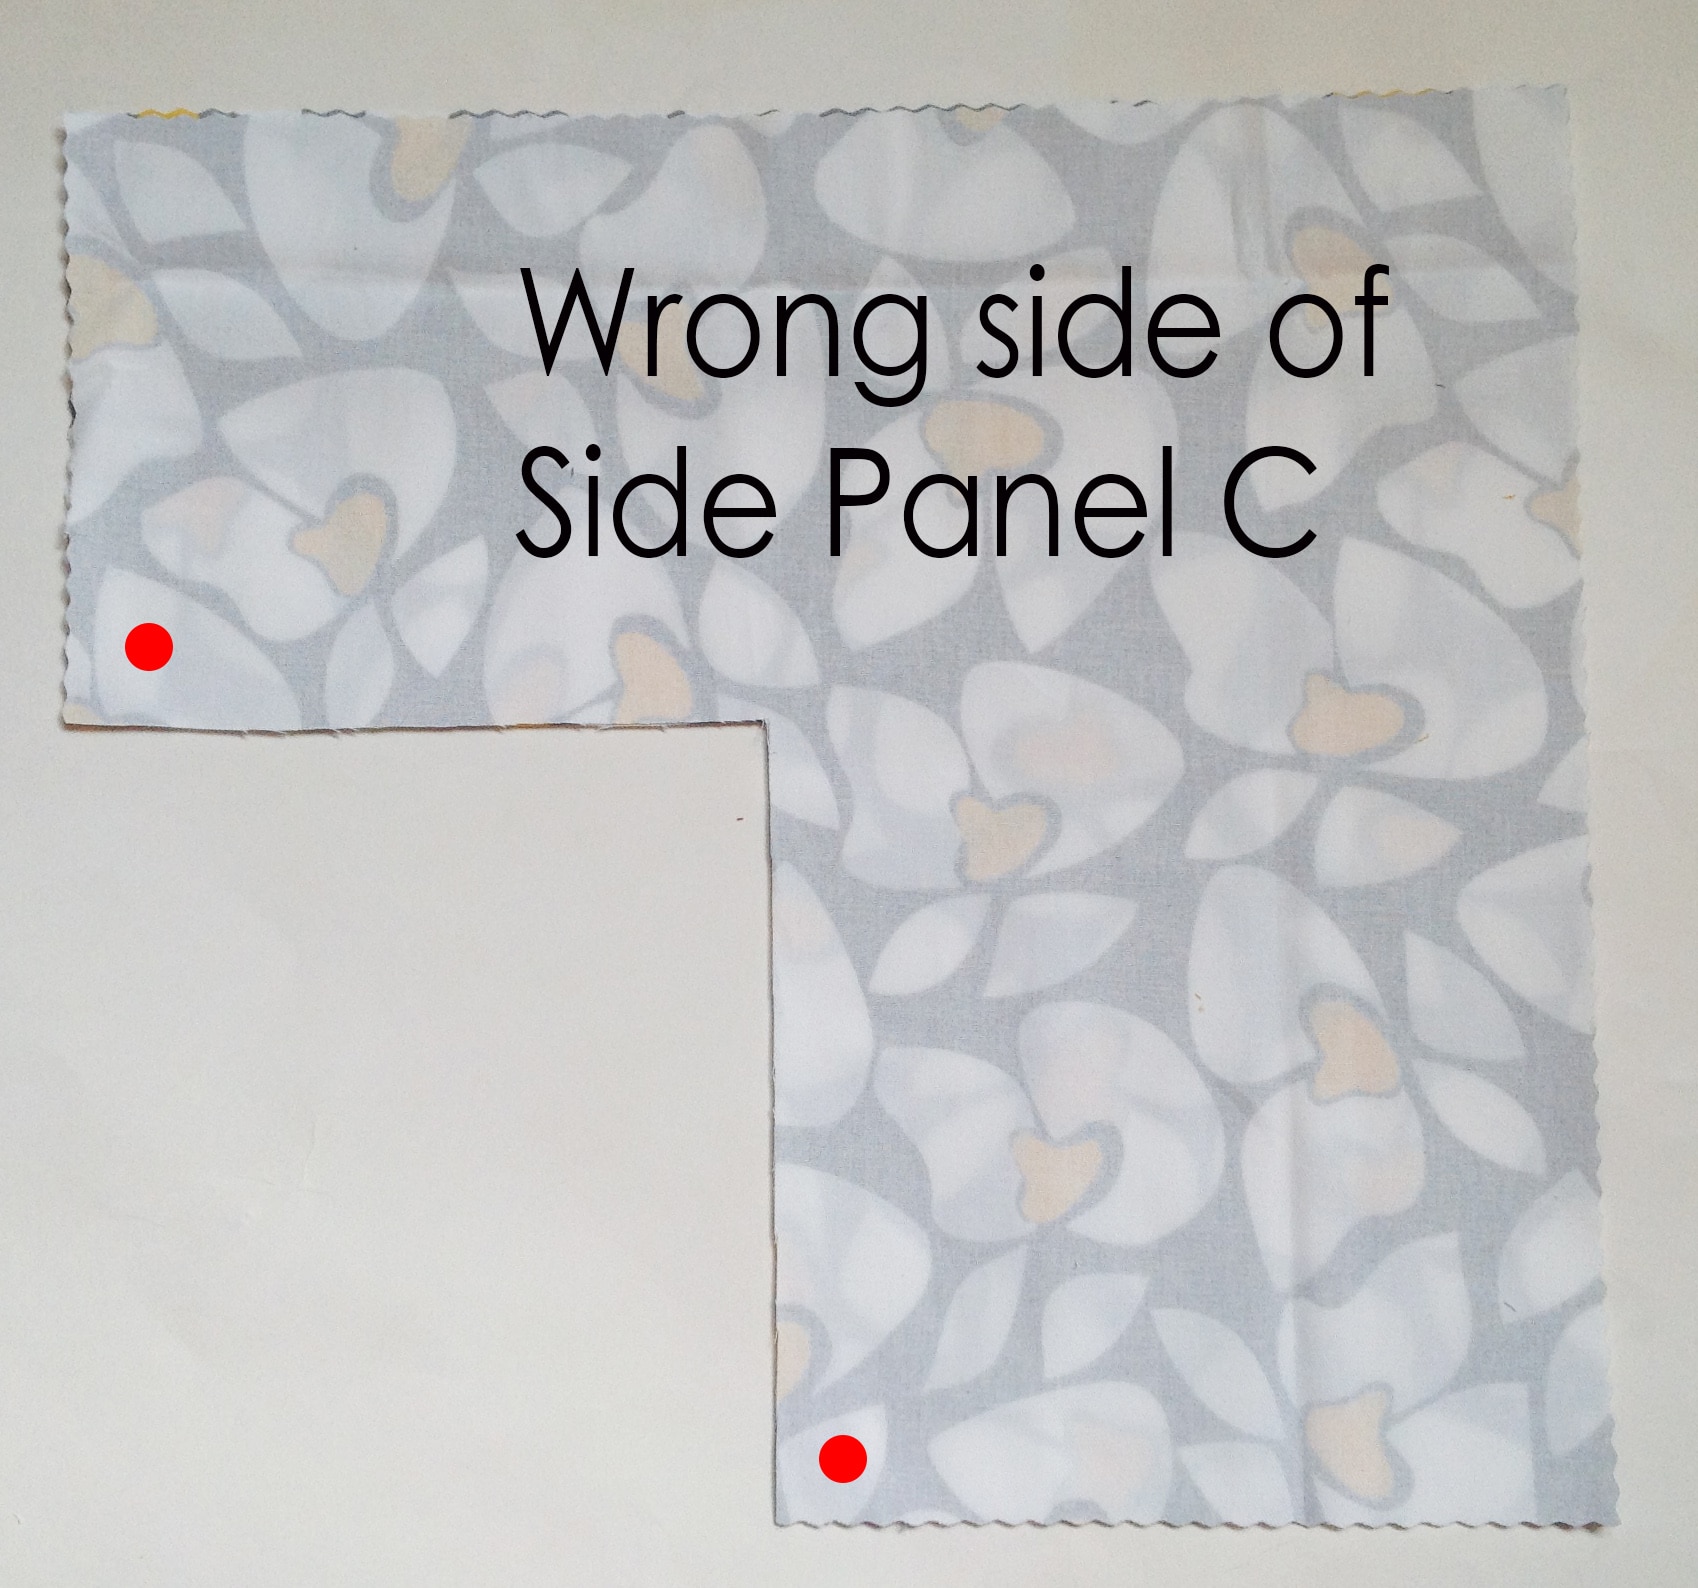
Repeat on the I panel (the same piece as C in the Lining fabric).
If you were motivated and have already marked and your panels as the pattern instructed, it’s ok!! It will work out just fine!
On to the handles!
If you decided to try the new technique for the handle, and have your handles cut 2 1/2″ wide then stay on this page and read on! If you cut your handles at 2″wide as the pattern instructs, go here for the rest of today’s tutorial.
Grab one handle from each of your two fabrics and your webbing (you can also use interfacing as a substitute for the webbing – I just like webbing because it is so strong, doesn’t crease and has a nice body to it). 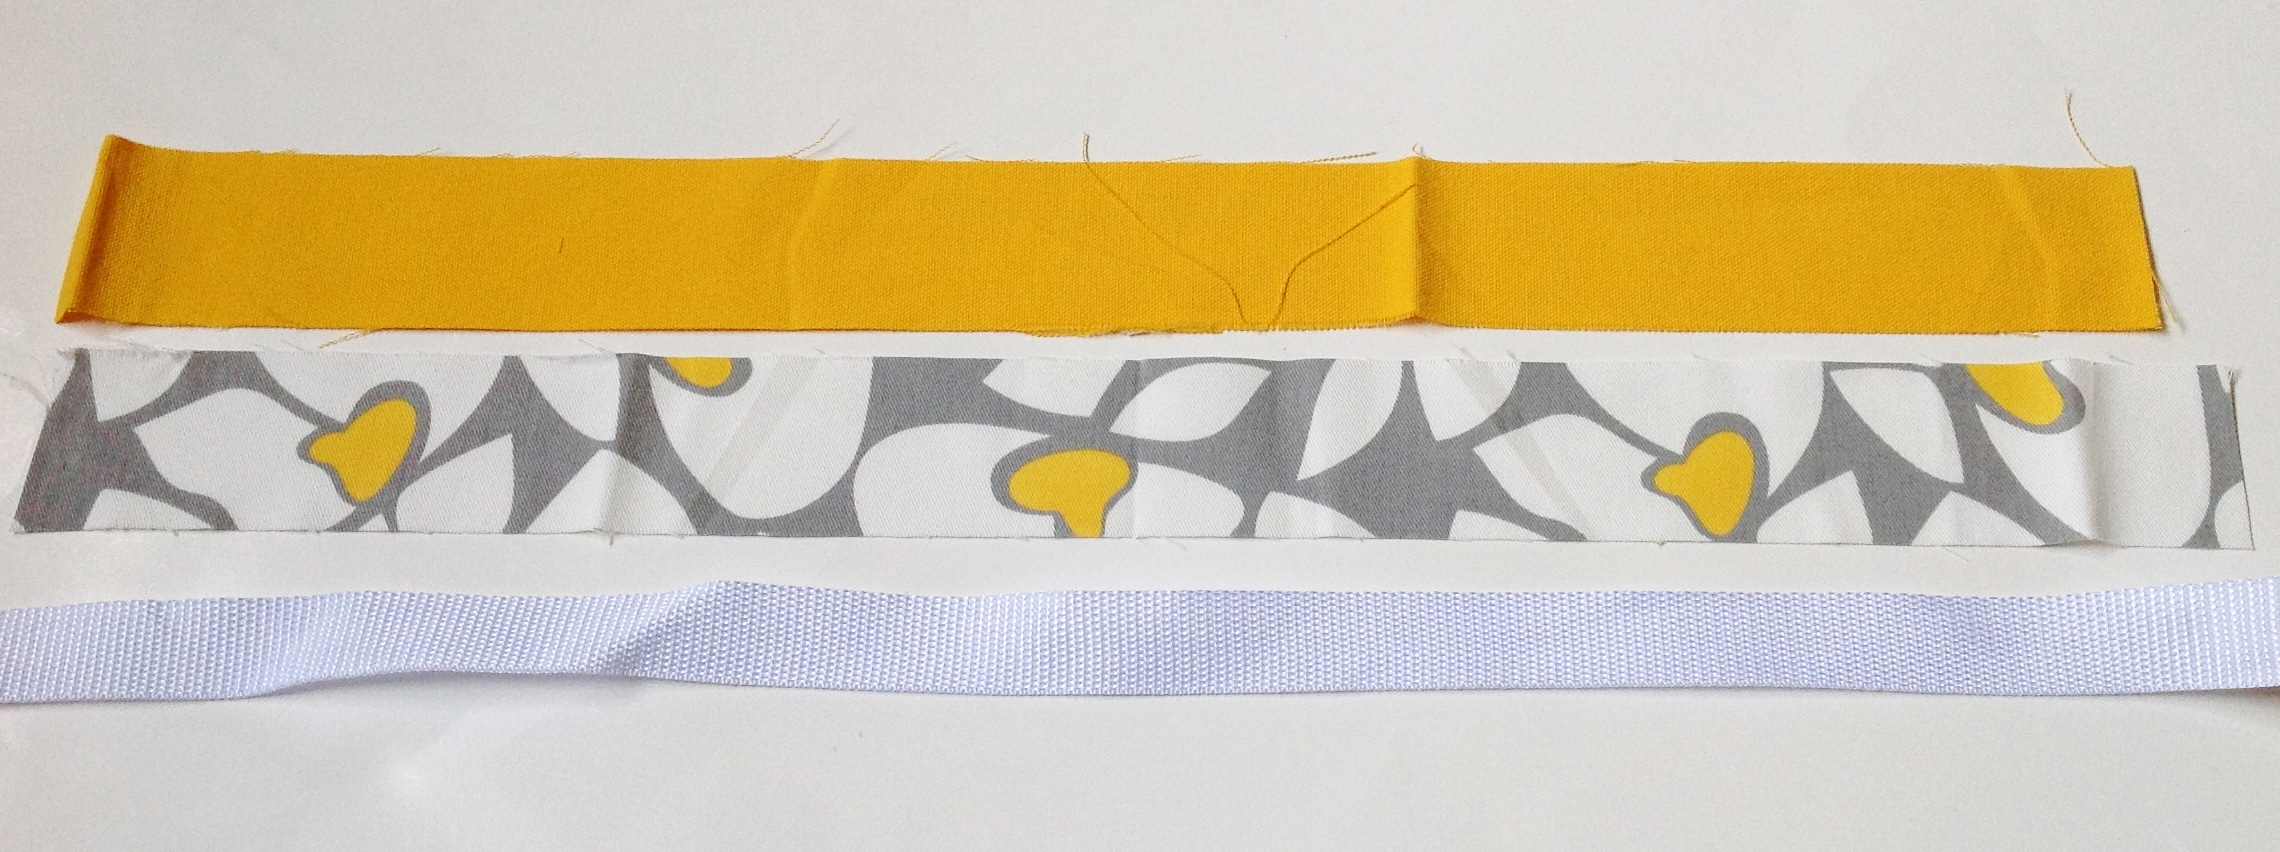
Align all the edges with right sides facing and sew one long edge. Remember that the seam allowance here is 1/2″. Open the seam allowance and press.

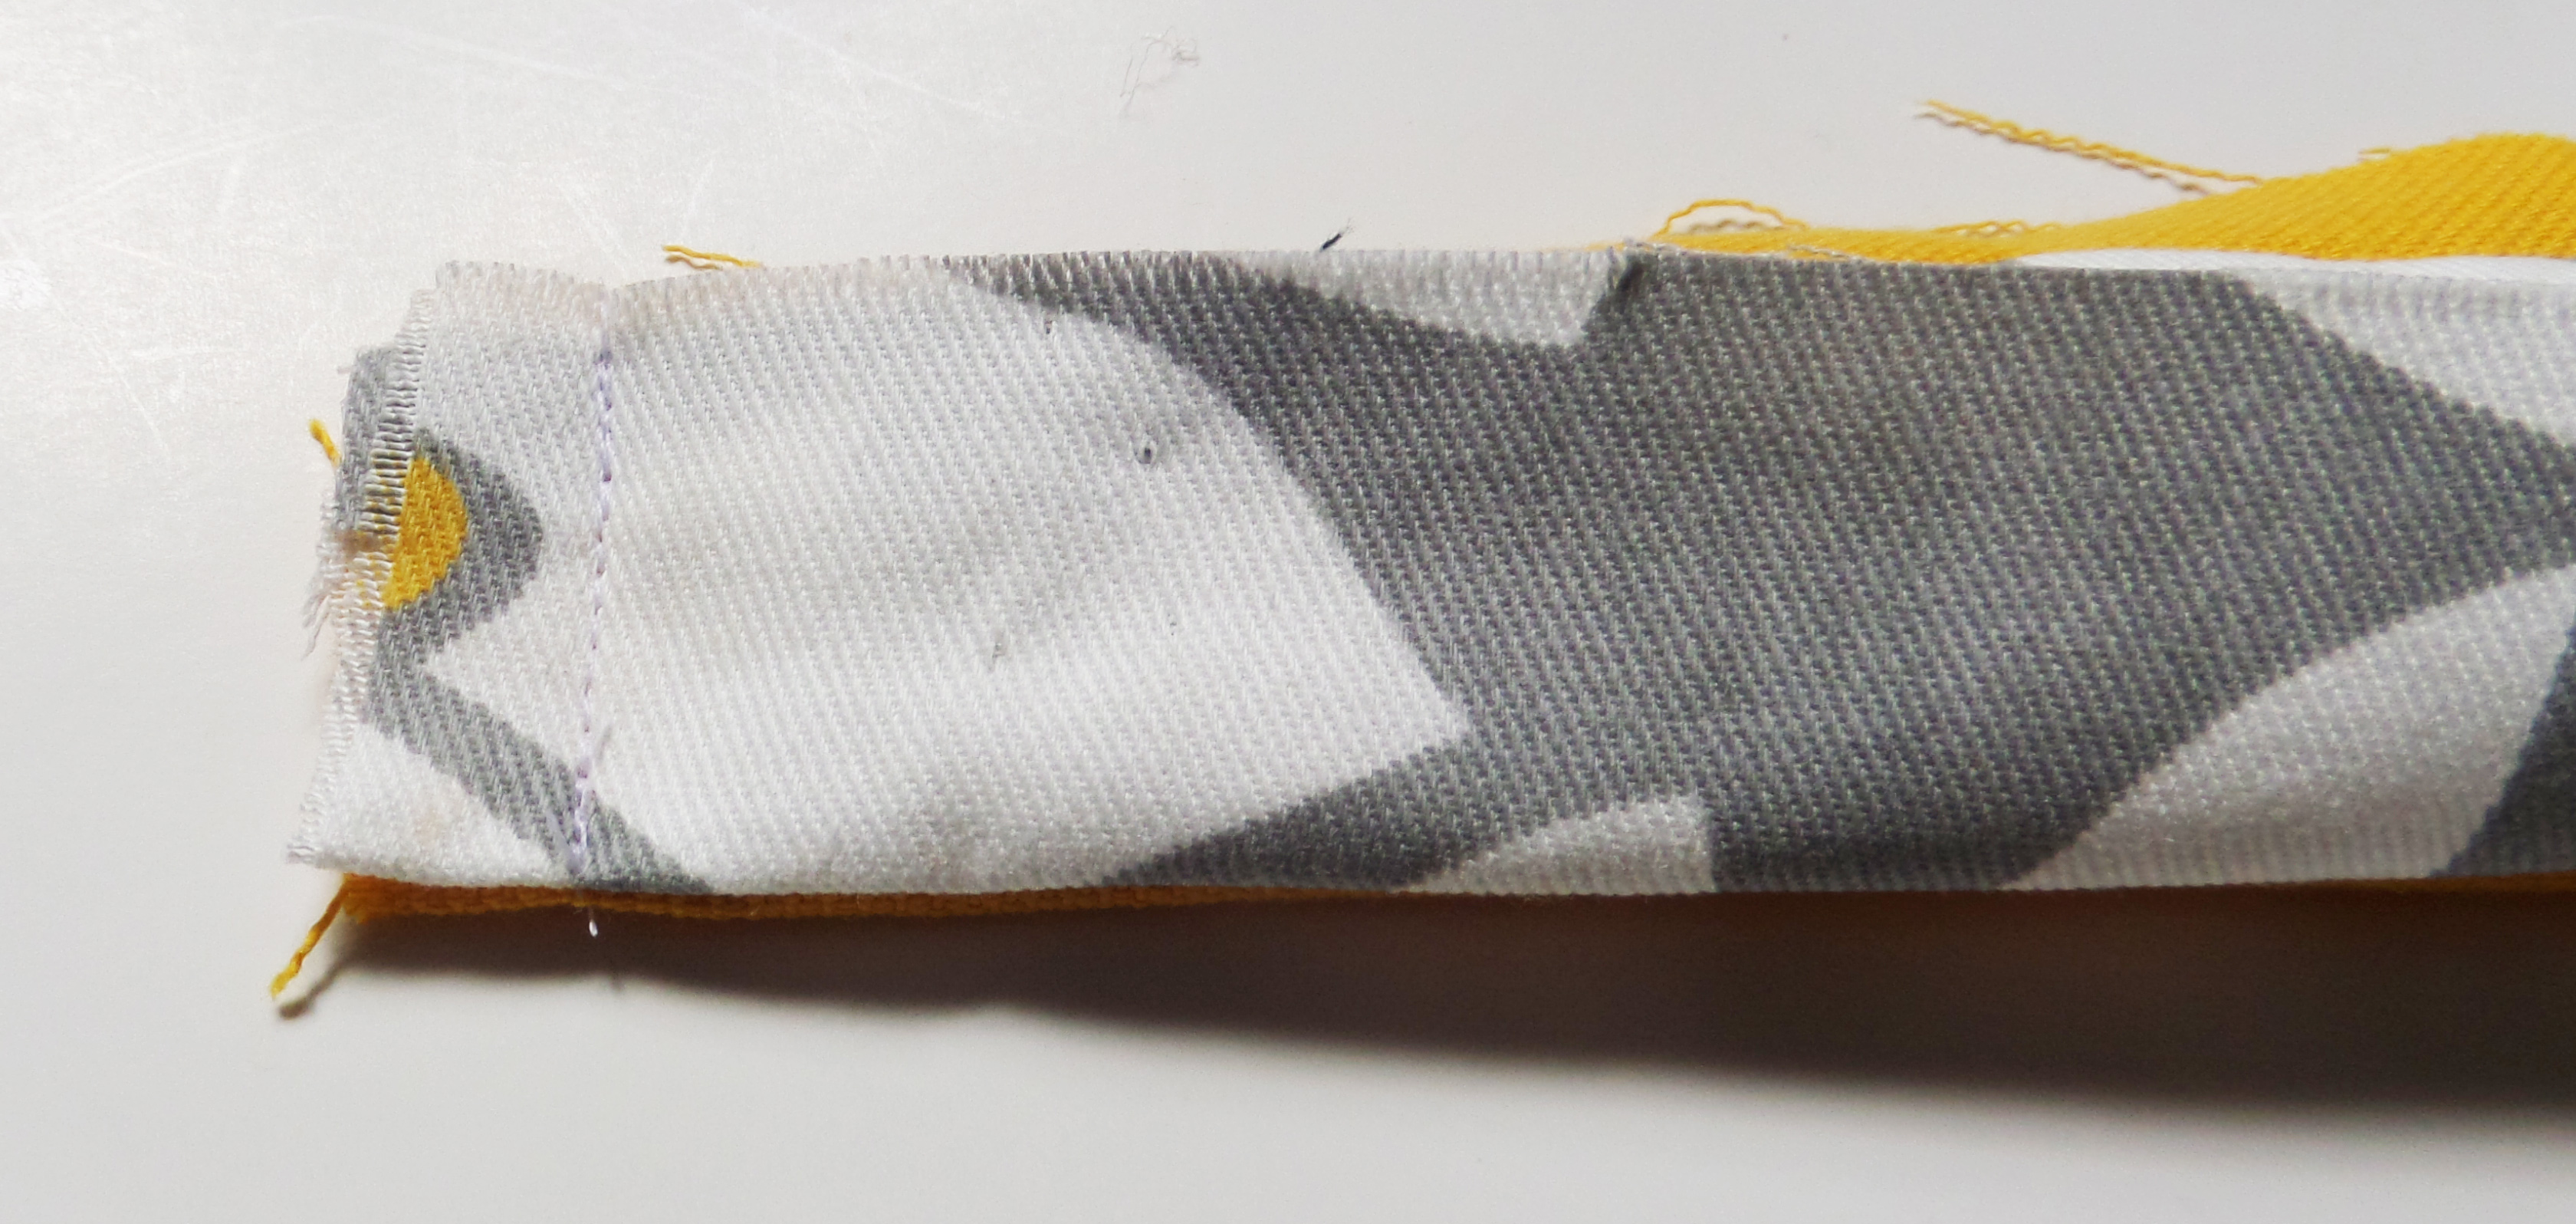
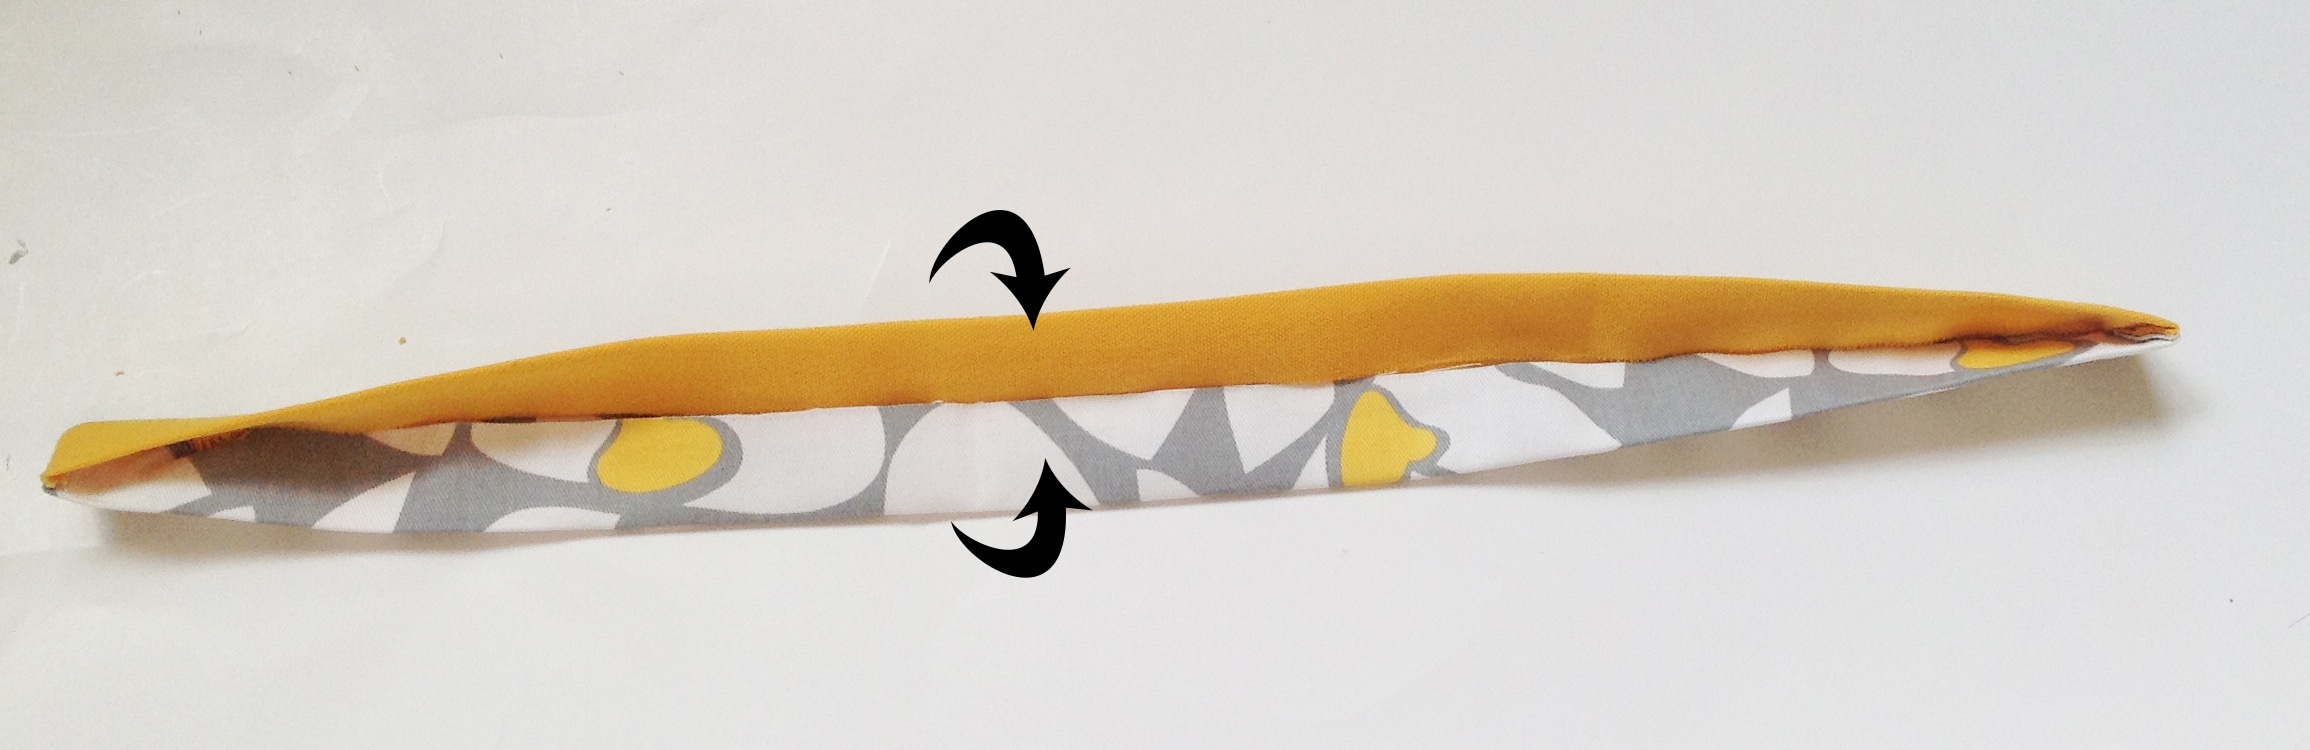
Just at the last few inches of one end, fold the long edge of the primary fabric in to meet the seam line (the primary fabric is not folded in half with wrong sides facing). You should be able to see the right side of the fabric…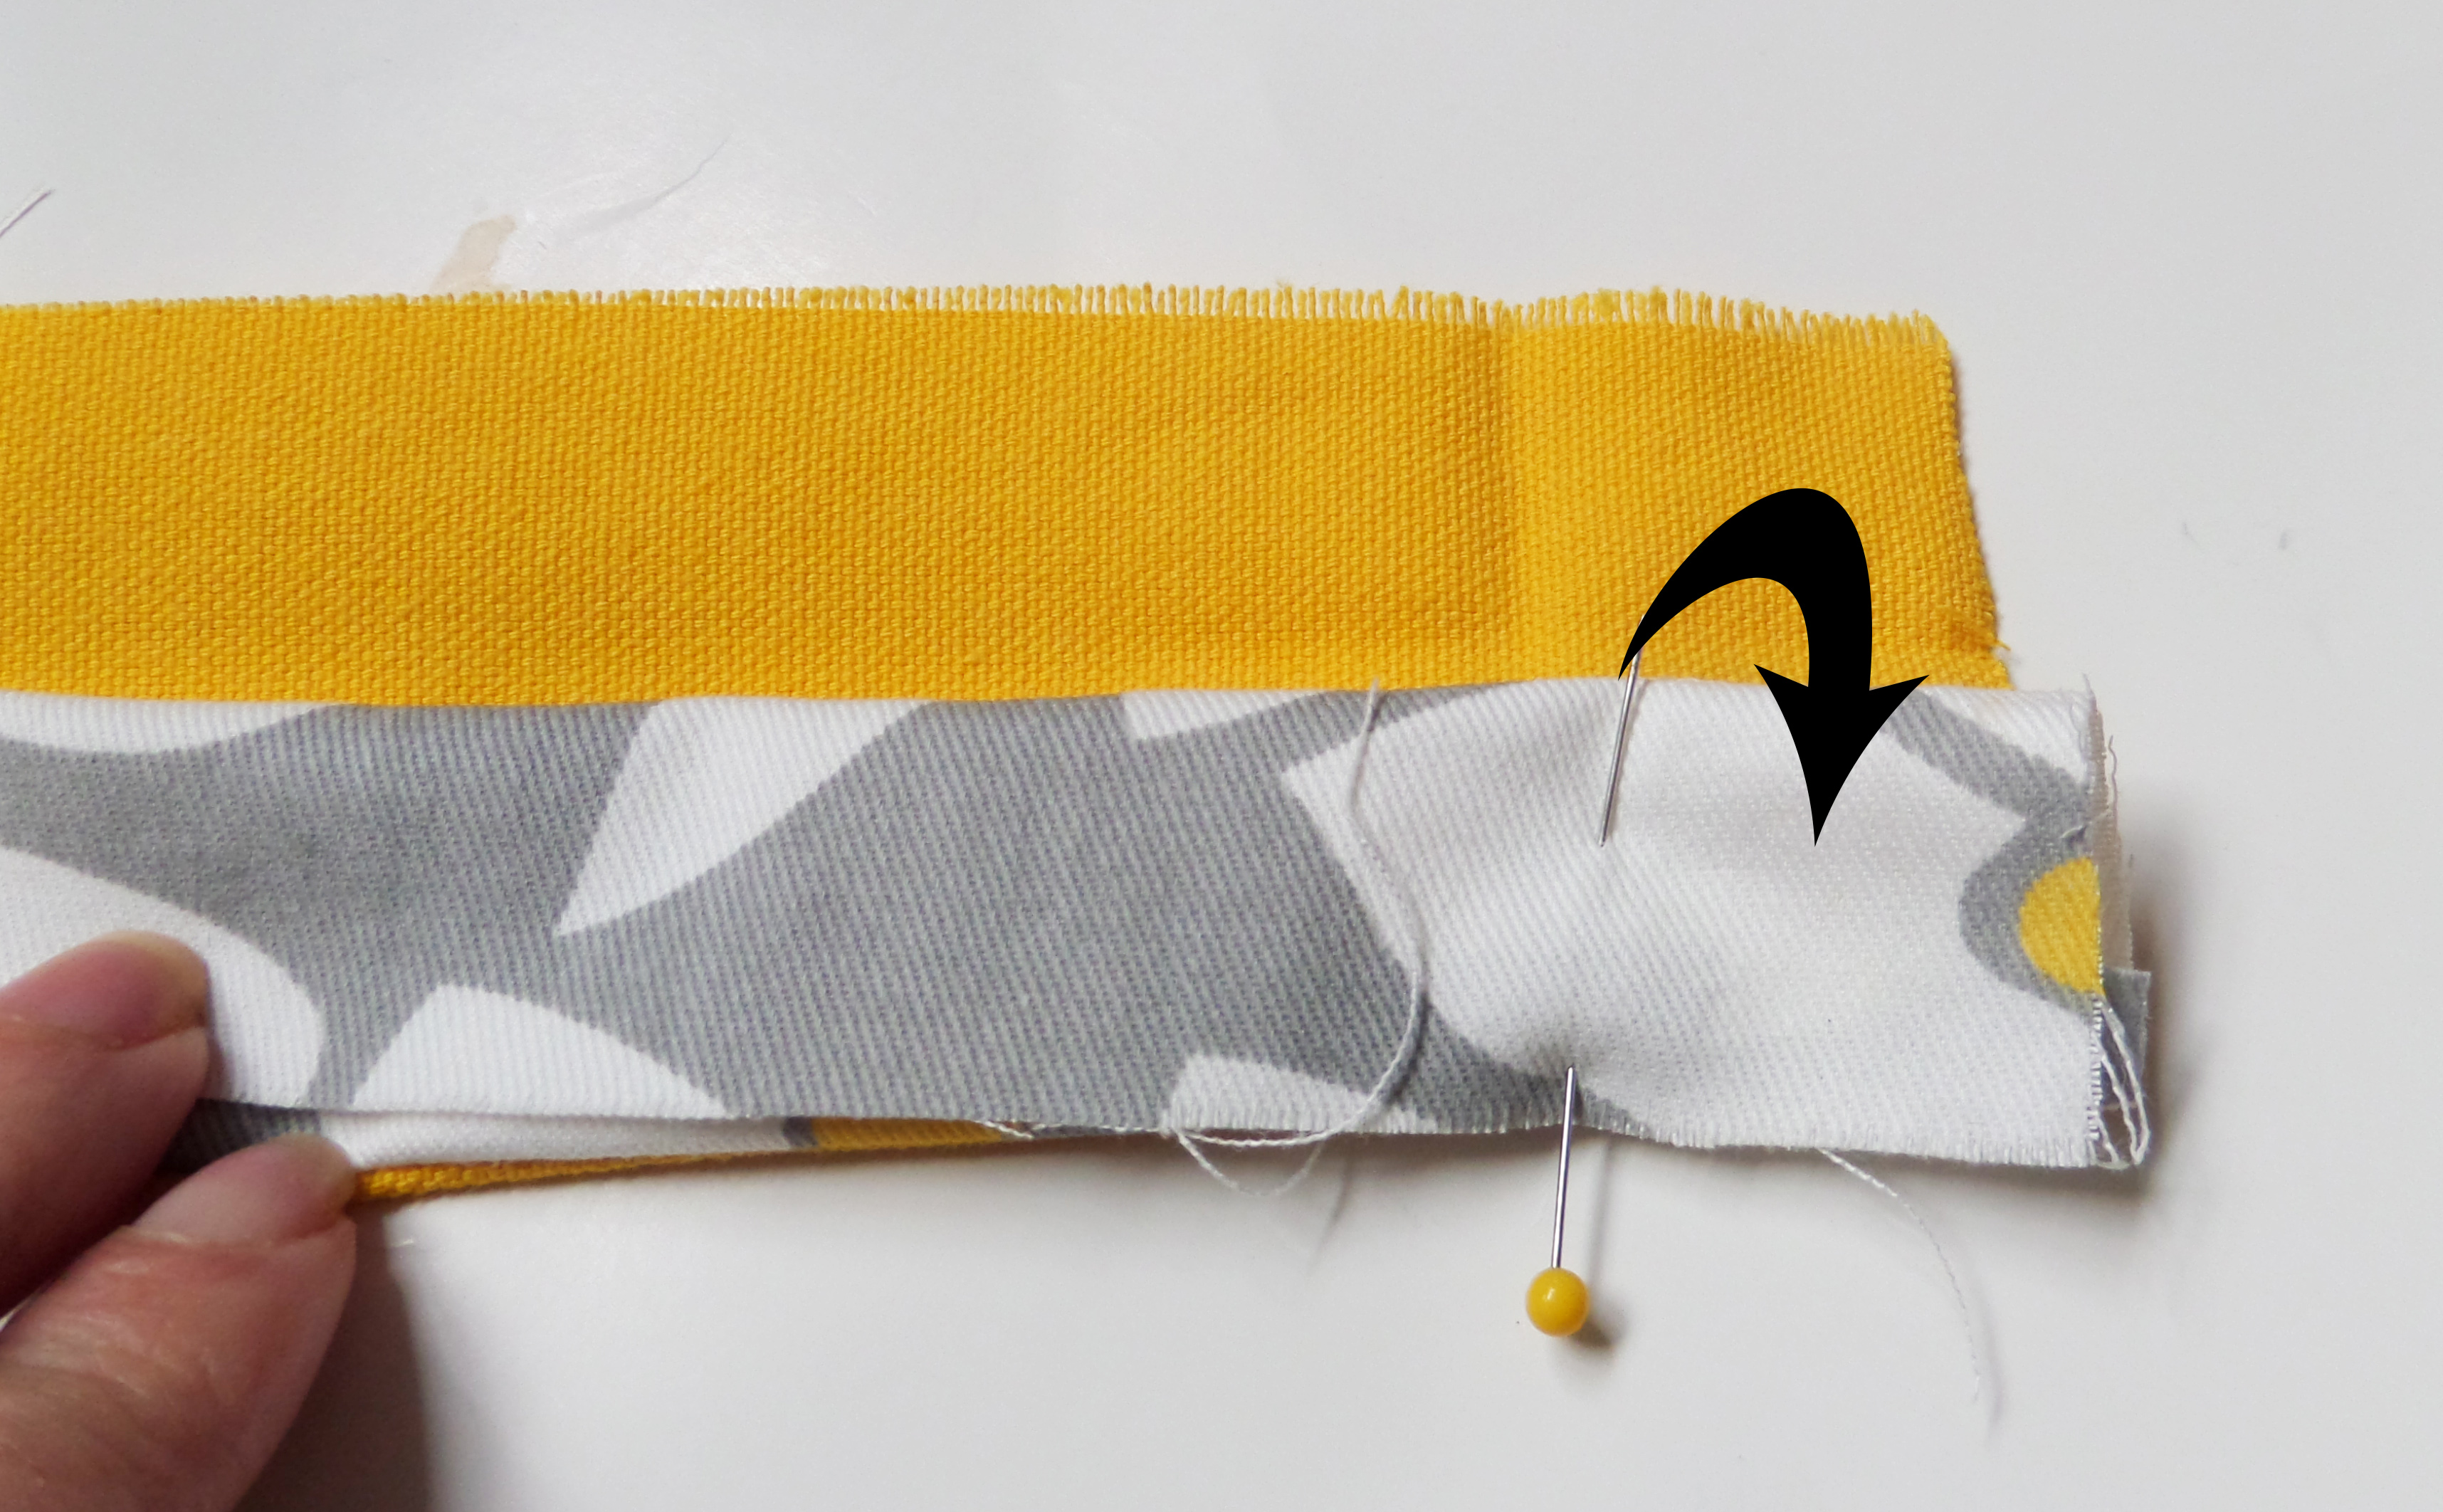
Now fold the lining fabric in (wrong sides together) to meet the seam line.
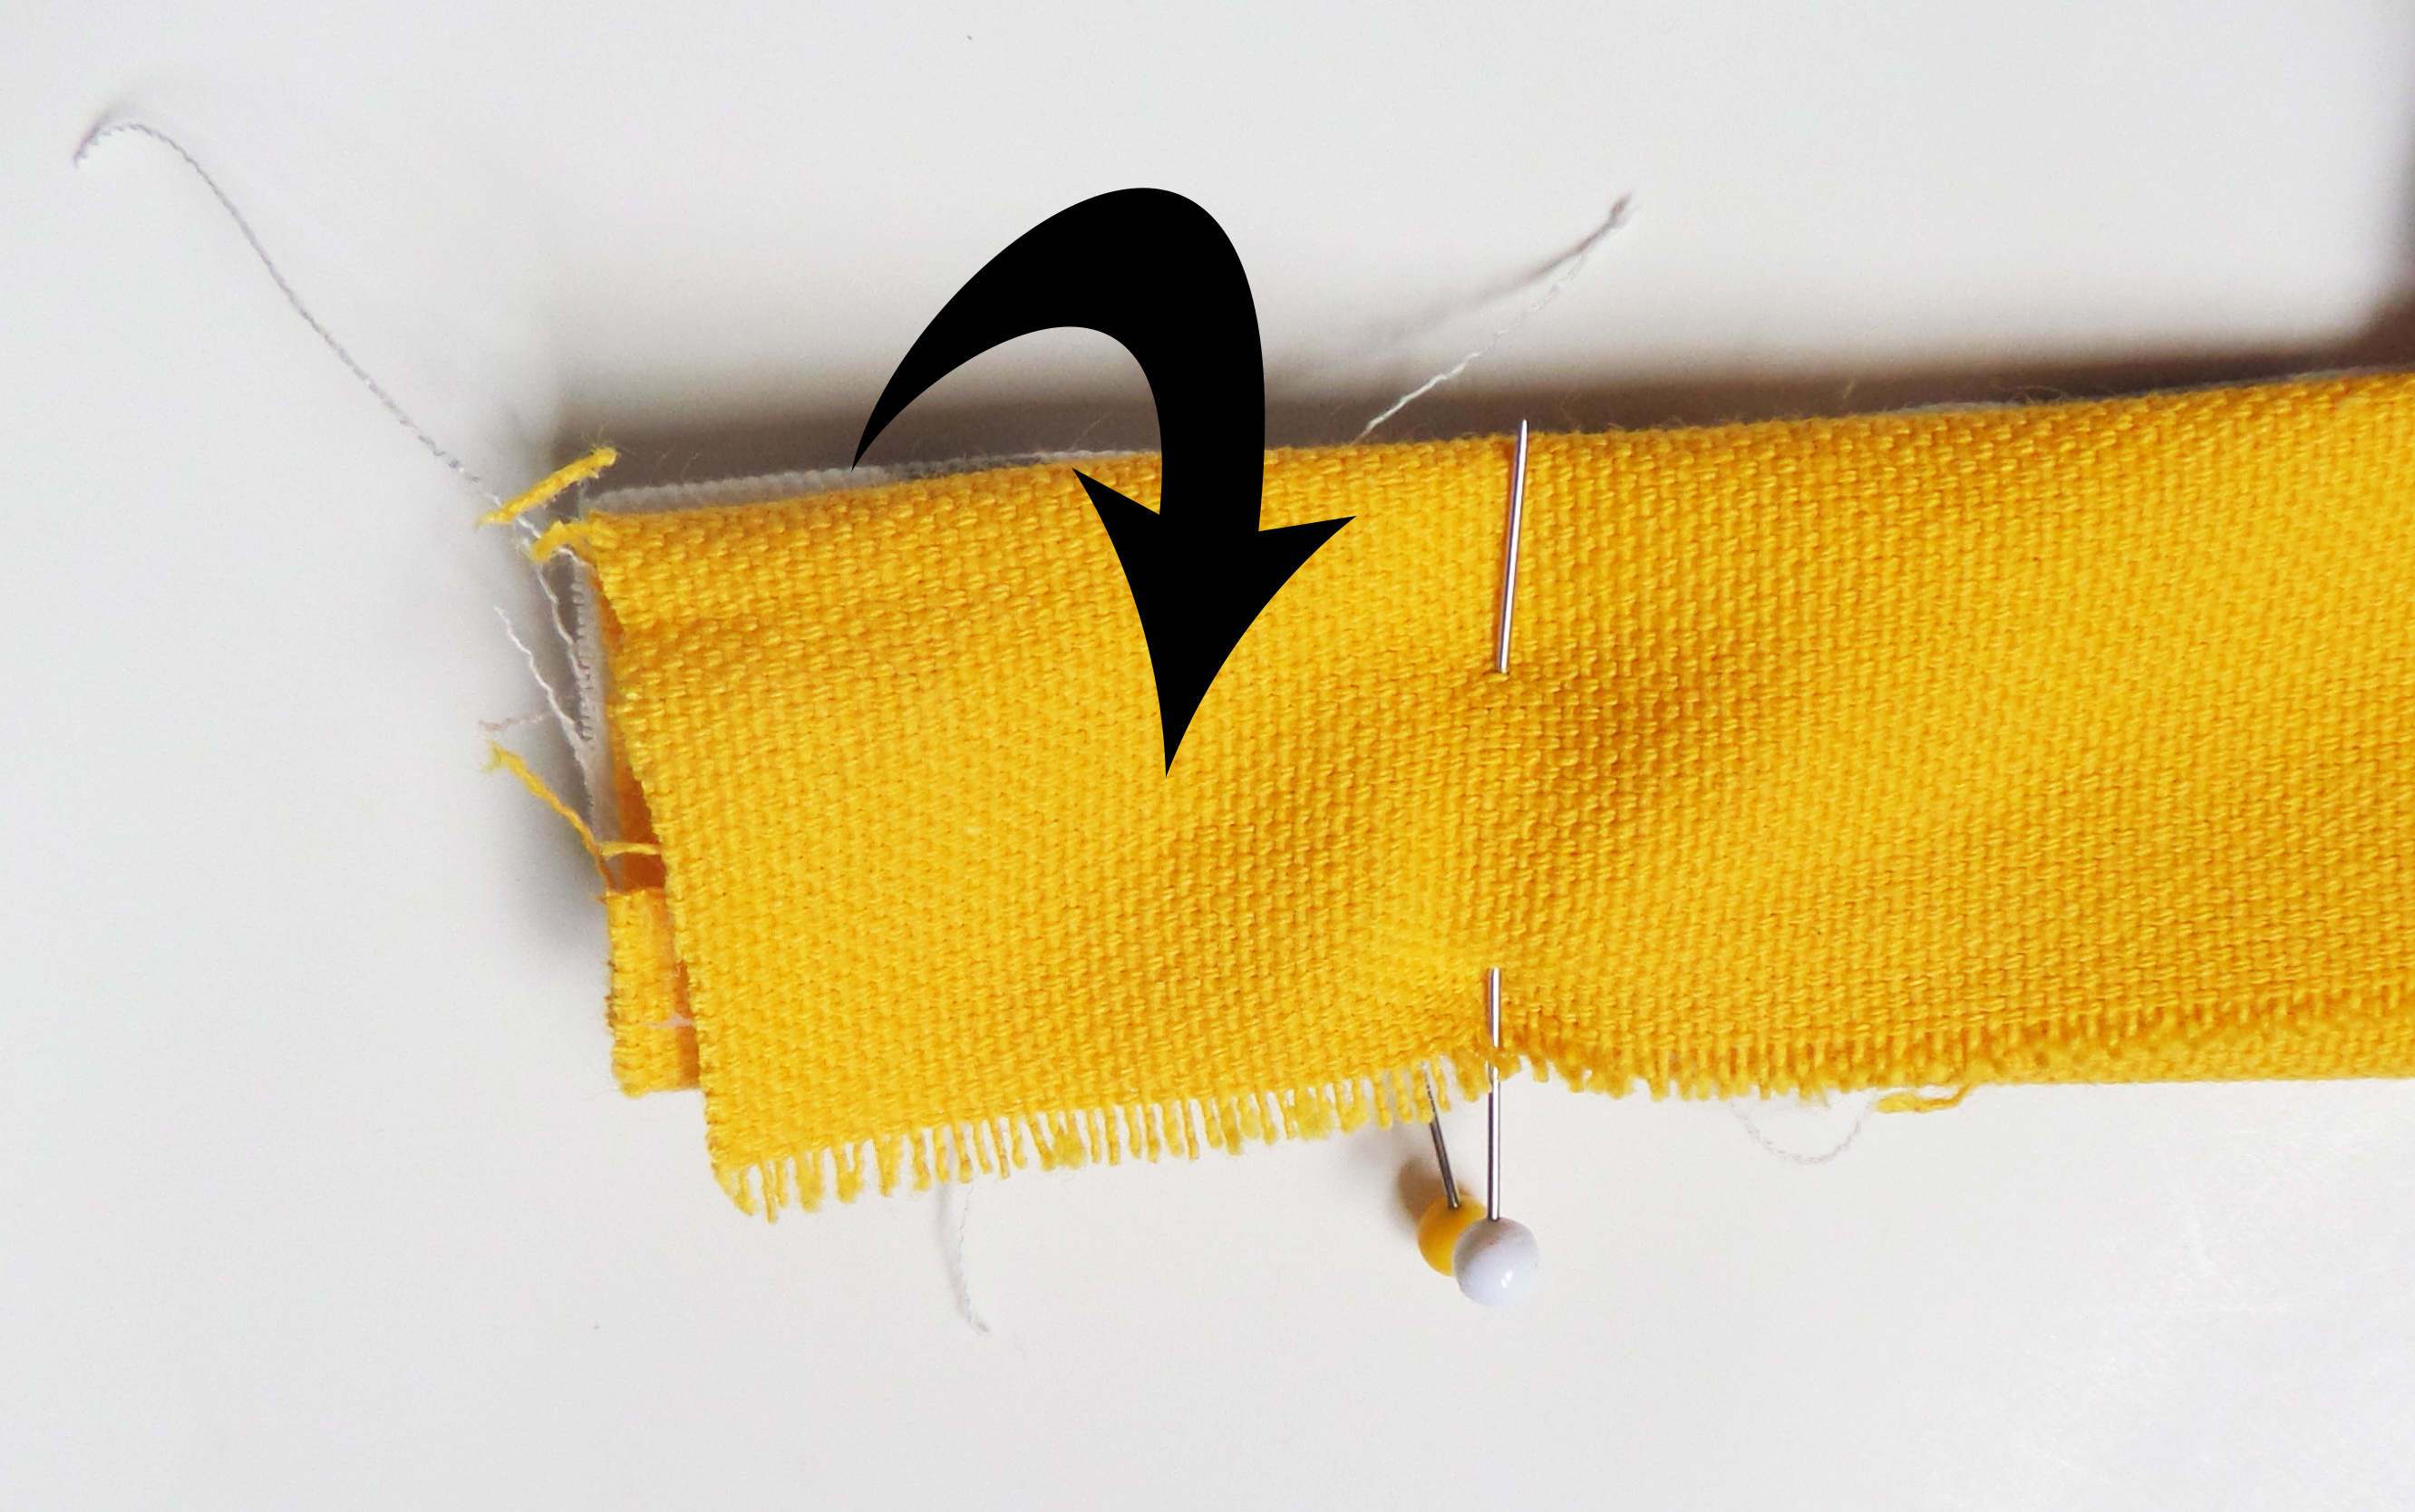
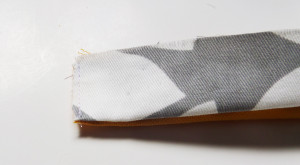
This is a side view when both sides are folded.
Now just sew across that short end.
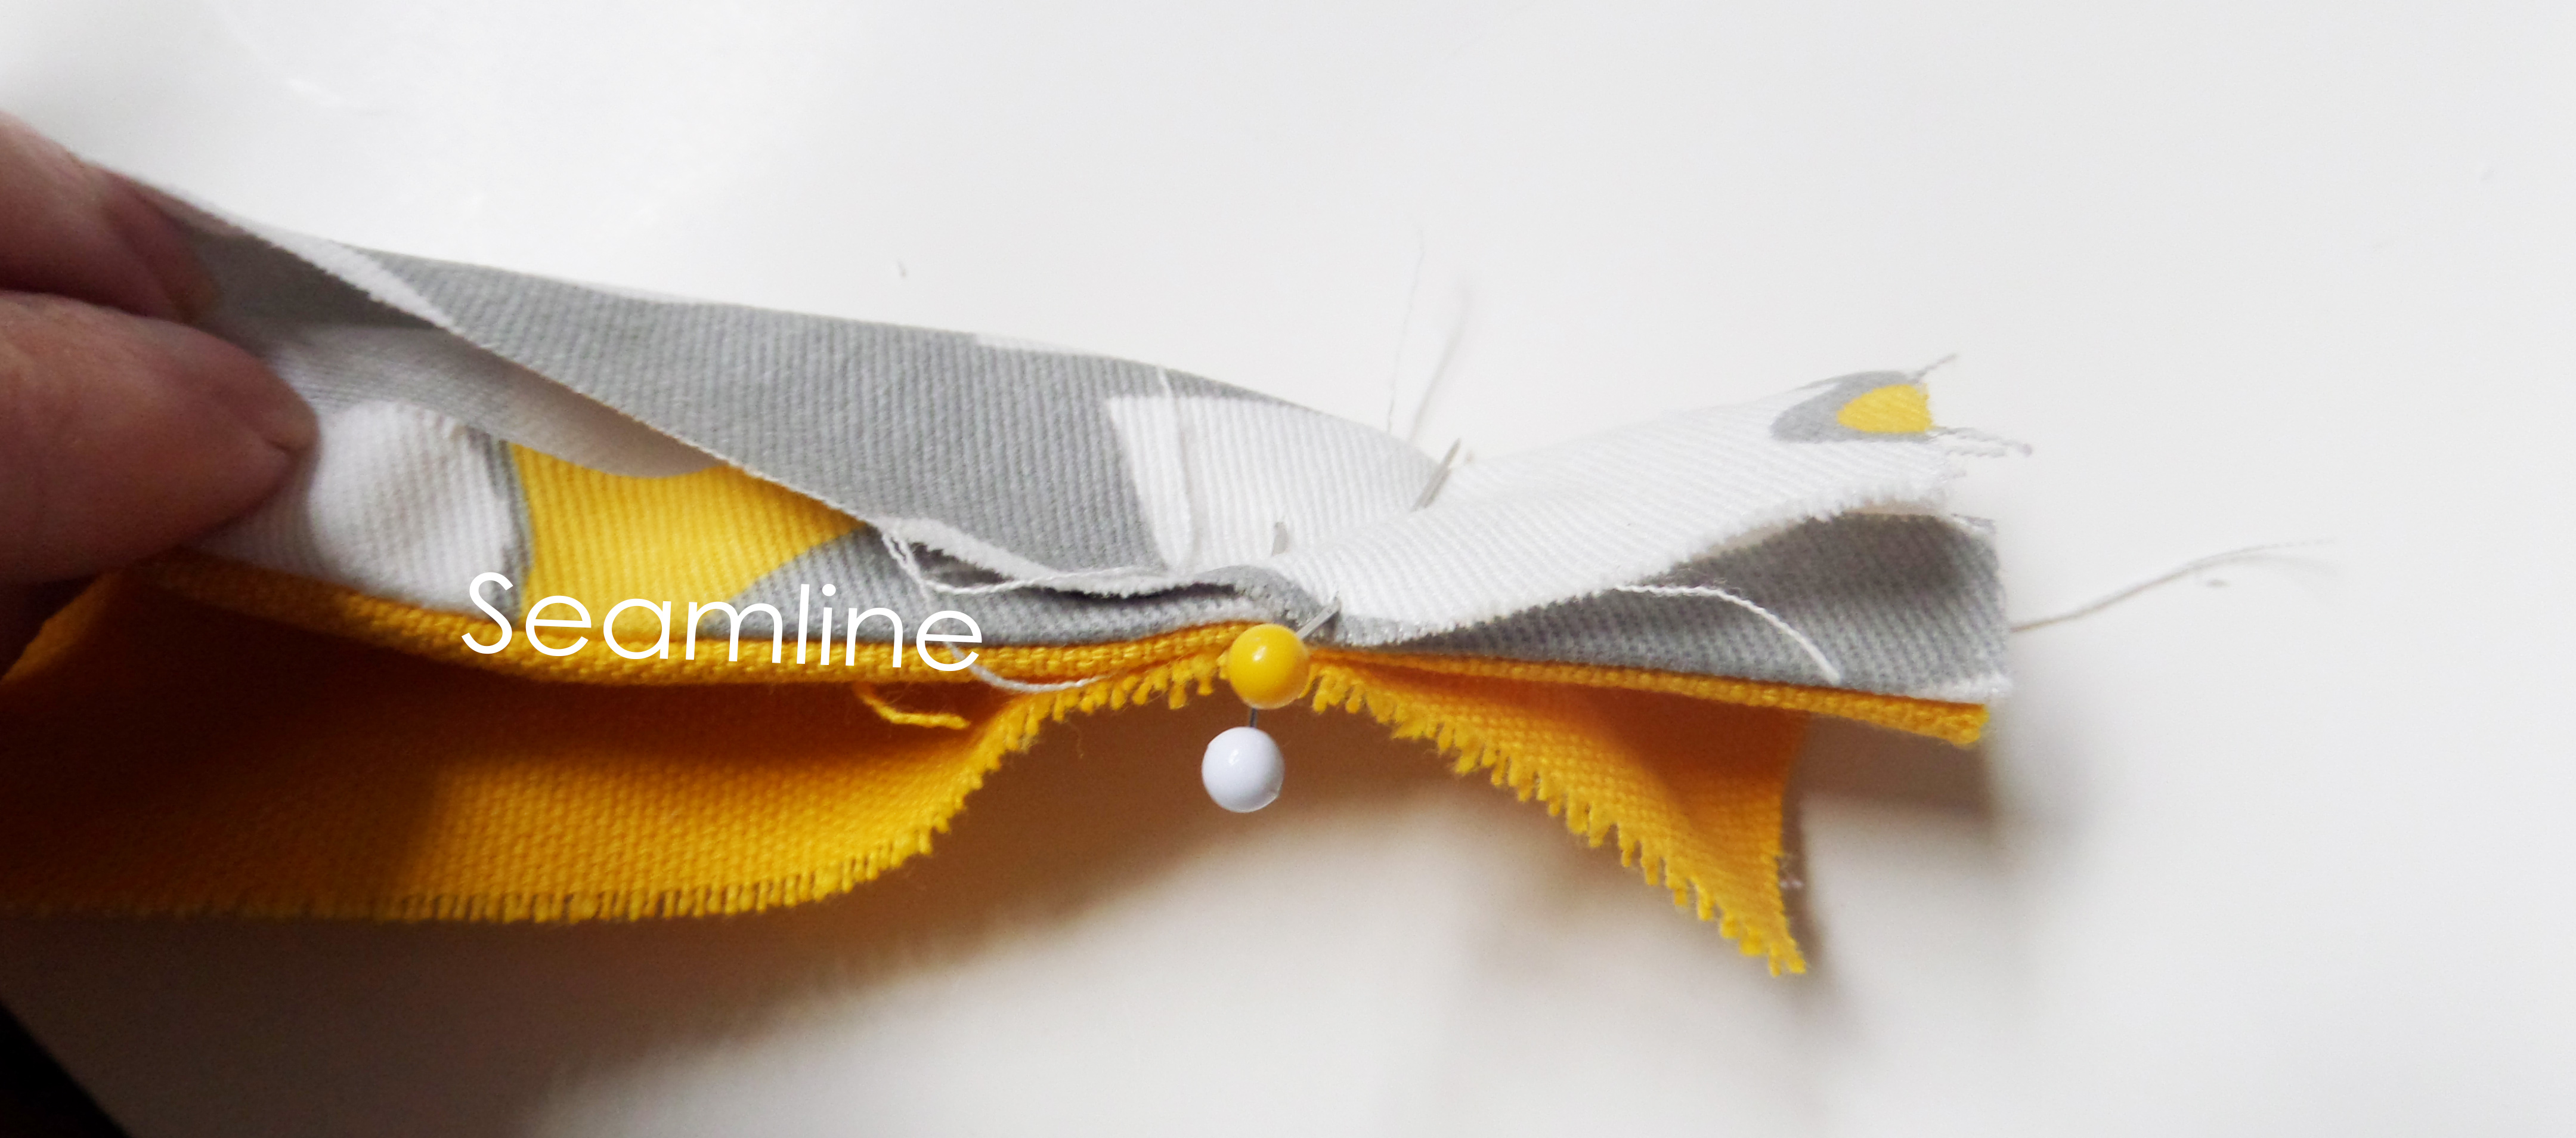
 Cut the corners close to the seam.
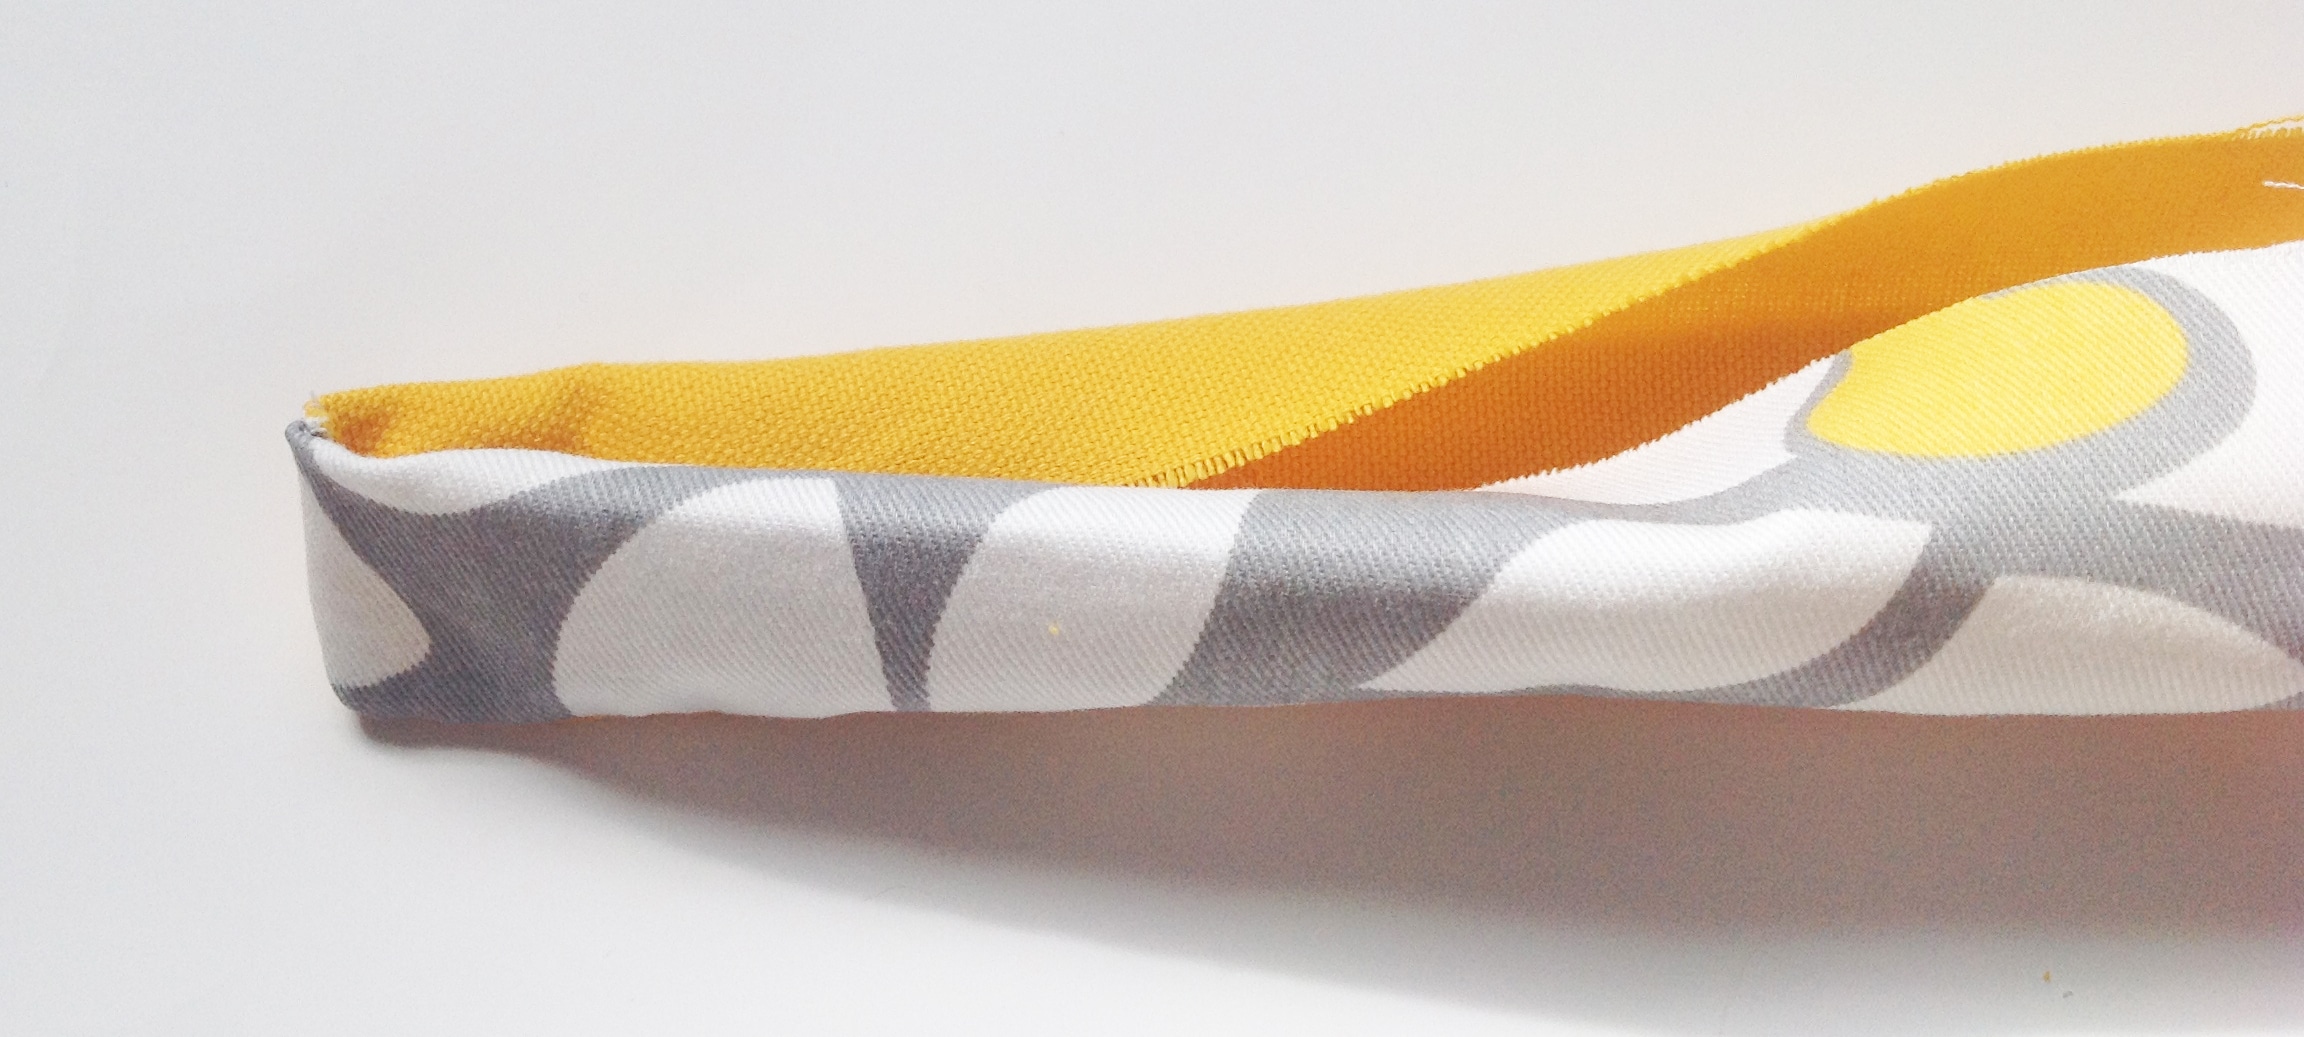
Now turn the end of the handle fabric right side. You’ll need something blunt to poke out the corners.
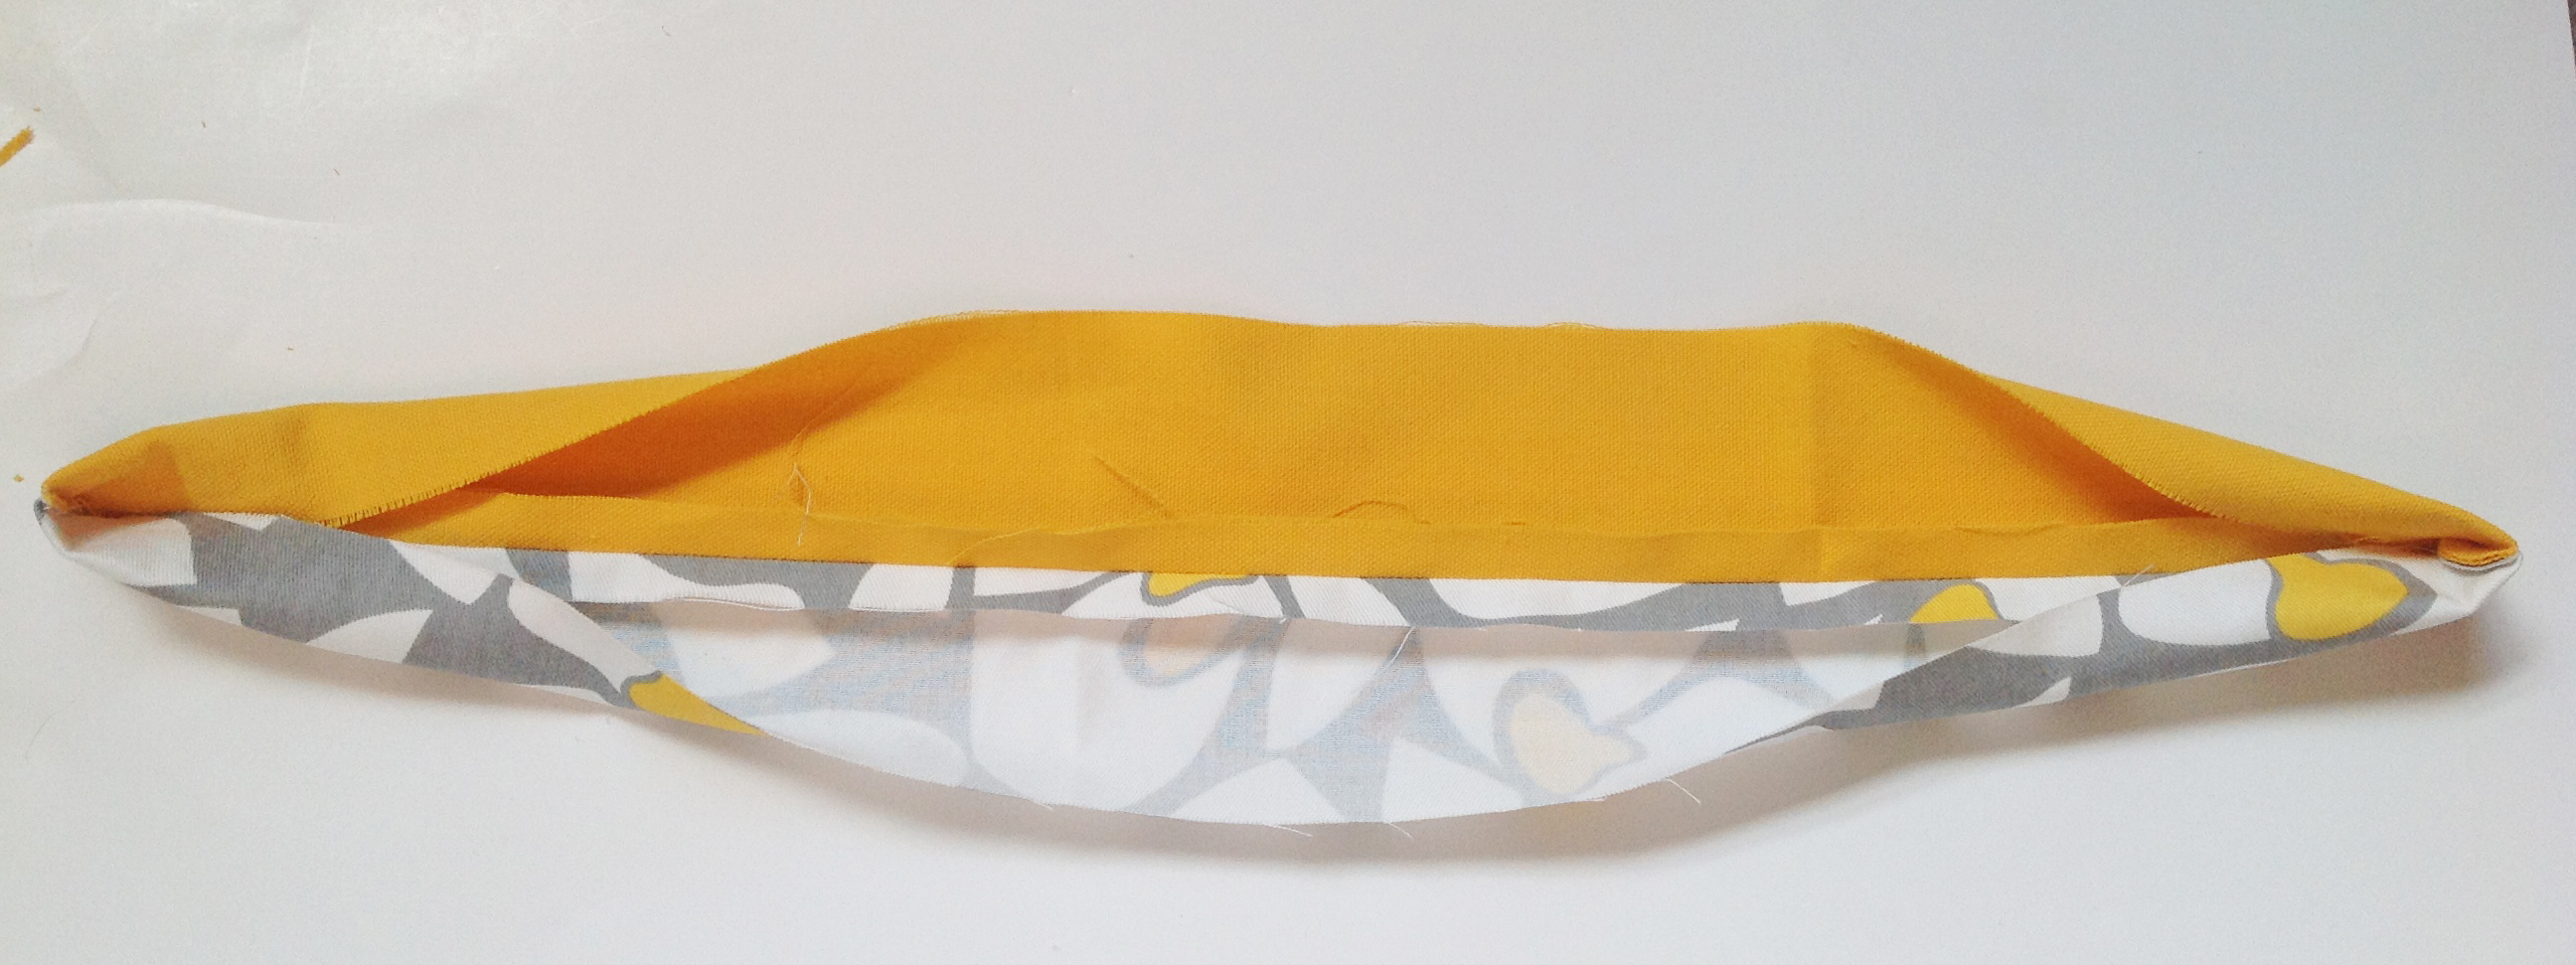
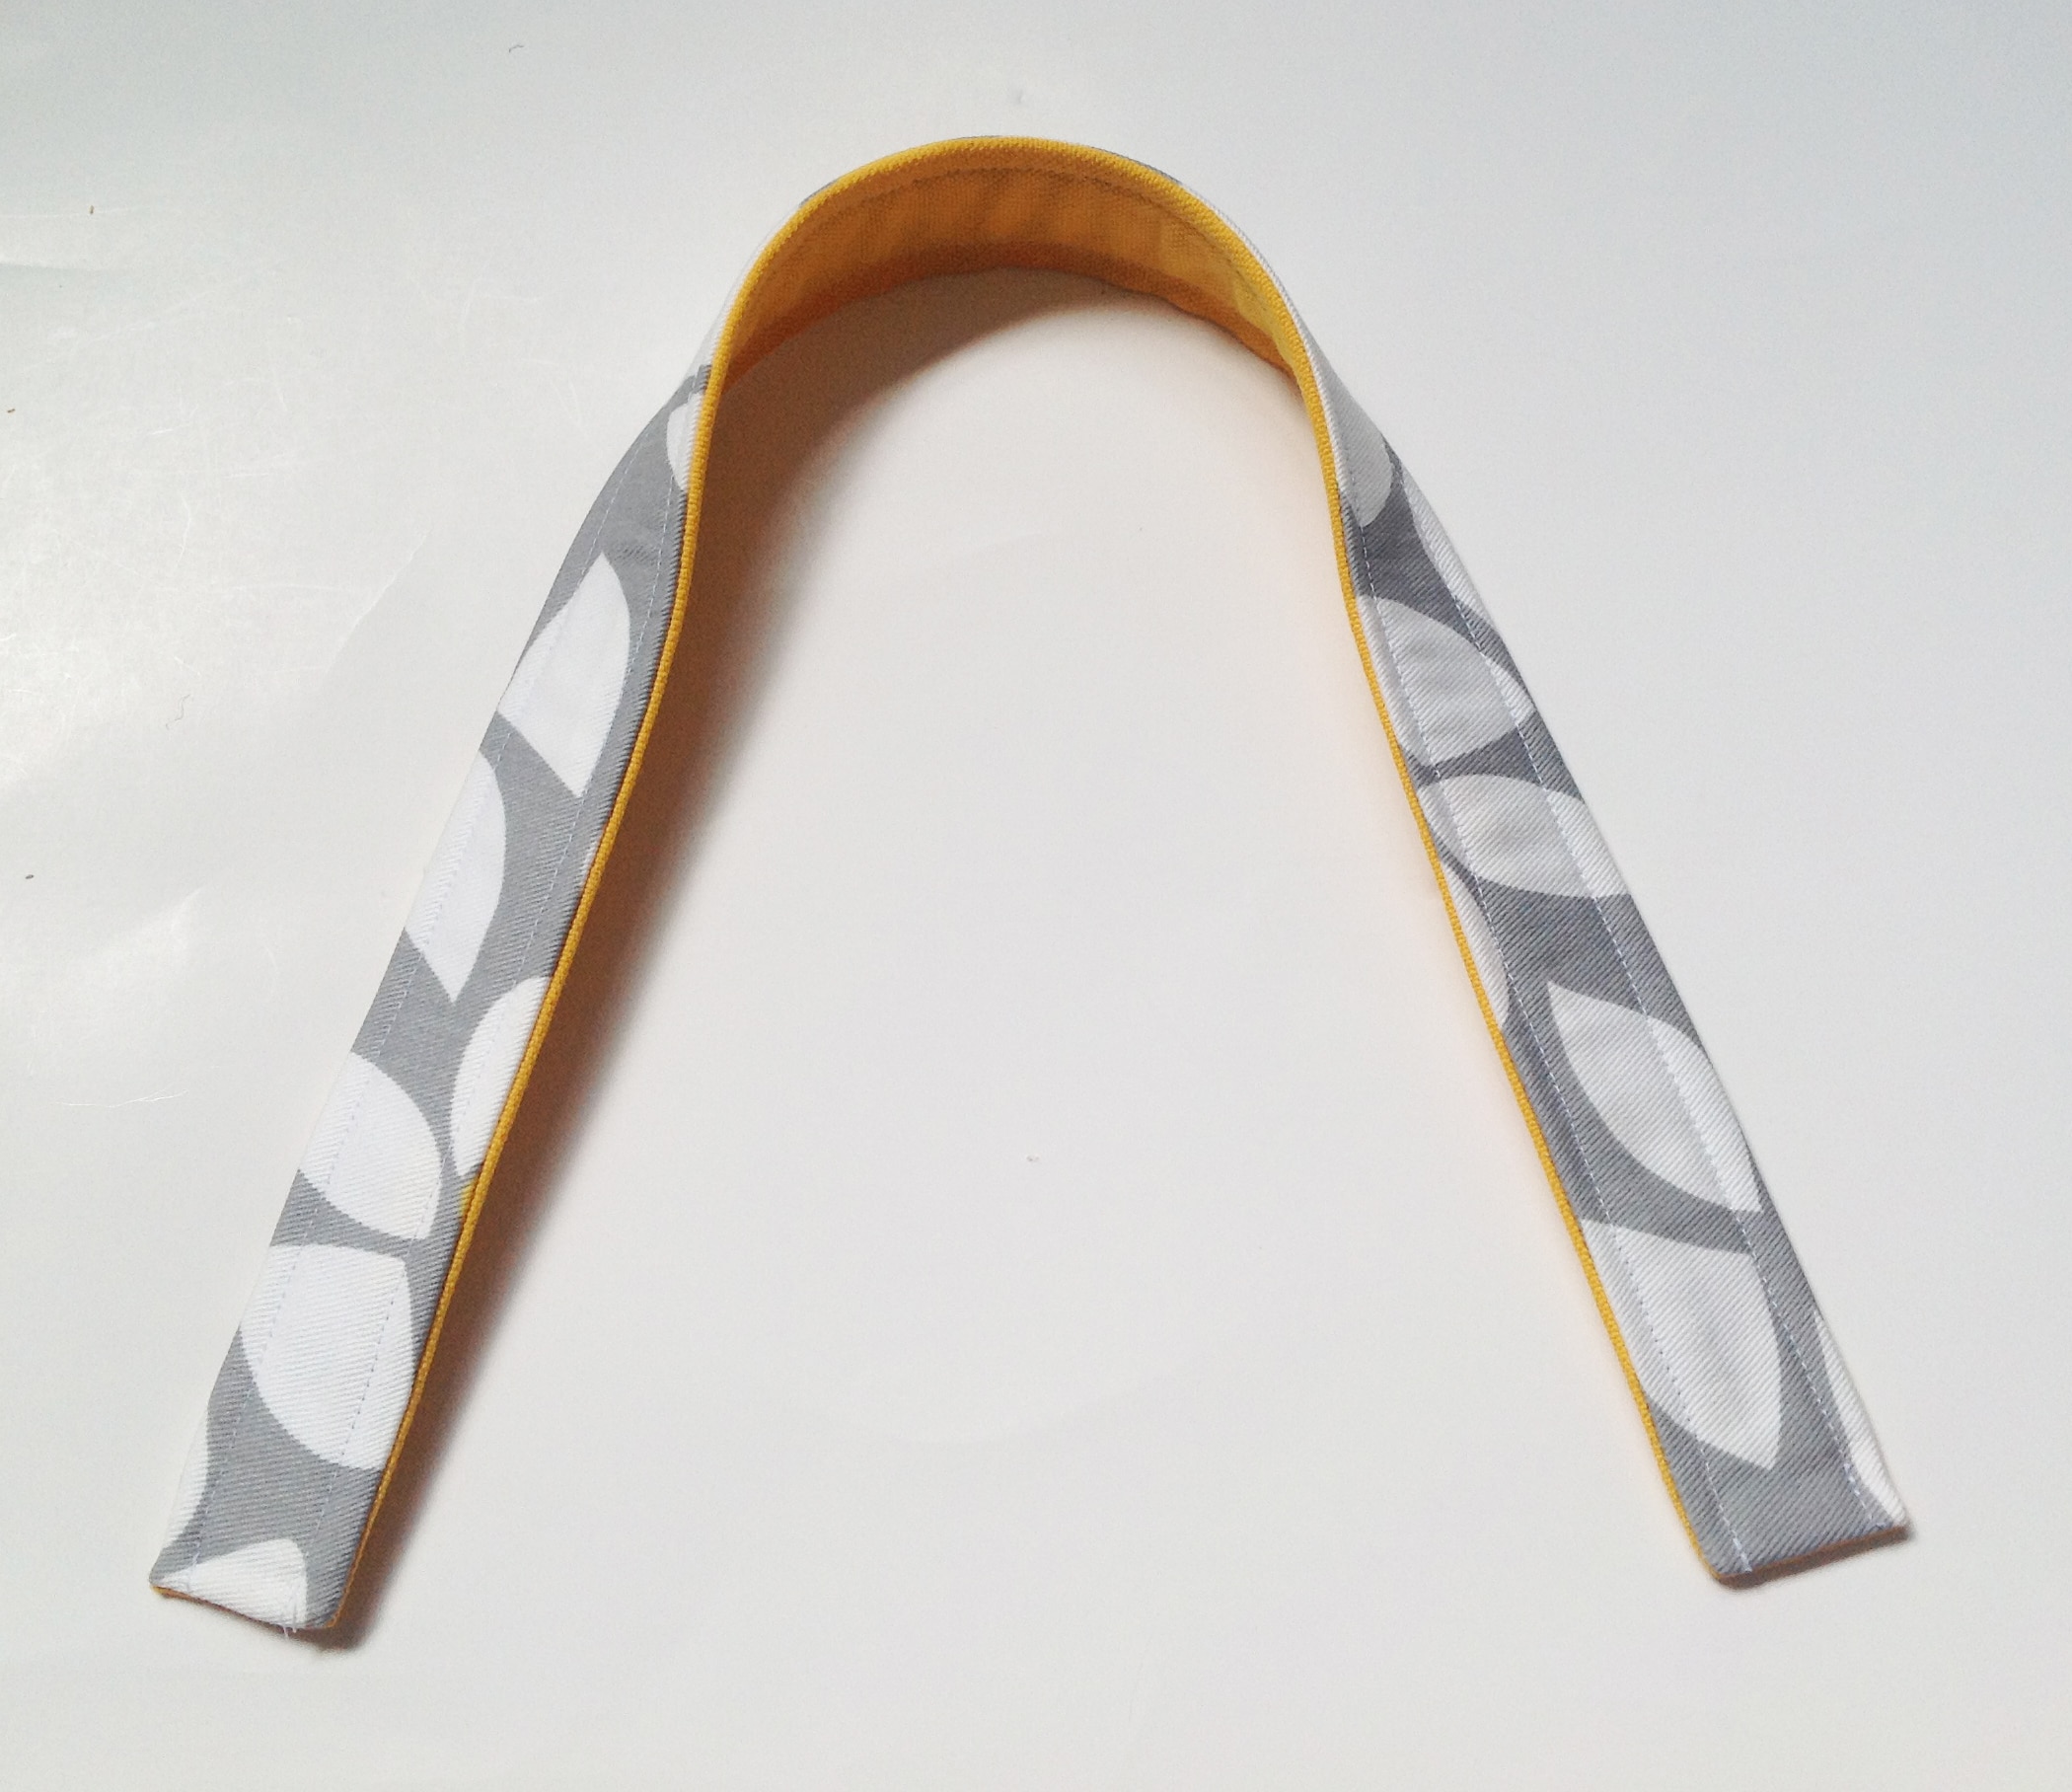
Repeat that on the second end and your handle and it will look like this:
Now fire up your iron. Fold and press the interior long edges in to meet the seam line.
Now, open up one of the folds you just press and tuck you webbing in there and fold back up.
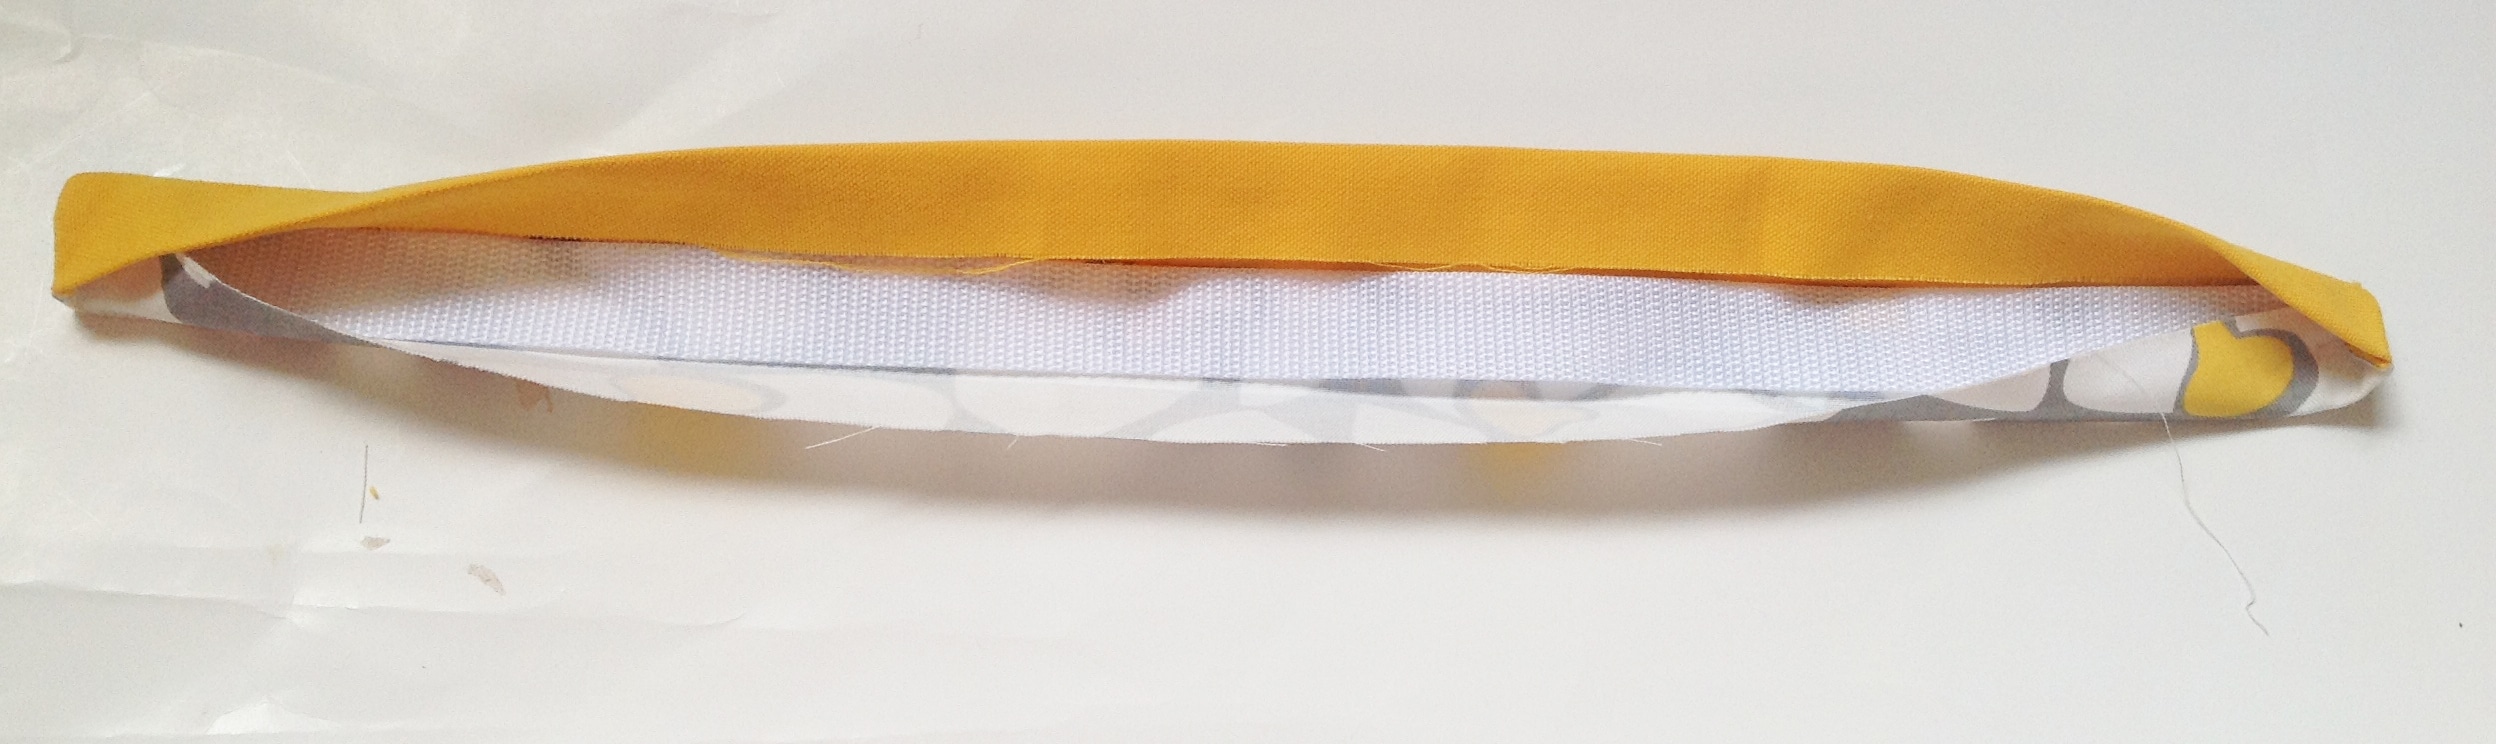
Now all you need to do is topstitch along both long edges and your handle is done – pretty, huh? Repeat on the second set of handle pieces.
That’s it for today. Please post your questions and comments! The next post is Thursday, July 17th. You can find it here.
See you then!
Sarah
for some reason the FB link doesn’t work ???
Thanks for letting me know, liz, I changed it so let me know if you have any problems, it’s working for me – glad you are watching out for me!
I’m always watching…LOL