This tutorial covers the final steps in the Convertible Reversible Bag pattern – steps 46-51.
You are almost at the end of making your amazing bag! These final steps combine the two bags into one. So let’s get started.
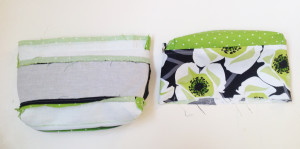
At this point in the pattern, you should have 4 components: an upper and lower part for each of the bags: (btw, you can click photos for a closer look at the image)
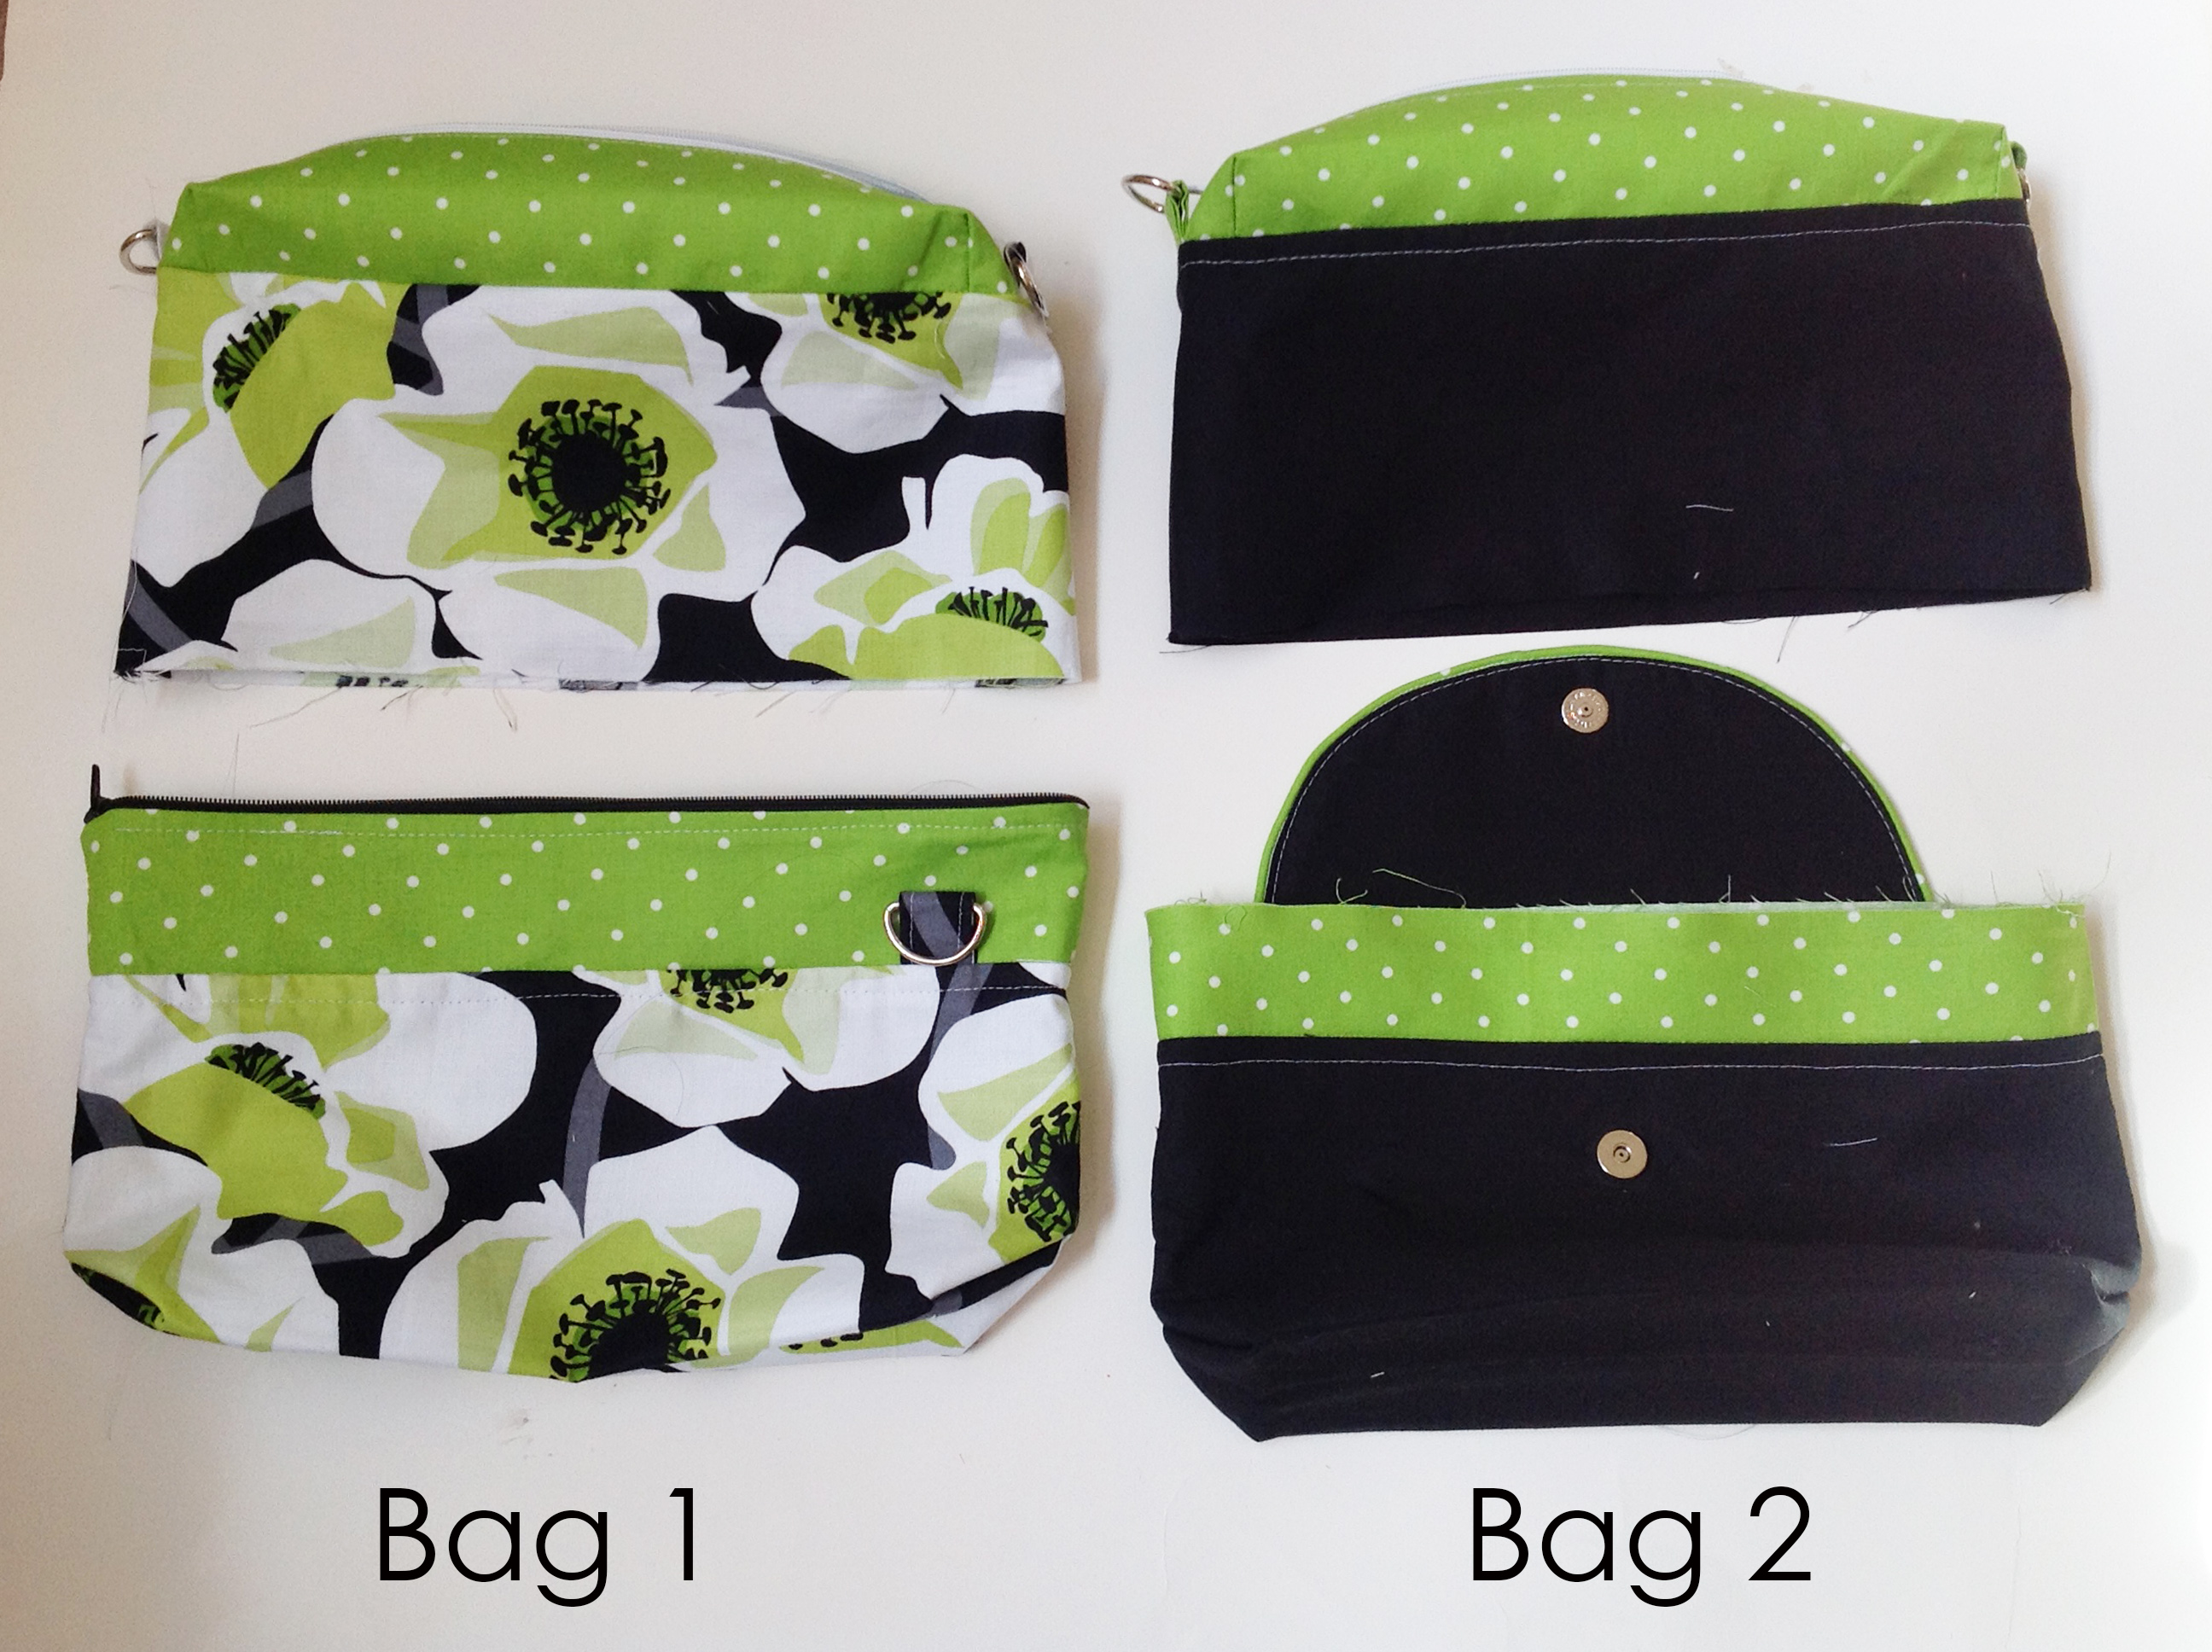
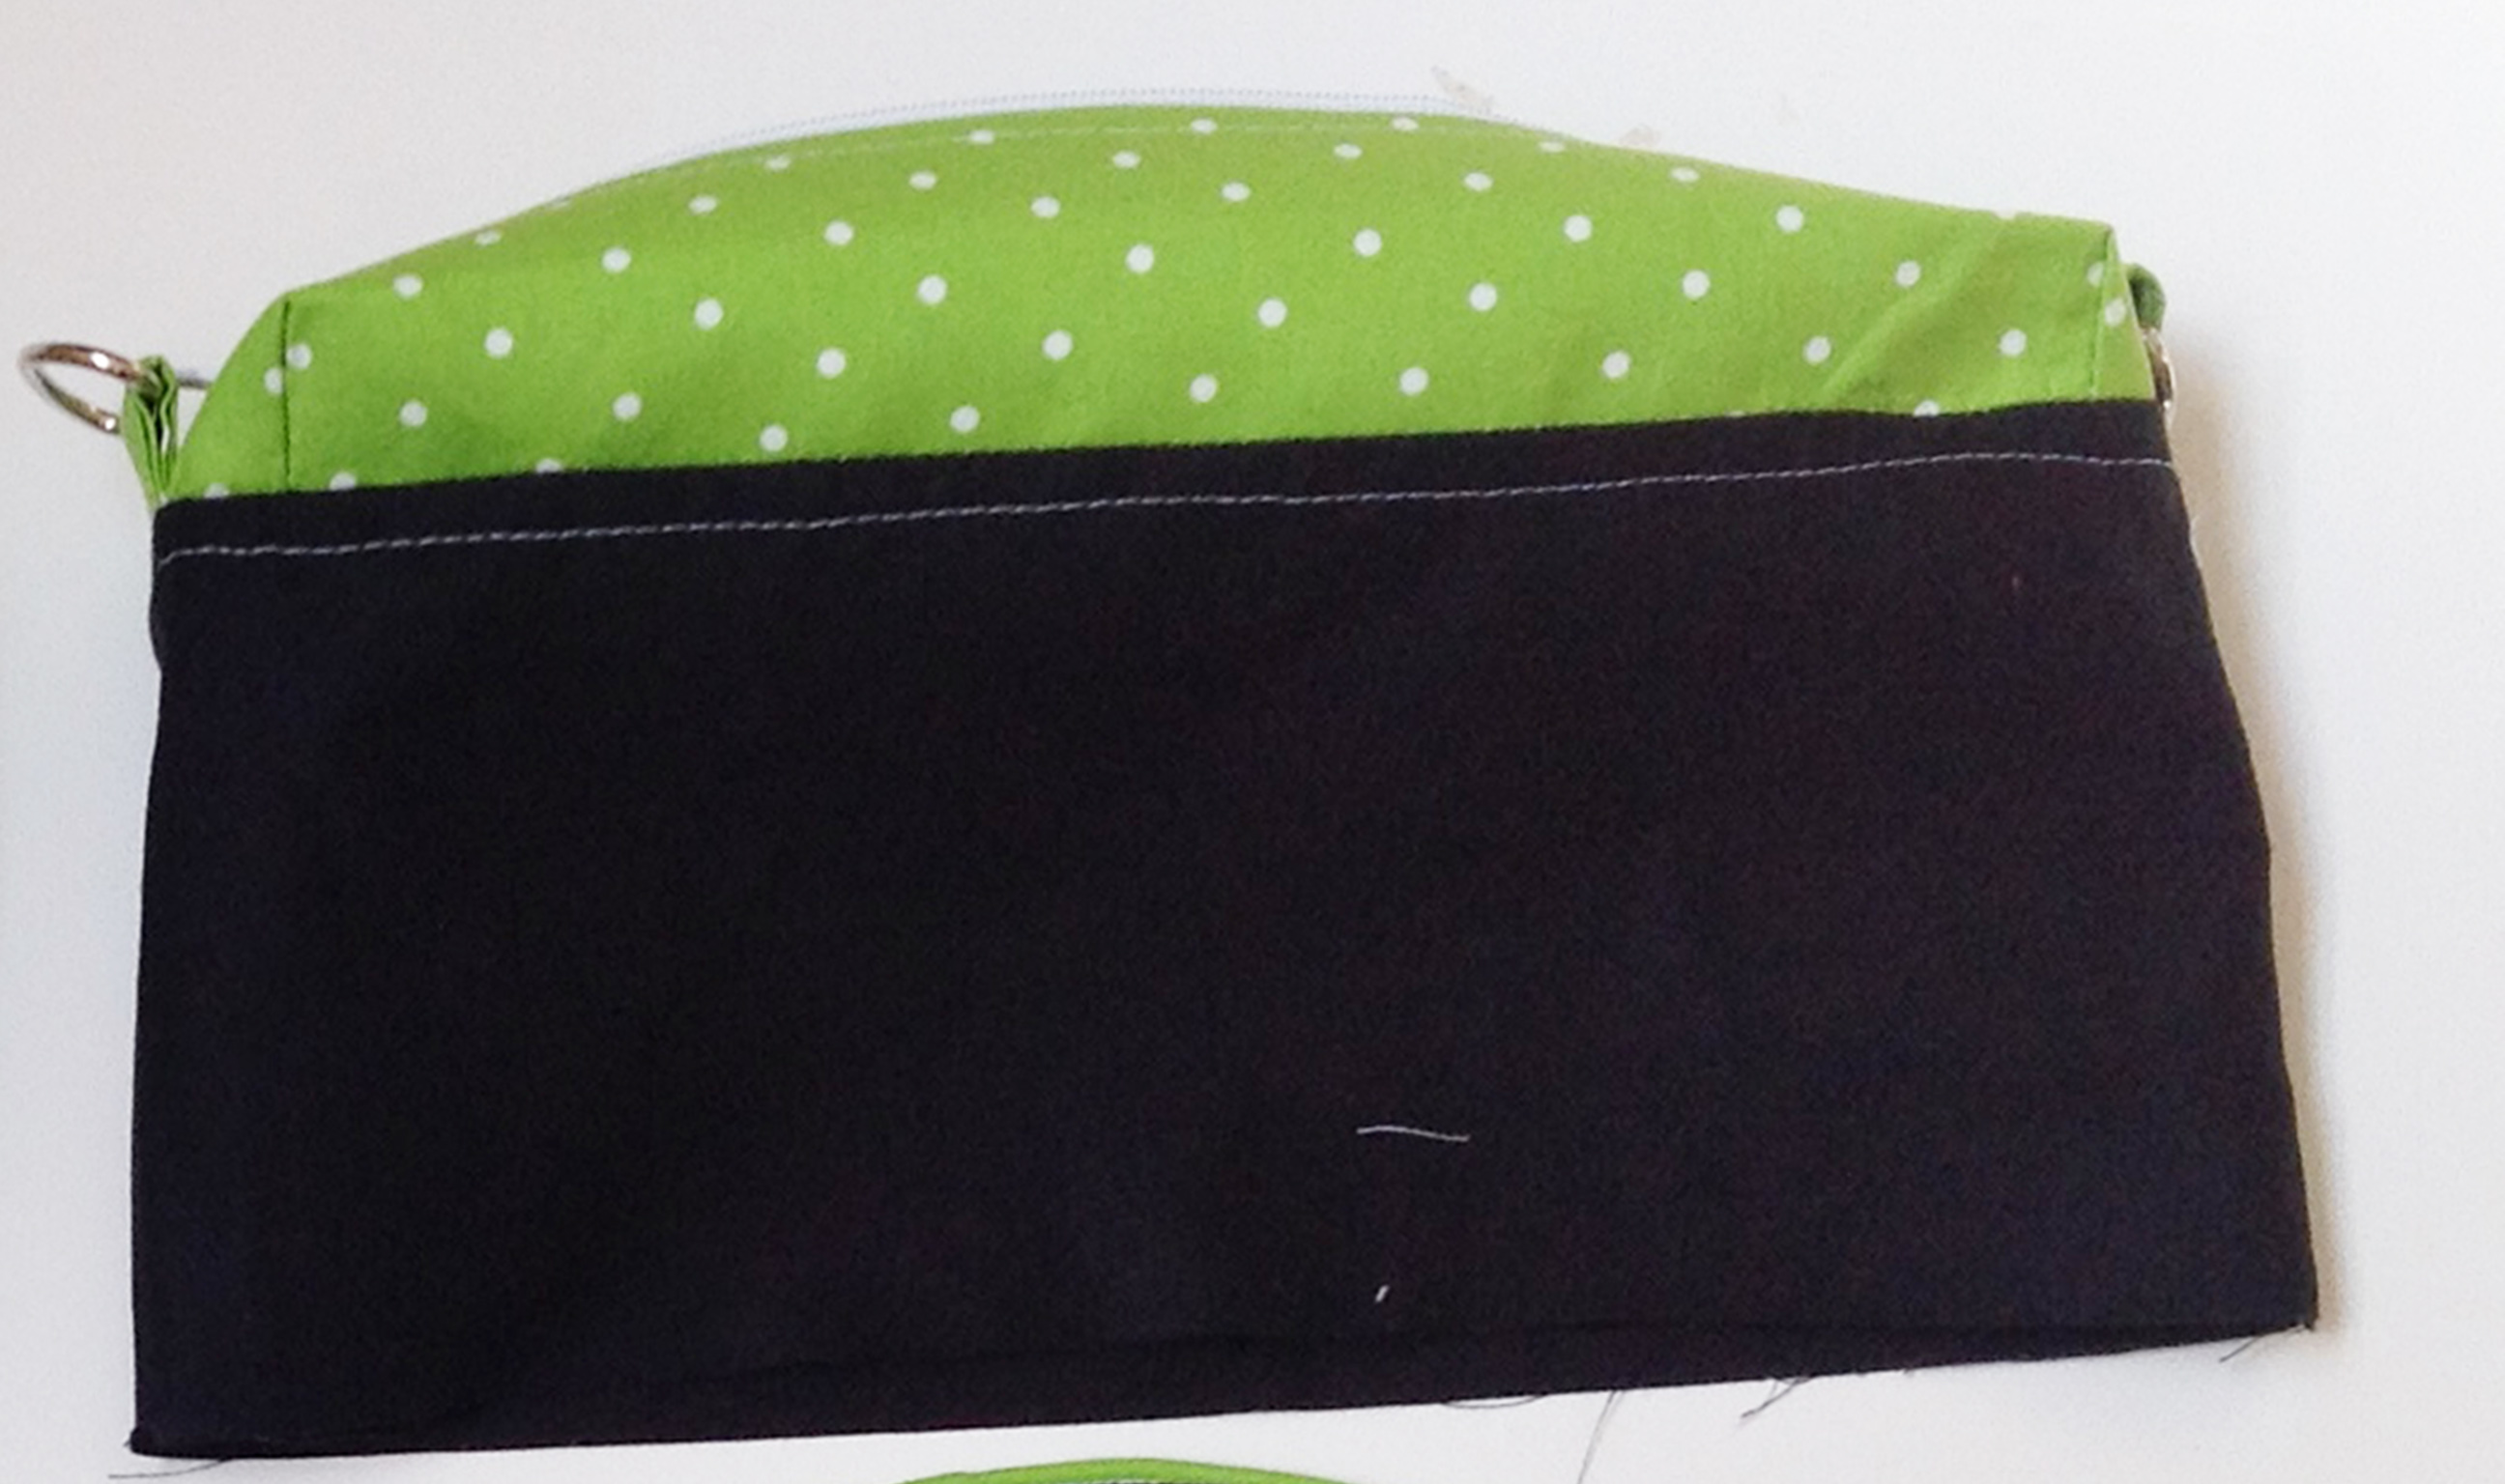
The first order of business is to combine the bottom halves of both bags. We want to do this with Bag 2 on the outside and Bag 1 on the inside. So, grab your Bag 1 bottom section and turn the zipper flange so that it is facing downward, like so:
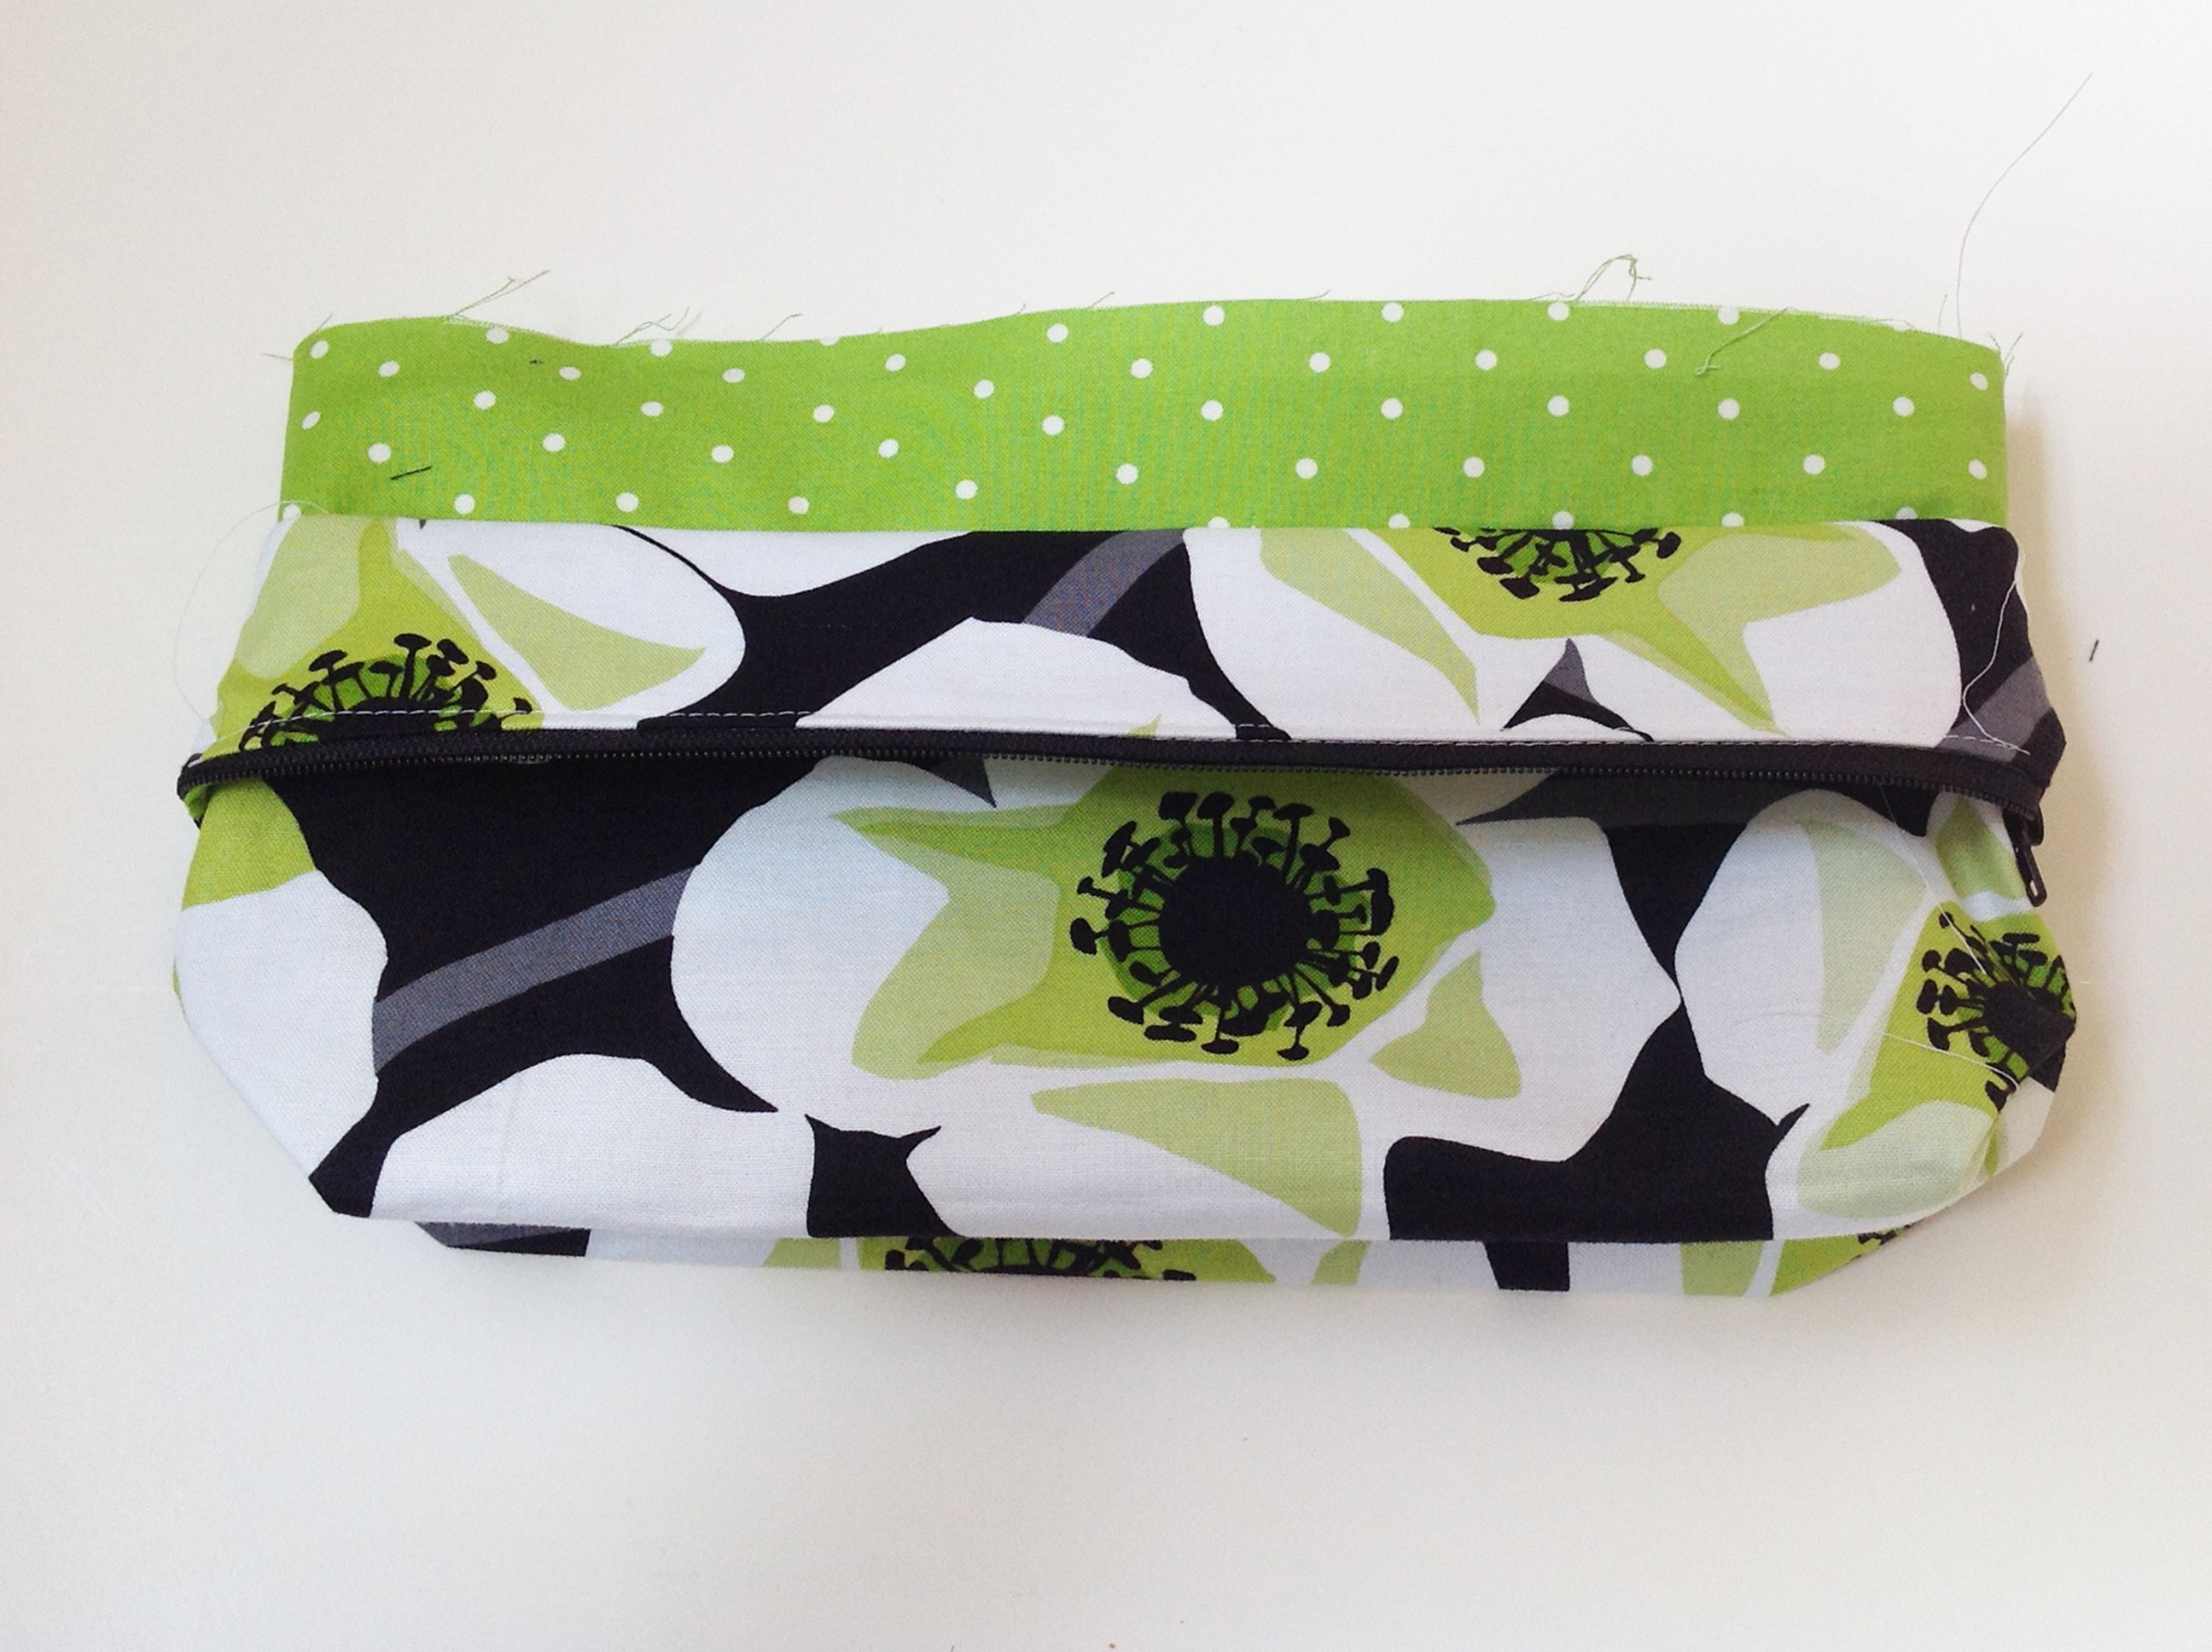
Leave the Center panel turned up (the poka dot panel in the picture above). Then turn the whole thing inside out.
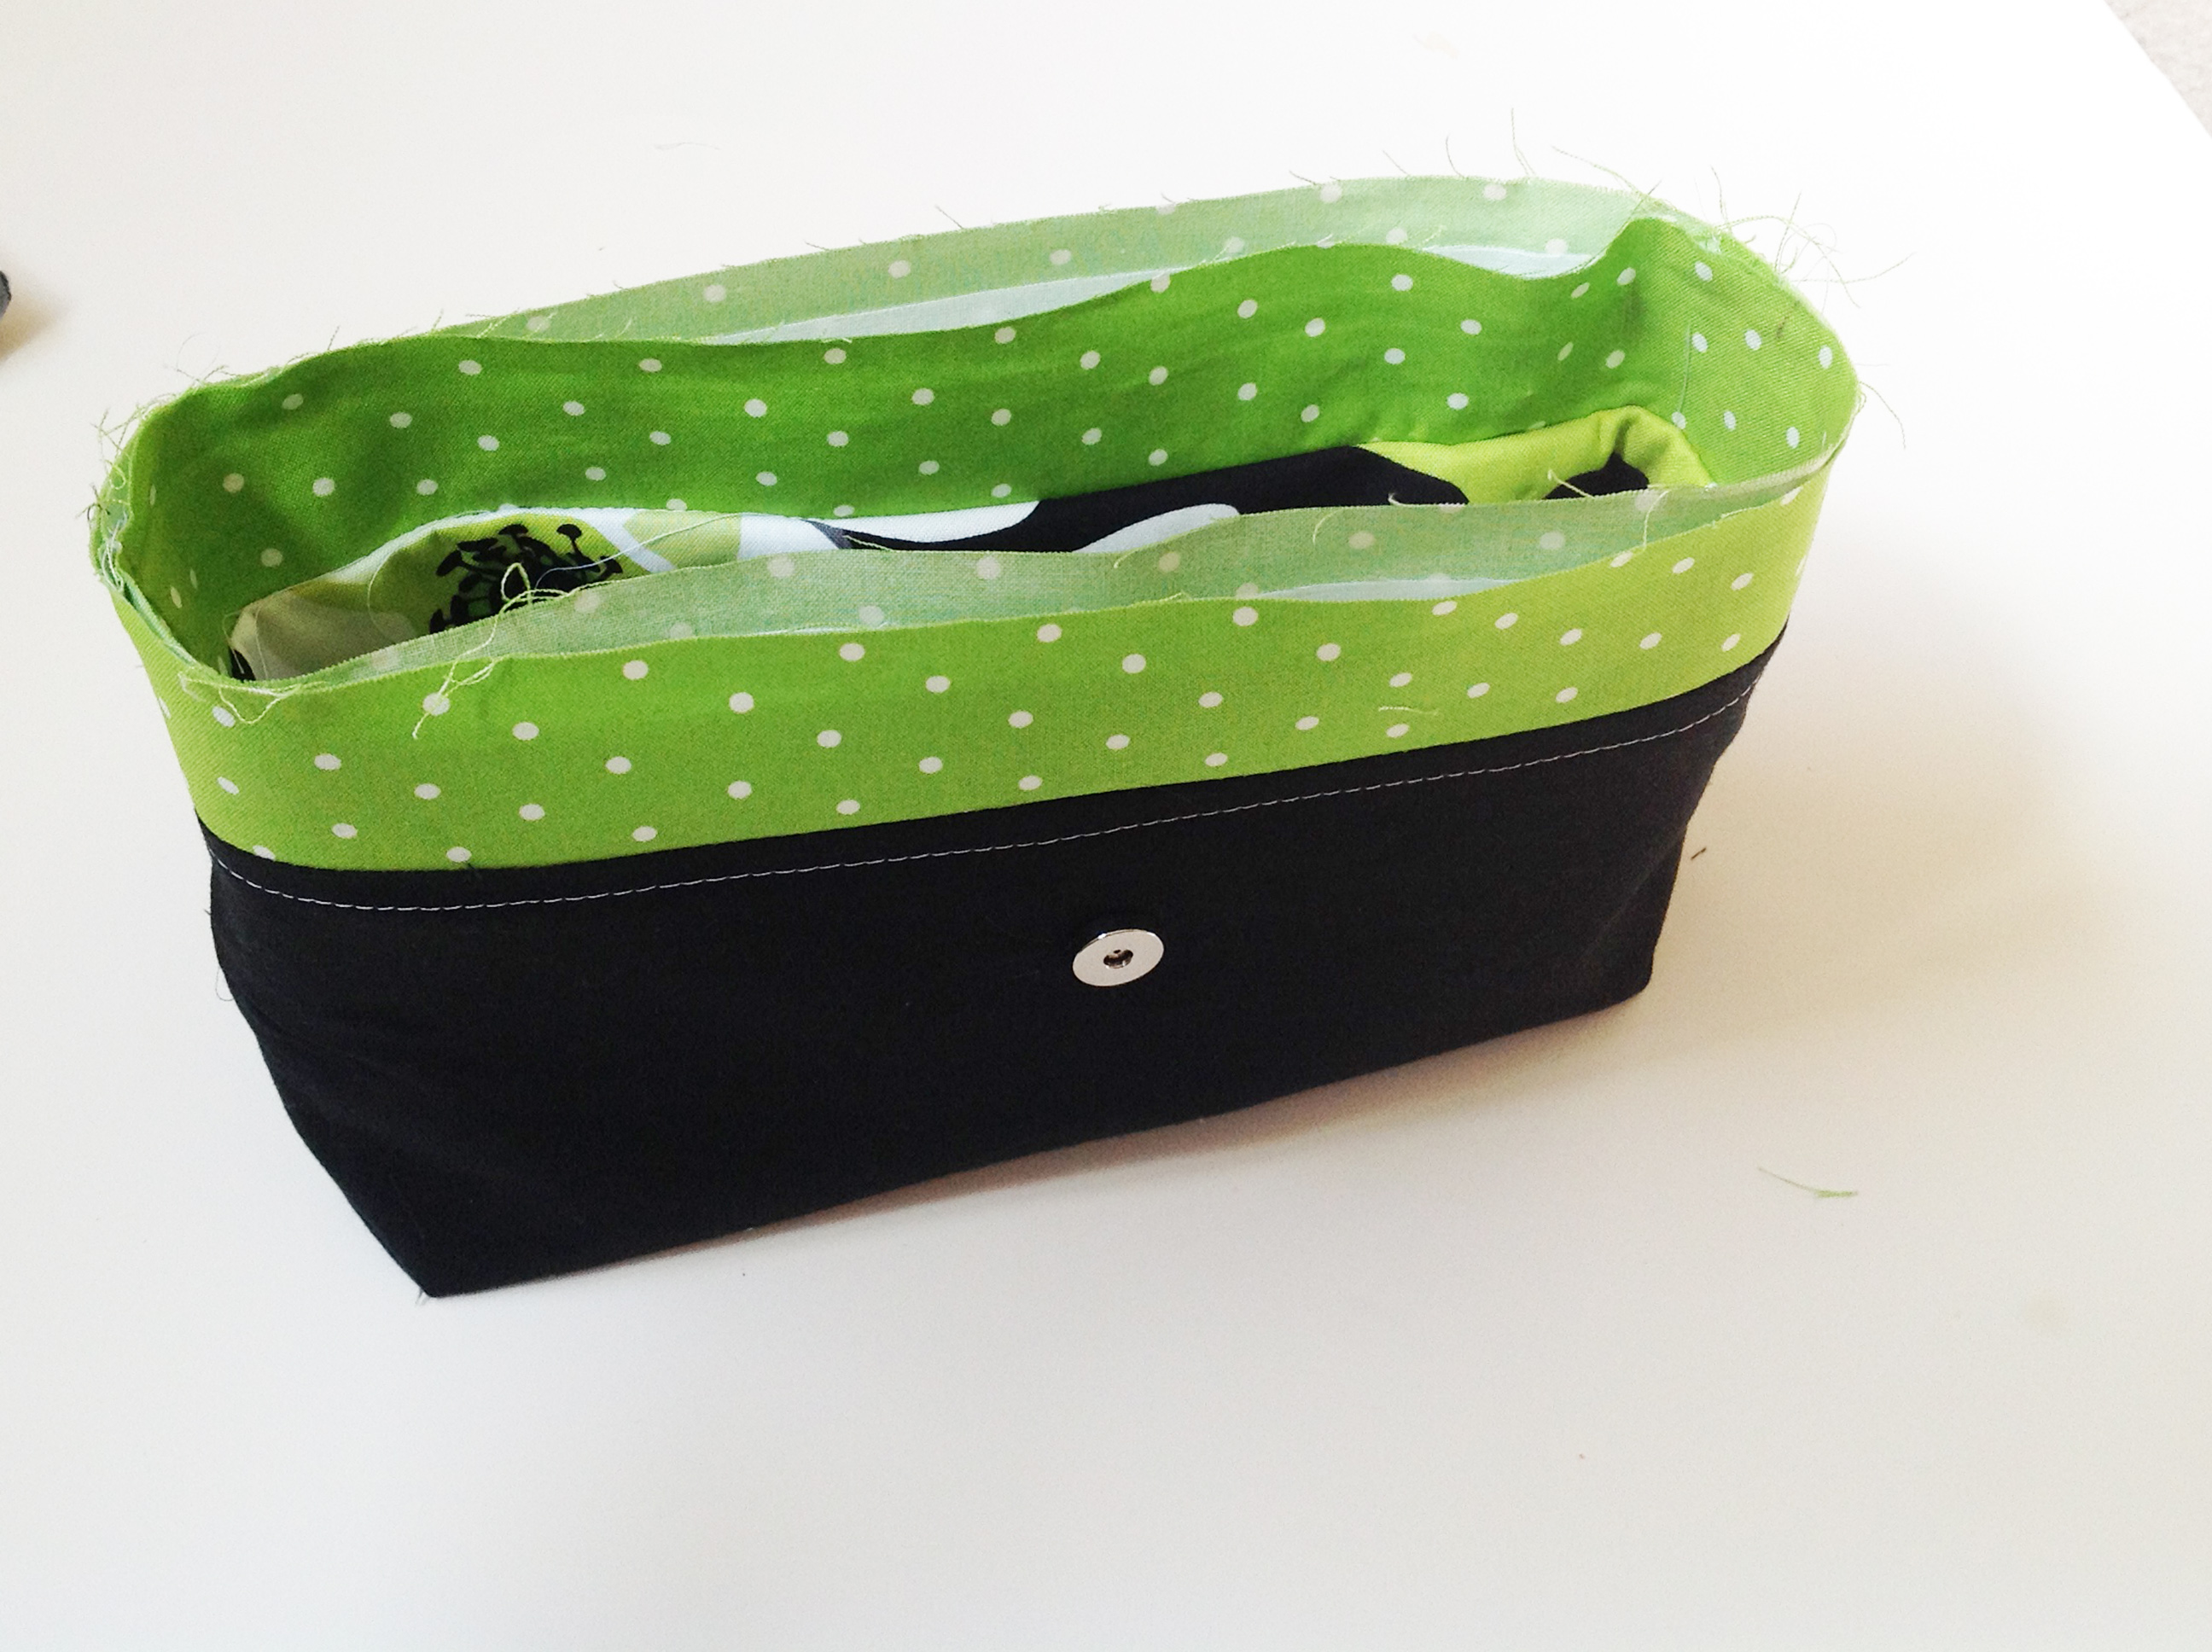
Grab Bag 2 and turn it right side out. Put Bag 1 inside Bag 2 so that the wrong sides of both bags are facing.
Now this is where is starts to get a little unusual! We are going to sew these two segment together around the Center Panel. Not around the top though! We are going to sew 1/4″ from the seam that joins the Center to the Bottom panels (indicated by the big arrow below). The red line is the seam line you are going to sew. Be sure you do not sew the Flap into this seam as you go!
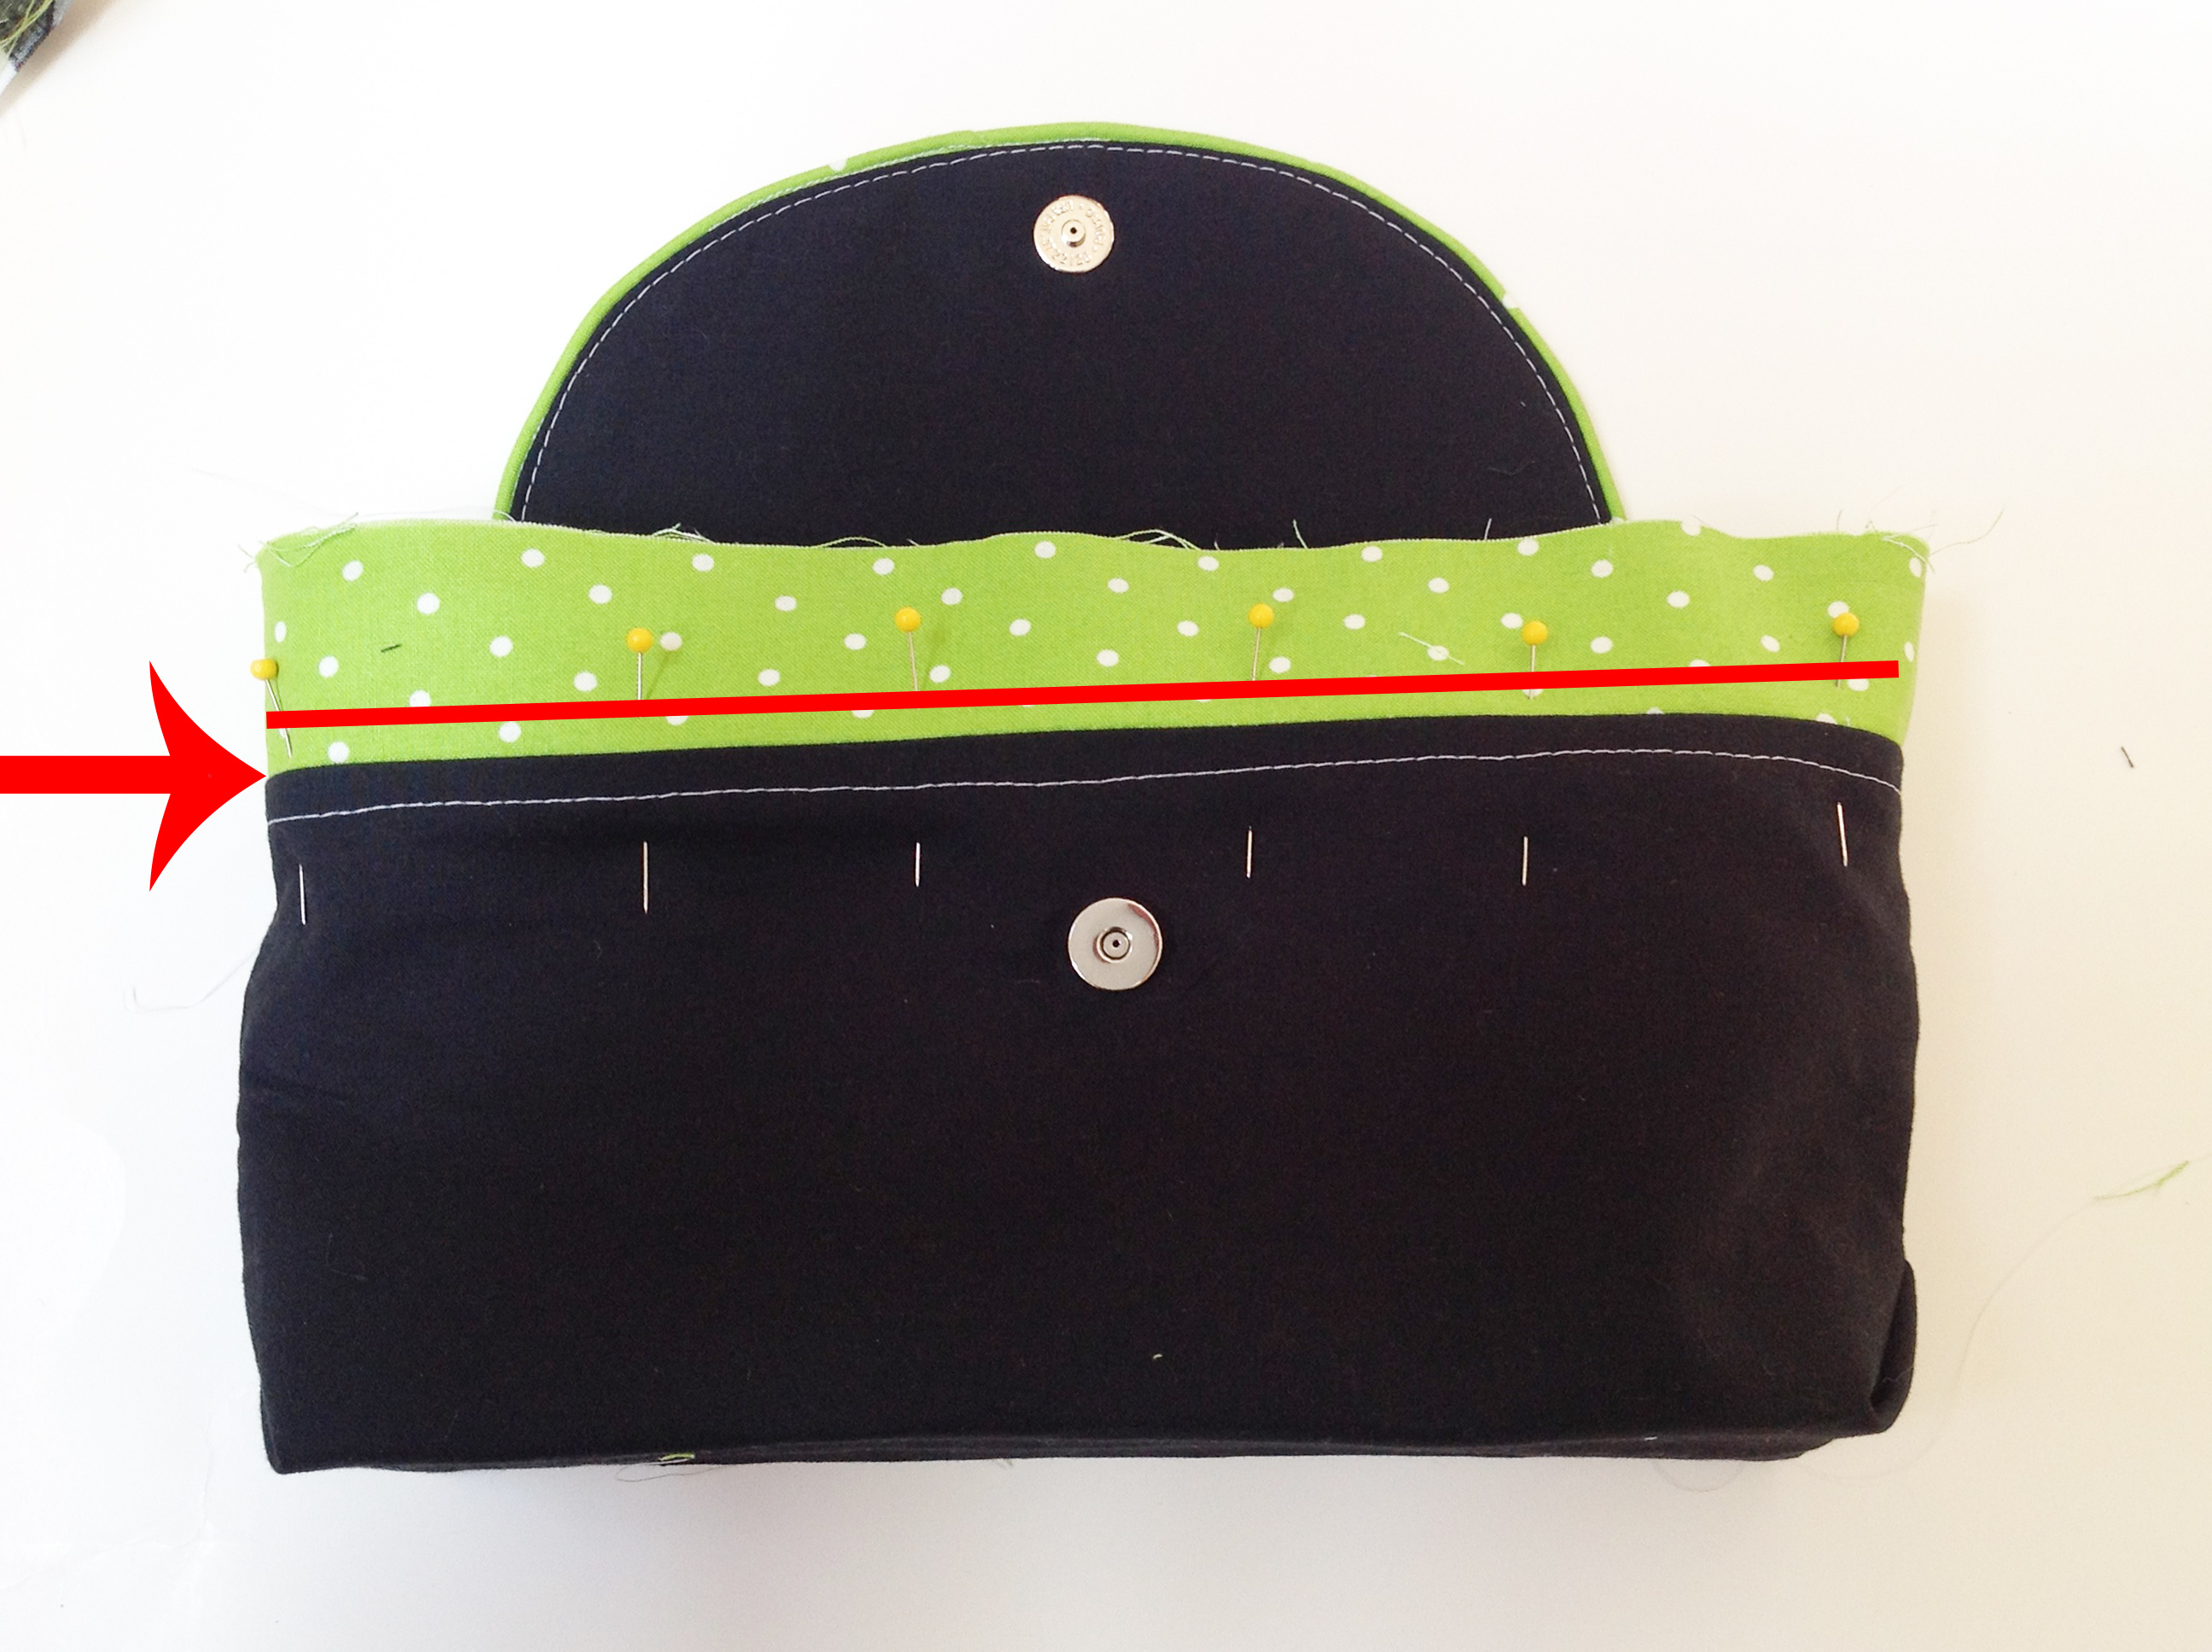
The reason we sewed these together at such a low point because we are going to join the upper portions of the bag to the top of the Center panel in the next steps.
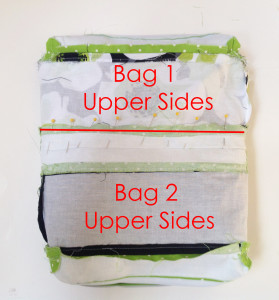
Now don’t change anything! It’s important that your Bag 2 is still facing out and that the zipper flange on the inside bag is still facing downward. Grab your Bag 2 Upper section:
Open the zipper and turn it wrong side out. Put the Bottoms inside of the Upper Section. Now, this is important!! Take the Center panel of Bag 1 (the bag on the inside) and get it out of the way – push it down and pin it there, if needed, or tape it down if you are using laminate!! 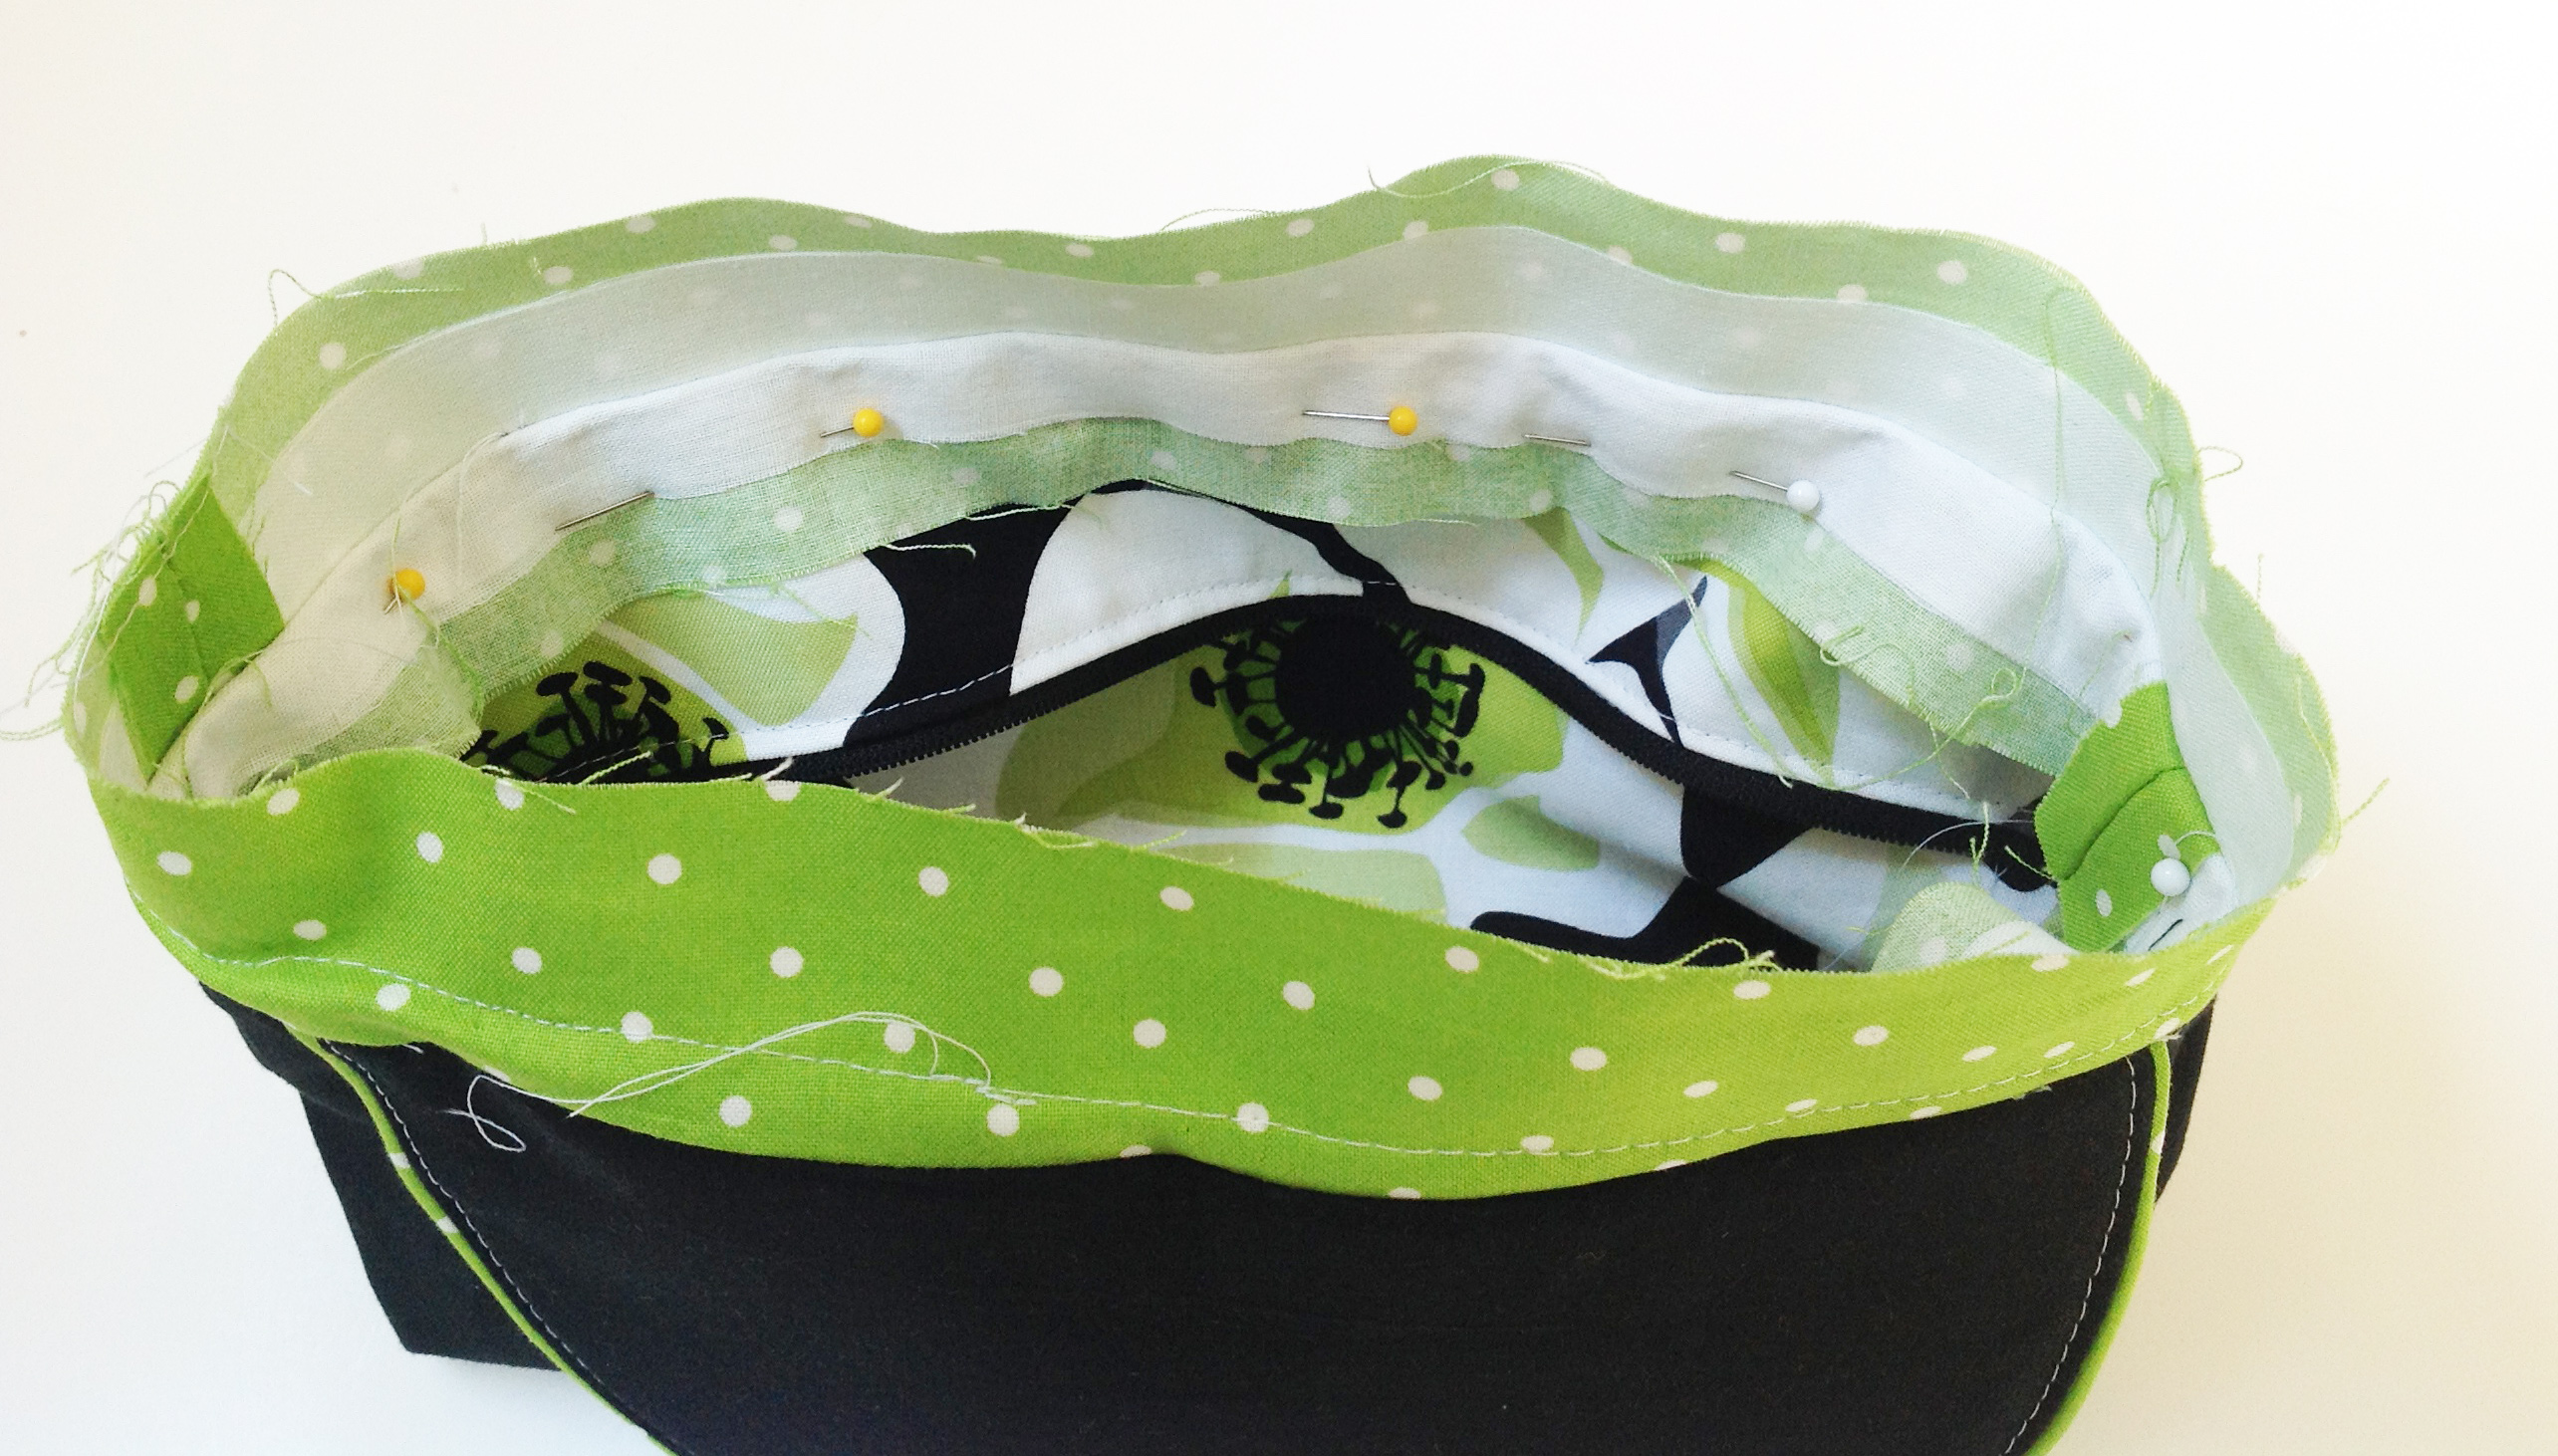
So, line up the corners and side seams/center points like you did in the last step, and then align the top, raw edge. Now all you need to do is stitch around the top edge to sew the Upper Half to the Bottom (indicated by the red line below).
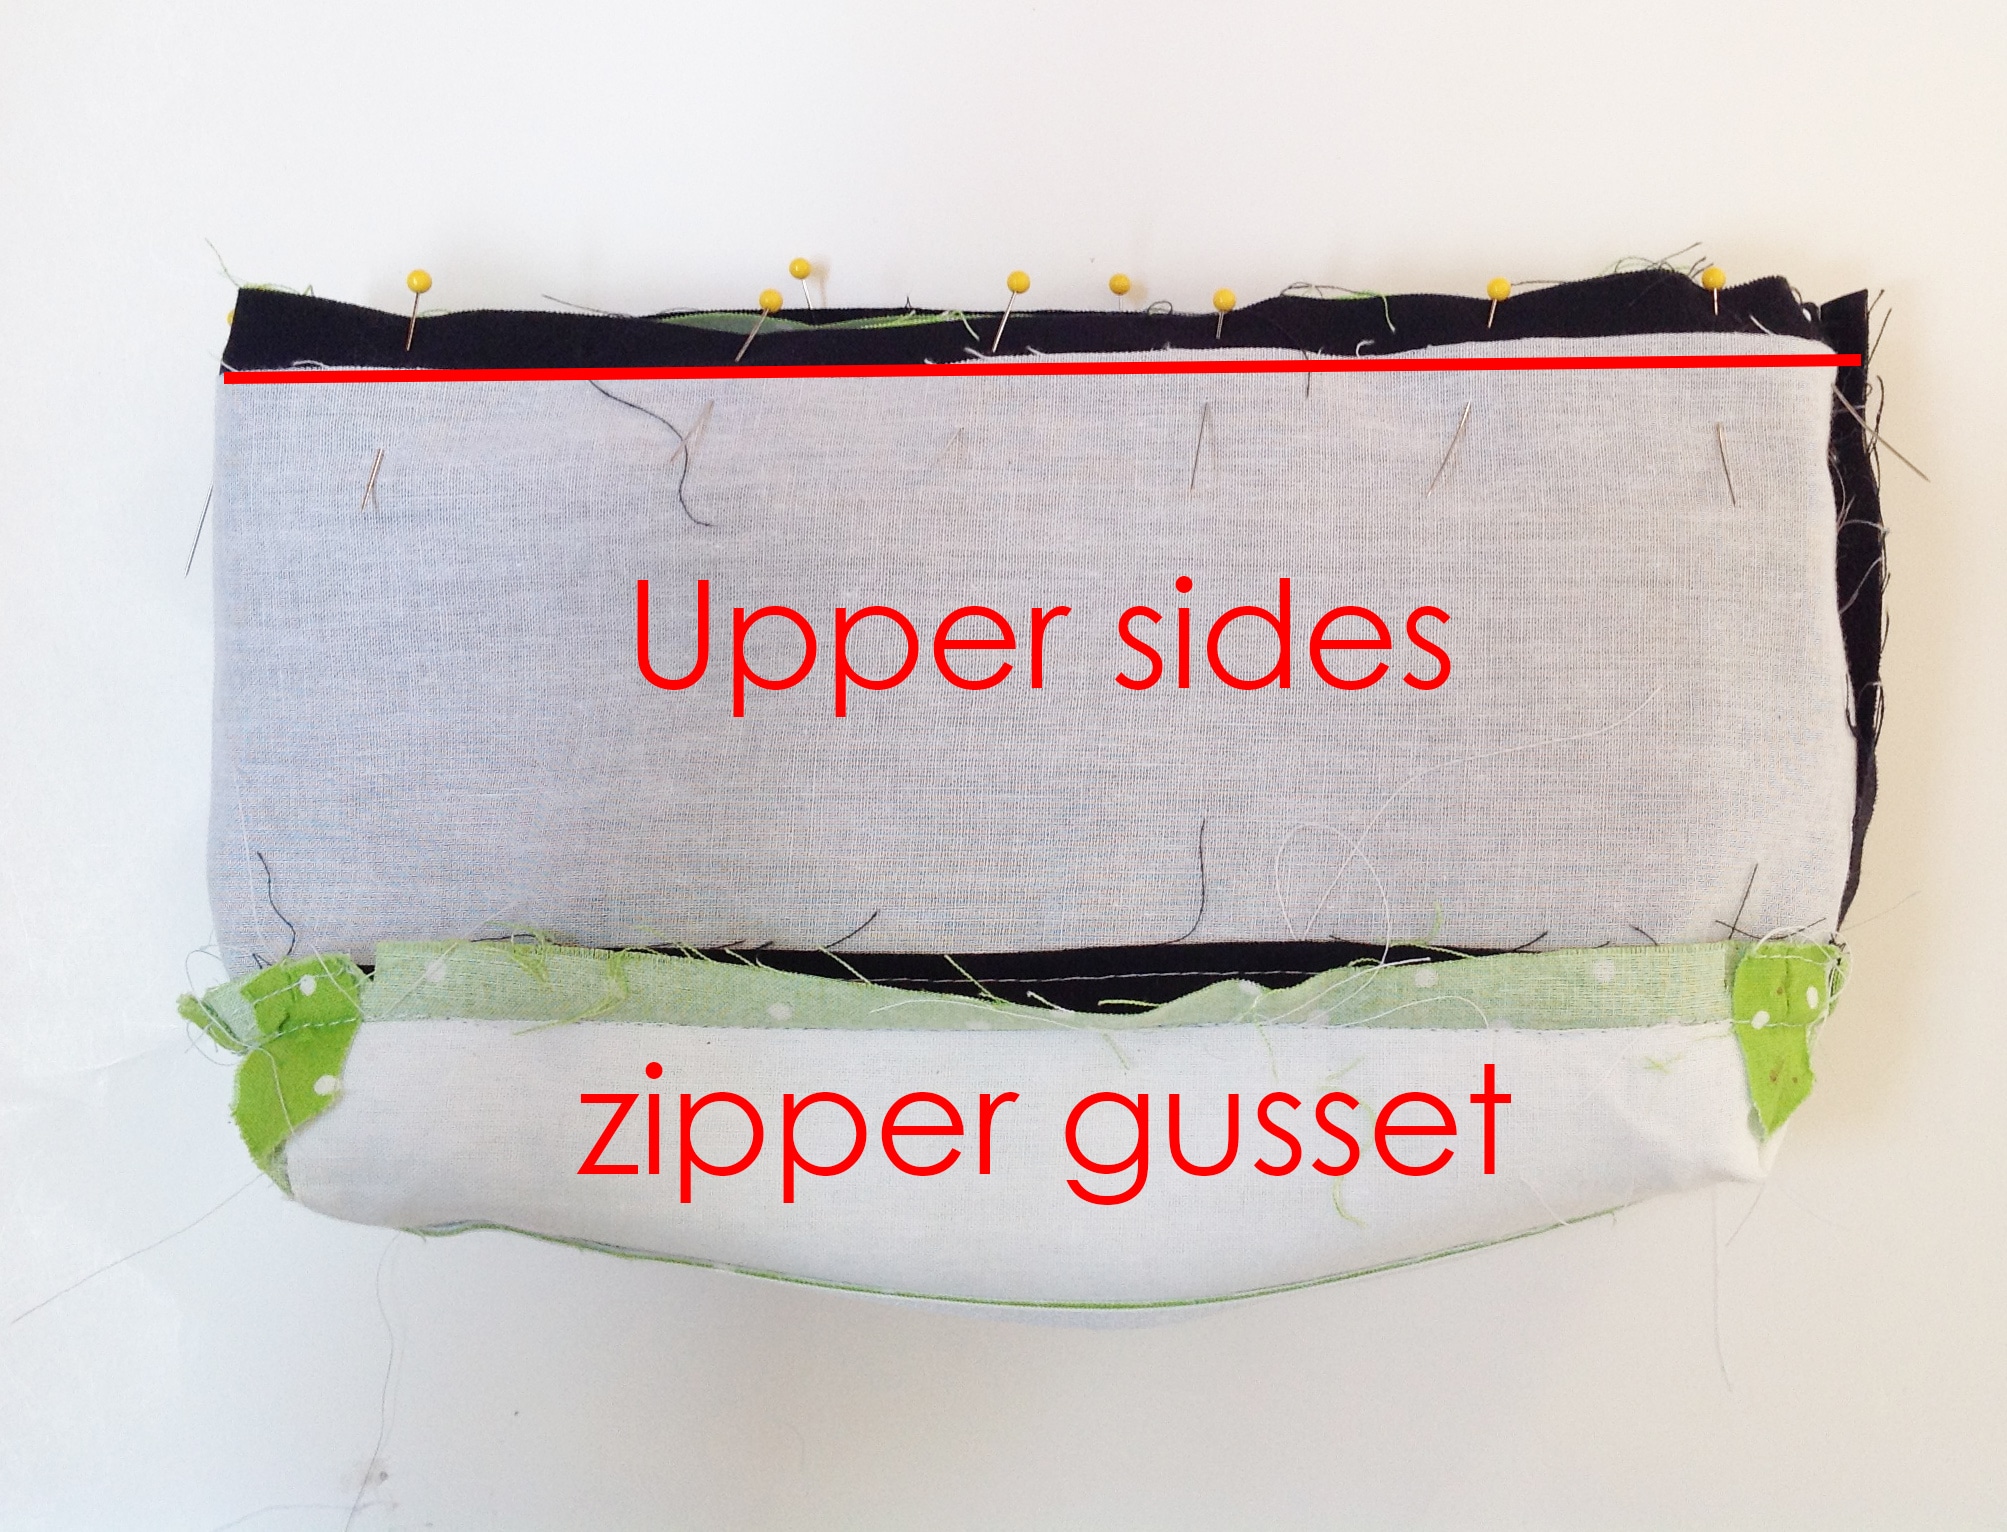
Keep your eye on that seam allowance because we are going to be stitching that down. So, reach inside the open end (not the zipper gusset end) and pull out both Bottom Halves. You should be able to see the Bag 1 bottom right side out, like this:
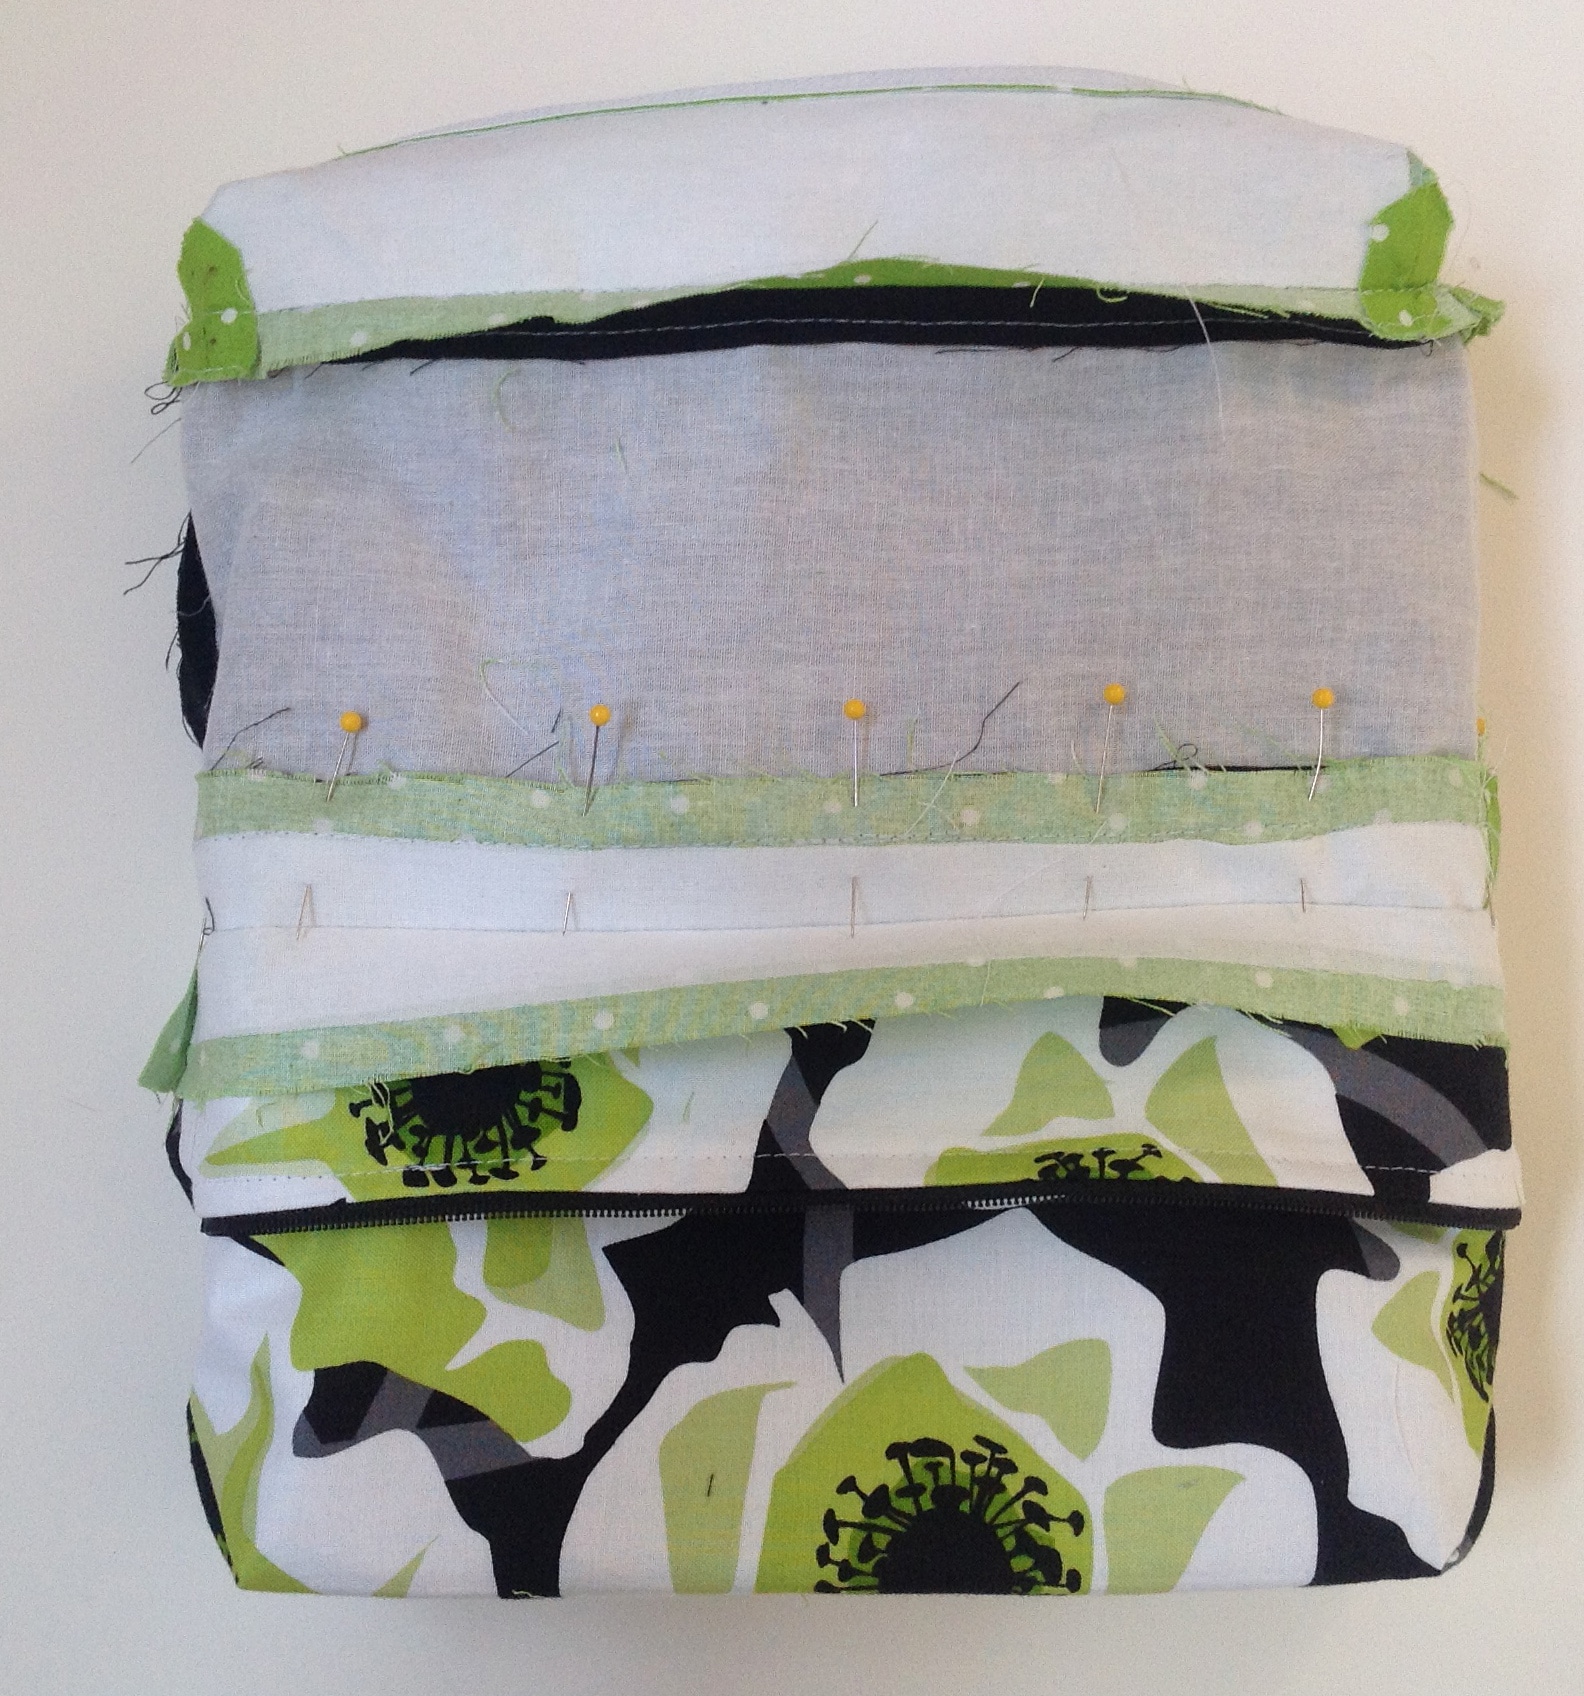
We are going to sew that seam allowance to the Upper Sides panel so be sure your seam allowance is folded that direction. The important thing here is that you only sew the seam allowance and the Upper Sides panel- so be sure your flap is out of the way! You are going to sew 1/4″ from the seam you just made in the previous step (indicated by the red line below). This seam is visible on the bag so you are going to want to take your time. If you are more comfortable, you can also turn the whole bag inside out through the zipper gusset and topstitch this down but don’t forget to turn it back this way when you are done.

Once that is done push those bottom sections back up into the Upper Section. You may notice that it won’t go all the way to the bottom and that’s ok. Now we are going to attach the Bag 1 Upper section. Remember the other part of the Center panel that is pinned in the Bag 1 bottom? Now is the time to unpin that and bring it upward. We also need the Bag 1 Upper section to be right side out and open the zipper.
Put the Bag 1 Upper inside the bag so that both Bag 1 pieces are right sides facing. Align the sides and corners just like before and bring the top raw edges together. Stitch around. Sorry I don’t have a photo for this but I am guessing by now, you have the idea and you can always refer to your pattern.
Once that is done, we need to understitch that seam allowance down. Reach inside again and pull out that Bag 1 Upper section. So your bag will be totally wrong side out and you will see both Upper Bags. the bottom portions of the bag should still be nestled inside of the Bag 2 upper portion. Flip the seam allowance toward the Bag 1 Upper Sides panel and stitch that down 1/4′ from the original seam, just like you did before with the Bag 2 seam allowance.
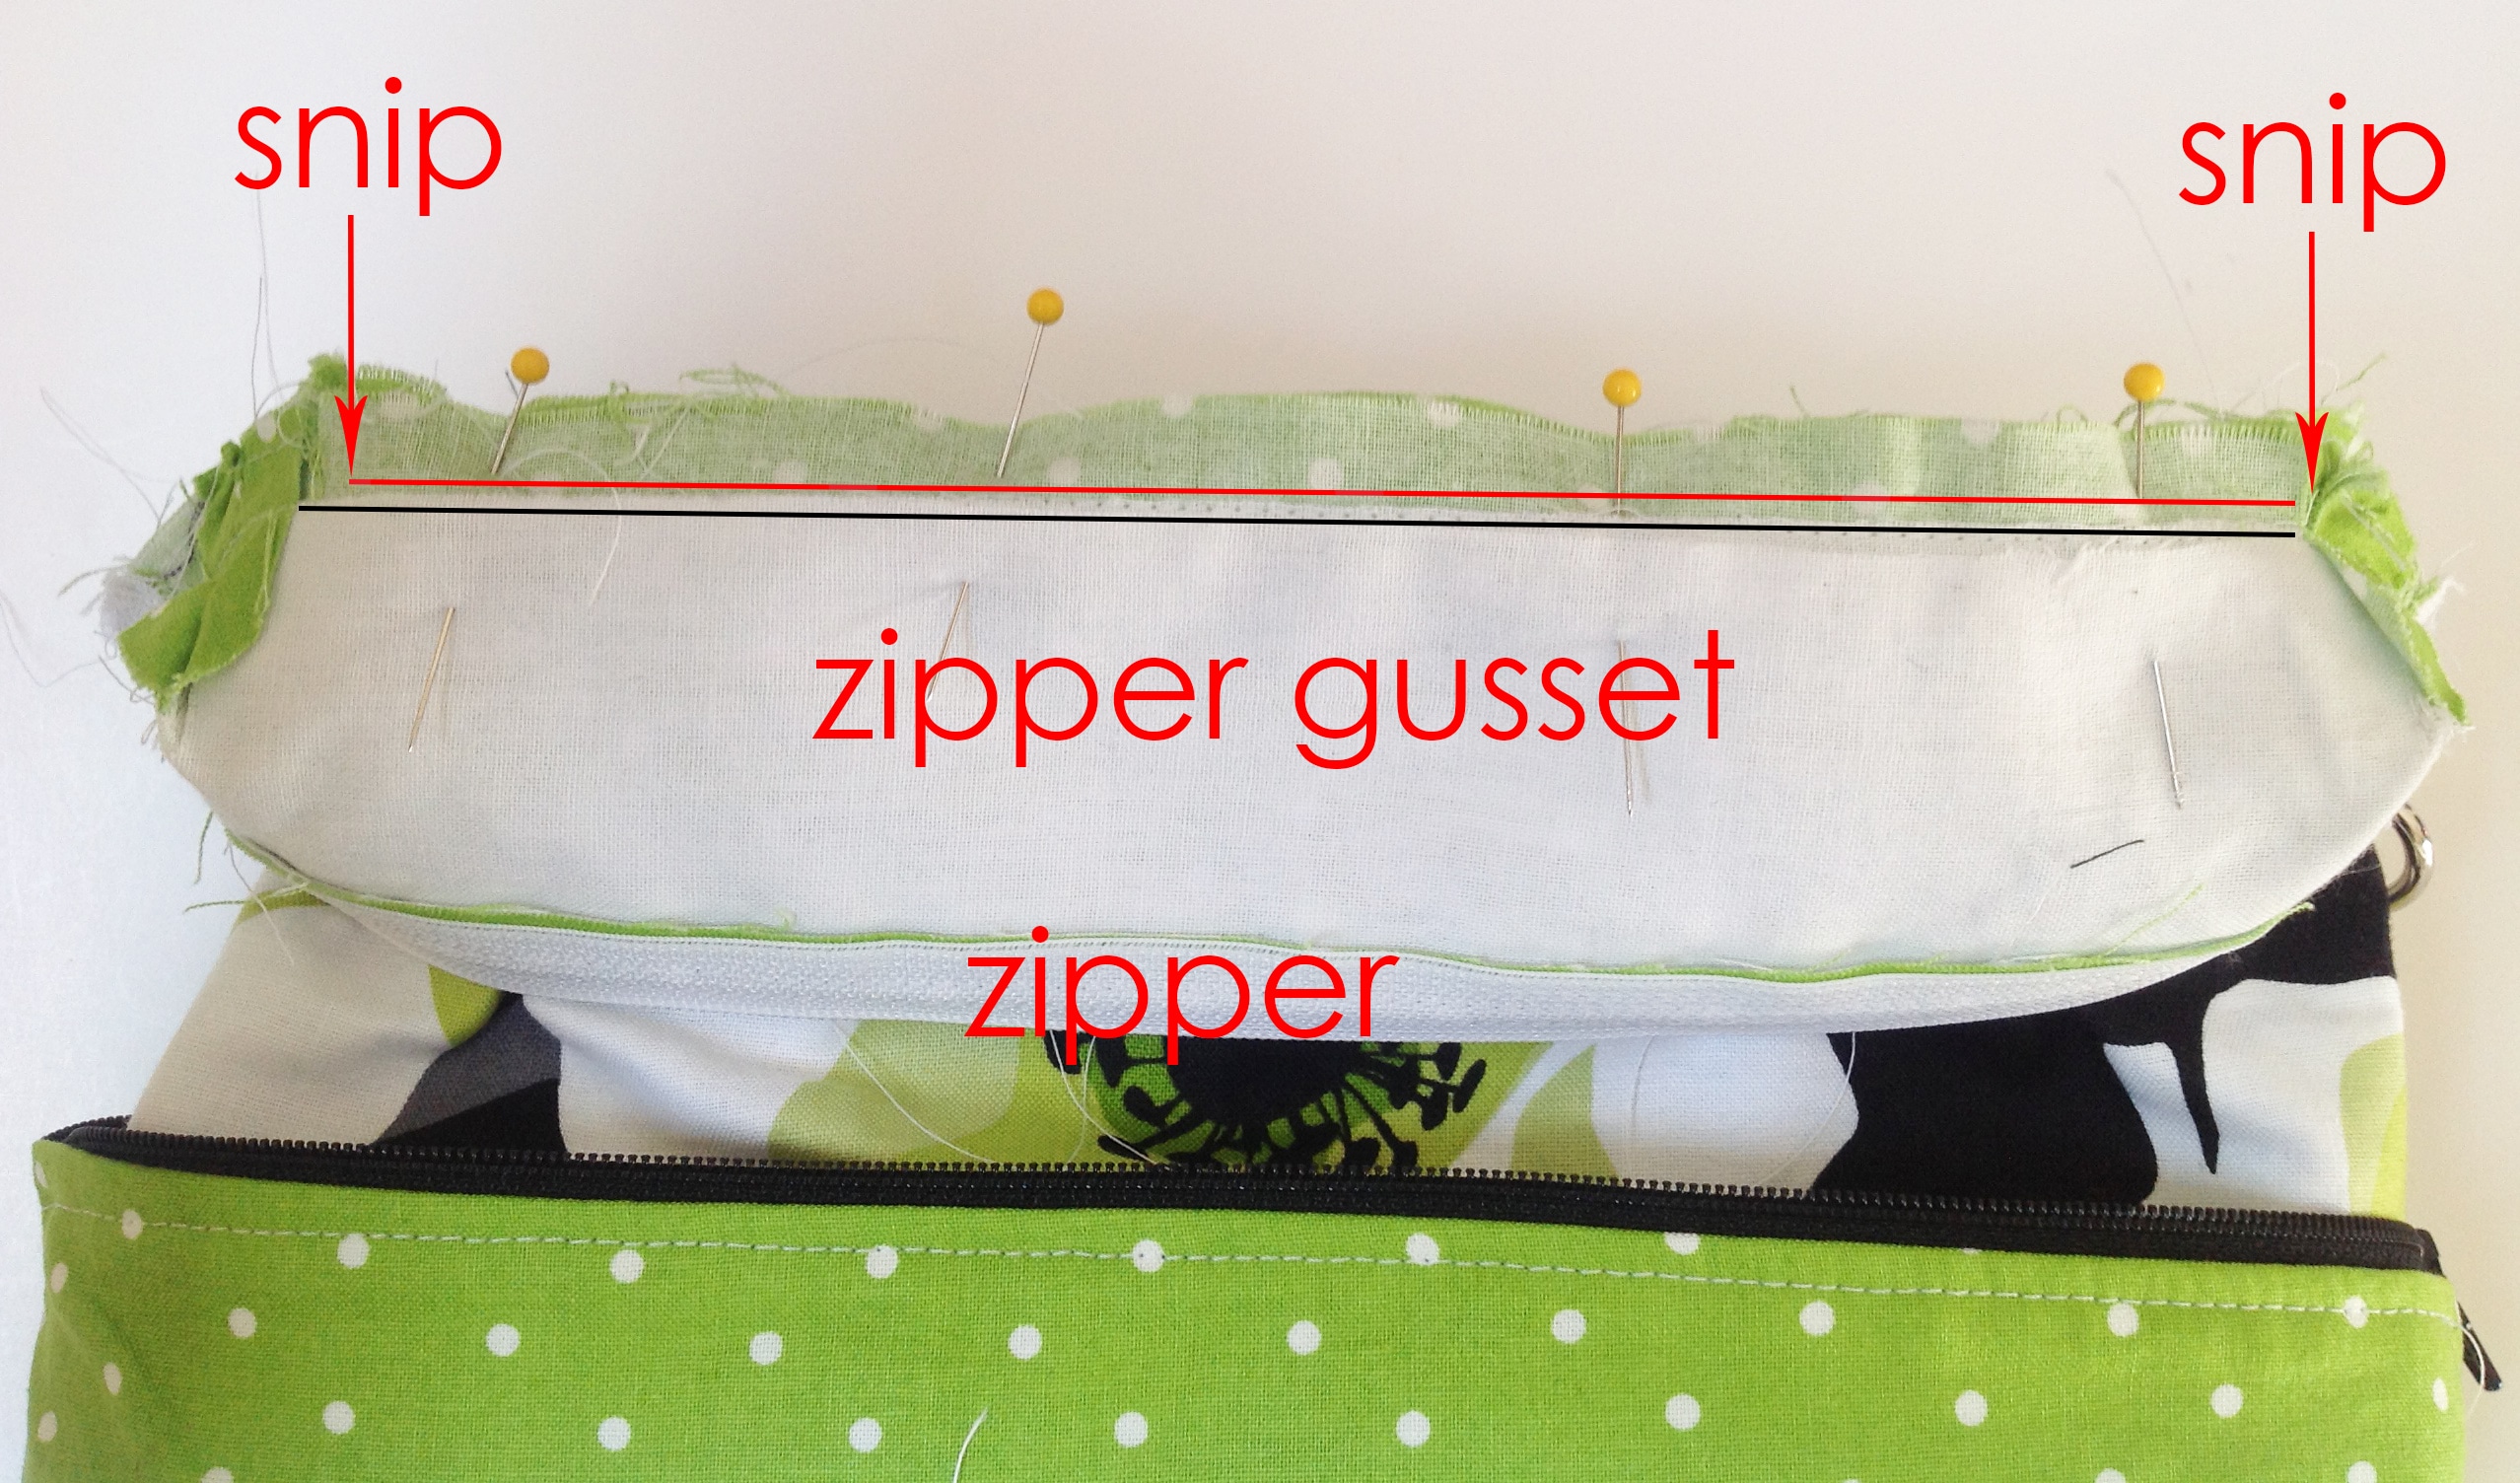
Oh, we are so close!! Bring your Bag 1 Upper Sides up and over your Bag 2 Upper Sides (or vice versa – doesn’t matter). Keep both zipper gusset panels wrong side out. This is a little tough to see but you want to find the seam allowances that we snipped earlier in the pattern (in step 33). It’s the seam allowance that joins the Zipper Gussets to the Upper Sides panels – along the long edge. Find them for both bags on one side of the zipper. You want to bring those two seam allowance sections together and sew them (indicated in red below) right next to the original seam line (indicated by black line below). Do the same thing on the other side of the zipper.
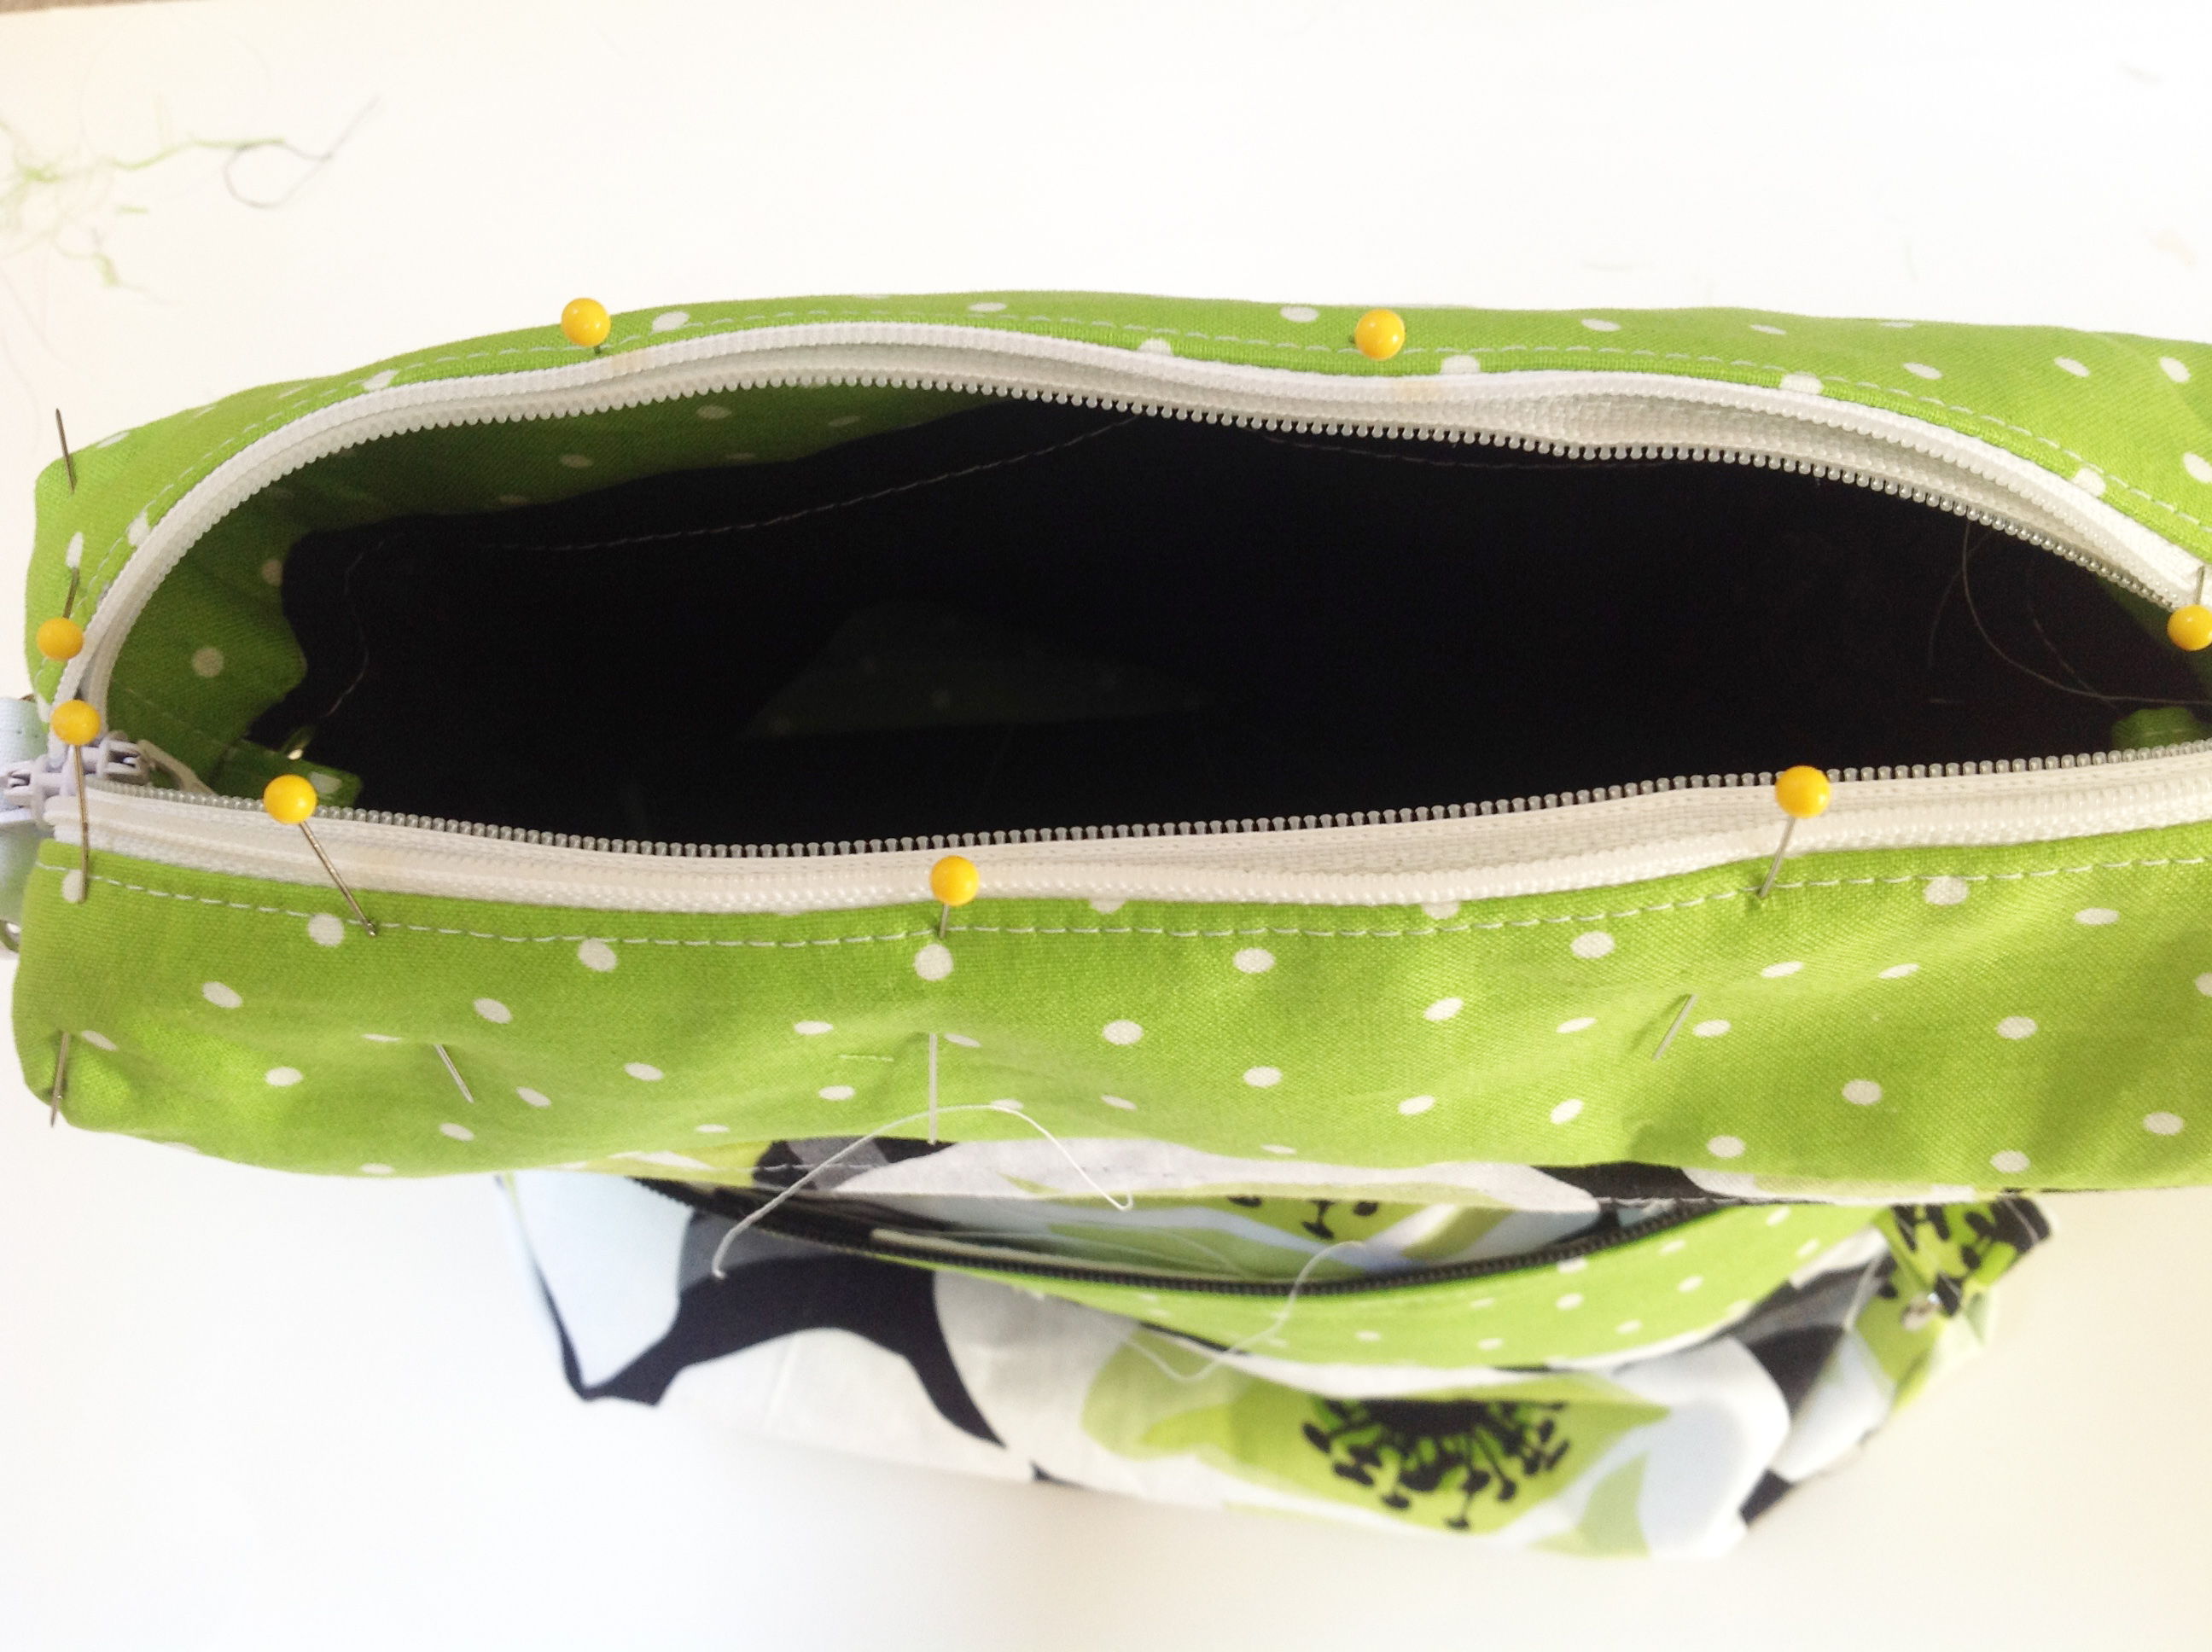
 Now, turn the outer bag’s Zipper Gussets right sides out and push the inner bag’s Zipper Gusset into the out bag’s. Align the corners and bring the zippers together; one right on top of the other and pin them together.
And there you go! A little like a puzzle, isn’t it! I hope you had fun making it!
If you are giving your bag as a gift or selling it, you can print out an instruction sheet that shows how the bag works and explains how to convert it. There are two sets of instructions on the sheet.
You can also make a little covered snap button for Bag 2 (when it’s extended the snap is visible and this will cover that up artfully!) Here’s the link.
Thanks so much for purchasing my pattern! I hope you had fun making it! I would love to see your creation! Post your photos on any of these places below or email to cozynestinfo@cox.net
Leave a Reply
You must be logged in to post a comment.